Painting & Finishing
PREPARATION
Painting is perhaps the most important stage of the restoration. It provides protection against corrosion and can give the mower that original look and feel that most collectors want to achieve.
The secret of good painting is preparation. When you have cleaned the parts and removed excess oil, grease and paint as described in the previous section you will be ready to start applying paint.
It is worth reading about choosing the right colours and where to find the right paint before you start.
Everyone has an opinion about the right way to paint old machinery. The method suggested here is suitable for virtually any old mower and does not require any special equipment.
All the paints can be applied by brush for simplicity. If you prefer to use a spray gun the general principles still apply.
USEFUL TIPS
Apply costs of paint thinly while making sure the item is properly covered. This will help prevent drips and runs in the paint. Some people like to rub down the paint between coats but this is not necessary unless the paint has been applied too thickly or has run and then dried to leave a mark. It is normally better to brush these runs out before the paint dries.

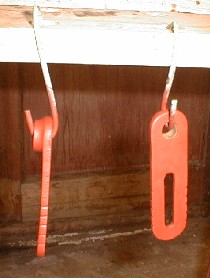
Cut up old wire coat hangers into various lengths and bend them into elongated S shaped hooks. These can be used to hang items up after painting while they dry. They can also be used during painting to support the item and prevent paint getting onto hands and gloves.
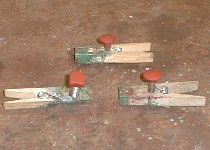
Small items such as nuts and bolts can be held in clothes pegs during painting and drying.

Make some jigs using pieces of wood and nails to support cumbersome items such as cutting cylinders.
Clean brushes out after use as directed on the paint tin. There is nothing worse than having to clean a brush before you can use it!
Wear gloves if only to keep messy paint off your hands.
PRIMING

Priming prepares the metal surface for additional coats of paint. Any good quality red-oxide type primer will provide the necessary "key" for further coats and give good protection against corrosion.
There is no need to use any of the extra special primers with additional anti-corrosion chemicals. These tend to be more expensive, harder to apply because they are more viscous and leave a thicker coat which is more prone to chipping.
Before you start decide if there are any areas that really do not need paint. For example, there is no need to apply paint in holes where shafts or bolts will pass. If you do paint them you will only need to clean them out afterwards.
Two thin coats of primer is more than adequate. Apply the paint with the brush as thinly as possible while making sure to cover the whole surface. Pay particular attention to working the paint into any pits in the metal surface and into any ridges and undulations, for example around cast lettering or other features.
Leave the parts to dry over night between each coat.
UNDERCOAT
Undercoat provides a suitable foundation for the final colour. It also provides a boundary between the primer and top coat so that fewer applications of the final colour are required.
One coat of undercoat is normally all that is required. A neutral colour such as grey is suitable for a wide range of greens and reds most often used for the final coats.

TOPCOAT
The topcoat provides the final colour of the mower. Most people use modern gloss paints because these are readily available. For older machines an "eggshell" type of paint may give a more authentic finish. It is really up to personal preference.
The coverage of modern paints is good enough that two thin coats of gloss is all that is required.

As with primer and undercoat, apply the paint sparingly while making sure to cover the entire surface. Leave to dry well between coats.
That is all there is to it. Some people add layers and layers of paint, rubbing carefully down between each, and then boast about their efforts. This is unnecessary. Even our two plus one plus two coats of primer, undercoat and gloss is much more than the original machines would have had but at least it provides a good standard of finish.
FINISHING
The final job when painting is to pick out any raised lettering. This is where you paint the lettering in a different colour to make it stand out.
It was often done on older mowers where manufacturer and model names are cast into handles, scraper plates or name badges.
Not all mowers had the lettering picked out but it should be possible to see if yours did during the inspection before you started the restoration. If there is evidence of a colour then you should use the same one when picking out.
If there is no evidence of picking out, there is no reason why you should not do it anyway. Popular colours include red, yellow and gold.
With care and a little practice it is perfectly possible to get good results using a small artists' brush. Some colours can also be applied using "painting pens" that can be bought in hobby and craft shops.
