Ransomes Marquis crank case removal
Hello,
I picked up my first classic lawnmower- a Ransomes Marquis with a BSA sloper engine back in February time and I have been slowly dismantling it (in between other projects) ever since. I hope to do a full refurb and rebuild. I have managed to disassemble most of the mower with the help of information gathered from this forum- even building some of my own tools along the way. However, now it is my turn to ask a question.
Last night I started taking the engine apart as I ran a compression test and I got a reading of 70psi- slightly on the low side? I took the head off and found a large amount of carbon build up on the piston and valves although to be expected on a mower of this age. In keeping with the full refurb and rebuild, I want to get inside the engine to inspect and clean the internals as well as replace all of the gaskets. The cylinder walls look ok from what I can see but I am obviously unable to view the piston skirts and rings. I plan on lapping the valves and possibly a light hone of the cylinder depending on condition subject to further inspection.
Whilst I wait for some lapping paste and valve spring compression tool, I started trying to remove the crank case cover. I began by taking the flywheel off, this came off with ease. I then turned my attention to the clutch using knowledge I had gained from posts on this forum. I managed to get the clutch off although I might have slightly damaged the spigot bearing- I will be able to repair or replace hopefully.
Anyway, after getting the clutch off and loosening the 6 crank case bolts, the crank case came away. However, only by about half an inch (see photo).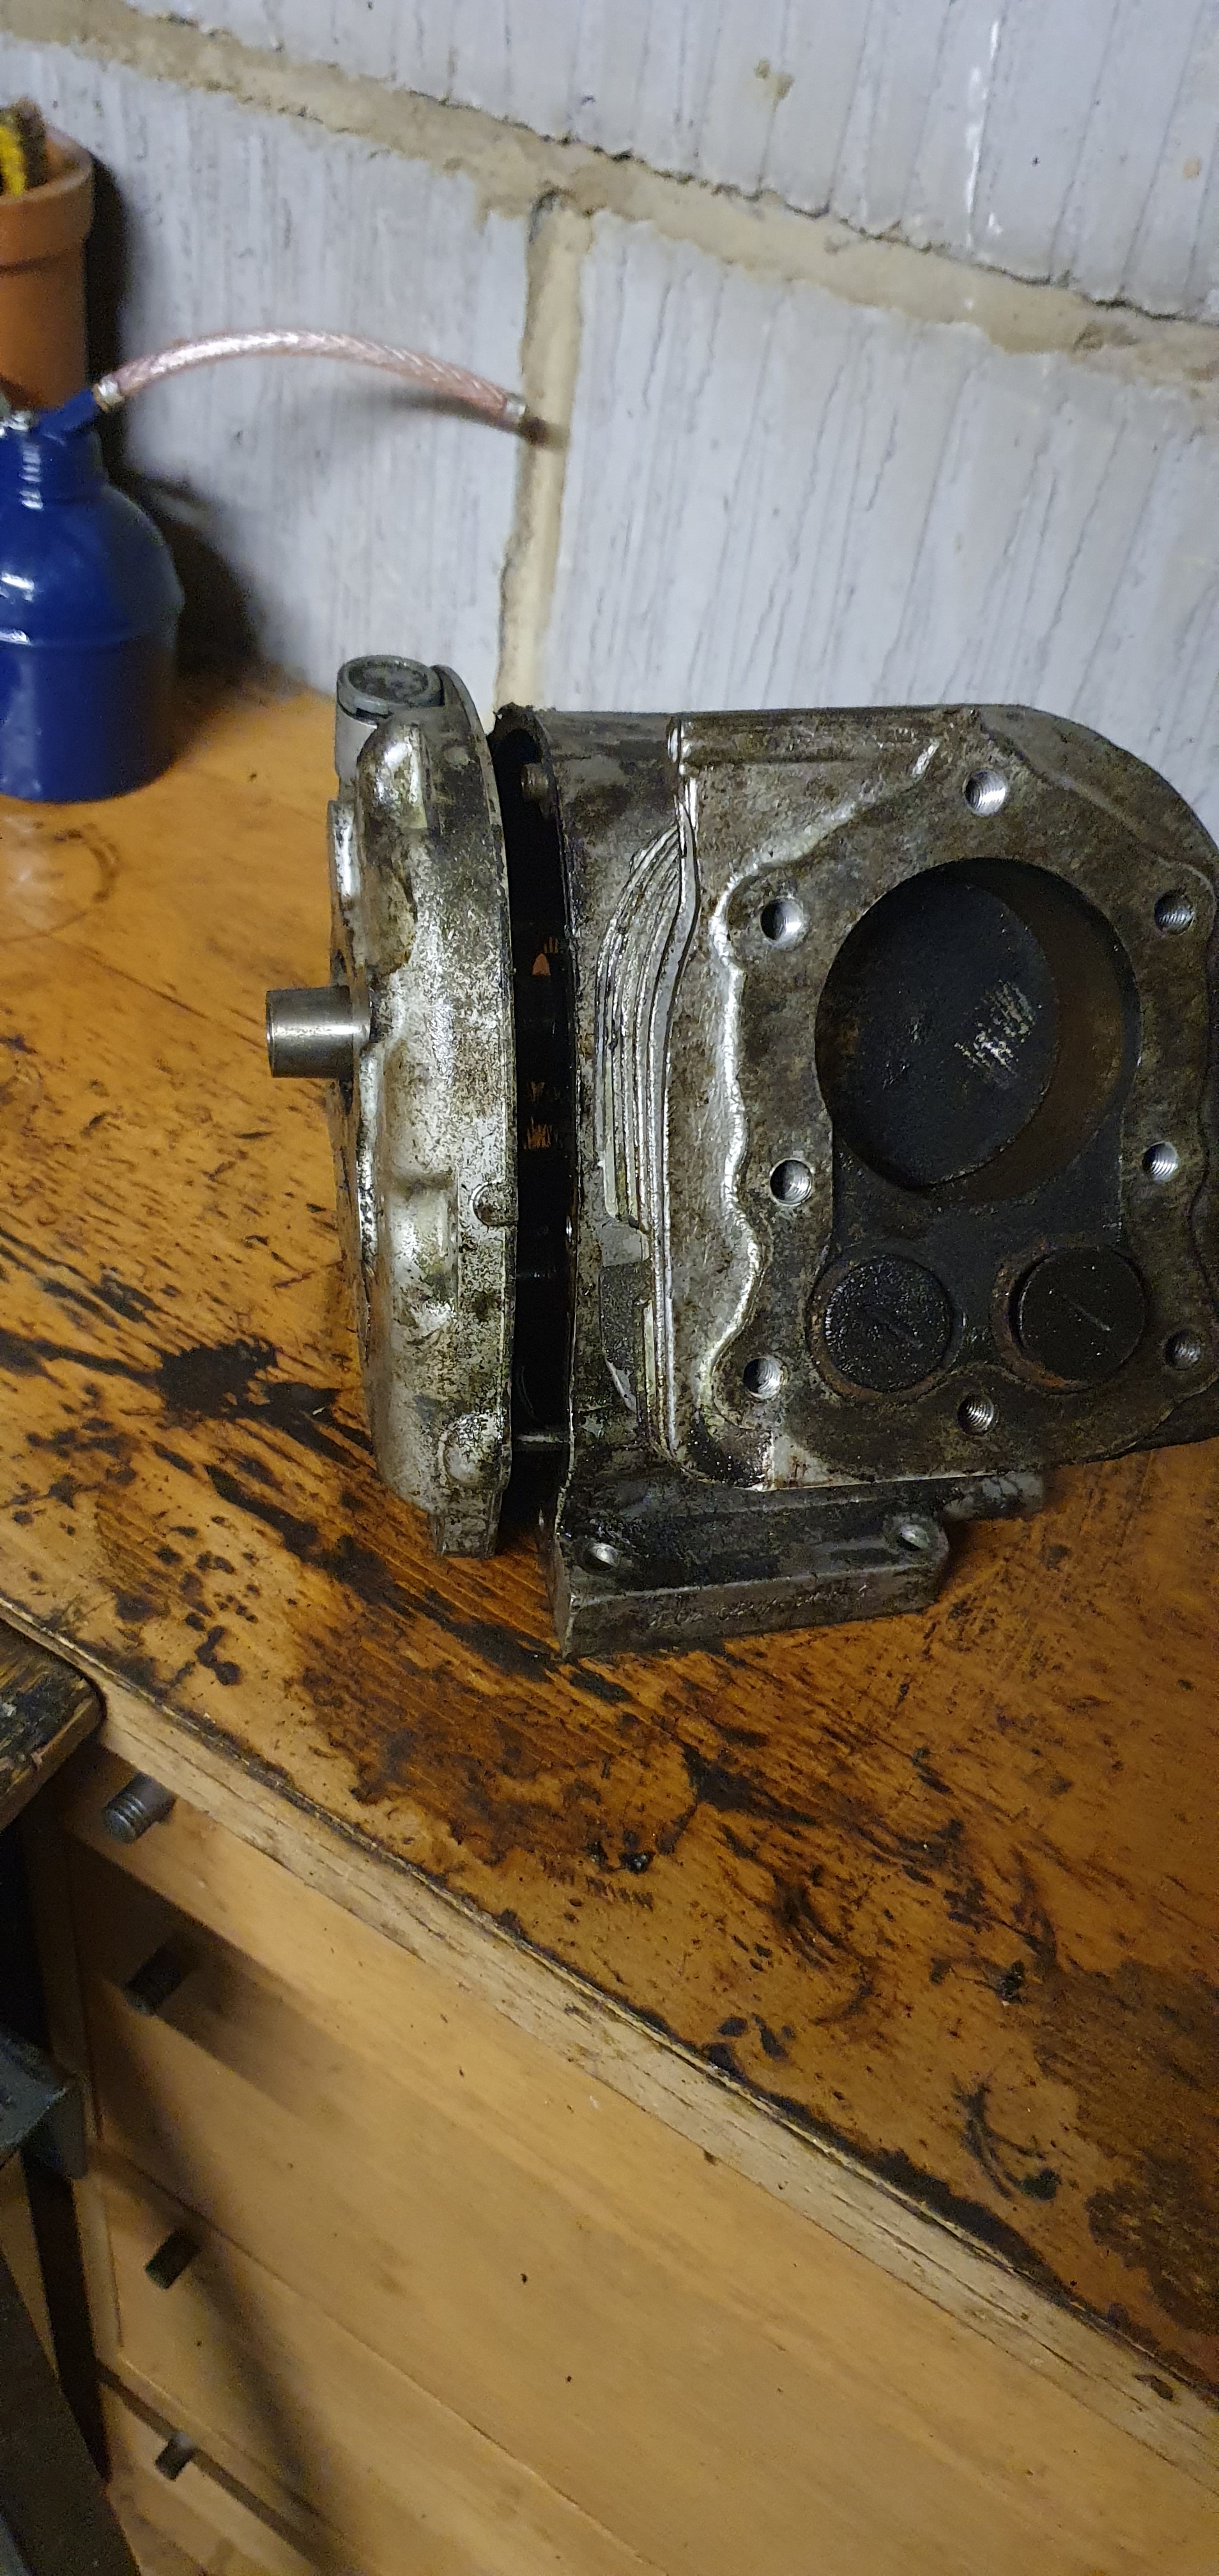 It feels like there is something preventing it coming off- is this the case? I am reluctant to pound on it without knowing. Is there something I need to detach first or does it just need a bit of persuasion?
Thank you in advance.
James
Forums

Welcome to the club, and a
Welcome to the club, and a good choice of mower to rebuild! Once you have cleaned up the exterior portion of the crankshaft as Wristpin has explained, try wiggling the cover slightly clockwise/anti-clockwise as you pull and it should overcome and remaining friction - my covers were the same when removing, and just needed a little effort to overcome the friction of the oil seal - more so after fitting new seals. Good luck with the rebuild and I look forward to seeing the progress
Thank you both for your
Thank you both for your replies- Wristpin I’ve seen your name on numerous posts, I take it you’re a bit of a legend of the forum. Anyway, I have managed to get the crank case cover of after cleaning up the crank shaft and applying a bit of oil.
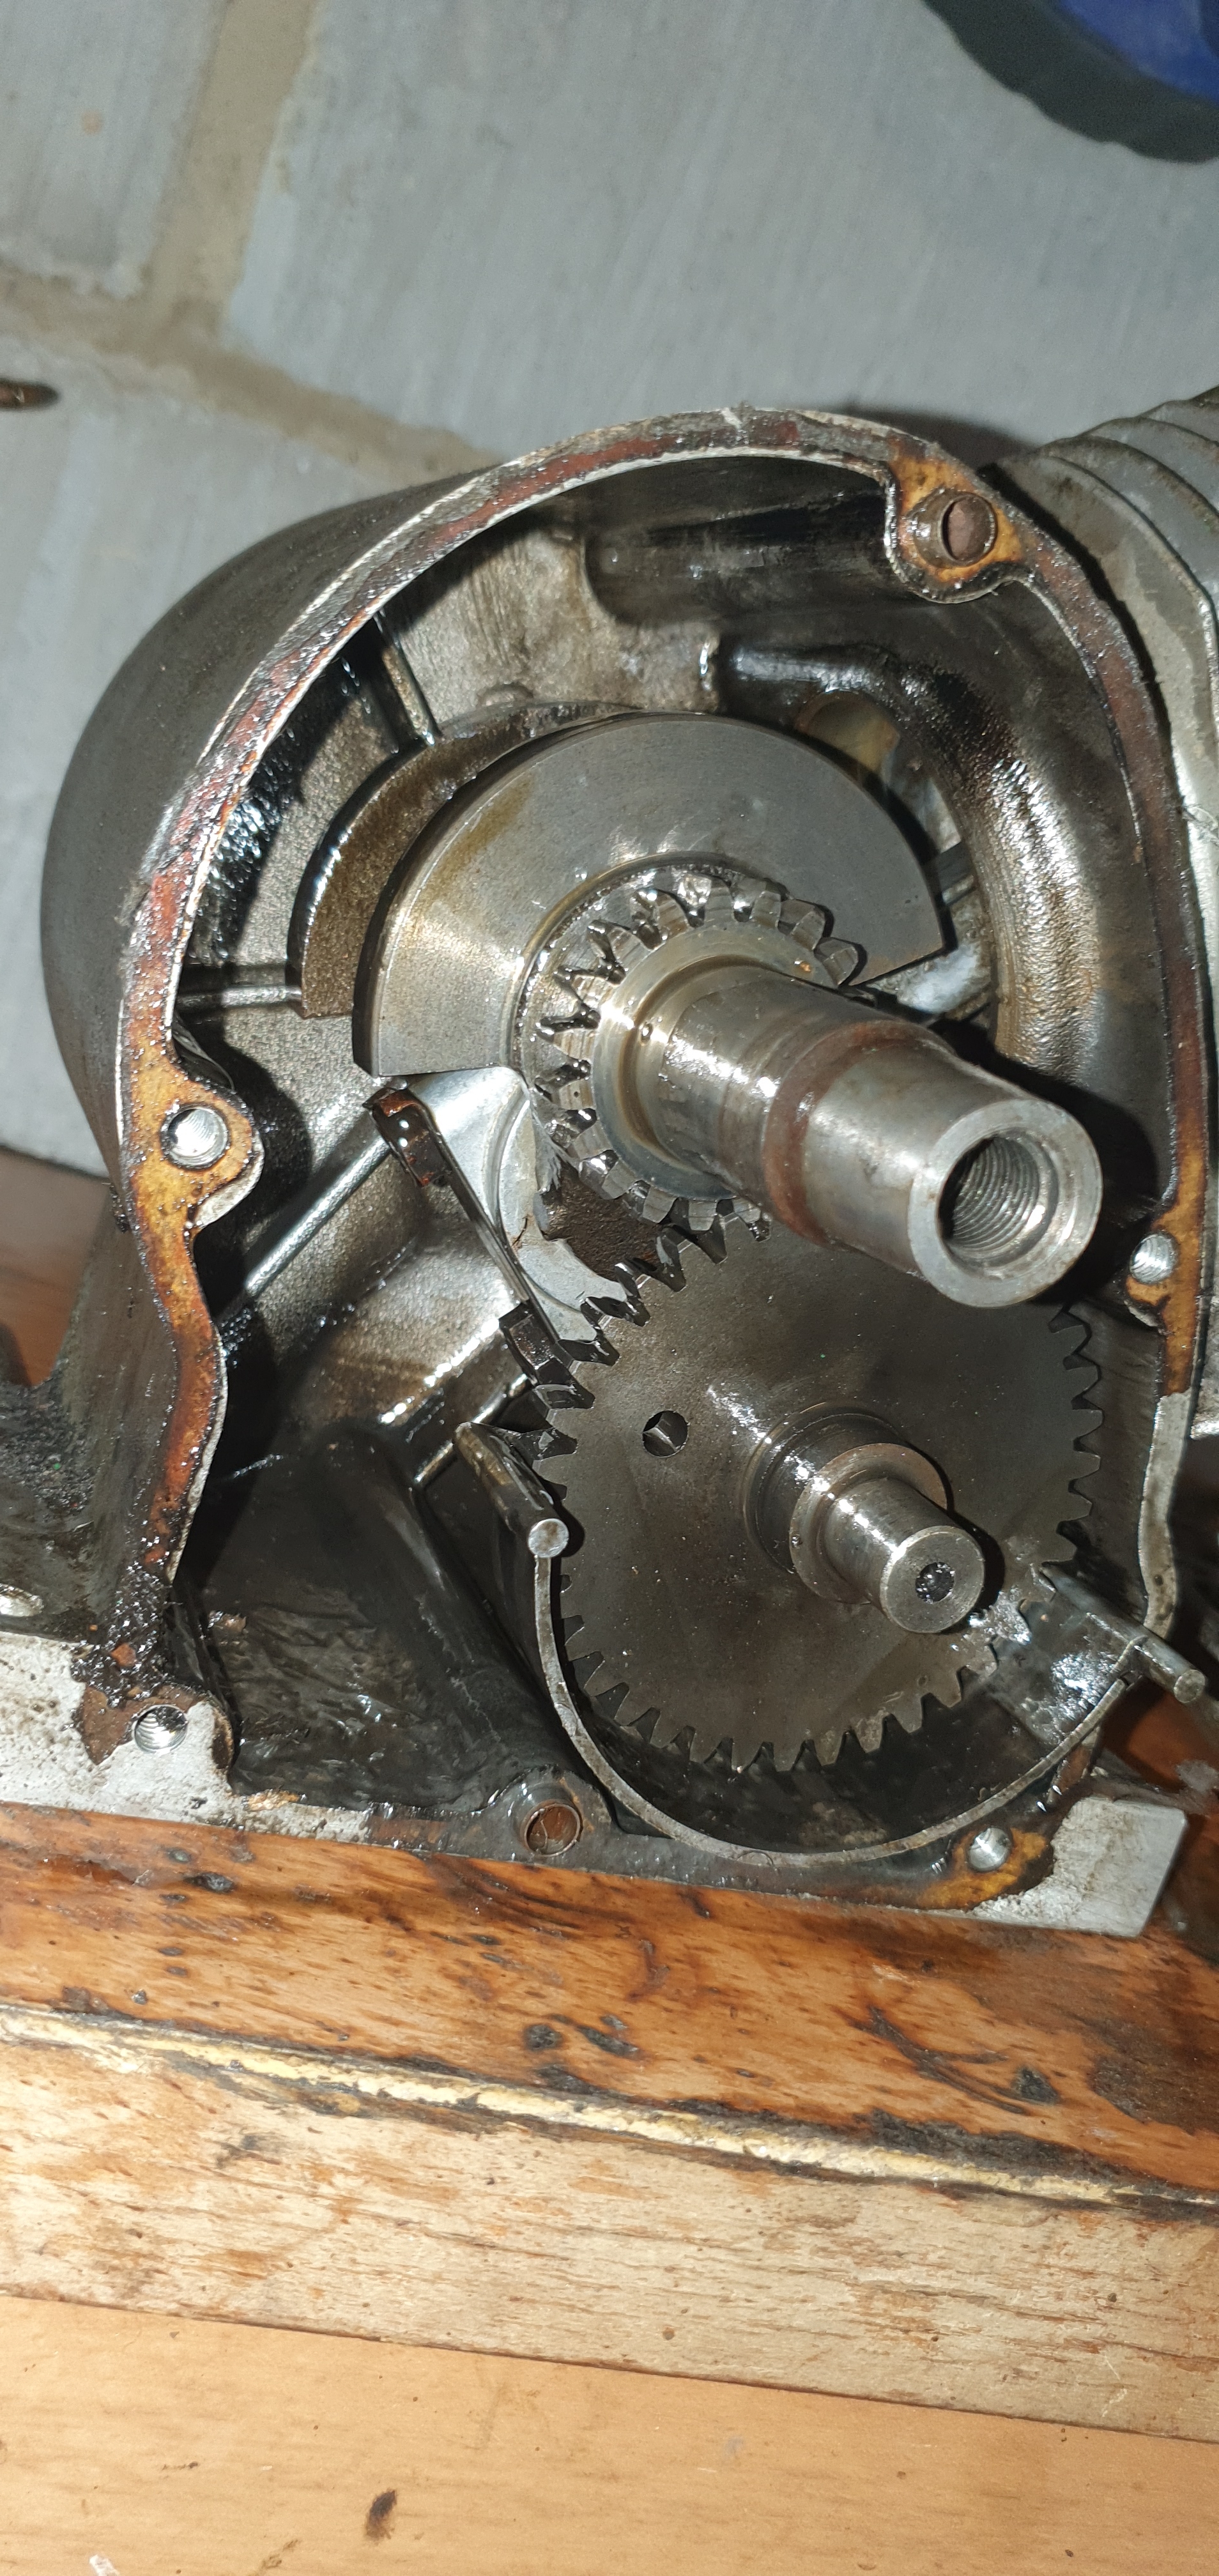
Now that I have the crank case over off, I can see the internals, but I am a bit unsure as to where to start- I thought it would be a little more obvious. I’m looking to get everything completely removed leaving just the block- any advice would be greatly appreciated.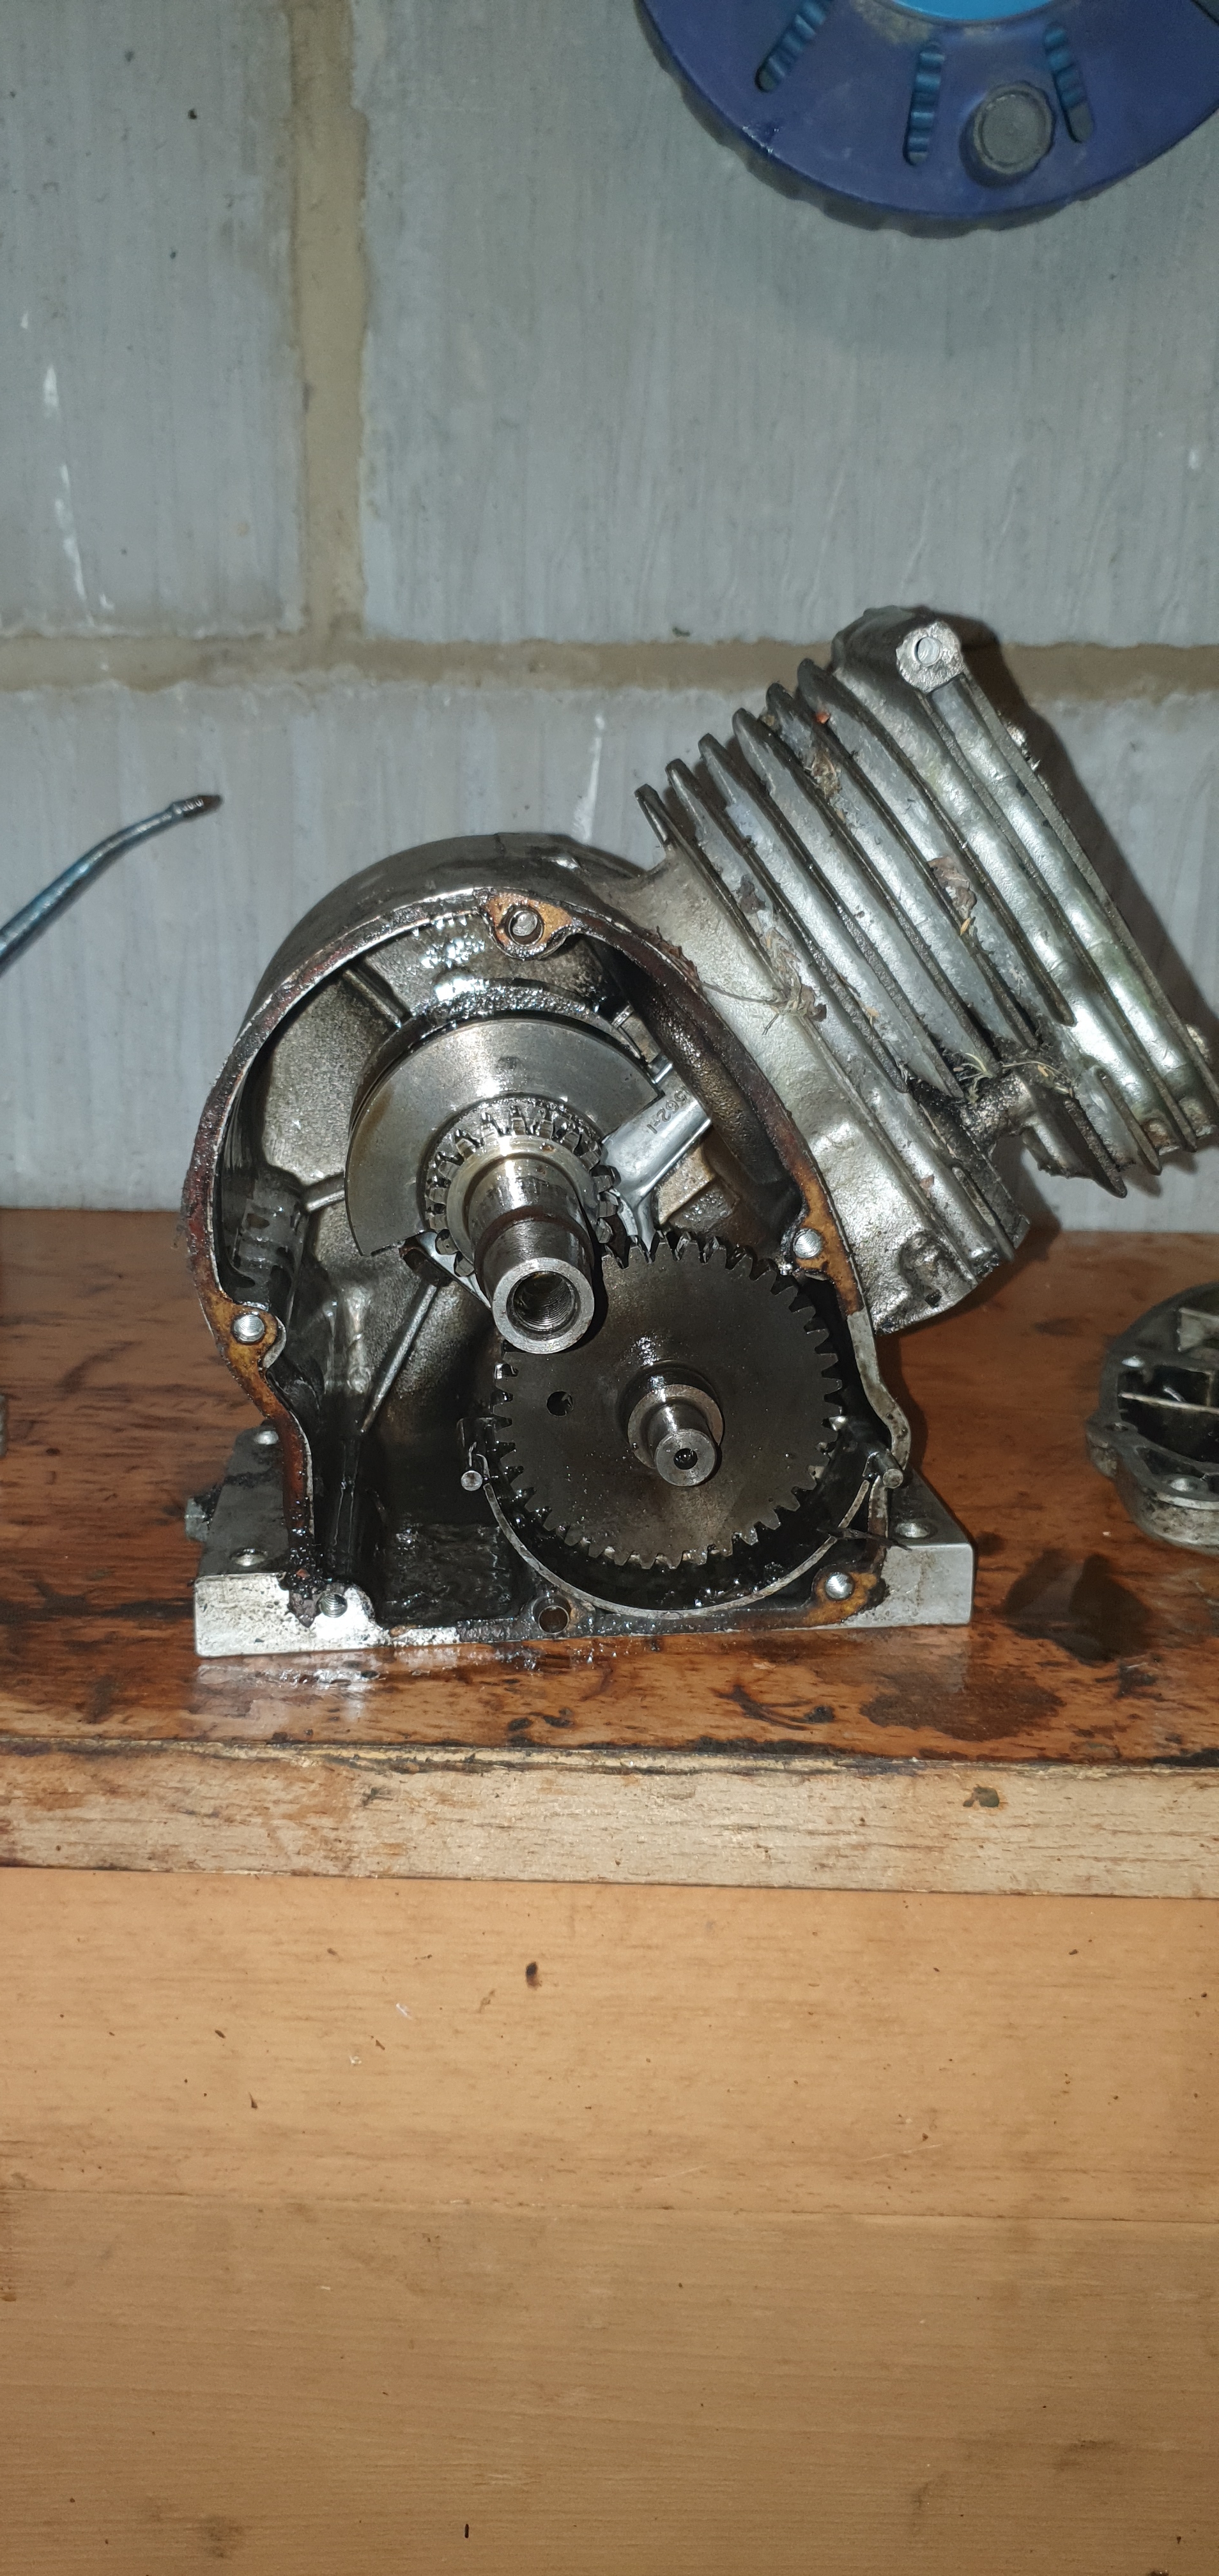
My valve spring compressor arrived as well, so I set about trying to remove the valves but with no luck. I’ve watched a couple videos on youtube about removing lawnmower valves with the technique being to push/pull the spring allowing the valve stem to slide out. I’ve tried this but no luck, is this the correct technique for BSA slopers? 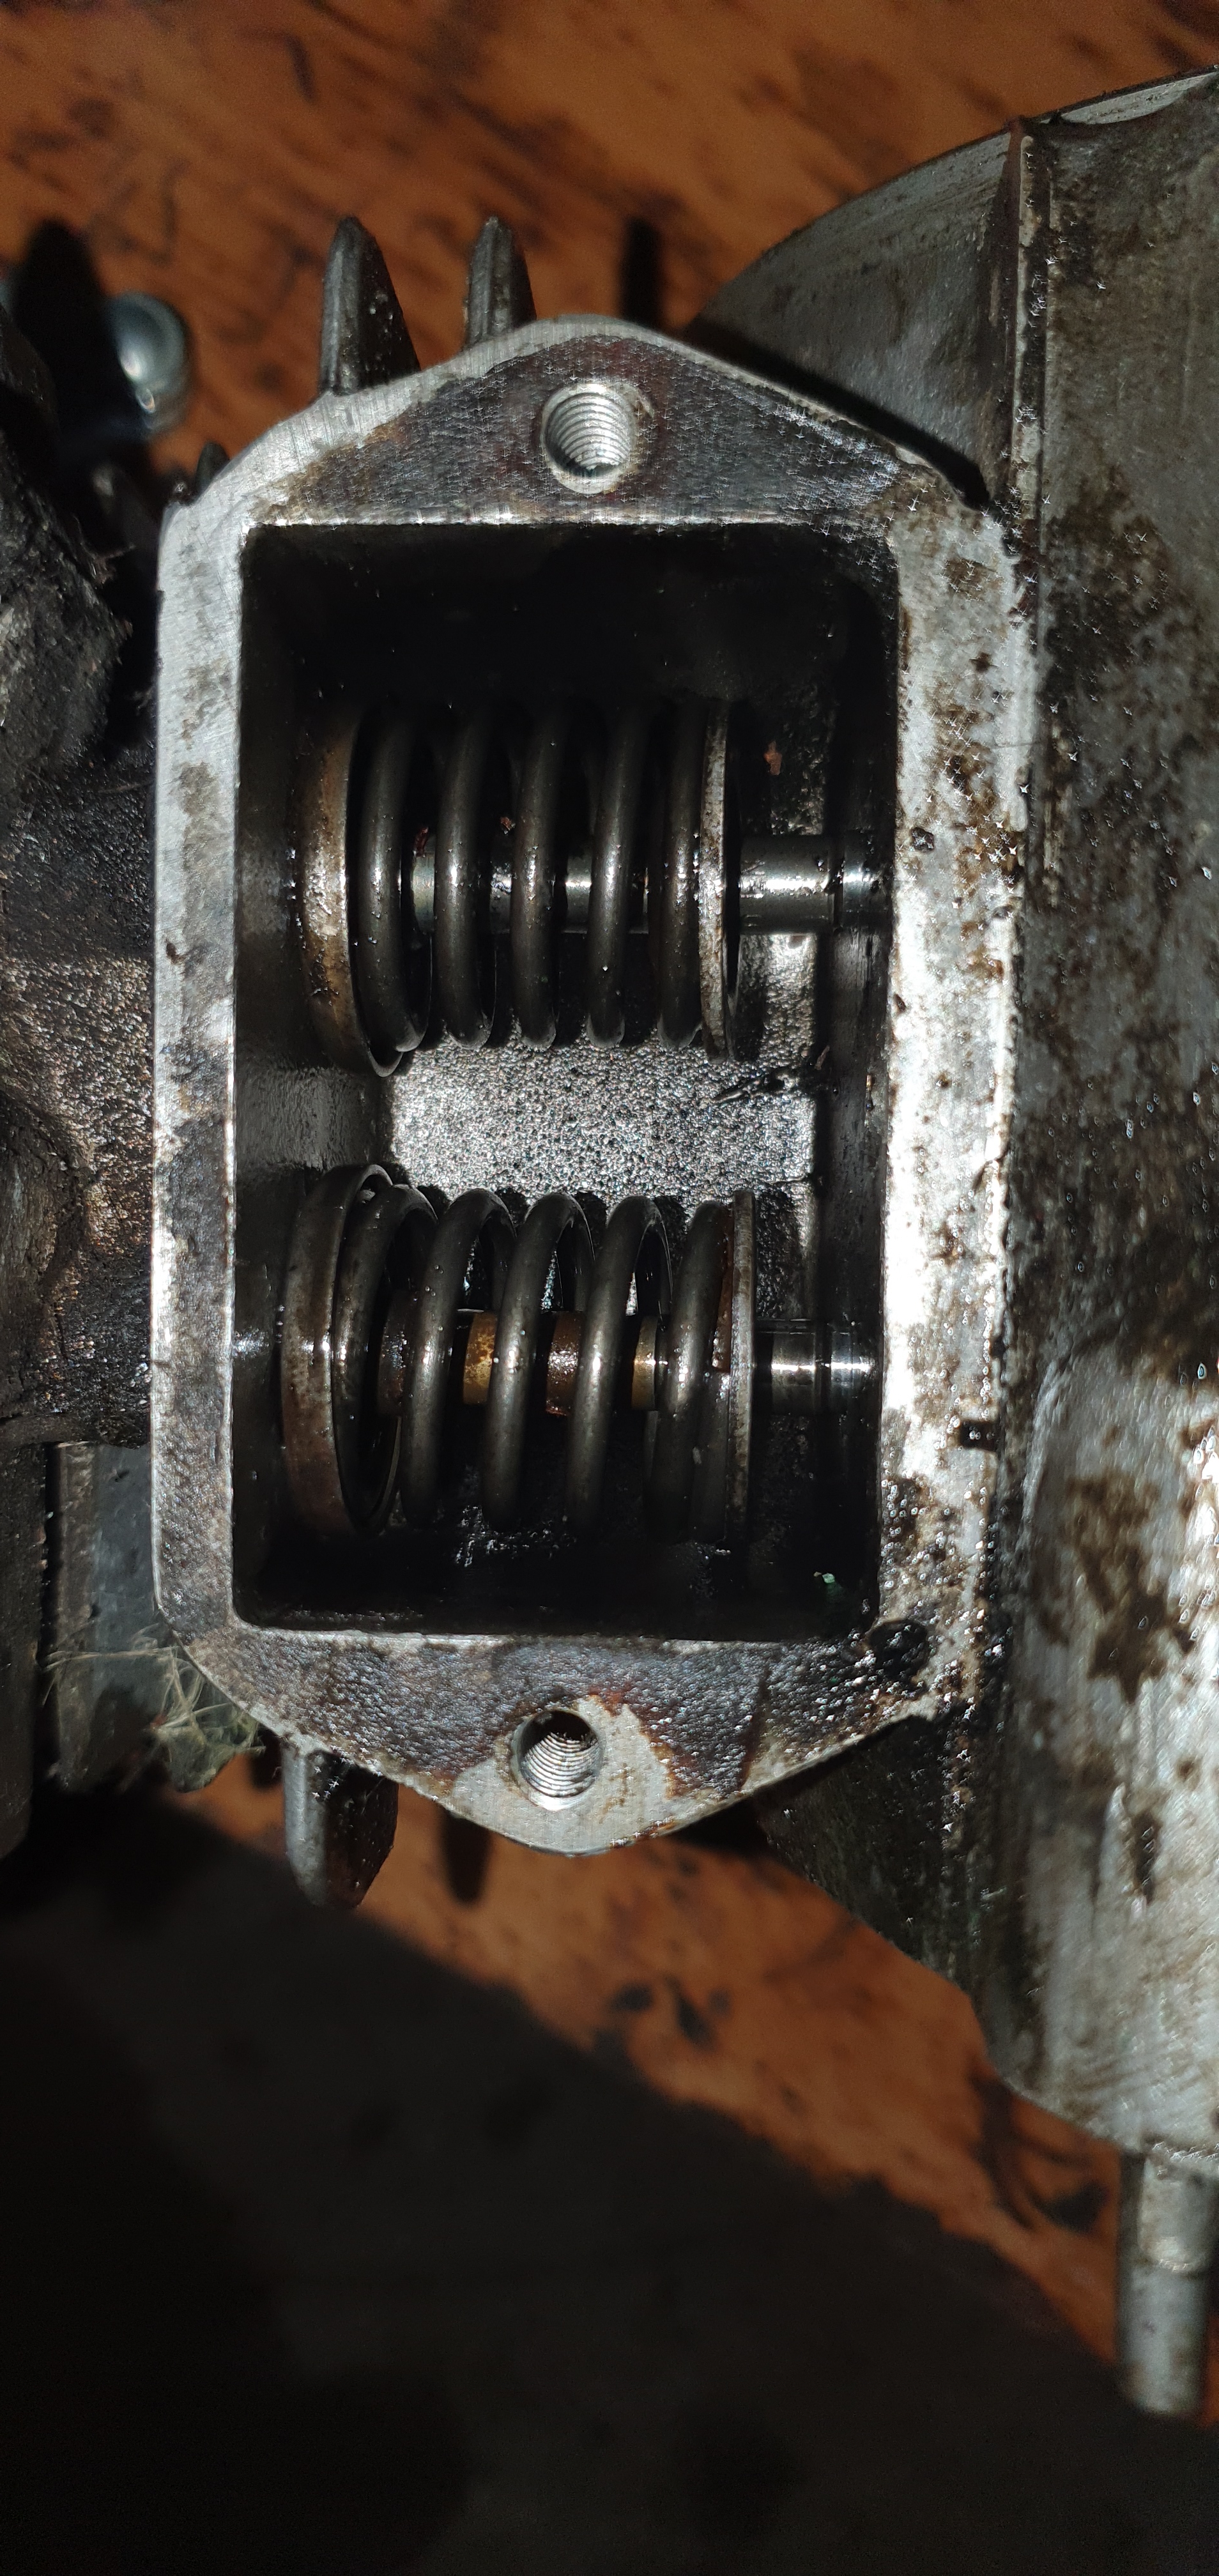 When I was trying to get it out, this fell out- any significance?
What you have there is one of
What you have there is one of the valve spring retainers. Your efforts with the compressor were good enough to compress the spring enough to release it from under the lower spring cup on one of the valves but instead of that spring being released it’s probably hung up on the now vacant slot in the valve stem . Take a screwdriver and wiggle the lower end of the spring a bit and it should release. Keep your fingers clear of the spring until the spring has released. Alternatively both spring retainers are in place and the one you have was lost earlier.
Its probably best to rotate the crank until the piston is at Top Dead Centre on the compression stroke with both valves shut. That you will enable you to withdraw the cam shaft without a fight, but before you do, note that there are alignment marks on both the crank and cam gears to aid correct reassembly. When the crank is withdrawn the cam followers ( tappets ) will drop out but if you get the chance before they do, mark them so that they may be returned to their original positions. With the cam gear removed , the oil trough may be removed ( pull it outwards). Then the big end bolts may be undone. Before removing the piston clean any ring of carbon from around the top of the bore and make a light reference scratch mark on the top of the piston so that it may be returned to its original orientation - I always make it pointing to the valves .
Hi James, glad you managed to
Hi James, glad you managed to get the cover off OK.
If you want to see some internal pictures of the engine at various stages of dismantling / rebuilding, page 3 of my current thread may be of use - https://www.oldlawnmowerclub.co.uk/forum/history-and-technical/technica…
I was about to say that you may have the earlier cotter pin valve retaining system which I have in both of my BSA F12 engines, but then your last picture shows that you have the newer style of 'horseshoe' clip retainers. I've only just obtained a B&S valve spring compressor and it took a little bit of fiddling to get used to using it, however when I removed my valves, I used the cable tie option, using some needle nose pliers to thread the cable ties around the top and bottom spring coils, and then pull tight to compress the spring on one side - then repeating so that you end up compressing the spring evenly on each side. This should allow you plenty room to manoeuvre the springs out of the way enough to release the valve retainers and withdraw the valves.
Once the valves and springs/cups etc are out of the way - keep the inlet setup all together and the exhaust all together so they don't get mixed up. Then you should be able to pull the camshaft out by pulling towards you - making sure to poke the cam followers up out of the way of the cam lobes first. Then the oil trough just pulls towards you off the spring that it locates on, then you can withdraw the cam followers - again keeping them on their respective sides or in a bag labelled with the inlet or exhaust valves/springs etc.
Depending how far you want to go, you can then remove the con rod bolts, in order to release the big end bearing cap and push the con rod and piston up the cylinder out of the way, which will allow the removal of the crankshaft.
It looks like your engine internals are about as clean as my two were, with thick black sludge in the bottom - have fun cleaning it all out - it's a messy job without a proper parts washer - which I wish I had!! :)
So after taking both of your
So after taking both of your advice on board, I have successfully removed all of the internals.
When it came to the valve springs, I tried the one which I hadn't already tried. This came out no bother so I knew I had the technique correct. Back to the first one I went. I was having bother getting the end of the valve stem through the hole in the bottom cup, it was a very tight fit. Anyway I managed to free the spring after much wiggling. However, then I couldn't the the end of the stem through the guide in the block- turns out one of the shoulders on the cut out was slightly "mushroomed" so used a bit of emery cloth and out it came.
Ive cleaned up the parts and now im looking for a bit of advice on some potential issues.
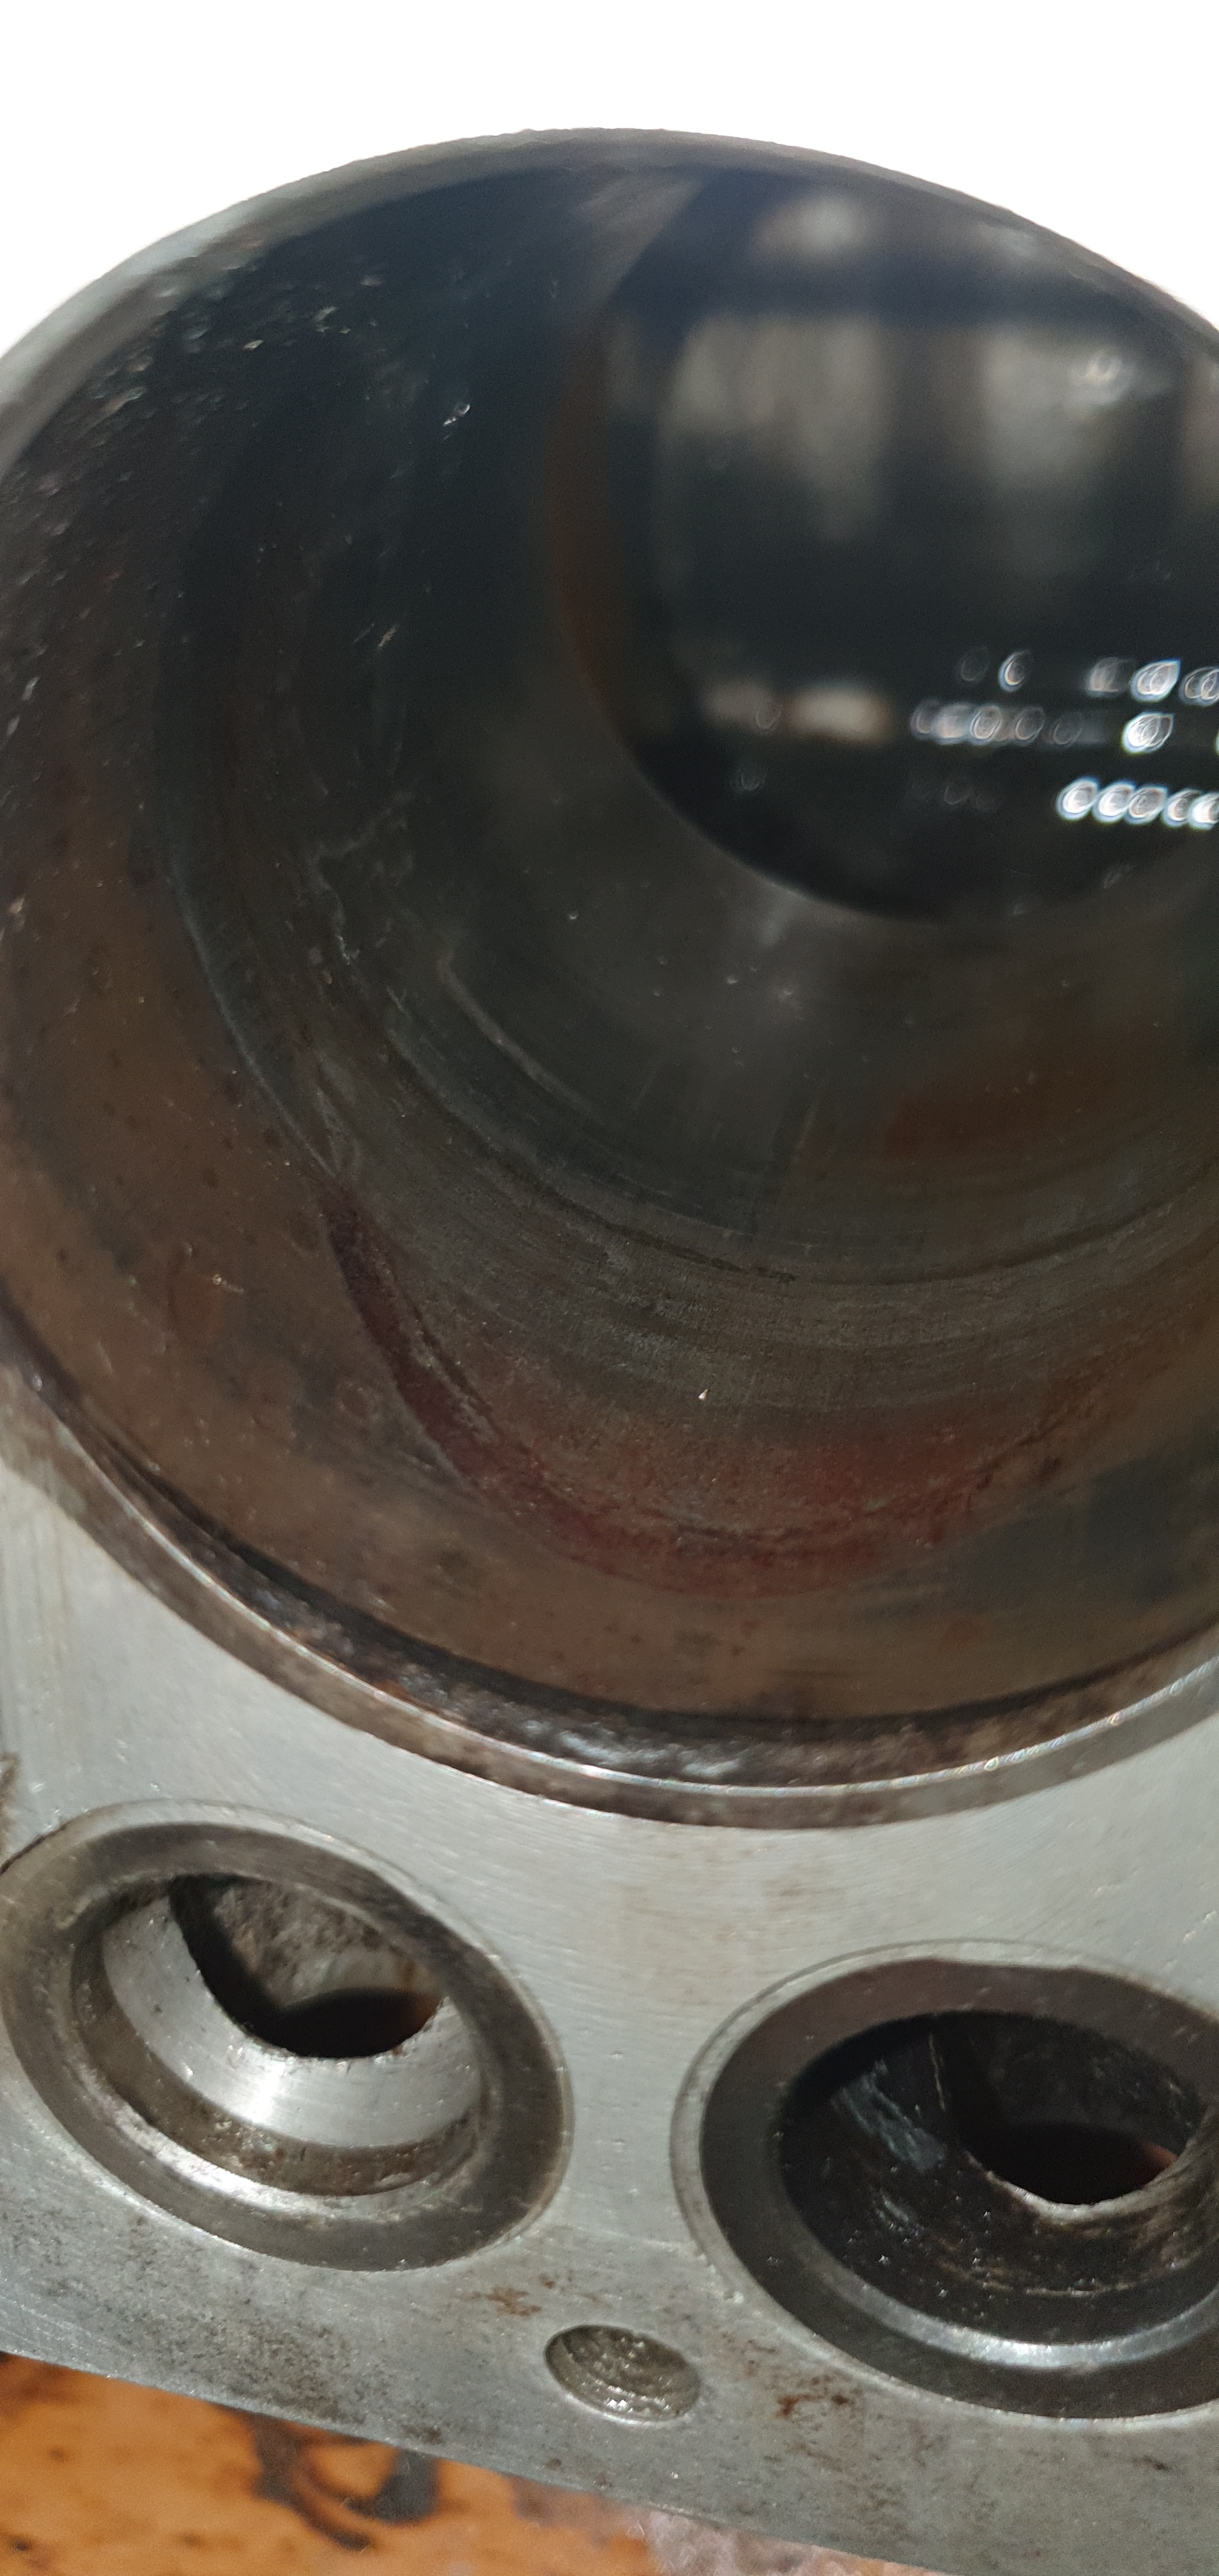
1. The piston. Theres a few marks on the piston (neither intake or exhaust side) I think they look worse than they are especially in photos as it feels smooth to the touch. Other than that the piston is in great shape.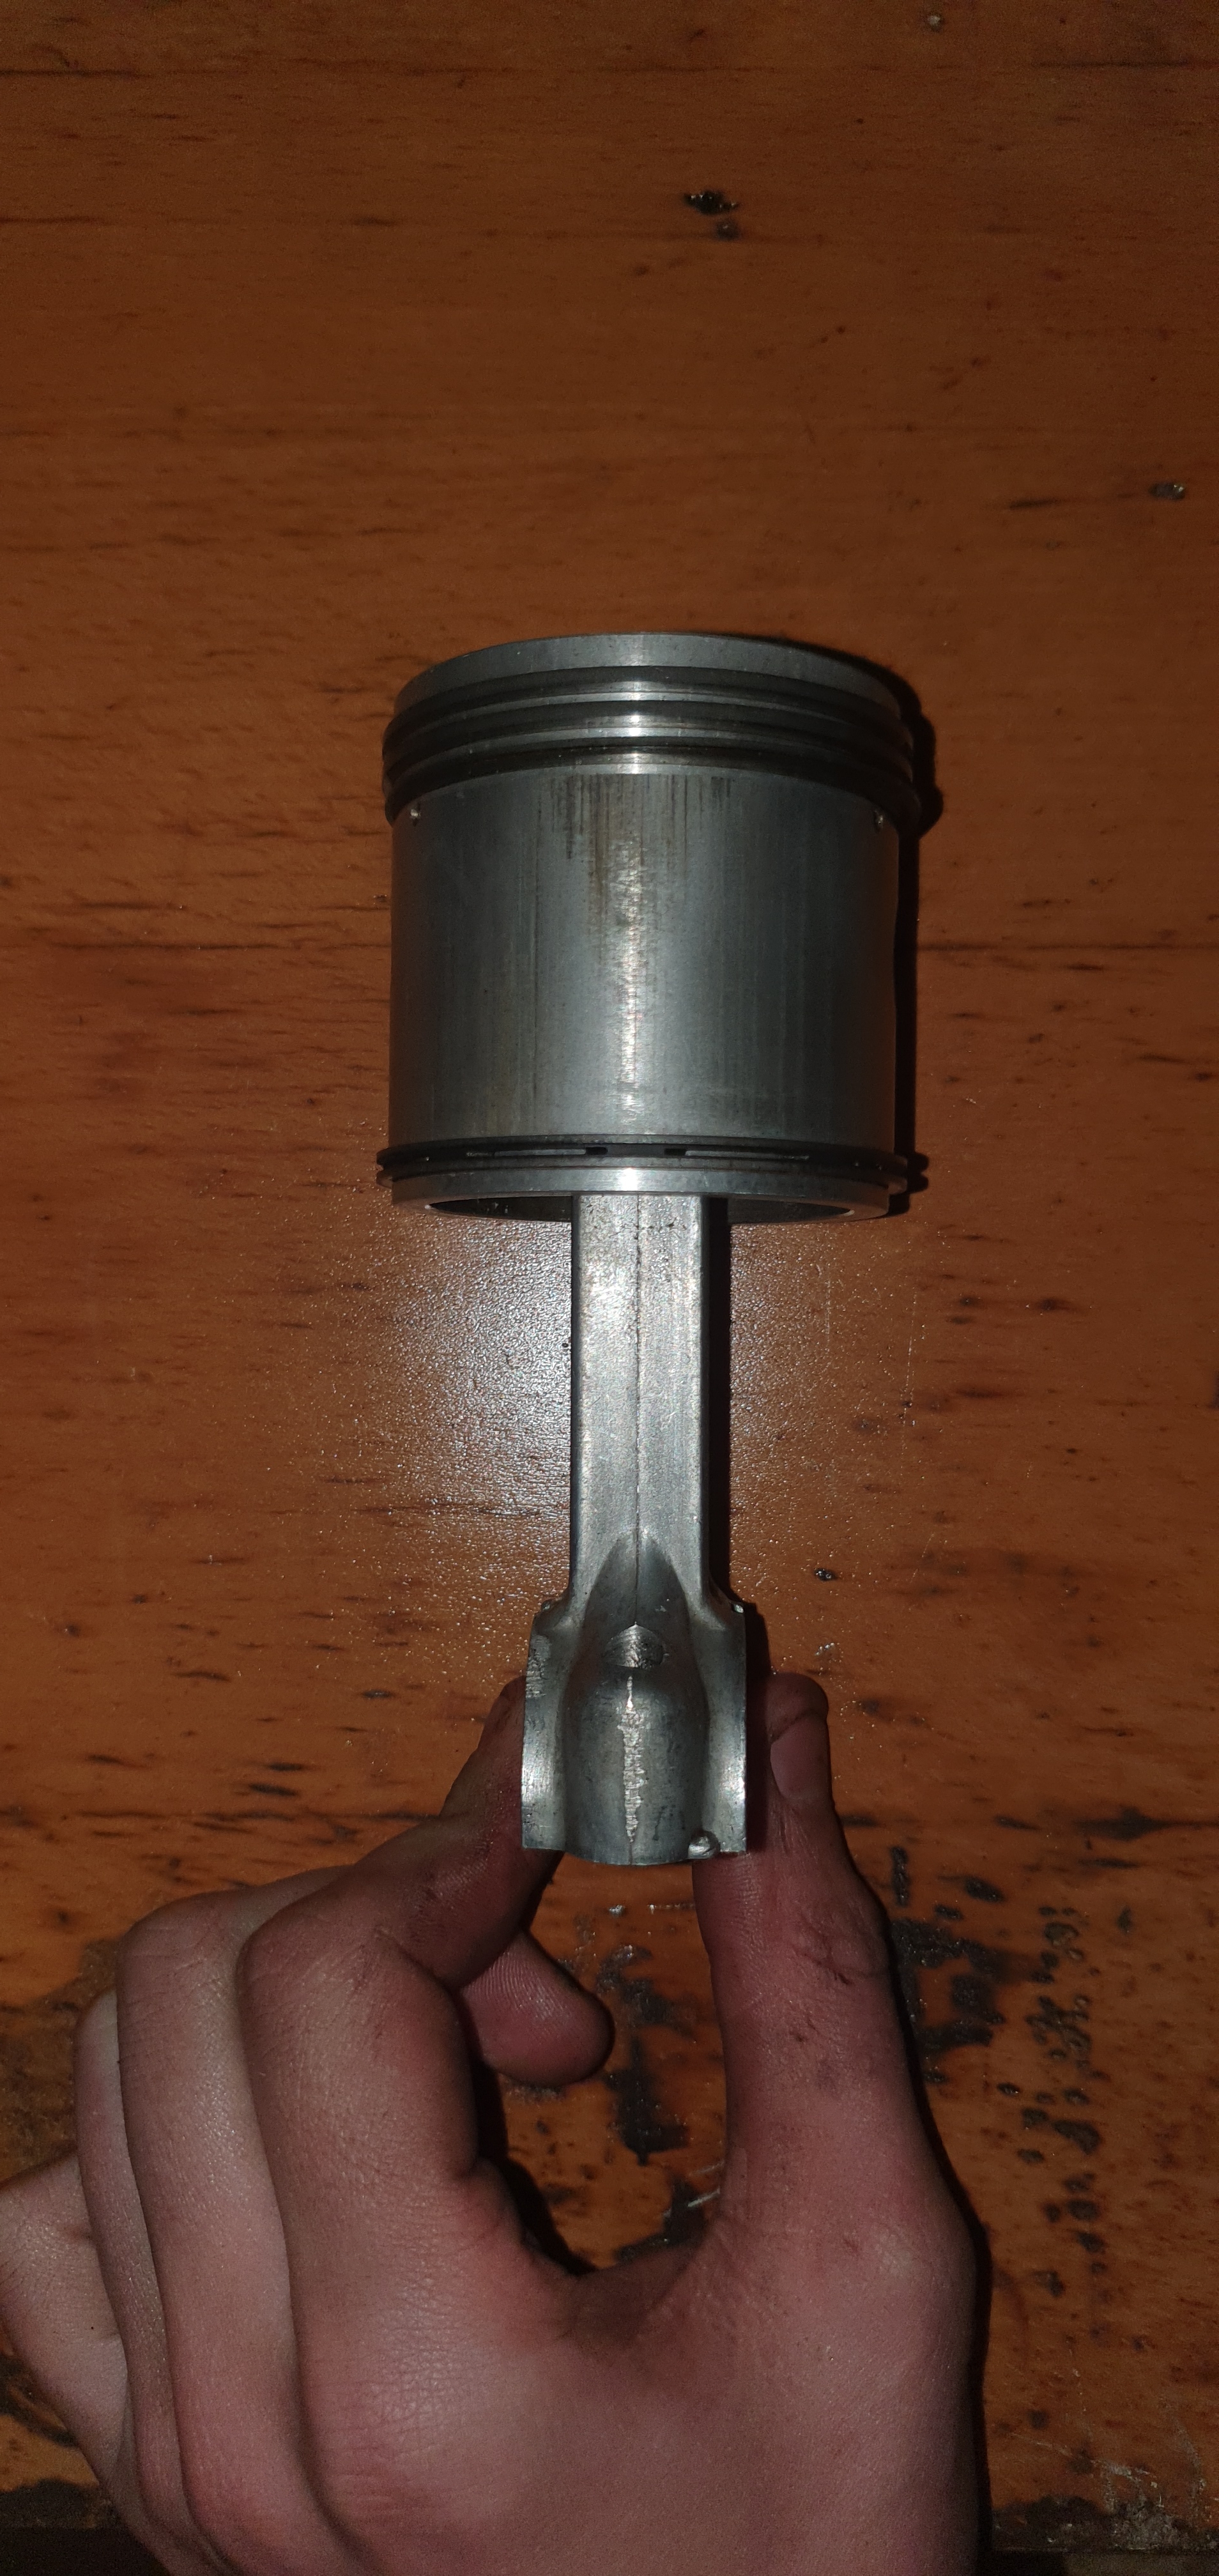
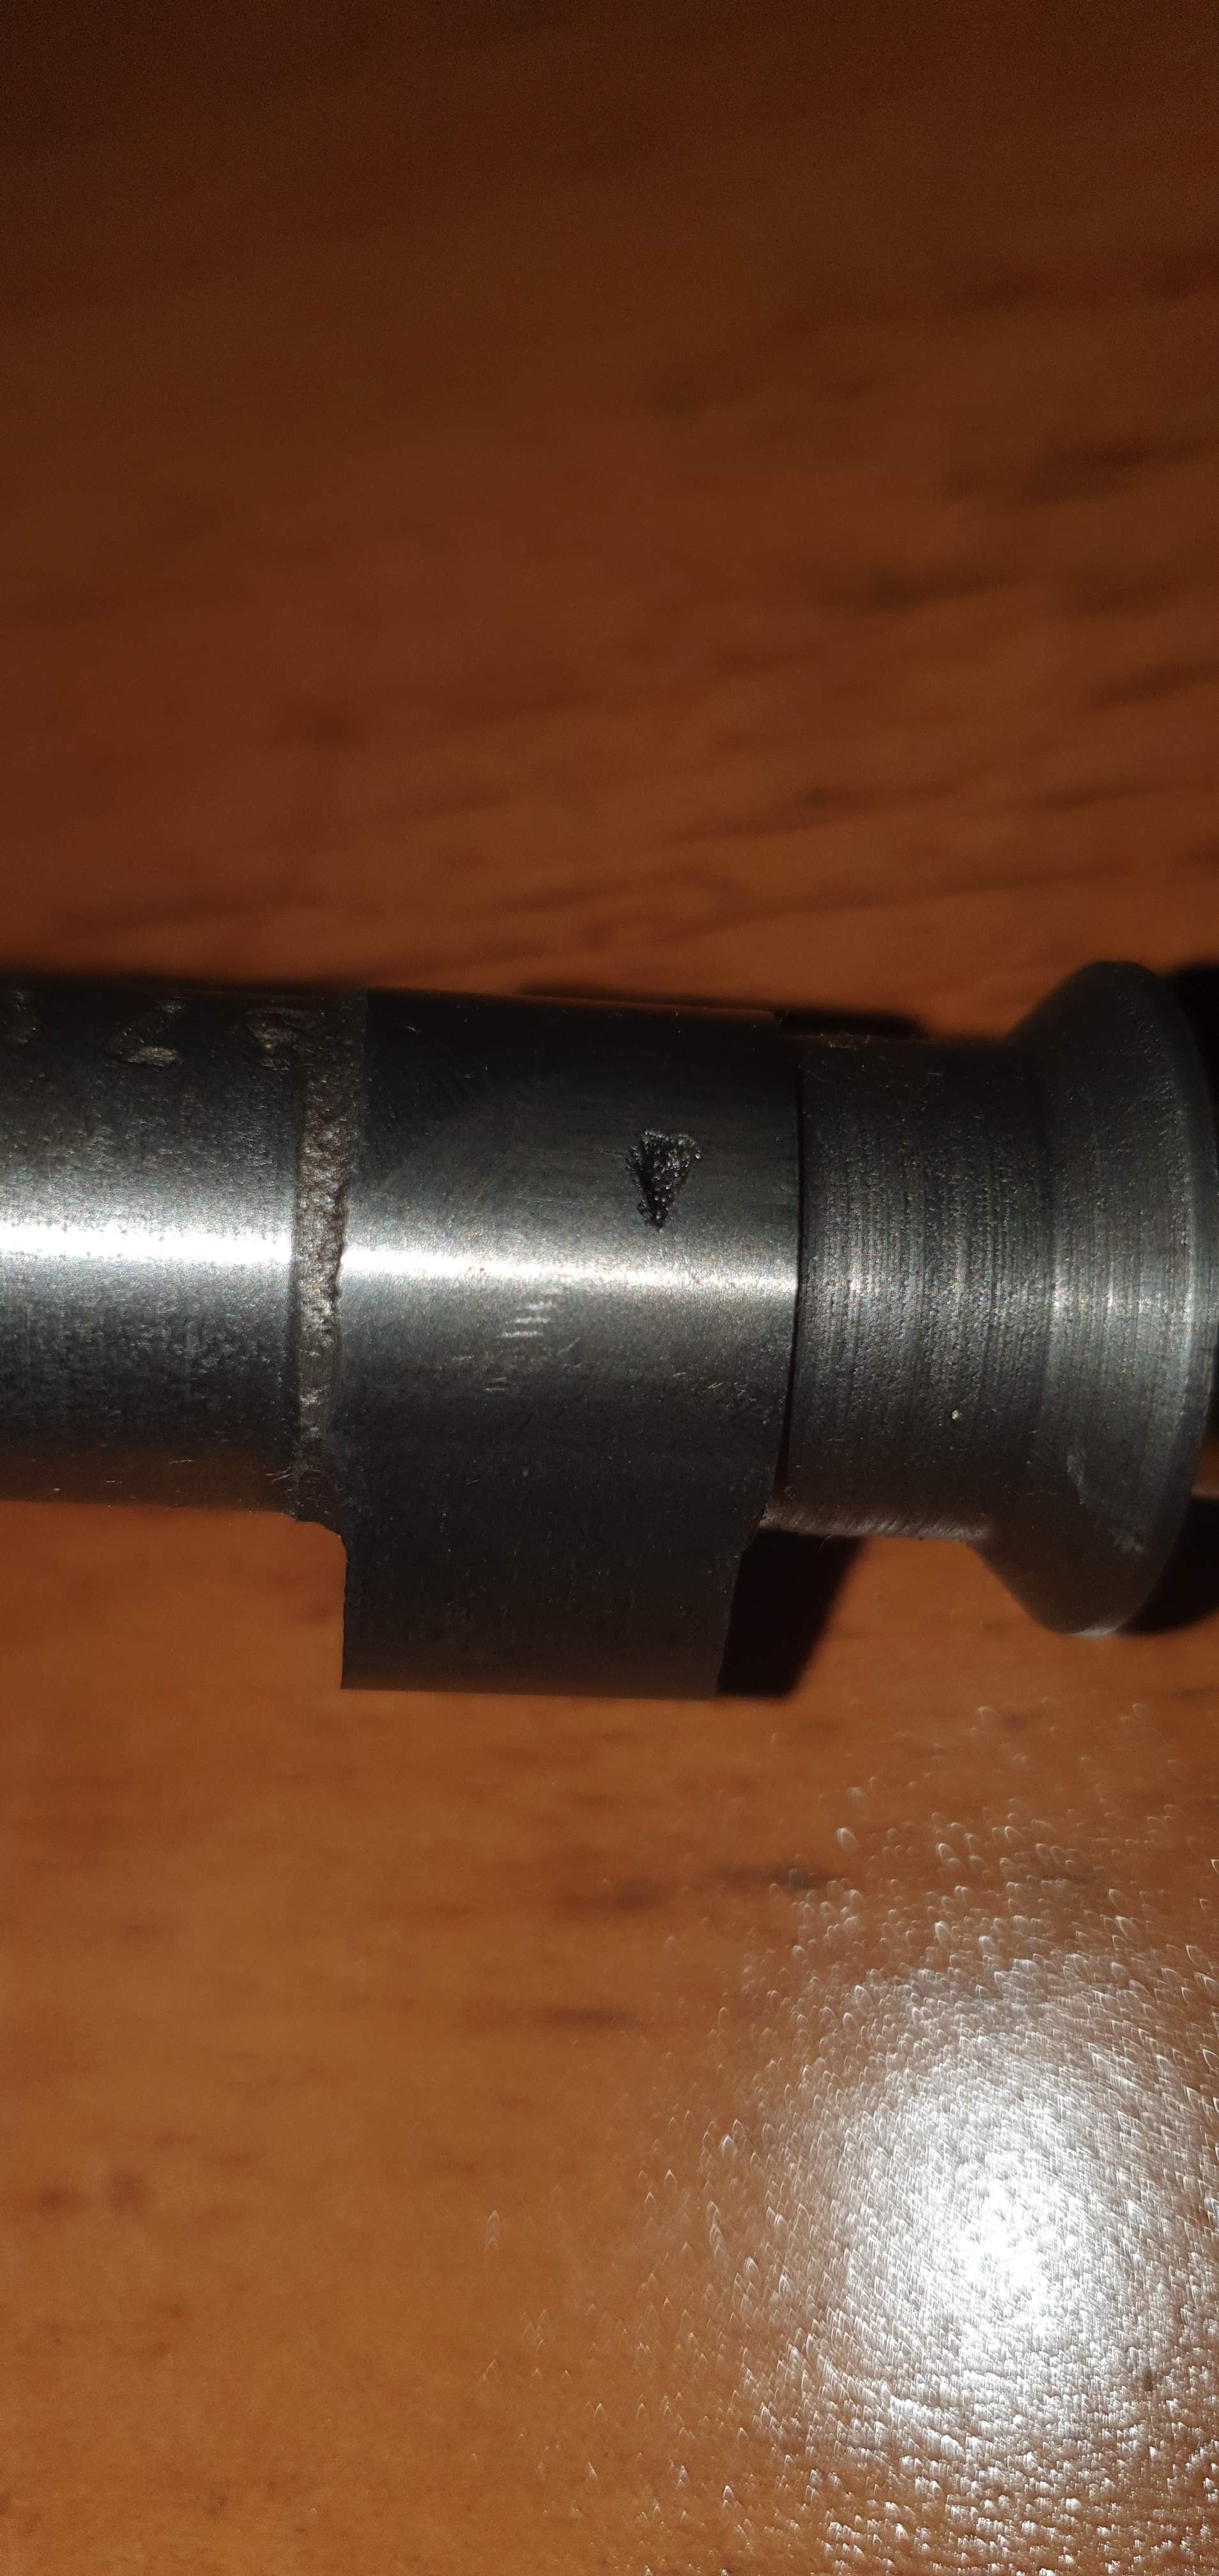
2. Cam shaft. Ive noticed a small chip in one of the cam lobes although I dont imagine this being too detrimental.
3. Valve. Some pitting to the underside of one of the valves, the other is in good shape. Should i be able to get rid of this pitting with some lapping paste?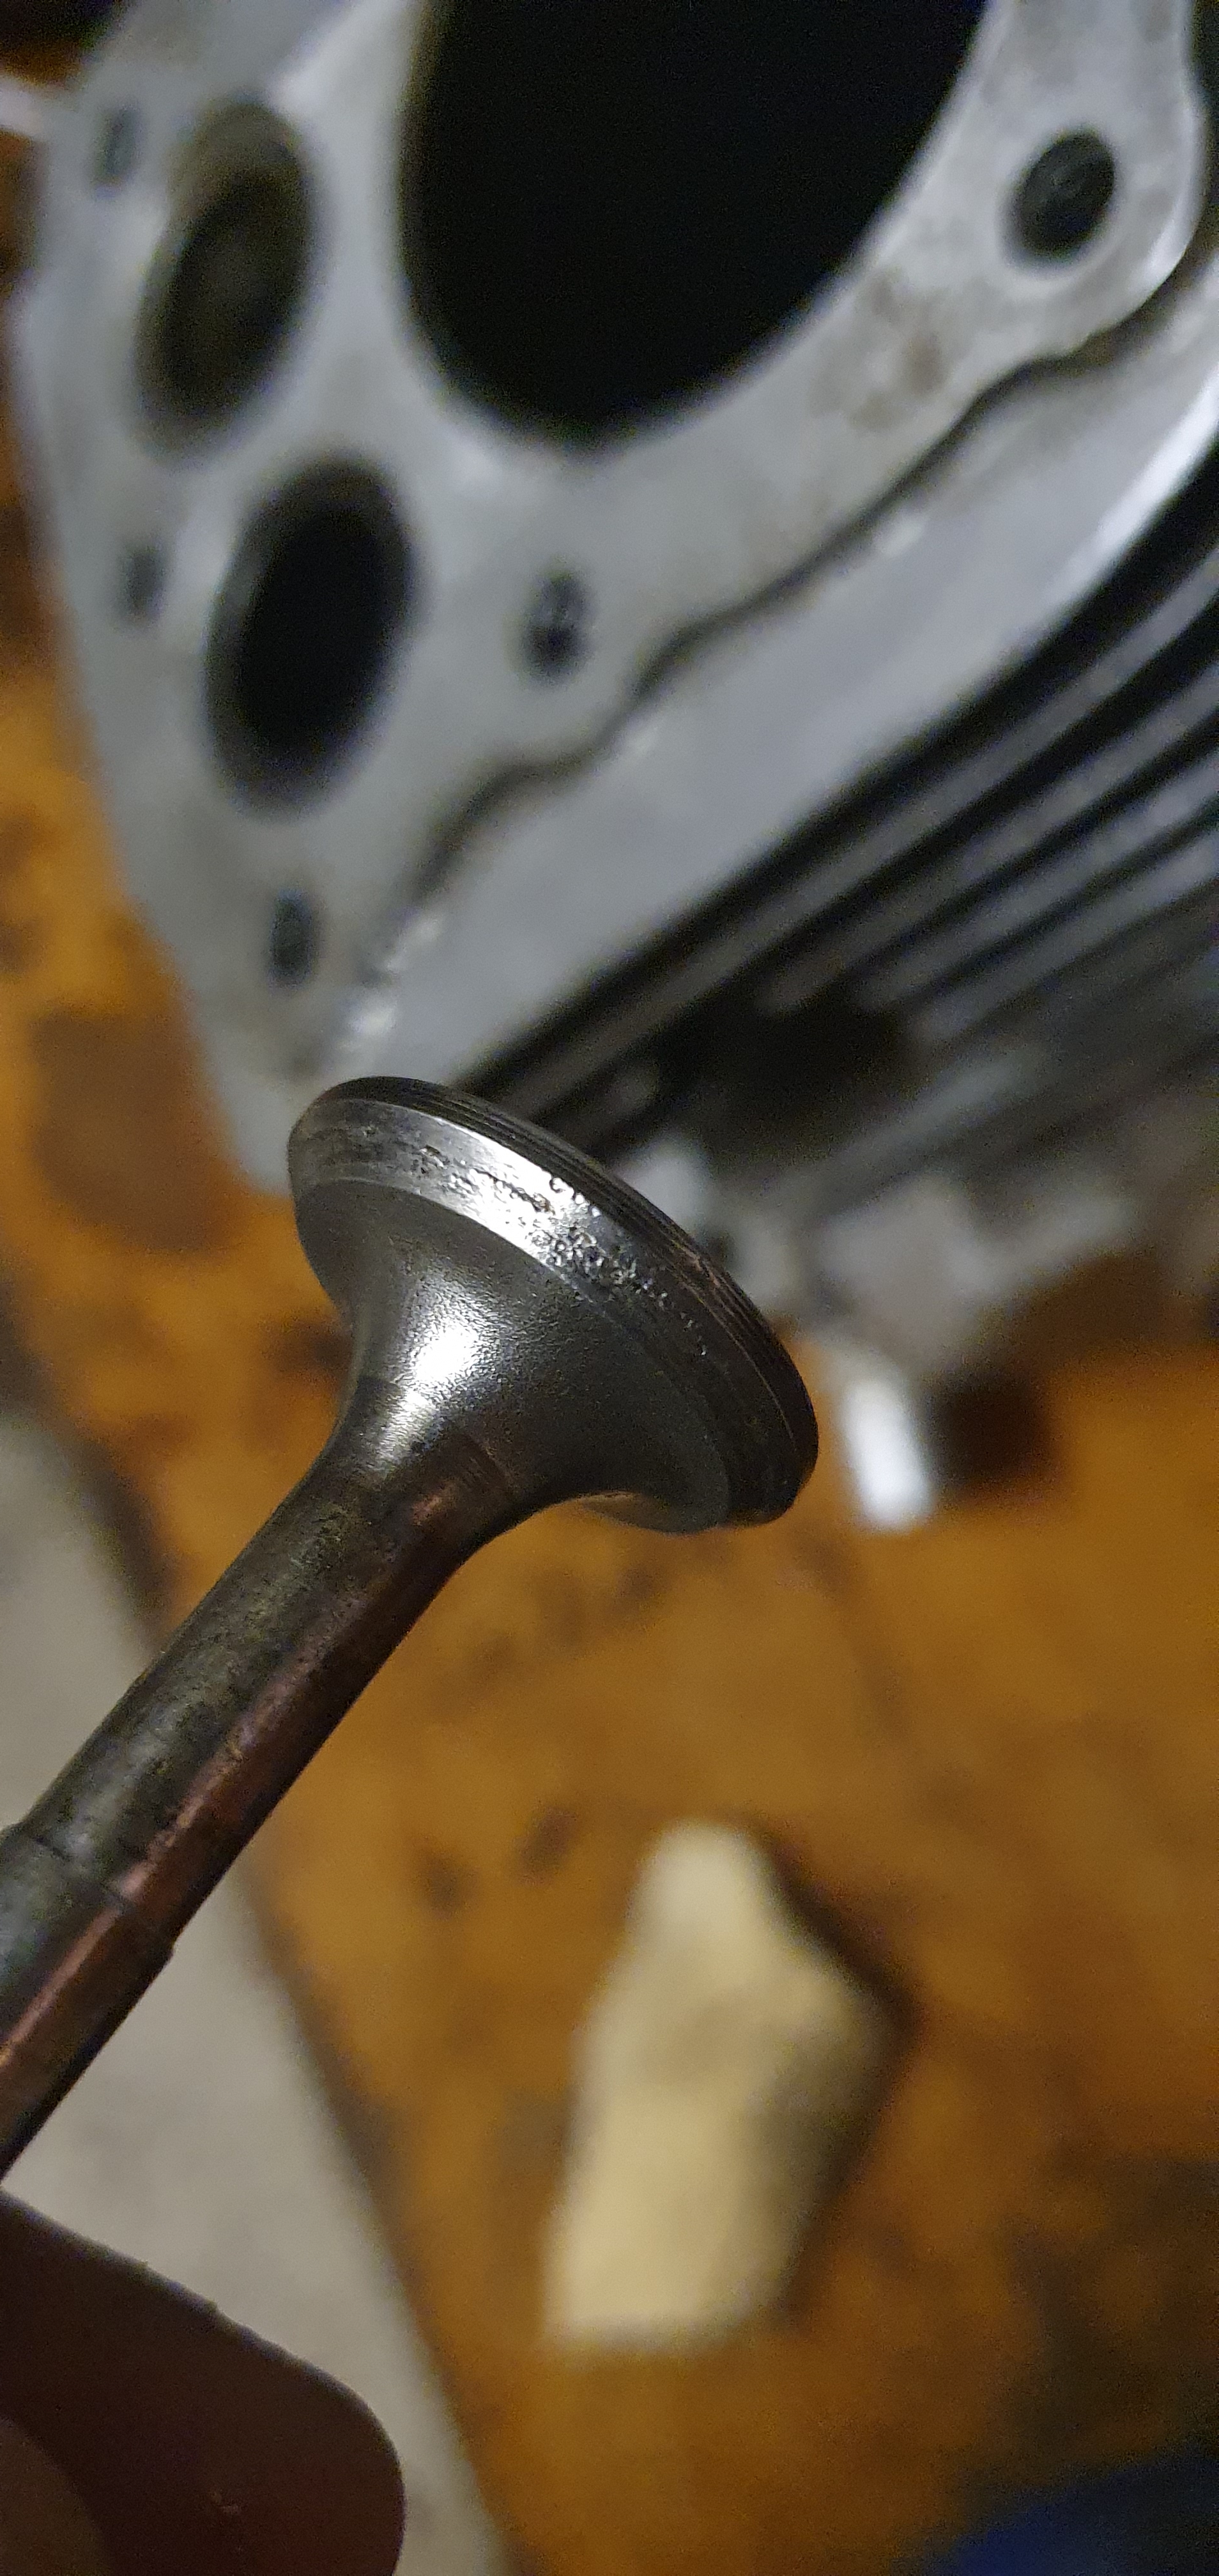
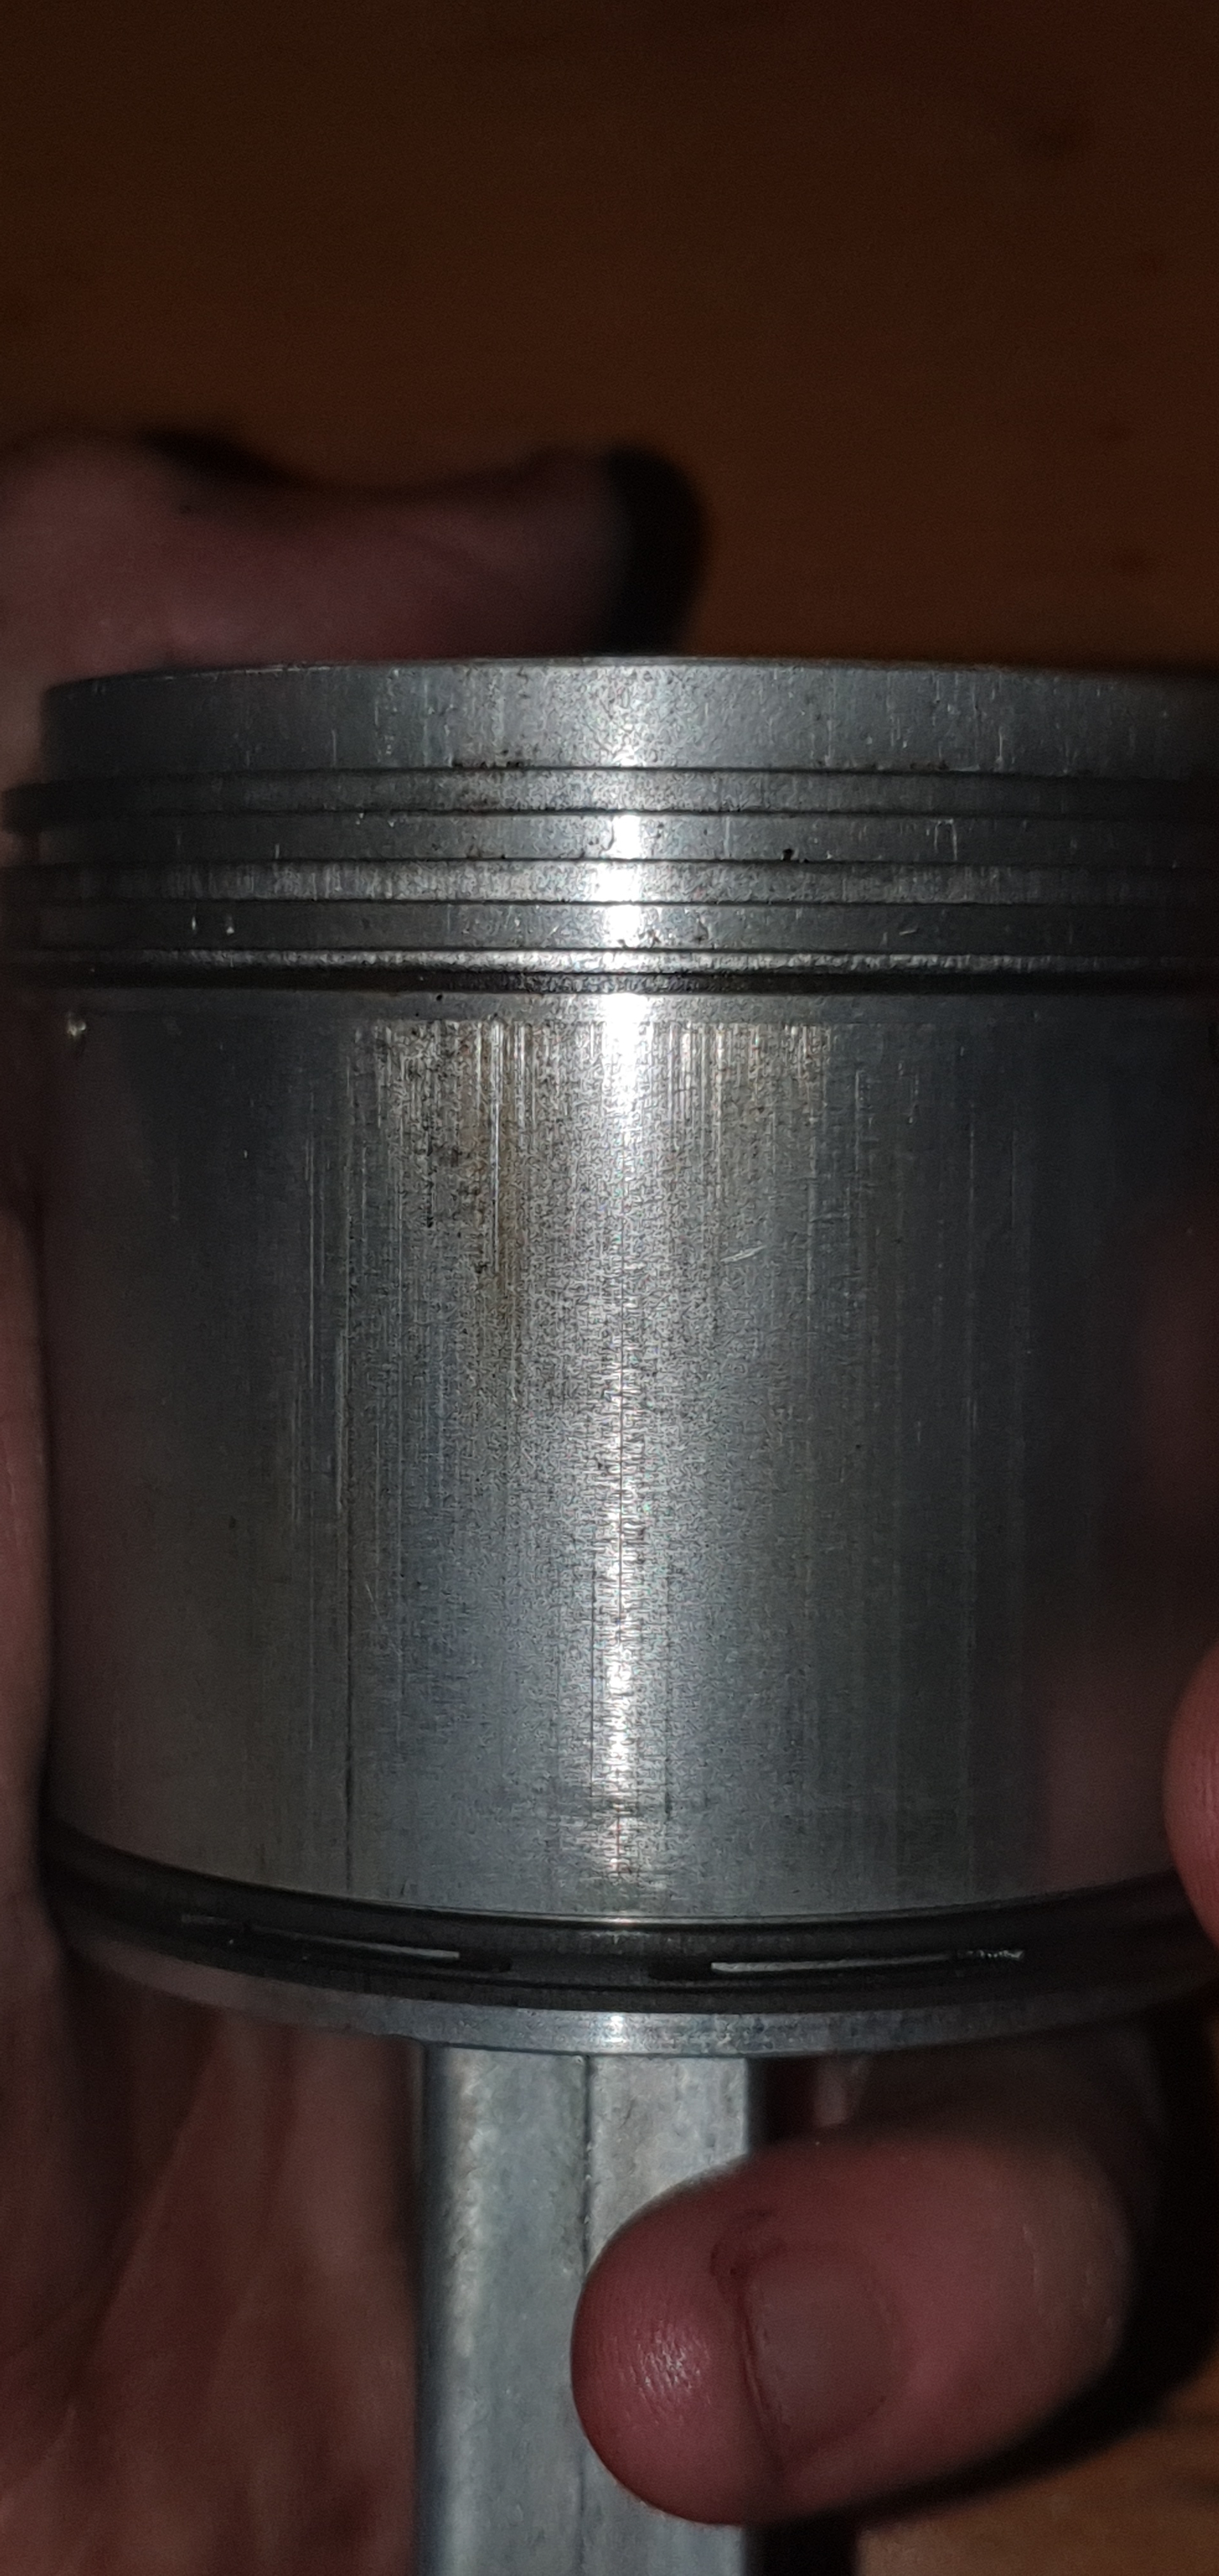
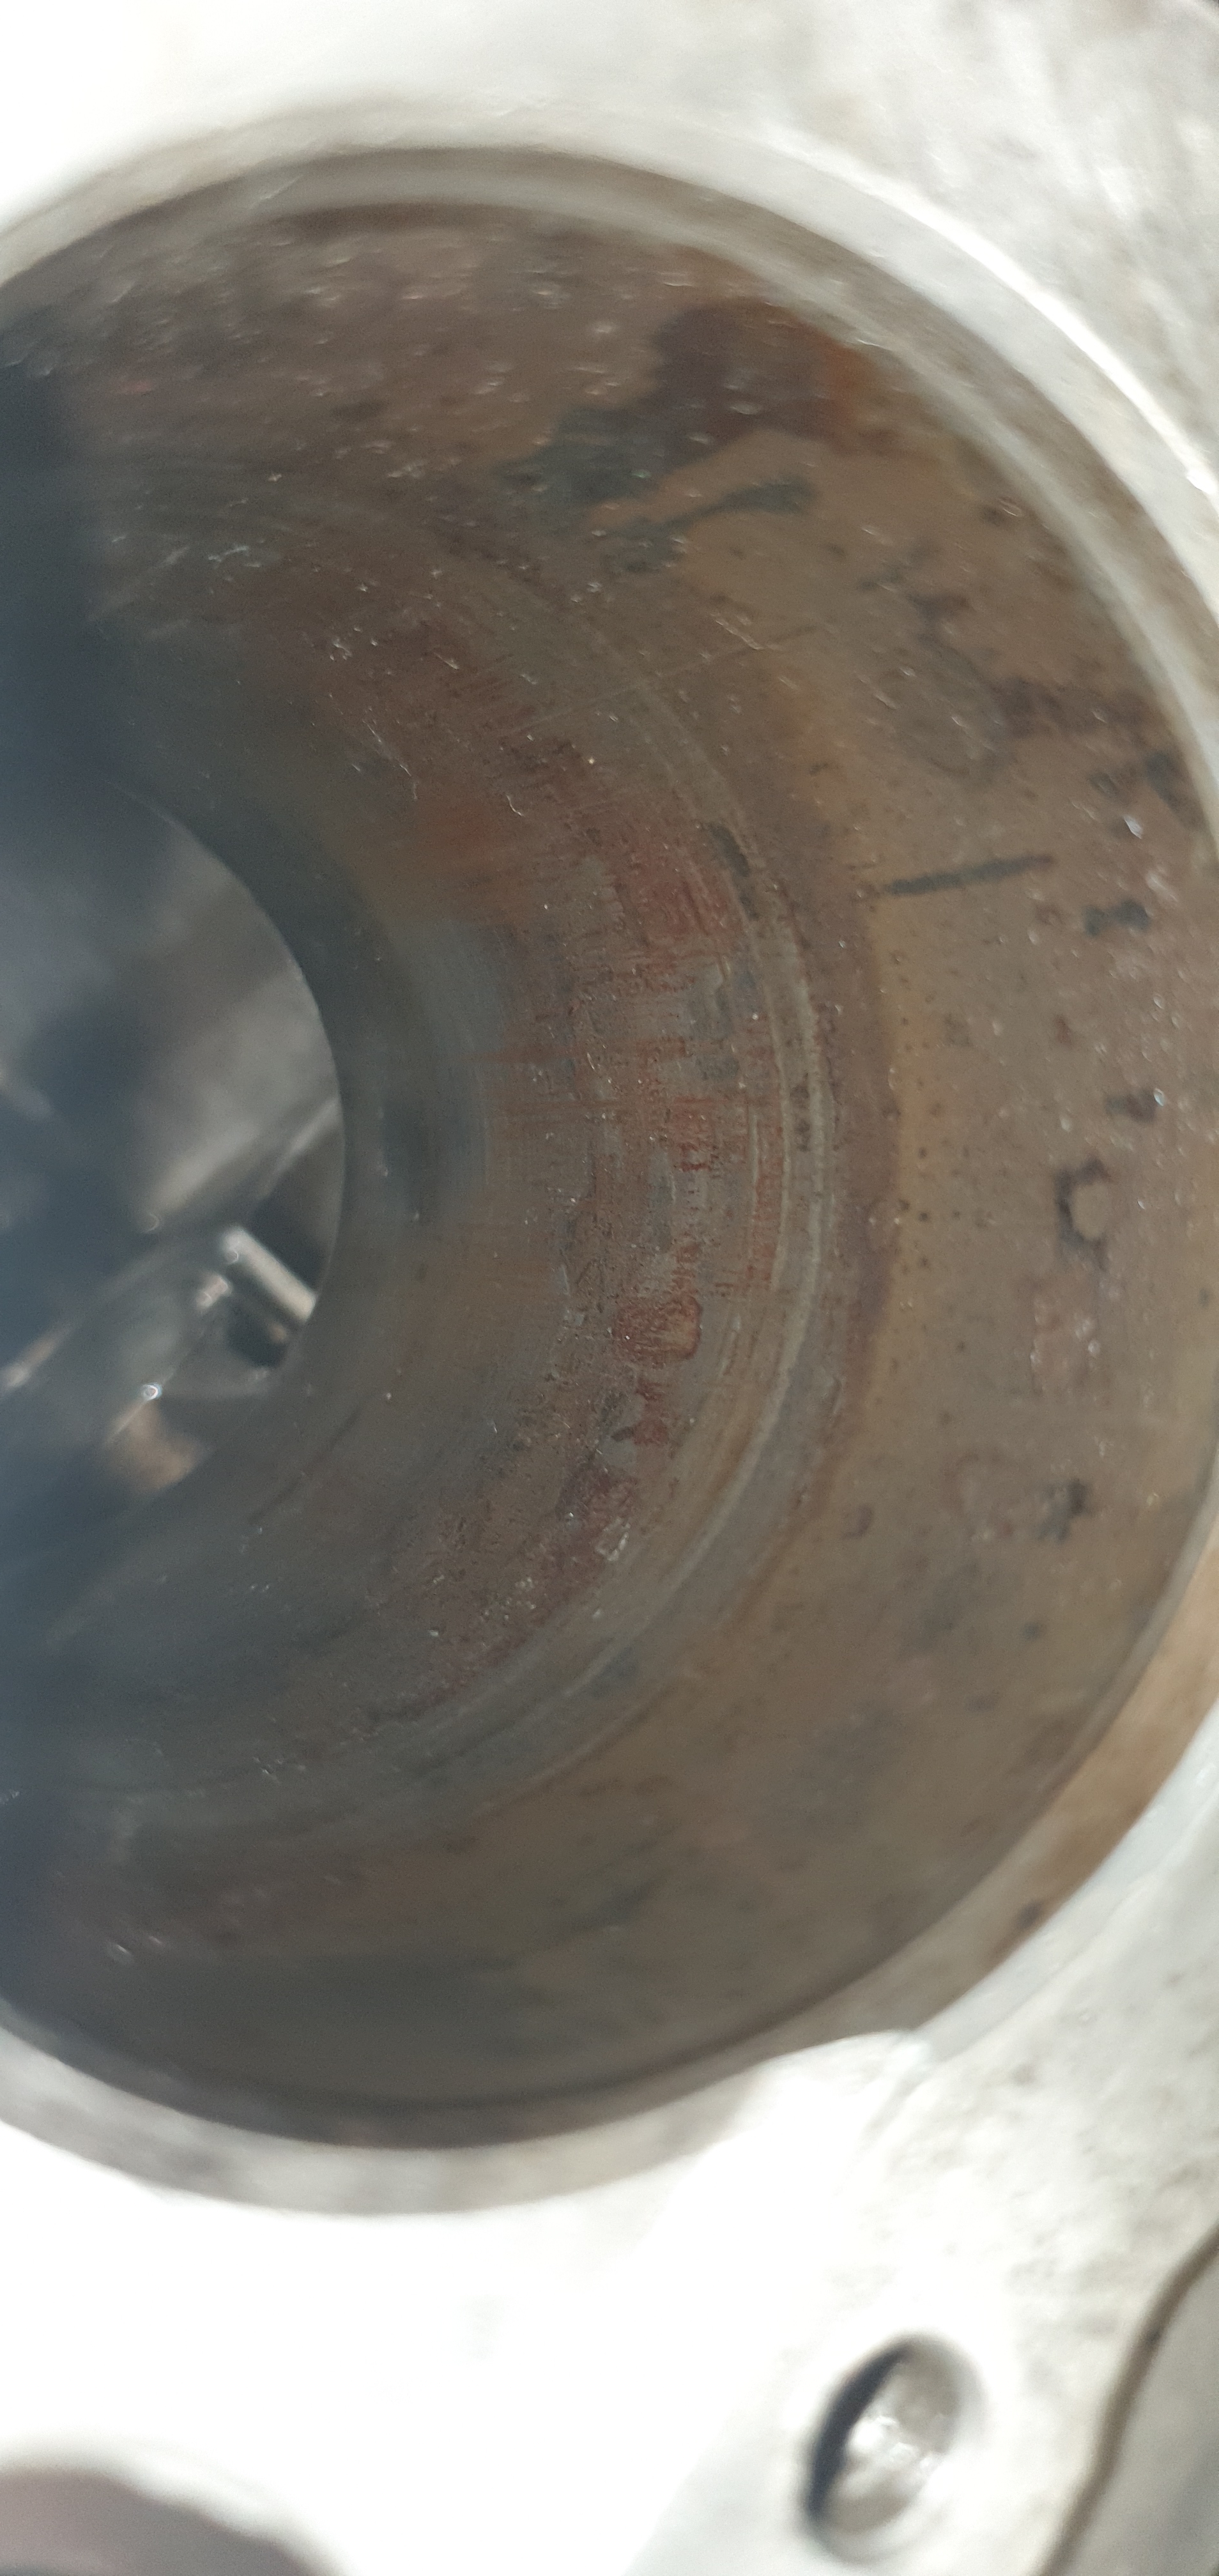
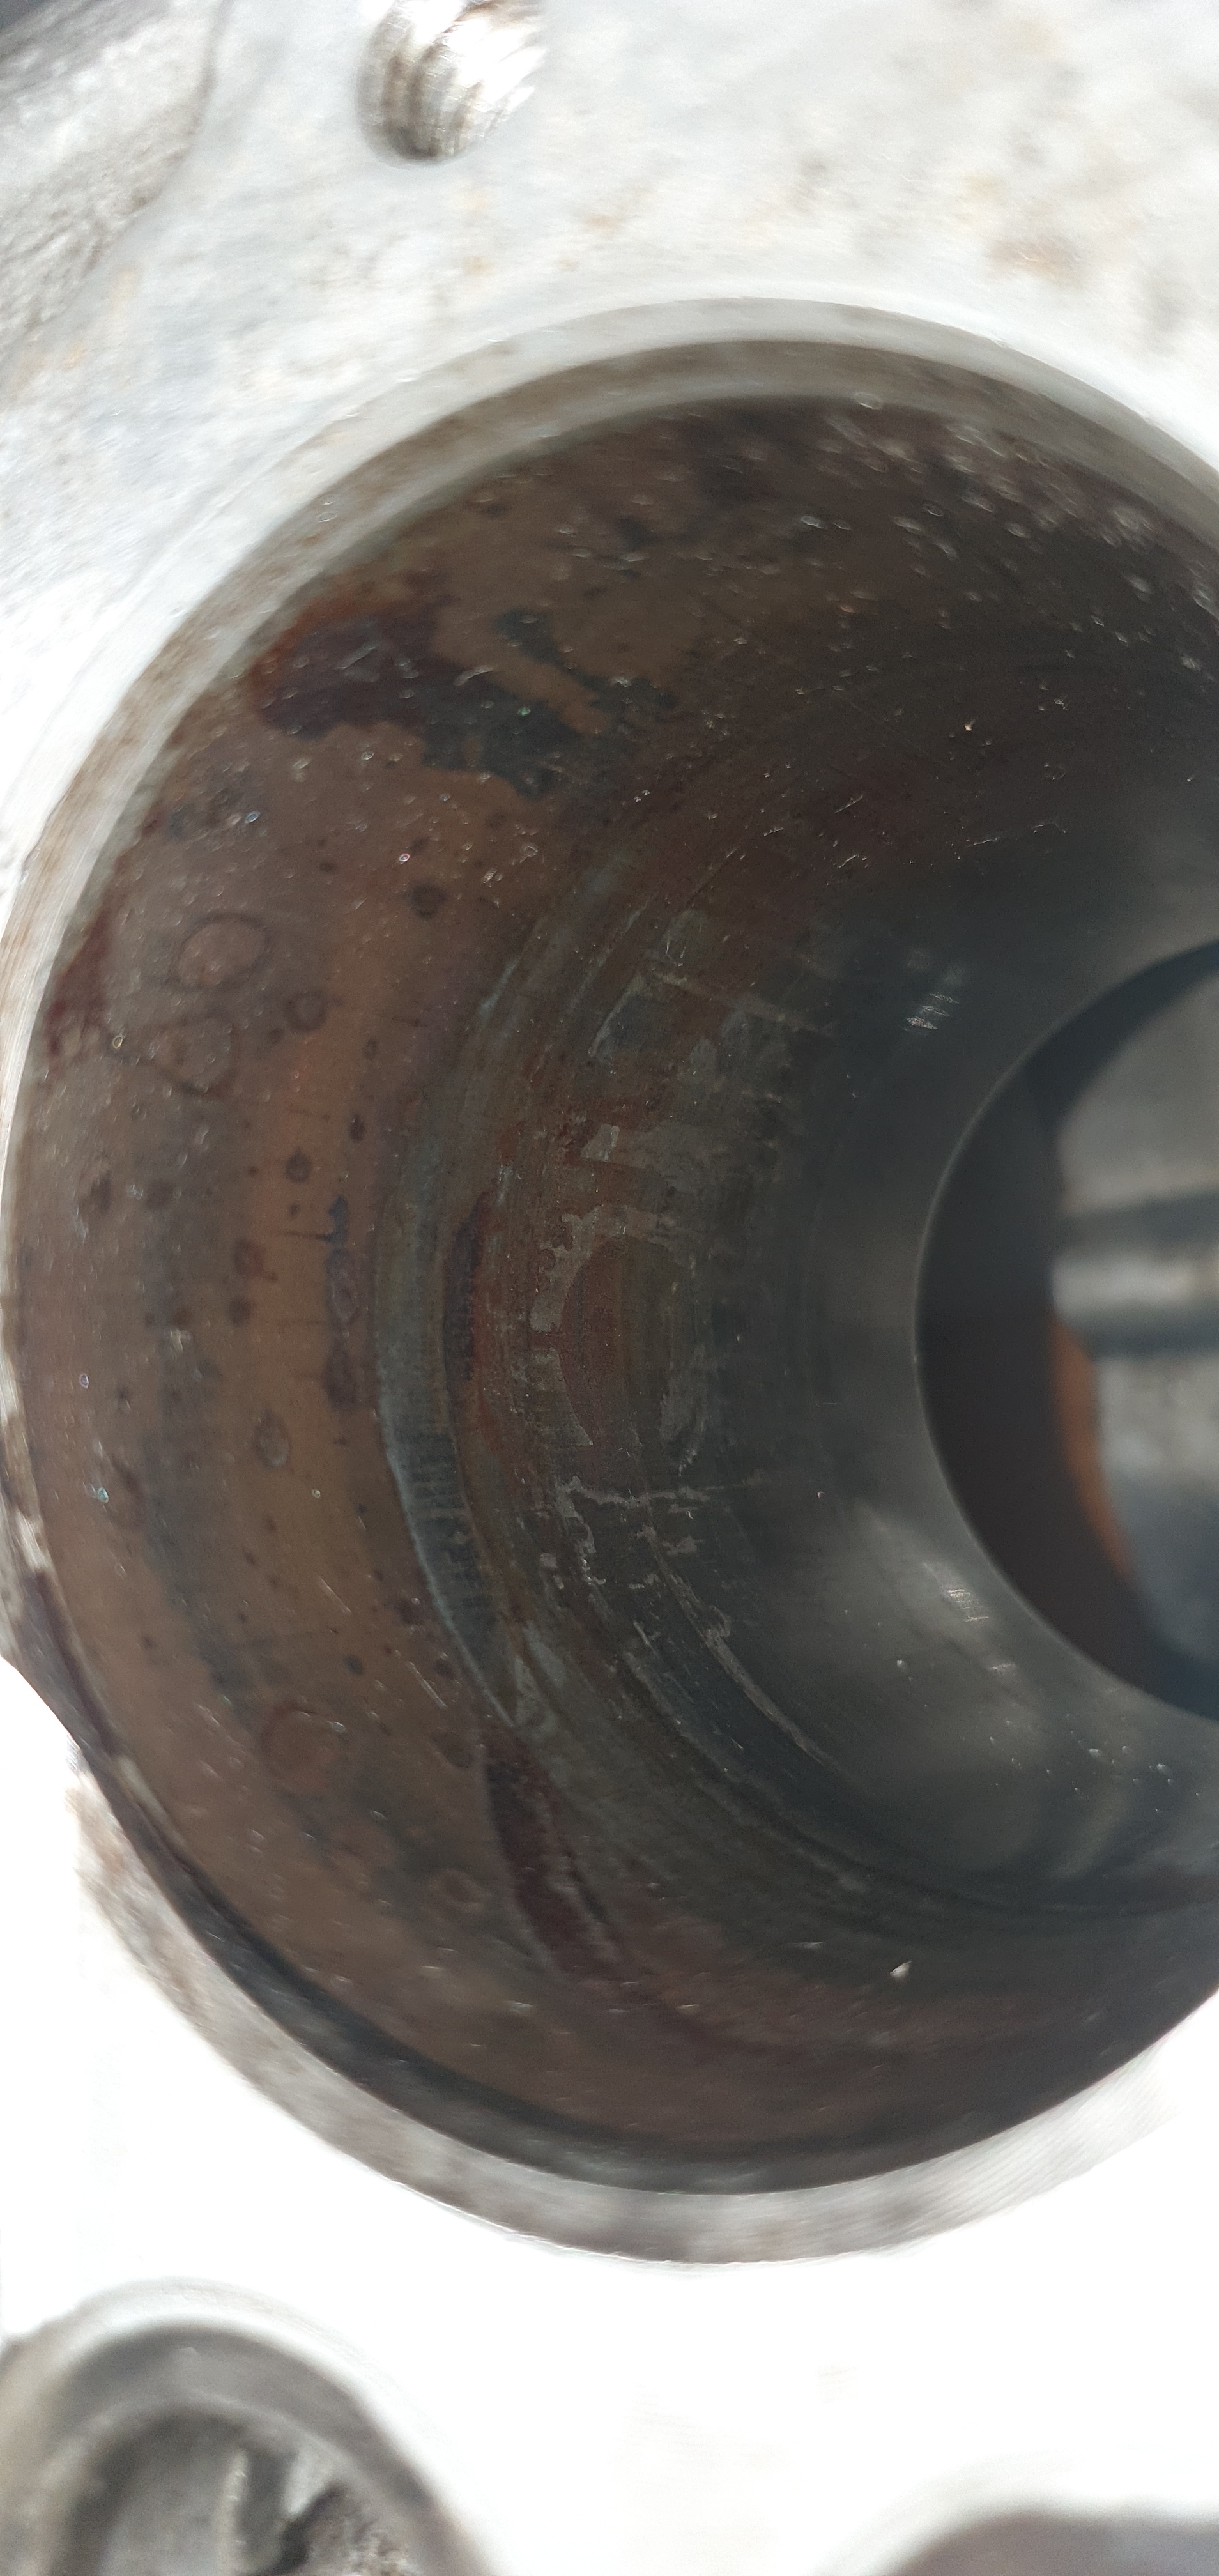
4. The cylinder bore. This is my biggest concern. I cant see any deep scratches but there is some corrosion. I was thinking about very very lightly honing the cylinder, but would this mean I would then have to get new rings and possibly a new oversized piston? Im very keen on doing whatever I can as a new block would be very hard and very expensive to source, not to mention the fact i get pleasure out of repairing instead of replacing.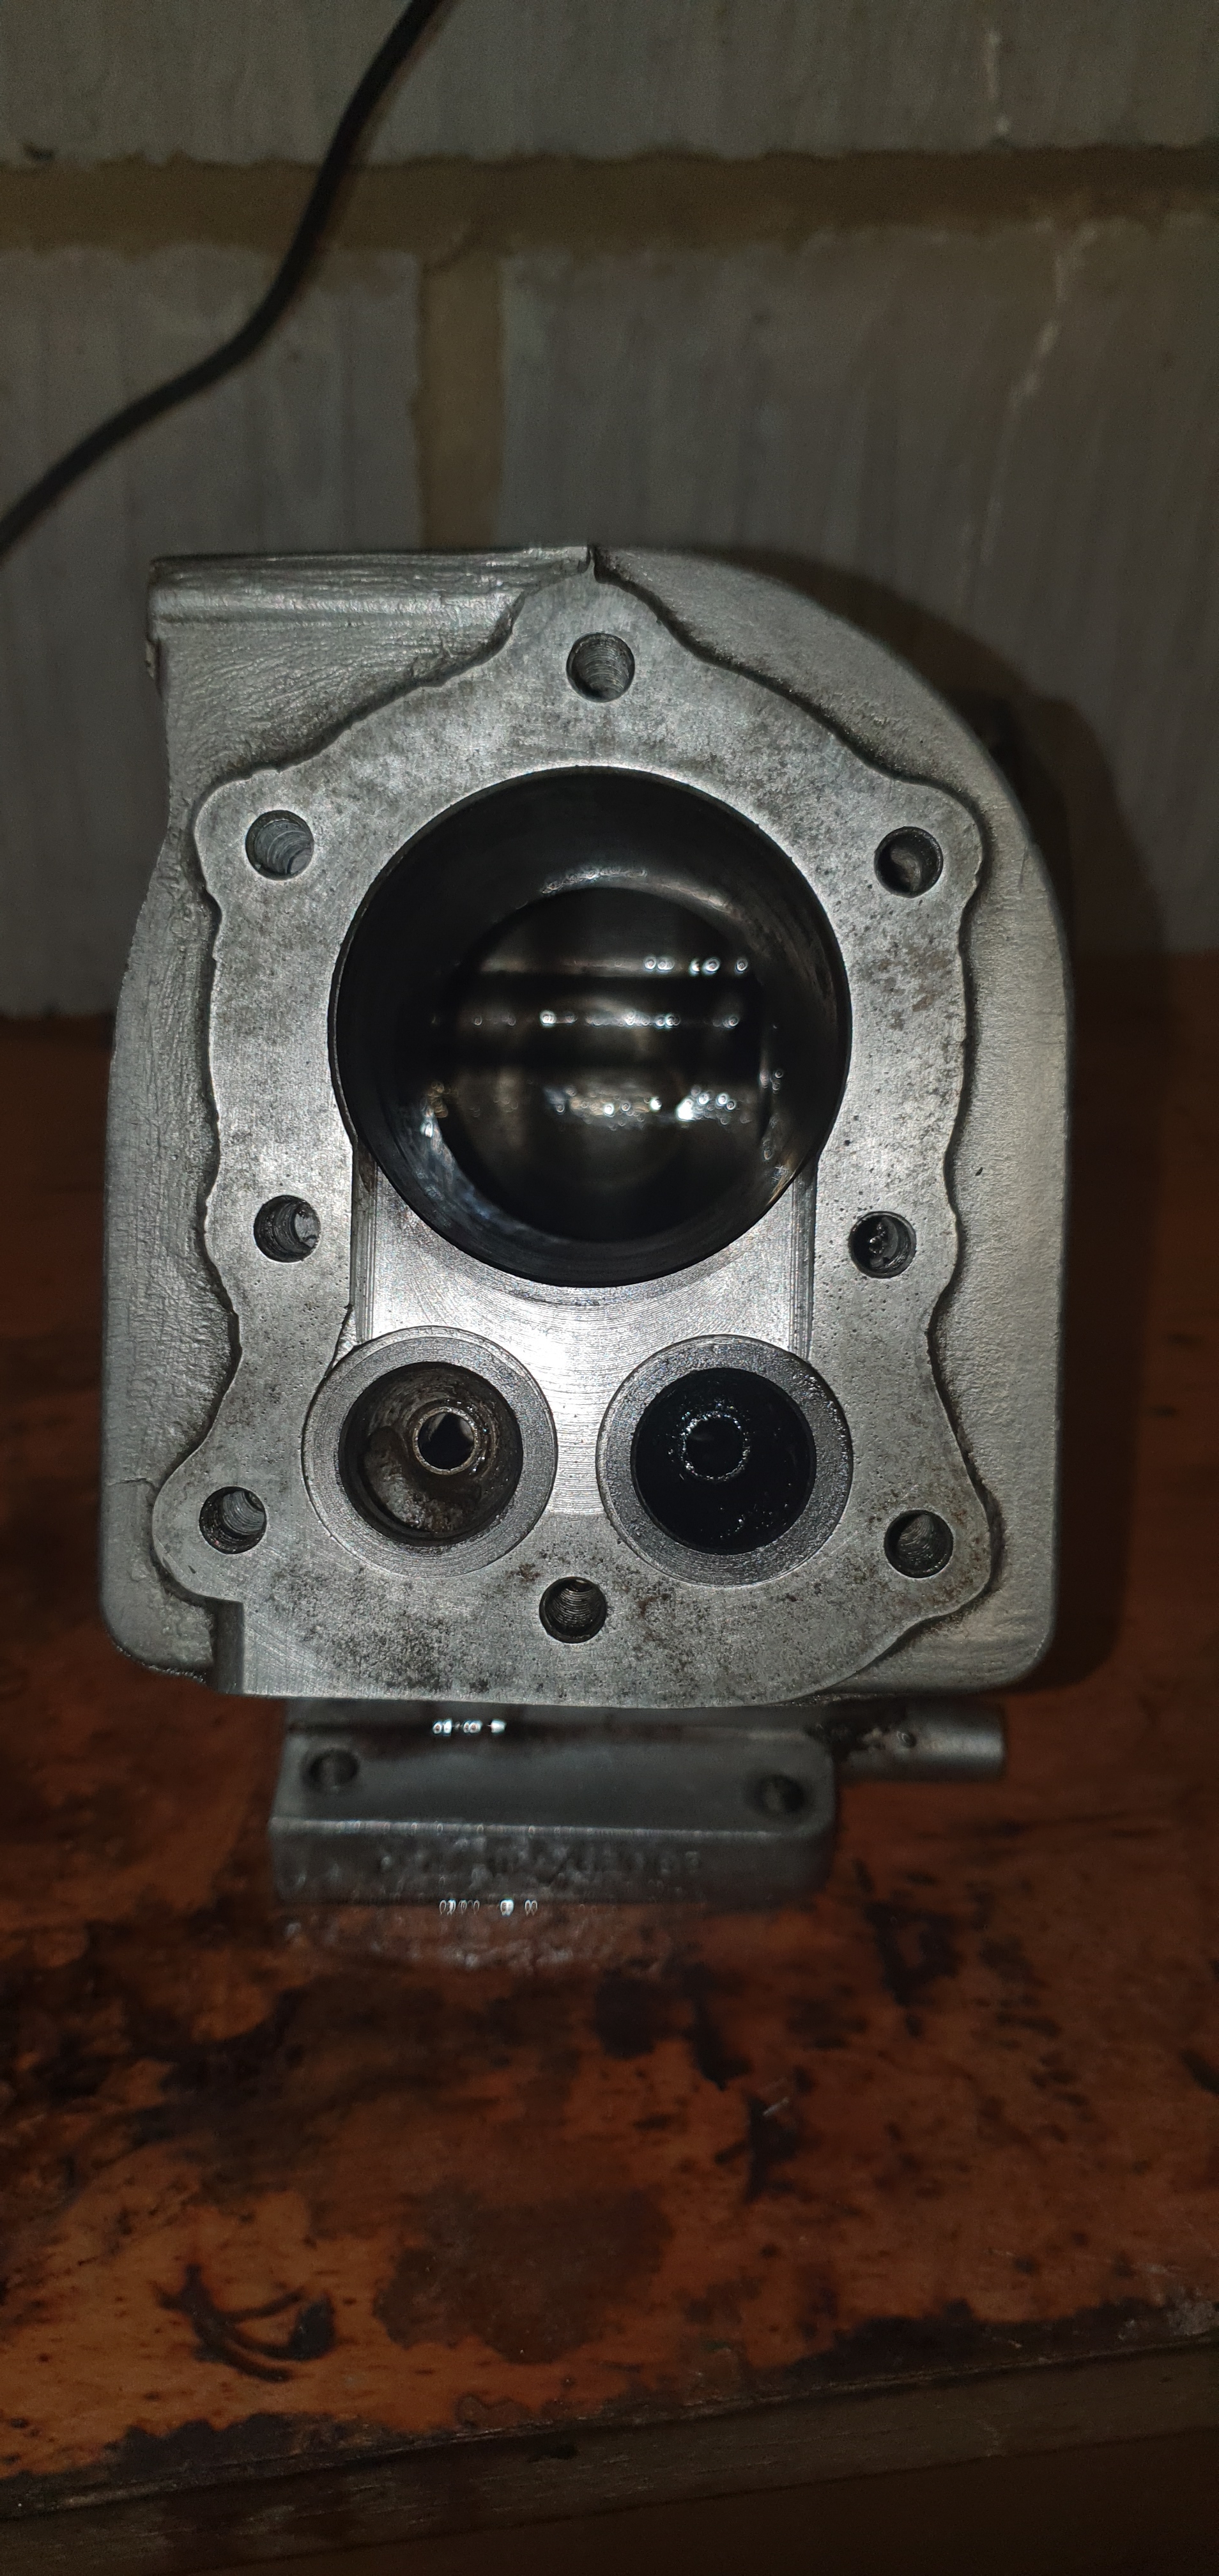
Any advice is welcome. Thanks in advance.
Briefly. The cam . What you
Briefly. The cam . What you describe as a “chip” , looks to me like a casting defect that has probably been there all the life of the engine. As it’s not on the business end of the cam lobe , I wouldn’t worry about it.
Piston and bore etc . Before you dig a bottomless hole do some research into what is available in both standard and oversized components ; such parts are getting thin on the ground and may be the limiting factor in what you can do - even if the engine really needs it for the intended purpose. It’s amazing how well old (50 year?) engines will run with wear and dimensions way adrift from what the manual may class as reject wear.
Valves. Forget lapping. The valve needs to be refaced. It has a good margin and will probable take as much as it needs to remove the pitting. The same goes for the seats. Best valve advice I was ever given was/ is that if the faces won’t come good within a couple of minutes with the FINE end of the paste tin - reface and recut. No lapping with a drill either!
If it starts, runs and doesn’t smoke, what more can yo ask from an old lump?
I wouldn't worry about the
I wouldn't worry about the camshaft, looks like a fault at the factory quality control!
The valve will need quite a lot of coarse grinding paste to get anywhere near, a new valve would be a better idea, otherwise you'll be grinding valve seat away also.
The bore is in a state, you can buy very fine hones that fit an ordinary electric drill, that will get rid of all that, you could also buy various grit papers and do it by hand, or even 'flapper' type emery cleaners that don't cost much if you have the time and inclination.
Use a ring and push it squarely into the bore about a quarter to half inch down and read the end gap with feeler gauges, you will be reading both bore wear (if any exists) plus wear of the ring itself, this will at least give you a very rough idea of the engines main working parts condition, not counting the main bearings of course.
Thanks for the advice, its
Thanks for the advice, its all very helpful.
In terms of the bore, I understand Wristpin was saying that older engines can still run well with wear, but what kind of numbers should I be looking for if I was to do as DJD mention placing the ring halfway down the bore? I dont have access to any kind of manuals/specs. If I can get a measurement as it stands I might be able to make a more informed decision as to the way forward. The idea I had in mind was to use a fine spring loaded hone that fits in an electric drill as DJD mentioned.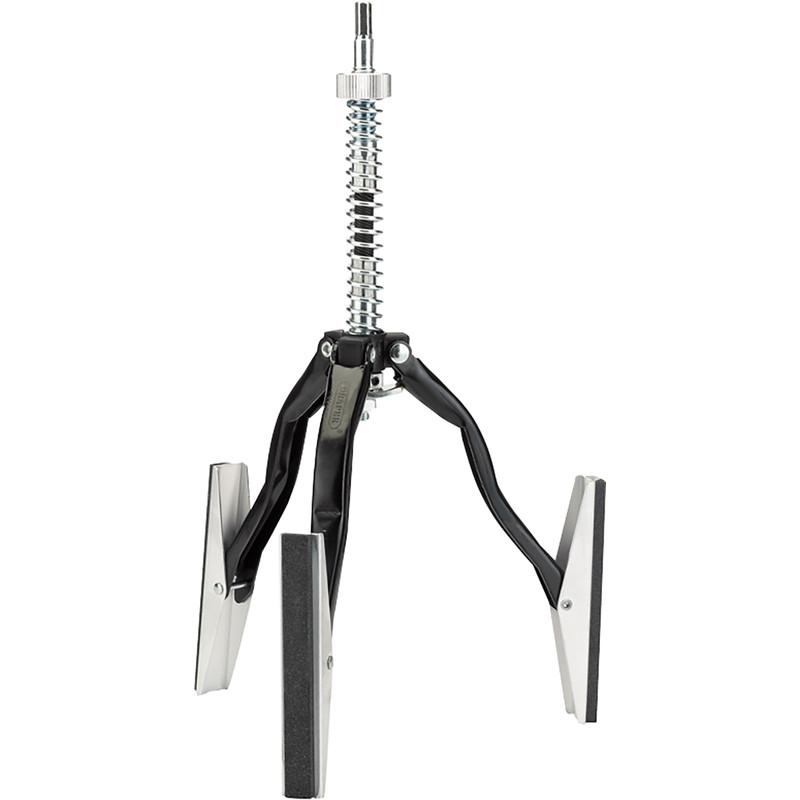
I will check out sourcing a new valve, if not i will see about a regrind. Any recommendations for regrinding? Im based up in the North East.
Anyway I have a busy weekend ahead planned so might be a while before I get around to sorting the bore and valve out, but ill keep an eye on the forum.
Cheers,
James
The possible problem with
The possible problem with honing the bore is that if the bore is oval, tapered or belled the hone will hit the high spots and miss the low. Honing is more usually used to either deglaze or smooth out asperities on a rebored cylinder that is parallel and true.
For a mucky looking bore of unknown dimensional condition the suggestion of cleaning it up with a flap wheel may not be as unorthodox as it first appears . I’ve done it myself, with success in a “nothing to loose” situation. A Tecumseh two stroke that was immersed in flood water and then abandoned for a few months is still giving good service since I rescued it and gave it that treatment in 2014.
That valve wil almost certainly clean up OK. Any decent engine shop or classic car / motorcycle restorer should be able to do it for a few pounds .
This should give you all the
This should give you all the dimensions that you may need.
https://www.dropbox.com/s/izjqq21tqdfthmj/Villiers%20F12%20Sloper%20eng…
Welcome to OLC.
Welcome to OLC.
Push the crankcase cover back on and with some fine abrasive cloth or paper, clean any rust or corrosion from the crank shaft right up to the oil seal. Clean off all traces of the corrosion and abrasive grit, give the crank a squirt of oil all around the seal and then try again, pulling evenly from both sides together.