Books About Mowers
Book Image | Body | Order Now | |
---|---|---|---|
1920-1945 lawnmower wanted must be in working order | old lawn mower wanted any make but in working order good price paid joe.bristow@blueyonder.co.uk 07806936905 |
||
Atco vintage edge trimmer | |||
HELP ! Webb Witch with ribbed rollers, works backwards !! | It's driving me potty. All restored. Now taken apart 4 times to check large ribbed rollers and fittings. Cannot see a fault but when it's all back together it clicks nicely cuts nicely ,blades rotate nicely BUT ONLY PULLING BACKWARDS. Turn it round I hear you say but there's nothing to turn round !!
ALL THOUGHTS WELCOMED. |
||
I misheard, oops | Acquired a nice 14 inch Certes today, happy mowers day to me, oh, mothers day, sorry, i misheard. Oops |
||
New Member ... with Question about Qualcast Commodore 14" | Dear All I have have just joined and have small collection of Qualcast Commodores, patiently waiting to be restored. Could anybody help me in identifying the Qualcast green RAL colour. I could at a pinch try to colour match against some existing paint, however I would prefer to try and achieve the exact and original colour if possible. Additionally could anybody please recommend a paint manufacturer. Many thanks George |
||
Norman engine | Hi ive started a resto on a Green master with a rare Norman flat twin engine. I've learnt from the Marque specialist that there are no workshop manuals ( unless you know different) if anybody has had cause to work on one of these I'm looking for a source of spares for the Wico type A magneto and a manual. I also need some valve springs, there are none available so I need to find a supplier to make me some. Any info gratefully appreciated cheers mime |
||
Qualcast pushmower | Hi all Any info / history on this mower , tips on what to avoid when restoring and where to get replacement rubber handles , would be most welcomed.
Thankyou |
||
Ransomes lion badge | Hi guys I am trying to find a cast badge for my Ransomes push mower . I inherted it from my father in law years ago but didn't have a lawn to mow . I have got it freed up and working but it is missing the badge, if anyone can help or point me in the right direction I would be greatfull.
Thanks Rodney |
||
Sidewheel Seeking Identity! | Following on from a Sunny weekend at Malvern Autumn Garden Show, I have been gifted with this sidewheel Mower.
Does anybody know the make please? Once daylight some better photographs to be supplied! |
||
Wanted. Amal Carb for a Ramsomes Marquis MK 4 Sloper F12 Engine. | Hi all. Would anyone have a Amal carb for a F12 Sloper going spare. Many thanks in advance. |
||
"Classic Lawnmower- Free to good home" -Hayter Ambassador 2. | Free Posted Classic lawnmower free to good home A classic fine finish mower made in the Uk with a Briggs and stratton engine and a fine finish roller Available due to deceased realtive. Maybe a runner or good for spares or project NB (Not exact photo but looks like this) To collect by weds 27th aug. tel 07950006813 after weds 20th or 01947 896339 till 20th aug |
||
"jerrycan" for old mowers | Hi dear members ! I have just finished to fill my mower tank with a not suitable and a sad plastic jerrycan (what we call jerrican with bad English accent as usual in France) and I'm wondering what kind of tank was used in England in the 50' 60' for achieving well this task ? Maybe some local retailer (let say Atco retailer) have sold a specific model as in France, for famous "VeloSolex" (cheap bike) retailers have sold "Solexine" in specific 2 liters tank (fuel came from BP in fact !) : http://solexin.free.fr/mecanique/solexine/. I hope that I am understandable enough : I am just looking for a nice empty vintage tank which was (still be) popular in GB, not a petrol+oil mix which I can do myself ! Thanks for your advices. Regards, Arnaud PS : I was wrong concerning jerrycan noun history : I thought it was an American origin but it seems that it was an English word given to German metal tank during WWII. Are you agree ?
|
||
"Little Gem" ~ 8" ~ by Ransome's Sims & Head of Ipswich | |||
"Qualcast" 43 electrickery | Having fun with this ole' 43 but it's defying all attempts to make it spark. New plug, points sorted but nothing so it looks like I made need to source some parts. is the magneto assembly available from anywhere?
|
||
"Webb" Toy Mower | Hello Folks A friend of a friend has given me a little children's mower which carries the name Webb on the grass deflector, I have never seen one of these before. I intend to restore the little mower as it is rather cute ! Has anyone seen one of these ? I assume it would be a toy from the 50's (no health and safety then) Any information gratefully received.
|
||
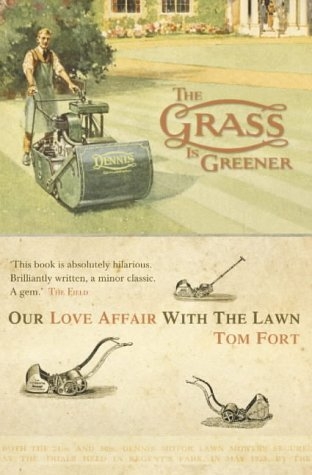
'' The Grass Is Greener '' - Tom Fort | Those of you with a broader interest in the history of the lawn and lawnmowers will currently find '' The Grass Is Greener '' by Tom Fort available on BBC Sounds : https://www.bbc.co.uk/sounds/play/m001yzkz?partner=uk.co.bbc&origin=share-mobile
It is a well regarded and entertaining book written with humour nearly 25 years ago. The Old Lawnmower Club and a few Members get more than a passing mention. |
||
'47 Lawn King SS | Greetings! It's my first visit. I just thought I'd share a peek at my LK SS project, currently underway... More to come as time permits. What do y'all think?
|
||
'Atco "HY" Motor Mower #1 | The Atco Motor Mower, from the 1920s and early 30s, was hugely successful and many examples survive (and are still used by some) to this day. The 12" and 14" versions were made in a design which collectors now call the "HY". |
||
'Call the Midwife' | Hi folks. 21st January 2024 episode of - 'Call the Midwife'......spot the old mower. Cheers. Rob |
||
'The Perfection' 12" Push Mower | Hi folks. I have seen for sale on the Bay of E .... 'The Perfection' a 12" Push Mower and out of interest wondered who made it. I have put the link to the mower so you can have a look at it. Thanks for any replies. Cheers. Rob |
||
'Which' magazine March 1960 issue - Best Buy Mowers | Hi folks. Saw a March 1960 copy of 'Which' magazine for sale on E Bay that had a feature on Lawn Mowers so bought it. I thought you might be interested in the mowers they considered to be the 'Best Buys' in their opinion at that time. They tested several different mowers by 41 hours of mowing with each machine on different types and lengths of grass at different heights of cutting during the apparently dry summer of 1959. Another set of tests were carried out later to check the mowers general condition and extent of wear along with the power mowers being tested for radio and TV interference. The results were: Best Buy Sidewheel the Suffolk Viceroy £4.17s 6d, Best Buy Roller Mower the Ransomes Ajax 4 £12.14s.4d and the Best Buy power mower was the Qualcast Powered Panther £25.14s.6d. Cheers. Rob |
||
(very)old horse drawn mower photograph | From the remarkable "Unidentified photos of the British Isles Group" Facebook group, where they identify the location of photographs using remarkable powers of observation and deduction... |
||
10 Blades ! | I read with interest the article in the latest Grassbox about the annual AGM in Milton Keynes. I managed to cram in about 15 mowers in my car to display including one of my JP Supers. I included it within the anniversary display of JP’s. I can already hear you saying why am I bothering to discuss a JP Super when they have been discussed and featured hundreds of times throughout the Club. I am featuring it here as it was not mentioned in the Grassbox article . The interesting feature of this mower is that the cutting cylinder has 10 blades and not the normal maximum of 8. This could be the only 10 blade Super around unless anyone else can tell me otherwise. Certainly no members of the Club in Milton Keynes have ever seen one and cannot explain this one. No hybridisation seems to have been in play and the mower looks to be totally unmolested. Enjoy the photos. |
||
10 tooth sprocket questions | So having bought an old Suffolk Punch for complete strip down and restoration, the first stumbling block is the 10 tooth sprocket on the clutch spindle. It looks as if it is screwed onto the spindle. Am I correct? Also the spindle seems quite loose in the bearing. Is this normal? I think it's a Series I or II. |
||
10" British Binch | |||
10" Curtis Star All British sidewheel | |||
10" Drummond Willing Worker | |||
10" Greens Silens Messor, with box | |||
10" Presto Hand Mower | |||
10" Presto Rollmo 5-15 | |||
10" Presto Sidewheel | |||
10" Qualcast Model E | |||
10" Qualcast Model E, c1930s | |||
10" Ransomes Ace, 1930s | |||
10" Ransomes Anglia | |||
10" Ransomes Anglia, c1930s | |||
10" Ransomes Cub (may not have bow irons/handles) | |||
10" Ransomes New Automaton | |||
10" Shanks Scot (cylinder re-ground -may not have bow irons/handles) | |||
10" Suffolk Popular | |||
10" Suffolk Swift | |||
10" Webb | |||
1085Y85R | |||
11" JP Minor Mk2 | |||
11" JP Minor, c/w box | |||
11" Ransomes Lion | |||
11" Ransomes Lion, 1927 (may not have bow irons/handles) | |||
11" Williams & Co ' Surprise' sidewheel, 1895 | |||
12 bladed Ransomes Ajax | With help and guidance from the FAQ section I have restored my mk3 Ajax. Having restored a mk 5 already, I was familiar with obtaining the correct bushes and bearings, As Ajax's are still readily available I had no issues with a slight deviation and making a 12 bladed cylinder from 2 six bladed ones, it was mainly curiosity to see how much better the cut would be. br woody |
||
12" Alexander Werk Mars sidewheel (may not have bow irons/handles) | |||
12" Atco Kick Start | |||
12" British Made Sidewheel | |||
12" Flexa | |||
12" Flexa | |||
12" Follows & Bate Magic | |||
12" Gamages New Champion | 1920s/30sGamages was a London department store that also sold its wares through a catalogue. Shoppers would browse the catalogue and place an order by post or telegram. The items they bought would then be sent by rail to their nearest train station ready for collection. This mower was made for the store by one of the major manufacturers, probably Qualcast or Follows and Bate. Many other shops, including department stores and local ironmongers, sold machines with their own names but which were made this way. Because of this it is possible to find two otherwise identical machines with different names on their wheels or on a badge on the wooden T handle. Mower collectors refer to these machines as "catalogue mowers". Sidewheel mowers were extremely popular because they were cheap, easy to use and reliable. For these reasons many millions were sold to people who had small lawns and who did not need larger machines. |
||
12" Green Zephyr | |||
12" Greens grass box without fitting screws, with operating instructions | |||
12" Greens Zephyr, 8 bldes, with box and operating instructions | |||
12" JP Maxees Mk3, with box | |||
12" JP Super | |||
12" JP Super x 2 | |||
12" JP Super, nine blades, with good box | |||
12" Patent Gear Automaton | Hello all Following from this I took it to bits yesterday and having eaten a few more ginger biscuits today I set too with the blow torch, impact driver, puller and more tea. I gave up trying to get the actual gears off their shafts, but I don't think I need to now. It is now all in a bath of water with the last 3 packets of Billingtons Molasses to be found in Tesco. All the small nuts, bolts, screws, washers etc fit in the milk bottle. The rest go in the planter with the rollers taking their turn on the next round. The plastic bags are to try and keep any wildlife out. I will take a look at progress next month. So in the meantime is it possible to get a 4 hole 12" bottom blade for an Automaton? Can I ring Garfitts and ask for a 4 hole blade for say an Ajax? The original colour appears to be a sort of light sage / apple green with gold letters and red for the cylinder and inside the rollers. Is that lighter than the standard Ransome's Green? There is probably too much rust to leave it oiled so I may have to paint it to preserve it. I will have to fabricate a deflector plate if anybody has any photos please? Al
|
||
12" Pravo | |||
12" Presto Rollmo 5-15 | |||
12" Qualcast | |||
12" Qualcast | |||
12" Qualcast B1 | |||
12" Qualcast Concorde | My old friend Terry asked me if I still repaired mowers and could I take a look at his. I agreed, just to help out a friend in need, I'm sure he'd get short shrift at our local repair place if he'd tried. Despite the "De Luxe" designation, I soon wondered why he hadn't binned it years before. I fitted my last new bottom blade to such a machine at least a decade ago, so I could only file the old one up to square it. A lot of movement in the cylinder as I moved the machine around turned out to be a very well worn out spherical cylinder support bush, someone else had welded blobs around the bush on the side plate to help support it, I ask you... I went through my small amount of Atco/Qualcast/Webb/Bosch parts and felt very lucky to find a new bush, plus rivets, and felt seal and black spring packing ring in the same kit. I had to half strip the machine out to remove and clean up the cylinder, I used a clip on ally moulding with some ally oxide grit paper glued on to grind the cylinder to the bottom blade. I was eventually able to get it cutting thickish paper all the way along, but grinding took over an hour. Terry's back 'lawn' is only ten feet square or a bit less, he loves to see his stripes, so I can see no other alternative to the concord for price or convenience, he won't be needing it for a while yet though! Incidentally, a local lawn mower business packed up about 2012, I bought many wooden boxes of assorted parts there, amongst my finds were about eight 'bolt on' type grass edging attachments for concord type machines, I eventually took them all to the recycle, never sold a one, what grieved me a bit was to see all the original packing and boxes going into the skip...what a shame, same experience with six brand new Mountfield plastic rear rollers, for 16" machines. |
||
12" Qualcast Electric | |||
12" Qualcast Hand Mower | |||
12" Qualcast Model E | |||
12" Qualcast Model H | 1920s/30sThe Model H was a sidewheel mower made by Qualcast, one of the biggest mower manufacturers in the inter-war years. The company initially made castings for other manufacturers in the early 1920s but soon turned to producing its own machines. It was particularly well known for its range of sidewheel mowers. The Model H replaced an earlier model and was designed for cutting longer grass on rougher areas. Qualcast claimed it would cut grass up to 8" long. It featured a "high wheel" design (basically this means larger diameter wheels) which allowed a bigger cutting cylinder to be used. The wheels were wider and had deeper treads than normal. This meant the mower was easier to push and control on rougher ground. Prices in the 1930s ranged from 35/- (£1.75) or a 10" model up to 39/6 (£1.95) for the 16" machine. A grass box was available for an additional 5/6 (27.5p) |
||
12" Qualcast Model H | |||
12" Qualcast Panther | |||
12" Ransomes Ajax | |||
12" Ransomes Ajax Mk2 | |||
12" Ransomes Ajax Mk4 | |||
12" Ransomes Conquest | |||
12" Ransomes Cub (may not have bow irons/handles) | |||
12" Ransomes Lightweight | |||
12" Ransomes Motor Mower | |||
12" Ransomes New Automaton, 1885-1896, all sandblasted ready for painting/assembly, needs weld to subframe | |||
12" Shanks Britisher, with cast thrower plate | |||
12" Shanks Caledonia, original condition, no box | |||
12" Shanks Hawk (may not have bow irons/handles) | |||
12" Shanks New Britisher | |||
12" Shanks Silver Comet | |||
12" Shanks Thistle, c/w wooden-ended box | |||
12" Suffolk Colt | |||
12" Suffolk Colt Grass Box | |||
12" Suffolk Super Swift | |||
12" The British Binch sidewheel (may not have bow irons/handles) | |||
12" Webb | |||
12" Webb | |||
12" Webb Wasp, with box | |||
12" Webb Witch | |||
12" Wilkinson Sword Flexa | |||
12/14" petrol or electric cylinder mowers | Im keeping my eye open for my next restoration and am open to petrol or electric mowers. Would have to be good runners as engines are far from my strong point. Ideally i would like a compact 14" petrol, were there any made that size of was 16" the norm back in the day? Clive has a little gem Ransomes Ajax electric mower done with an adapter kit, probably a very rare find. |
||
13" Ransomes Lion | |||
13" Suffolk Motor Mower | |||
14" 1964 | |||
14" Atco | |||
14" Atco Battery Mower | |||
14" ATCO Grass Deflector Mounting Advice | Hello all, My first post as a new member, I'm looking for images or a description on how the grass deflector should be mounted on my 14" ATCO. It has the two tabs at the top which can be seen in the above pic. Fairly obvious it mounts on these but just behind the bottom blade there are two small posts. I can't tell if it shoudl rest on the posts, be clamped by them or should there be tabs which are part of the deflector that are used to fasten the bottom edge of the defletor to the posts? Few pics below to show what I have. This pic shows where the lower posts are mounted. I have removed the one on the right. This is the removed post close-up, you can see its in two parts. A fairly robust L shaped bracket which is threaded on the lower portion for the retaining screw/bolt. The other part is much thin, similar in thickness to the deflector which is why I feel like it should maybe be part of the deflector but has simply broken free through fatigue, on both sides, from years of rattling. The lower most picture shows the jagged edge circled where I think the deflector used to be attached. Does anyone have a similar model mower and can take me a picture of this area please? Many Thanks James |
||
14" Atco HY | |||
14" Atco Motor Mower | |||
14" Atco needs a good home | I have just joined the club so hello everyone. I have two Atco mowers and want to pass one of them on to a good home as I don't use it. This is a 14" (1950 / 60s?) 4-stroke petrol. The engine runs ok, although does struggle or cuts out when engaging the clutch. The wood rollers have some woodworm but other than this it is not in bad nick really it has a metal collection box in reasonably good condition. See pictures. I don't want any money for it as long as someone can collect it (I can deliver locally) and it goes to a good home. I am based near Derby in the Midlands.
Other than this I am a regular user of an old 24" Atco petrol 4-stroke - not sure of the model which is very reliable. I did read today with interest another member's comment about having to run to keep up with it and I am planning to use my creative engineering skills to see if I can change the gearing on mine a bit - will keep you posted. Look forward to hearing from anyone regarding the 14" Best regards Andy |
||
14" Atco Standard? | This has popped up on ebay: https://www.ebay.co.uk/itm/Vintage-Atco-Standard-Lawnmower-c1920s-Villi… Might be a bargain if you live reasonably close to Cornwall... especially with the carrier wheels, but I didn't realise that there was a 14" Standard, I thought the closest was the HY?
Educate me, please, gents! |
||
14" British Flexa | |||
14" Flexa | |||
14" Flexa | |||
14" Greens Lightweight Motor Mower | |||
14" Greens Motor Mower, 1930s, original condition, Greens 2S, runs | |||
14" Greens Zephyr Push Mower | Hi. I am hoping that someone may be able to help me with the paint colour that I need to be true to the original. The Zephyr I acquired came in parts already sand blasted. Thanks for any help received. Regards. Rob |
||
14" Greens Zephyr, 10 blades, no box, with replacement bolts | |||
14" JP Maxees | |||
14" Pennsylvania sidewheel | |||
14" Qualcast Model E | 1920s-50sThe Qualcast Model E was one of the most successful lawn mowers ever produced. Many millions were made from the 1920s to the 1950s. Most were sold to people who had a small lawn at the front or rear of their house. It was inexpensive, reliable and easy to use. The Model E was available in 8", 10", 12" and 14" cutting widths. Prices in 1927, for example, ranged from 32/6 (£1.62) up to 40/- (£2.00). The grass box was an extra 8/6 (42p). This example on display is the 14" version. Examples are very common today although the 14" model is less common that the smaller versions. Nevertheless all versions are very collectable due to their significance in the history of the mower. |
||
14" Qualcast Motor Mower | |||
14" Ransomes 2-stroke Motor Mower | |||
14" Ransomes Anglia Mk5 | |||
14" Ransomes Ascot | |||
14" Ransomes Automaton, no chain or roller scraper | |||
14" Ransomes Certes Mk8 | |||
14" Ransomes Leo | |||
14" Ransomes Marquis | |||
14" Royal Enfield motor mower, restored in 2015, very nice, c/w box and all correct transfers | |||
14" Shanks Britisher | |||
14" Shanks Britisher, early cast bow irons | |||
14" Shanks Eagle roller mower | |||
14" Suffolk Punch | |||
14" Suffolk Super Punch | |||
14" Suffolk Super Punch 75G14-25A | I purchased my mower new in 1975 and it was used regularly for over 20 years. It then languished at the back of the garage for a number of years until a renovation of my garden required better defined stripes on the lawn. Other than replacement of one cylinder bearing, it has served me well until a few months ago when the engine stopped while I was mowing the grass. Not seized, just stopped. I assumed a blockage in the carburetor so cleaned that out, to no avail. On having it checked, I was advised that the spark was weak and intermittent so I have replaced the coil/condenser assembly in the magneto. I now have a decent reliable spark but the engine still does not fire. On removing the plug I can see traces of and smell fuel. Can anyone advise what I should do next ?
|
||
14in Atco | Free to collect. There is also a Suffolk punch. |
||
15" Pennsylvania sidewheel, unusual style EAF Paris | |||
16" Atco Standard, recent restoration, original tool box and dealers brass tag on handle | |||
16" Atco with petrol engine and roller drive, no box | |||
16" cut Atco Standard, with box | |||
16" Greens Motor Mower, 1930s | |||
16" JP hand mower | |||
16" JP Super, non-runner, engine needs parts | |||
16" Ransomes Certes Mk10, c/w good box | |||
16" Ransoms with a Blackburn Engine various parts needed | I recently purchased a Ransoms Simms and Jefferies lawn mower with a blackburn engine. I want to find some information about it the Reg number is A2303. I need a petrol tank as it is missing and one of the rear cast rollers has been damaged. I am looking to get it working ASAP so any help will be gratefully received. This last image shows the type of fuel tank that I need. |
||
16" Shanks Standard Chain | 1920sShanks was one of the major mower manufacturers of the 19th and early 20th centuries along with Greens and Ransomes. The company was based in Scotland and produced its first mowers in the 1840s. It was probably the first company to develop designs independently of the original Budding style. This model was known as the Standard Chain and was one of the first mowers to use the familiar roller chain. Before this time chain-driven mowers has a more basic block chain. The model was produced from the 1890s to the early 1930s. Like many hand mowers of this size it was designed to be pulled by one person (often an apprentice or labourer) while the gardener pushed and steered. Larger machines were designed to be pulled by donkeys, ponies or horses. Shanks was the first company to design a mower specifically to be pulled by horses. The machine on display was sold by an ironmonger in Buckinghamshire in the early 1920s but the owner returned it after a few weeks and bought a motor mower instead. The shop never resold the machine which means that it has done less than a month's work in almost 100 years. |
||
16" Shay/Power Specialities RotorScythe | |||
16" Suffolk Punch | |||
16" Turfmaster | |||
17" Atco 1950s | |||
17" Atco Kick Start | |||
17" Kickstart Clutch | My 1956 17" Atco Kickstart runs ok but the clutch seems to slip as soon as I try to cut grass. I have adjusted the lever and also the spring but it still slips. Must I replace the plates or can they be reconditioned? Where can I obtain the necessary assistance or parts for this? |
||
17" Suffolk Super Punch | |||
1747 Atco Roller replacement | I have had to replace the front roller on my recently aquired Kick start atco which had been stored in the previous owners "outside shed" The original is made of metal with a diameter of 100mm. A metal one being too expensive I approached ProKraft Which have managed to turn one for me which for £54.00 posted to me is just superb it is a great job done in 3 sections of 2 @7 an 1/8th of an inch and a middle one of 4 an1/8th is great value I think. I totally recommend them if any members need any woodwork doing. if I can I will put a picture up. |
||
17inch Atco Deluxe 1970s Manuals | Hi People looking for the manuals for this model to assist in a recondition/recommission I am starting on.
Regards
Dave |
||
18" Atco rotary with petrol engine, with box | |||
18" Atco Standard, with box | |||
18" Automower | |||
18" Herschel | 1920sThis 18" sidewheel mower was made in the USA in the 1920s or 30s. It was designed for use with a collection bag rather than a grass box. Sidewheel mowers made in the USA are typically larger than the models made in the UK. This is because, as a general rule, the grass found in the USA is thinner or less dense than that growing in the UK. This makes it easier to push the mower which means larger models could be used with the same effort. Most of the sidewheels found in the UK were made here but models made in the USA were occasionally imported, especially after trade restrictions were lifted in the early years of the last century. One tell-tale sign of an overseas mower, especially American machines, is the use of bright colours such as gold and silver, rather than the normal green and red found on most British machines. This is not a hard and fast rule because some British machines, including a number made by Ransomes and Qualcast, also had brighter colour schemes. The Herschel Manufacturing Company was based in Peoria, Illinois, the same town as Caterpillar. |
||
18" Lloyds Ariel, Honda engine, runner, with photocopy of instruction manual | |||
18" Masport Rotary | |||
18" Ransomes marquis, sloper engine, needs attention, with box | |||
18th. Annual Vintage Event, Lords Farm, Sheet, Petersfield, Hants. Sunday 29th. May | Not long now ! Sunday 29th. May This very popular, well attended get together organised by Club member John Lovell will have all the regulars including antique and vintage lawnmowers, all being well some will actually be cutting the grass. Do come along and support the event, this year raising money for Guys and St Thomas' Hospital Cancer Research and Treatment Unit. More info can be obtained from me : colin.stone@oldlawnmowerclub.co.uk
|
||
19" Moto Mower Sidewheel | |||
1920 ATCO MOWER | GOT A 1920 ATCO LAWNMOWER ALL TIMING PARTS IN BOX ALL NOW REFURBED READY FOR REBUILD WHAT POSTION SHOULD THE BACKING PLATE BE AS IT WAS NOT FITTED WHEN BOUGHT MOWER ROUGH IDEA HOW TO TIME IT NEARLY STARTS BUT ITS THE BACKING PLATE THAT WANTS ADJUSTING HOPEFULLY I WILL GET IT GOING NOT RUN SINCE 1970 BUT STORED INSIDE ON THIRSK CRICKET GROUND 1 OWNER ALL ITS LIFE ANY ADVICE WELCOME THANKS ROCKETMAN |
||
1920 Atco Standard 22" mower | HI Guys & Gals
I,ve only just joined the forum and I,m sorry to say my first post is a question so here goes
Please can some one tell me how to start a 1920 Atco Standard Lawnmower I,ve got the timing set fuel in the tank good spark and tennis elbow from cranking the dam thing
Please help
Graham |
||
1920's RS&J 24 inch | Looking for some information as I start a refurb of this 1920's (I think) RS&J mower with a Blackburn engine. Serial number is C768. Are there any documents, manuals or information on age avaliable for this mower or engine. Engine turns freely and also has a grass box. Thanks in advance. |
||
1921 Atco Standard - engine help requested | Hello This is my first post on this excellent forum. I made use of the content when I restored a Ransomes mower previously. I've now inherited two Atco Standard 22" mowers and thought it was high time I joined. I'm now very glad I did as I've started tackling the first of them and I'm hoping to get some help from members here. One of the mowers belonged to my wife's grandfather and the other to her great uncle. Based on the information about these mowers on this forum, I've dated one of them as the 1921 model on account of its oval cross-sectioned frame. The other is younger but in worse condition. I've decided to see if I can get the 1921 mower working first. The mower is really not in bad condition for its age. The engine turns over nicely on the starting handle and there seems to be compression. I'm told by my wife's uncle that it started last time he tried it, but I've worked out that was around 40 years ago... My first test was to see if there is a spark. There is not, and that's what I've been investigating. (I'll look at the fuel system once I've got a spark.) Trying to investigate things in order of ease and cost (cheapest first!), I have: 1. Bought a new spark plug. Still no spark. 2. Tested the HT lead for continuity. There was none so I've made up a new lead. Still nothing. 3. Removed the flywheel and the coil (the flywheel was really tight! I've attached a photo of my method for holding it which seemed to work well). It seems to me that there is no continuity in the coil (although I want to check I'm testing properly) which I understand is bad. I think I'm right in saying that having continuity doesn't guarantee the coil is good, but no continuity is a problem? My questions for anyone who is able to help are: A. How should I be testing the coil? Is it point A to C, A to B or B to C? I have continuity between A and C, but not A/B or B/C. B. If the consensus is that coil is dead, is there any advice on how to go about replacing it - i.e. where to buy from and how to choose the right one? C. If I replace the coil, should I also replace the condenser while I'm at it? D. Are there any other steps I've missed/should be thinking about? Thanks in advance for any help you can give me. Nick |
||
1922 ATCO standard - Transfers and brass tank ? | Hi all, (this is my first mower restoration) .... two questions ... I'm a good way through a full restoration of a 1922 Atco Standard, 16 inch model (it had no paint left on it what so ever when I got it from the scrap man) so the decision of a full restoration was an easy one .. Anyway... I've looked at, and google'd lots of Atco standards, and cant seem to find a definitive answer as to exactly what transfer go where and what set I need to order from here .. I've seen so many variations. Secondly, mine has a brass fuel tank, would that have been left in the polished brass finish from the factory or should it be green ? .... Thanks very much, any help very appreciated ! Mike |
||
1929 Atco Standard Parts & help needed | Hi all, I am here looking for some basic help that i could not see in the ATCO User book. I am looking to replace the old spark plug in my 1929 atco 30" J.A.P 500cc but could not find a plug number on old plug due to old age or in the ATCO User manual. I am also looking for a timing sprocket for the same engine(crankshaft end) as i noticed the other day that there is a tooth missing from my one. If anyone can help with this it would be a great help.
http://www.youtube.com/watch?v=Mi_x05DVhcQ&feature=share&list=UUOueInyX… |
||
1930 Ransomes for sale |
Anyone interested in a pair of 1930/31 Ransome 14” Light Mowers? Both with Villiers 150cc engine in working order. 1930 model with FSH from new, original owners docs, and
|
||
1930s Atco kick start | |||
1932 24" Dennis Z Type ignition timing | I have a 24" 1932 Dennis Z Type. Took the engine apart to sort some oil leaks and other issues out, at the time didn't realize the ignition gears didn't have alignment marks. It is all back together now after some trial and error changing the timing I got it to run. Now it is difficult to start and I would like to verify that it is timed up correctly. Was running well before the rebuild.
Does any one have any ideas on how to verify the timing? If I had another one I would take the side cover off and count gear teeth to the mark.
They way I worked out where to start with my trial and error was to align all other timing marks with piston at TDC, counted the number of teeth (32) then 360 degrees divide by 32 gave 11.25 degrees. Worked out the point where the ignition snapped to create the spark, advance the ignition to 11.25 degrees before TDC. This setting gave me some life out of the engine. After a lot of manual priming it ran and ran well, idled nicely picked up nicely. Went to it the next day and it fired with out any manual priming again running well. 2 days later wouldn't start with out lots of manual priming. It used to start well before the rebuild. It has good compression, the spark is very strong, and fuel is definitely getting up. I have spent nearly 30 hours on this machine so far and had the crank/ flywheel re-machined . It is good to cut grass this season if only I could get it starting reliably. |
||
1934 Atco 14" Lightweight - Restored | Hi Everyone, I stumbled into this hobby quite by accident between mid-2018 and late 2019, however with the pandemic hitting us early last year the time for projects made it possible for me to actually start restoring something I had bought in Wales some 18 months earlier, and by December last year I was well on my way towards getting a project started and finished - that was when I signed onto this club (Dec '20). In the past 4 months I was able to source and replace nearly all the nuts, bolts, and other fasteners needed to replace the rusting ones, get the cup & cone clutch dismantled, cleaned and completely refurbished, figure out which gears went where on reassembly (because I didn't take pictures of those!), reassembling the drive roller, and just as interesting reassembling the clutch handle! Thanks to all of you here at the OLC for helping me with drawings, advice, and just as importantly telling me just what I had exactly (apart from a motor mower, of course!). I am pleased to present my fully restored Atco, minus a grassbox, that square bar that runs above the wooden rollers, and one oiler cup lid (I still can't find those anywhere!) and - of course - the Atco branding on the petroil tank (that should be in the post soon, thanks Colin).
I broke the motor mower down into all of its individual parts, with the exception of the engine which I worked on last spring / summer (removed the cylinder block and de-coked it with a bottle brush and an electric drill! Replaced the coil and timed it, installed a new fuel tap and overhauled the carbuerettor). I inventoried all the parts first before I took them up to a specialist in Wisbech (GLW Engineering) to sandblast them clean of any paint.
Most of the parts (except for the clutch assembly, cylinder cutter and certain gears) I applied a Teal Green (apologies to anyone if this isn't period accurate, Teal is one of my favourite colours) using Hammerite Smooth Green and Smooth White at a 13:2 ratio, and a 2:1 ratio of paint to Hammerite Thinner and Brush Cleaner, and shot this through a Voilamart L-898 LVLP spray gun. Took the better part of a day to convert the front half of my garage into a makeshift spraybooth. The wife was not amused when she came home from work that night!
The red bits mounted on the wall are accessories to my Howard Bantam rotovator... the drum to the left is one half of the drive roller. I shot these in the garage one evening at 10 deg. Celsius, the absolute bottom end for painting temperature-wise. Took 24 hours to cure. The clutch I completely tore apart, cleaned, then had the parts sandblasted before repainting and reassembling (except for the cone, I was wary of the liner getting damaged). The Motor Mower runs nice and steady; unfortunately, when I tried to engage the clutch, nothing happened (the cone probably needs a new liner). All the bearings (save for the drive roller, they were still in really good shape) were changed out and replaced with brand new self-aligning open bearings from Budget Bearings. As many of the fasteners as I could replace I did with BSW and BSF stock from Namrick; nearly every join on this mower has a shakeproof washer of the period along with a washer to preserve the paint underneath. All the hardware was soaked and wiped down in SAE 40 motor oil to prevent corrosion. I assembled the entire lower half of the mower this past Saturday while the wife was at work - took me all day, and only made one mistake in the reassembly - I fastened the handle bars to the outside of the chassis plates instead of the inside. Sunday morning I finished it off. The wooden rollers are English Oak in Danish oil, courtesy of Mike Floody who did an excellent job. That's the reason for the cardboard "pavement" running all the way out to the drive!
Now this - this is the absolute highlight of the whole project, in my opinion. Matching English Oak handles, 1 coat of Johnstones' woodstain and 2 coats varnish to get the right colour match to the wooden rollers at the front. Thanks again to Mike Floody for doing a fan-flippin'-tastic job turning these handles! The clutch handle I just 'winged it' with a simple, cylinder-style handle that Mike turned and drilled for me to some pretty precise specifications. They pressed on just fine, and I ran several layers of hard-curing epoxy resin down the gaps to fill. The Atco throttle body, like the coil and fuel tap, I purchased from George at Villiers Parts in Essex, along with a completely new, fabricated cable as the old one was really worn out. George told me then I have the last one of his factory-new throttle bodies... I have more pics, and a video of her purring along but these were the best of them. I know I've dropped quite a few names in here of stockists and services, and it was intentional: they provide a service and a point of supply for us to draw on in order to pursue our hobby, and I'm sure some of these folks derive a small income from our patronage so I felt it important to point them out by name here for the excellent work / service they provided me to complete this project. Thank you. Now, does anyone out here know someone who can put a new liner on the cone of my clutch? Cheers, Tom
|
||
1935 auto scythe ? | Good evening gents I'm currently going through my late uncles farm and have come across what we think is a 1935 auto scythe .( See pics). Can somebody give me anymore details on the machine and if it looks complete . It's lovely non the less . |
||
1936 Ransomes Overgreens mowing tractor for golf greens | |||
1938 Dennis 36" Mower | |||
1940's ? Atco / Villiers Midget date | Good Morning Some 6 -7 years ago I was given a 14 inch blade ATCO fitted with a Villiers Midget Engine. It came from Terrington, Yorkshire. It seems to be a Mk 2, or Mk. 3 from the cylinder barrel design Good compression non runner as the coil is Kaput i feel, not spark. Crankcase is stamped CY. poss A, 404 Cylinder cast, looks like 2 PSA 353? Came with the grass box, somewhat moth eaten. Can anyone date this ? Starter is a fitting you push with your foot, that pulls a chain around a sprocke Undecided what to do, don't think the value is anything really, so might just refurbish as a Garden Ornament Motorcycles ( old BMW's ) are me real interest. Robert Freeman March, Cambs
|
||
1949 Atco 20 inch Heavy Duty with 8 blade cylinder for Tennis | |||
1950's Atco - Need to run to keep up with it! | Hi All, I have a 1950's 17inch cut atco. The engine runs like a dream (Villiers 2 stroke) and it cuts pretty well, although it throws the grass unevenly into the box which maybe suggests the cylinder blade needs a touch up on one side? My main concern, though is that even at just above idle, it moves so fast I have to jog to keep up with it... Any suggestions for what might be wrong, or were operators faster in the 50's? Cheers, Patrick |
||
1950's Atco 14" lightweight spares | I have spares for a 1950's 14" Atco Lightweight if you need anything, ... everything super cheap ... thought i'd offer it on here first to help anybody out, before i chuck it all on ebay
Villers engine £10.00 (turns freely, not tested) Exhaust good condition £5.00 Carb, very good condition £5.00 Everything else couple of quid ... Let me know if you need anything, and I'll see if i have it. (fuel tank sold already) Wooden rollers complete assembly in good condition. £5.00 or take the whole lot (in bits, so easy to load) for 20 quid, pretty much complete, less fuel tank. Collection from southampton area. All the best ... Mike
|
||
1950s / 60s Suffolk Punches - was there a Series 6 or Mk6? | Looking at the index to a parts manual for Suffolks of the 1950s it appears that the Punch range of the time started with the Series 1 and progressed through Series 1a. 2,3,4 and 5, then the Mk7. Was there ever a Series 6 or Mk6? |
||
1951 lawnmower made by Indian Motorcycles | |||
1952 atco light | Hi buddies I have inherited a 1952 Atco light 17” cut mower, but boot it needs a FULL restoration! At the moment I am trying to source a new spark plug for it, champion 8com but up till now no success Any ideas on good Atco spares dealers? |
||
1954 Atco 14" Restoration | The only thing left to do now on my 1935 (Thanks Clive, for setting me straight on the year) Atco 14" is a load trial now to ensure the mower can function/perform under load, which might be this Saturday, I don't know, we'll see. I'll take some video of it (if it performs!). That being said, the next mower up on my bench is a 1954 Atco 14" (I'm pretty sure about the year, the machine no. is 1454 NME), primarily because under load in my back garden it kept stalling on me, and this was the result of something getting jammed or bound up somewhere in the drivetrain from the motor to the cylinder cutter. At the initial run up, I ruled out the clutch on the motor as I couldn't find any signs of binding. On Tuesday I swapped out my 1935 Atco for the '54 Atco on the service trolley, then truly struggled to get it to catch and run. I resorted to an electric drill and an 11/16" socket which bore some rather short-lived results: it would fire up, then when I opened the choke it would overrun then die just as quickly. Went through that process about three times before I sat back to have a think. It has spark, otherwise it would've never started, the timing must be correct otherwise it would have never started, no obstruction in the silencer (I checked), and it's getting fuel - but is it getting a steady supply of fuel? So I pulled off the banjo bolt and discovered sludge in the passageways of the bolt. I then decided to give the tank, petcock and fuel line a thorough clean. And a good thing I did... I found still more sludge in the petcock valve, but the bowl above was only from the fuel tank, and nowhere else! I figured I'm going to need to clean down the carb, but in the meantime figured I'd put everything back together and give it a run to see if it'll run after all, and if so hopefully catch it 'in the act' of binding on me. No such luck. I pulled the '35 Atco off the service trolley, placed the '54 Atco on, strapped her down, and I got her fired up on the 2nd or 3rd kick. After a little up & down, I got her settled into a steady RPM and then engaged the clutch. It worked just fine; the drive roller spun as did the cylinder cutter, no problems whatsoever. I let her spin away like that on the stationary trolley for what must've been a good 15 minutes or more, waiting for something to happen, but nothing did. Frustrated, I took the mower off the service trolley, wheeled it into the back garden and put it under load. It didn't move 3 feet before it 'locked up' and shut down completely. Back to the workbench now, and time to see what's happened... My hands were far too greasy and oily to take the pic of what I noticed with my iPhone, so I've added a pic with illustrations to show what I saw: The chain had skipped the teeth of the drive roller sprocket (1), placing a lot of tension on the intermediate sprocket set (2), which in turn stressed the drive chain to the cutter. When I corrected this, I noticed a considerable amount of play in all directions around the spindle (2), and the drive roller chain seemed too loose to be correct; when I pulled the key link out and tried to figure out how many links extra there were, however, I couldn't even get to half a link overlap, much less a full one, so I figured it had to be correct, and the slack in the chain probably caused by the slack of the intermediate sprocket to the spindle. On closer examination I noticed the spindle appeared to be bent as well, which could be the root cause of the binding, after all. I've since taken all of the gears off and begun a thorough cleaning. Has anyone ever experienced this issue with this model of mower before? It looks now as though I'll need a replacement spindle and possibly an intermediate sprocket set since the bushing on the original one is probably too worn to be reused. I've purchased these off e-bay. Disassembly was pretty straightforward, and perhaps simpler than the 1935 Atco. In comparison, it appears the '35 Atco was probably over-engineered a little, but not uncommon I suppose given the period of manufacture. I had the entire mower broken down into its individual parts in less than an hour. The engine, a Mk I midget I believe, is a happy little runner, however when I took the silencer off to inspect the barrel the port was caked in coke, so I'm going to go ahead and invest some time and money into completely restoring the little midget - I'm going to install a new HT lead, probably replace the points, condensor and coil, give the crankcase and magneto castings a good, thorough cleaning and polish, and the barrel a decoking like I had done on the '35 Atco. This will be its own little project, separate from the mower.
|
||
1955 ATCO Lightweight kickstart spring | Does anyone know if these can be obtained from anywhere or are they as rare as the preverbial hen's teeth? Thanks in advance.
|
||
1955 Toro Sportlawn | Restoration of a 21" Toro Sportlawn Made in 1955 This may be the world’s best surviving 1955 Toro Sportlawn 21”. We’ll let you decide. I would like to share with you my son, Charlie’s, 2015 summer project. Kids these days seem to use all their time playing video games, sitting in front of a TV, or on their cell phones. I wanted to find a project to share with my son that was not only fun but taught a valuable lesson. We found a 1955 Toro Sportlawn 21” mower for sale on Craigslist and thought, “This is it!” The 60 year old lawn mower was rusted, missing many pieces, and had cracked tires. The first step for Charlie, being 11 years old, was to take many pictures of the mower as a reference for the reassemble. The mower was then completely taken apart, every single nut and bolt including the engine. Over the next several weeks each piece was degreased and sand blasted. We made our own homemade sand blast cabinet using a cardboard refrigerator box with a piece of Plexiglas and LED lights for viewing. Next, we sent the necessary parts to the chrome shop and began searching for missing pieces. Originally, I thought we could find replacement parts on the internet. I did not anticipate how difficult it would be to find original 1955 Toro parts. Locating original Toro solid rubber tires was near to impossible and almost stopped the completion of the project. While the search continued, Charlie and I visited the automotive paint shop to purchase high quality primer and paints. With every part disassembled and properly cleaned, painting was easy. Charlie learned to use a spray gun to get a clean even coat. We let the painted parts dry and harden in our shed for several weeks. All the while, searching for those tires. Once the rebuilt parts for the Briggs and Straton 5S engine arrived, we began to assemble the engine. We honed the cylinder, installed new rings, new bearings and new seals. We lapped and adjusted the valves. To our surprise we were able to buy 1955 reproduction engine decals. It looked beautiful but we didn’t know if it would even start. Reassembling the Toro deck was also a great learning experience. Charlie discovered that the complexity of the mechanical parts that went together to accomplish a designed function. We sharpened the reel blades by using valve grinding compound and spinning the blades in reverse against the cutting blade. After proper adjustment, the blade would slice through a sheet of paper. All the parts came back from the chrome shop and they looked fantastic. Final assembly went well and we were now looking at a 1955 Toro Sportlawn 21” that was probably in better condition than when it left the factory 60 years ago. Charlie and I had a good laugh, we realized we had just built a lawn mower that was way too nice to ever use! We didn’t want to scuff the tires or scratch the maple rollers so we located a 1955 Radio Flyer wagon to haul it. We are not sure what we are going to do with it but we know the time we spent together was priceless. Charlie and Dad.
|
||
1959 Swish-err | I restored this in my spare time over the course of about two years. It's all done and running except i cant remember how or where the blade return spring is fastened. Inside the blade housing on the right ride there is a square nut welded to the edge. I remember the spring hooked there. I thought at the time it may have been something someone added but now i am wondering if it was that way from the factory because of another picture i found on the WWW. Do any of you guys have a Swisher of this vintage and can you show me a picture of the blade engagement area where the return spring is?
Larry |
||
1960's Atco 21" rotary | Hi All, New here, looking for info on Atco rotary, 1960's green/cream model. It has an Aspera (I think) 4 stroke engine and Dellorto carb. Picked up this mower a while ago, it looks to have done very little work and is complete and original. Started work on it as a lockdown project with my teenage son...but its giving me a headache! Mechanically is good. no wear in the bore, electrically fine with a good spark. The carb has been stripped, ultrasonically cleaned and blown out with high pressure air more than once... but .. it wont run (well not as it should) It will run for a few seconds if primed with fuel straight into the carb inlet, and, strangely it will run (flat out) if I cover the air inlet 90% with my hand. - maybe that suggests an air leak but from where? Any ideas anyone?
|
||
1960's Hayter Condor Gearbox | Hello , I have one of the above mowers still going strong but for a broken gearbox output shaft. Desperately trying to source a replacement part / gearbox to no avail. I beleive the gearbox is a Foote 2010 pre 1970 , wondered if anybody could help with info regarding parts or a suitable more modern replacement ? thanks in advance |
||
1960s Victa part wanted | Hello there- I am looking for the rear flap/blanking plate for a 1960s VICTA self propelled 2, if anyone has one lying around, many thanks. Chris |
||
1961 ATCO Petrol 17inch Machine Reference 1761/2/3 | I require the locking nut for the crankshaft/flywheel fan shaft. It has never been removed until now and would appear to have been cross threaded on factory assembly, the thread is ruined following removal, so I have been informed by my friend a retired Leyland Motors toolmaker. The power pack I think is Suffolk and the nut is left hand thread 3/8" UNF ( Possibly ) |
||
1964 14” Acto | Hello & thankyou for accepting me into the club! i have recently acquired a 1964 Atco cylinder mower - the tag reads 1464 - but unfortunately it has come to me in bits and I was wondering if anyone had a parts diagram for the machine? Many thanks! |
||
1964+ JP Super MK5 17" Power Mower Logo | Hello All, Just acquired a very complete 1964 JP Super MK5 17" Power Mower. Clearly well maintained in the past, even came with the original carrier wheels and optional aluminium front rollers. However, latterly it was left under a dripping roof with resultant rust to parts of the mower. This has affected the transfer logos.
Does anyone have a good clear picture of the MK5 Logo on a mower they hold? Picture must be strictly 90% to the plane of either the grass deflector or grass box. I will then import into a photo editing program and doctor any minor imperfections....so the image does not have to be perfect. From that I can create a water-slide transfer. The better the image, the less editing I have to do! Grateful for any assistance. |
||
1965 Hayter Hayterette Throttle Control | I'm trying to source a throttle control for my '65 Hayterette, it's the white plastic type also found on the early Harriers, 21's and Ospreys but they seem rather illusive so much so I even tried to buy a '66 model just for the throttle. Ebay has had nothing like it for months. The exhaust bugs me too but as its a disguised replacement from 1980 I can live with that. |
||
1965 super punch 17 problem | Hi all, I am currently stuck with my suffolk super punch, Having had it running for the first time yesterday, i noticed the front drive shaft spinning without the hand clutch engaged. Engaged hand clutch and blades began to spin quickly. Switched, disengaged hand clutch and the shaft span again when started again. I have removed the circlip and moved the hand clutch down the shaft, loosened the 4 engine mounting bolts and slid the engine away from the shaft to allow me to remove the bigger clutch housing and gave it all a rub down with p40 sand paper i.e inside the drum of bigger clutch bell housing, clutch shoes as they needed it and adjusted the clutch shoe adjustment screws so to ensure the clutch was not catching on tick over. Cleaned the bronze center bearing on the clutch bell housing ( bigger clutch part) and the shaft area where this sits upon and back together again... continues to be the same.. start up hand clutch not engaged... shaft spins. Can confirm the clutch shoes are not grabbing. Is there supposed to be a bearing in the center of the bigger clutch bell or something? Cant quite understand whats causing it really? Any help is hugely appreciated! Thanks Rob |
||
1967 ATCO F24 20" mower | I have just acquired a 1967 ATCO 20 " mower and the only designation I can find on the machine is a tag with F24 and a number. I have failed to find any reference to this model save for a spares manual which it shares with the D14 model. The machine works and cuts reasonably well but I started to tinker with it to see if there was anything amiss. The carb has been removed and thoroughly cleaned but not yet reset from the 'as found' settings. I have removed the head and cleaned the piston and the head of all gunge that had collected. Spark plug cleaned and the engine fired up again. So far so good. I then had a look at the chain drives and the main cutter drive chain had been adjusted to its max and was touching itself in the middle. Perhaps the chain is too long. I have read other posts about a similar problem which in principle is the same as on my model but referred to a different model. I can find no information on the number of links there should be on the F24 drive chains or the number of teeth on the drive sprockets. The cutter chainwheel assembly seems to have 21 tooth and 9 tooth sprockets. I have seen on the web 20 tooth and 9 tooth sprocket assembly available and wondered if this would work on the F24. Are parts for the F24 interchangeable with any other model of this vintage and if so which one. Unless I can find new or refurbed parts I will just have to manage with what I have got. Any other info on this model would be welcomed Thanks David Peters |
||
1968 atco 14 id and paint | Hi i am new to this. I appologise in advance some of my questions will be basic. Q1. Is an atco 14 made in 1968 an atco delux or just an atco 14? Q2 i have found jenolite atco green machine paint, it seems to be a good match on the internet pictures. Not as harsh as later models, It is more of a southerm railway mid chrome green (yes i am a rivet counting railway enthusiast in revovery ). Am I on the right track (no pun intended) or making a mistake? Q3. The exhaust muffler is shaped like sardine tin, but the outlet is a plain round pipe. Should i flatten this slightly to match those i have seen on the internet of that age. Q4. Is there a simple guide for adjusting the carb screws when i reassemble it. How do i tune the carb in short. Your help would be greatly appreciated David |
||
1968 ATCO B 23 mower | Greetings from Sydney Australia, I've recently acquired the above mower in reasonably good condition, replaced spark plug, broken fuel cock and gave it an oil change, ticks like a clock, quiet smooth etc. Rotating blade is am little on the rough side so planning to do a little work on it using Valve lapping paste running the blades slowly in reverse. Problem 1 - I've removed the chains hoping to be able to rotate the blade backwards but can't work out how to take the sprocket off. It's either on a spline or reverse thread, not sure which but if someone out there can advise me I'll be eternally grateful. Would also be handy to have a service and workshop manual for it to help the cause, I'm trying to give it a full restoration, paintwork is reasonable but it would sure look so much better with a bare metal respray in 2 Pak paint. Amazing but the grass catcher doesn't even have a dent on it, I'll be looking for a photo of the original decals and transfers to apply when Hope to hear from willing helpers. Regards to all,
|
||
1968 Ransomes Motor Triple MK2 | Hi everybody. I am new to this club and forum. Do you have room for somebody who is a proud owner of a 1968 Ransomes motor triple mk2 mower. I have been busy restoring her as well as using it reguarly to cut my green. My Ransomes has the old Mag twin cylinder petrol engine fitted and she runs like a dream. My mower is called the Relic and is actually road legal. Here is a picture of my relic. |
||
1970s Qualcast Rotary | Firstly, thank you for accepting my join request. I have recently been gifted a 1970s Qualcast, and have now started restoration of it. I just love the way it looks, reminds me of my childhood for some reason. I'm hoping somebody can help confirm the identity. Having searched and searched the interweb, I can't find a single image the same, the closest that I have got is a single image of petrol driven version on the same chassis in an Argos catalogue page, from 1979. I now believe it to be a "15inch Electric Jetstream", and by the researching the version of the Qualcast logo, appears to be circa 1975 to about 1977. Any more info would be greatly appreciated, would love to get hold of a parts book, or exploded diagram / parts list etc. Thank you for your time.
|
||
1973 Mountfield M3, Briggs and Stratton engine | Hi. I am Delighted to join the club. I got this from my father, it is a little over 50 years young… it ran perfect for all those years only for one or two little fixes. It started idling high a few days ago and my father tried a few things and eventually ended up replacing the carburettor but no better. He just happened to come across another lawnmower free from my brother so he gave me the M3. I still believe lol. How hard is it to get parts for this, for example, grass box? I’d lov to restore it for my fathers sake and it has sentimental value to me as my first introduction to an engine! THE FULL LONG NUMBER ON ENGINE Is 92908 1344-01 73082808 AND BODY SERIAL NUMBER Is (M3 22650) thanks so much kind regards Ronan
|
||
1976 Dayton push mower. | Hello everyone I am pretty new to this site but just wanted to ask some Q's to the people who would know. I am new to lawn mowers really like to collect and restore vintage military vehicles and John deere tractors. But to get to the point of this I have a 1976 Dayton push mower I am trying to restore it to look nice but I can not find anything on them. I have looked for 2 years and cannot find any thing on Dayton makeing mowers so if any one could help me find some parts it would be a big help. THANKS TO ALL |
||
1978 Mountfield M4 De-Lux surplus to requirements in Northampton | Hi lawnmower enthusiasts. My 42 year old M4 has recently expired - the nylon recoil pulley has snapped.and I've given up hope of sourcing a replacement. I had a shinny new Mountfield delivered yesterday so the M4 is free to a good home. I bought the old M4 from a neighbour 20 years ago for the princely sum of six bottles of craft beer! It had given faultless service apart from the odd reluctant hot start. The glass fibre collection box has a broken hinge, but it still mounts and collects perfectly. Just wondering if anyone would like to take it off my hands free of charge - before it goes to the recycling centre? |
||
1980s ATCO Royale B24 | Hello everyone. Glad to be here. I have recently acquired a 60th Anniversary ATCO Royale B24. I have bought it for mowing as well as general interest in mucking about with it. I would really love to get hold of handbook for it though.
Nigel D |
||
1988 huskee garden tractor | i just bought this mower, was lookin for info on it, it is a 18hp 45 inch cut with a 4 speed gear box, on the tag on the rear is: WESTERN INTERNATIONAL INC, P.O. BOX 377, DES MOINES IA U.S.A. 50302, MODEL NUMBER 4518-0900, SERIAL NUMBER 725029, CODE 8008D, any info on this machine would be great |
||
1995 Atco Commdore B14 - Carb Questions | I ended up buying a 1995 Commodore B14 yesterday -- not exactly old but a lovely, lovely example. It is in fantastic condition and came with the original receipt and service papers from the chap's father. There's no rust on it and everything has cleaned up very well. It was sold as not starting and "requiring tuning". It has been stored dry in a ventilated garage for 2 years. I got it home and took a look at things. To begin with the gasket between the air filter housing and the carburettor was hanging only on one screw and when opening the carb up (as best I could on these modern carbs) there was debris inside. The rubber float bowl seal was broken too. I let it soak in carb cleaner overnight and it looked new when I took it out this evening. I sprayed cleaner and air through it after and let it dry. I did refit everything even with the broken float bowl seal while I await a new one. It started on the second pull but only runs with the choke fully open (or ON). It is a little rough idling but doesn't cut out. I think these mowers use a Tillotson carb? The one I have is identical to the picture below. I'm not familar with these carbs. A clear problem with it is that when opening up the screw at the bottom even very slightly, it pours petrol out of a small hole on the bottom. What could the problem be here? I'm not even sure how to prime/tickle the carb. PS -- thanks to wristpin on my earlier "Scarifier or Aerator" thread. I am on the lookout for the grass rake springs online.
|
||
1995 Atco Commodore B20e Cylinder Removal | Hello there everybody, I recently started working on a mower that I bought a few years ago and has been sat in storage since. It's in pretty good condition, little bit of surface rust here and there, I think it's from condensation. I wanted to remove the cylinder to repaint, as it would really make it look good. From looking at other posts it seems I have over dismantled, but none the less at this stage I have removed the back plate with the right hand bearing carrier attached. I have removed the two piece sprocket off the end of the cylinder spindle. At this point I thought I would be able to just pull the cylinder out of the left hand bearing carrier. I saw on other posts that the method was to unbolt the bearing carrier from the side plate, but I thought if it comes off in the end anyway I could leave it attached to the body. It's complicated by the fact that it looks like someone has had a go before on the hex cap bolts, and they are completely rounded off, allen key just spins inside. Do I really need to unbolt it? if so would I be best to dremel cut a slot across the bolt head for a slotted screwdriver or another method? I don't understand why I can't just pull it out, is there some kind of interference fit thing inside the bearing housing. I thought about using a drift to hammer it out, but I wanted to check first, incase this would be a bad thing to do and break something. any help would be much appreciated. |
||
1996 AGP Shanks Pony Mower | |||
1997 AGP Shanks Pony Mower | |||
1998 AGP Ransomes Motor Mower | |||
1999 AGP Greens Motor Mower | |||
19th Century mower identification | Hi folks - new poster here. I'm trying to identify the piece of equipment that the woman is pushing in the attached picture. I'm assuming it's a mower, but I've been unable to find a way to identify the type, and therefore confirm that it's not something else. The white box section at the front is the thing that's throwing me off. (I don't know what else it'd be if it's not a mower... ) Where the woman is standing where my house (and others) now stands. The year is (probably) after 1858 but before 1903. (In the larger picture this is cropped from there's a large house in the background that was dynamited in 1903.) Any help on the identification would be much appreciated! |
||
1: Ignition System Access |
Gain access to the ignition system by prising off the aluminium casing from the side of the engine. This will reveal a heavy brass flywheel with access holes for checking points. |
||
1: Removing Clutch Assembly | The first step is to remove the clutch assembly from the drive train. This is required anyway to gain access to the flywheel retaining nut and thereby access to the ignition system. The chain shown in Figure 1 has a removable link making its disassembly simple. The use of penetrating oil then allows the sprocket retaining nut to be removed, followed by the sprocket itself from the splined shaft. More penetrating oil enables the three nuts and bolts which hold the clutch ball bearing cassette to be removed, and after releasing any tension on the clutch cable, disassemble the clutch release forks assembly. A useful tip at this point is to store the disassembled nuts, washers and spring in the order ready for reassembly….or to photograph the details of this assembly order. Depending on how much clearance you have, you may or may not be able to remove the clutch assembly from the machine. In the case of this Atco Scythe, the engine needed to be shifted slightly to provide sufficient clearance to remove the clutch. The clutch is attached to the flywheel via the tabbed shaft and the associated slots in the outer clutch body housing as shown in Figure 2.
|
||
2 Stroke Atco Villiers mk1 boggs and cuts out when cutter engaged | Hi, I have just got my 1950 Atco 2 stoke with villiers mk1 engine running after about 20 years of sitting. Only one problem though, the engine boggs down and cuts out when I engage the cutter. I've just done a full carb strip with new gaskets and its made no difference, tried replacing the spark plug with a bit of success but still cuts out... It starts easily after about 2-3 kicks and revs and runs fine - no misfires or anything like that. Cutter is well oiled and fairly easy to turn by hand. The only thing I can think of is if the mixture is too rich or if the plug is the incorrect type. I use a 16-1 mixture and the plug is a champion 8 com, I've also tried it with a lodge equivalent with little success. Thanks, Chris |
||
2 stroke engine running erratically | I restored a 1930s 2 stroke Qualcast 16 mower about 8 years ago and it has served me well. However last year it started over-revving, as if it was drawing in air, and I had to mow the lawn constantly adjusting the throttle lever. I stripped the engine down again over the winter truing up the crankcase halves and fitting new gaskets and plain bearings only to find that the problem has not gone away. A classic sae 40 oil has been suggested and I've also used a classic sae 30 which make no difference. There seem to be 2 adjustments that can be made on the Villiers carburettor which I have adjusted endlessly which alter the running of the engine but do not solve my problem. Has anyone in the club got experience of one of these mowers who could shine more light on this please? |
||
2 wheel ATCOSCYTHE | I wonder if anyone knows how I can find out information on my Atcoscythe I have the machine number & it's readable for a change. |
||
2 x Atco mowers available | Hello allI have been contacted by Rob Thompson, his note below is self explanatory, if interested contact him direct via email robthompson.montreals@mail.com
"I have 2 old Atco lawnmowers here that I need to find a new home for and wonder if they maybe of some interest / use to you. I acquired both of them some years ago to save them from beingscrapped and with the possible intention of restoring them at some point. It now seems unlikelythat I shall find time to restore them, so maybe they should go to someone else.Both mowers have been dry stored here for approx 25 years. The engines of both are free to turn,but neither has a grass box. The larger ( Atco Standard ? ) has a piece broken out of the roller onthe left side - viewed from the rear. The cylinder widths for the small and large mower are 12 inchesand 22 inches respectively.I am located in Shropshire - near to Shrewsbury - SY4 1DB."
|
||
2-stroke mix | Sirs. I need your advices on the correct 2-stroke mix for my 1920's Atco Standard 16.Also,do i remember advice given on type of oil needed for an old engine.?Some of the modern day equivalents being unsuitable.Thanks. |
||
20" Atco with Kohler K101 | I'd appreciate any help with the restoration of my old mower 20" cut. It has a Canadian Kohler K101 side valve engine - i have sourced engine spares as it seems to be very similar to the K90/K91 4HP. Could anyone identify this mower - I'm sure it is an Atco ? I have overhauled it many years ago and so its now due for another rebuild. I'm after springs on the split drum drive ratchet. I did replaced them on the first rebuild but the mower shop who supplied them is now closed. I've enclosed photos. Many thanks Pete
|
||
20" Lloyds Paladin, Honda engine, runner, with box, photocopy of manual | |||
20" Patent Chain Automation | |||
20" Ransomes Marquis, land roller and frame only | |||
2000 AGP Ransomes Electric Mower | |||
2001 AGP Ransomes Overgreen | |||
2001 Suffolk punch 14s petrol - drive problems | Hello, I am a new member to the club and I have a couple of old mowers to renovate (or try to in the future!!) but I would appreciate some advice on a relative new machine,’a 2001 Suffolk punch 14s petrol cylinder mower QX system’, this is a 2 rubber belt driven-machine. The engine seems to run perfectly- but I seem to have lost the drive completely with the roller locking up as well both forward and reverse!, - but the cutters seem to operate ok. I did fit a new pinion drive and replaced the 2 belts but that didn’t last long so I have resigned myself to taking the roller off – which I now have done to replace the drive shaft and plastic bushes/housings which are held in with 3/16” pop rivets (I think). The carrier bearing/housing for the pinion shows some slight wear but 2 of the 3 screw shoulders of the carrier are broken off. Also the large belt pulley that turns the roller the centre is cracked too The parts I think I need are:-
2 X roller bushes
1 X roller shaft/spindle
1 X pinion gear/drive
1 X pinion carrier and bush
1 X belt pully or centre replacement,
Any help in sourcing these items would be appreciated, also any advice or other parts that I may need your input would be most helpful.
Thanks in anticipation
Keith.
PS. I did read an article on the technical forum dated-10/4/2018 from Tristan, - wristpin provided some valuable information for me and also supplied this link – https://www.dropbox.com/s/aeehg9ssysh03xg/Suffolk%20Qualcast%20QX%20issu…
but unfortunately it doesn’t seem to be available any more. Keith. |
||
2002 AGP Follows & Bate Climax | |||
2003 AGP Ransomes Reversible | |||
2003 CJT John Bloxham | |||
2004 AGP Lloyds Moto Mower | |||
2004 CJT Joyce, Dick and Alan Hardwick | |||
2005 AGP Clipper | |||
2005 Atco Balmoral 17se | Does anyone know where I can pick up a new fuel tank cap or cap liner for my Atco? I have tied all the usual places ebay etc and it appears to have been discontinued |
||
2005 Atco Balmoral 17se height adjuster knob | Does anybody know how i can get the height knob off the machine? |
||
2005 CJT Chris Thomson | |||
2006 AGP Chadborn & Coldwell | |||
2006 BOC Godiva Motor Mower | |||
2006 CJT Tony Hopwood | |||
2007 AGP Williams & Co Archimedienne | |||
2007 BOC Archimedienne | |||
2007 CJT Geoff Christopher | |||
2008 AGP Ransomes 30in Horse Mower | |||
2008 CJT Andrew Hall & Michael Duck | |||
2009 AGP Ferrabee Improved | |||
2009 CJT Tony Houghton | |||
2010 AGP Samuelson Mowers | |||
2010 BOC JP Motor Mower | |||
2010 CJT Colin Stone | |||
2011 AGP Shanks Jehu Motor Mower | |||
2011 BOC Ransomes Motor Mower | |||
2011 CJT Stan & Jonathan Hardwick | |||
2012 AGP Dennis Motor Mower | |||
2012 Annual Rally Dates | We've just confirmed our Annual Rally dates for 2012. The event will be held at Milton Keynes Museum, as usual, on Saturday 19 and Sunday 20 May 2012. |
||
2012 CJT Jim Ricci | |||
2013 AGP Ferrabee Improved | |||
2013 BOC Ransomes Conquest | |||
2013 CJT Brian Radam | |||
2014 AGP Ransomes Globe | |||
2014 Annual Rally Images Added | Images from this year's Annual Rally have been added to the site today: |
||
2014 BOC British Anzani Lawnrider | |||
2014 CJT Roger Wilkinson | |||
2014 STP Ray Hogben | |||
2015 AGP Samuelson | |||
2015 BOC No Award | |||
2015 CJT Richard Dent | |||
2015 STP Daniel Mortimer | |||
2016 AGP Barnard, Bishop & Barnard | |||
2016 BOC Clive Gravett | |||
2016 CGT Angus Shapland | |||
2016 STP Alec Hillyar | |||
2017 AGP Ransomes Patent Motor Mower | |||
2017 BOC | |||
2017 CGT John Dyer | |||
2017 STP Andrew Grout | |||
2018 AGP Shanks Horse Mower | |||
2018 BOC | |||
2018 CGT Steve Smith | |||
2018 STP Graham Loftus | |||
2019 AGP JP Super with Automo Conversion | |||
2019 BOC TBC | |||
2019 CGT Dusty Miller | |||
2019 Club Meet | Hi folks. Just back from having a great day at the OLMC annual get together. Good to meet up with with fellow enthusiasts. Lovely to see such a wide variety of fantastic mowers on show. Glad the weather behaved for us today. See you next year!! Regards. Rob |
||
2019 STP Alec Hillyar | |||
2021 AGP Little Gem | |||
2022 AGP Shanks Patent Gear Mower | |||
2022 BOC Seb Austin | |||
2022 CGT John D'Agostino | |||
2022 STP Lee Smallwood | |||
2023 AGP Williams Archimedean | |||
2023 CGT Lee Smallwood | |||
2023 STP Paul Harvey | |||
2024 AGP Ransomes Patent Motor Mower | |||
2024 CGT Seb Austin | |||
2024 STP John D'Agostino | |||
20th Anniversary Rally Next Weekend | The weekend of 15/16 May marks the 20th anniversary of our first ever Annual Rally. Since our first event in 1990 we've always held the rally at Milton Keynes Museum and this year is no exception. Over the weekend we'll be displaying hundreds of mowers of all ages from the 1830s right through to the 1980s, so there's bound to be something for every collector and enthusiast. Our first club rally in May 1990 was attended by fewer than 30 club members but next weekend we're expecting over 100 to call in at some stage. The event is open to the public from 11am to 4.30pm on each day.
|
||
21" Pennsylvania Sidewheel | |||
22" Atco Oval Frame | |||
24 inch Ransomes Automaton, Patent Gear (Circa 1900) | |||
24" British Anzani | |||
24" JP Blackburn | |||
24" Webb | Petrol cylinder mower, c/w ride on attachment but no seat or roller, no grass box, non-runner. |
||
24inch HD and Royale similarities | I am a new member of the club and have joined after buying a 24in ATCO with a roller-seat. It is one off my bucket-list as we had a 20" HD ATCO for as long as I can remember at home and from the late 1960s I was allowed to cut the grass - something that probably would not be allowed in these safety-conscious days ! However, I always thought of the ATCOs with the roller-seat attachments as being far superior and used to look at the adverts showing them with not a little envy. I now also have my fathers's 20" HD fitted with a newer MAG engine - as well another 20" HD left to him by an old friend which was in pretty poor condition and which I would like to restore at some point. Anyway - back to the point of this post. I am having a lot of trouble actually identifying these various machines as well as the engines and fittings. I seem not to be able to find a single source of info about ATCOs from the late 1950s to the early 70's. Perhaps this period falls between the vintage or "old" lawnmower categories and the newer and somewhat less interesting varieties. Does anyone know of such a directory which can be used to identify a mower ? In particular I am trying to work out the differences between the 24" HD series and the Royale. One reason I am interested is that I have what I think is a 24" HD BSF model which has a slipping cutter clutch. I have temporarily "glued" the dog-toothed parts together but want to sort out a proper fix at some point. What I was wondering is whether it is possible to replace enough of the parts on the 24"HD with Royale pieces to effectively alter the cutter clutch to the newer system - for which parts are still available. Or is there a source of parts for the older models that someone can direct me to ? Thanks in advance for any help regarding these various questions. |
||
27" Pennsylvania Sidewheel | |||
28/34 Frame Drawing | I recently bought an Atco 28/34 parts list from the museum although it list all the frame parts it doesn’t have an exploded view. Does one exist anywhere? |
||
2: Removing The Flywheel |
To perform any maintenance on the ignition system other than cleaning or adjusting the points, it is necessary to remove the flywheel. This is best achieved by jamming the flywheel (to prevent its rotation) with a wooden wedge between its outer circumference and a mower cross bar. Then, using an appropriate ring spanner, give a sharp strike to the ring spanner with a hammer in an anticlockwise direction to shock the nut undone (see image). A 1/2in Whitworth ring spanner can be used however, if one can be found, Villiers also produced a special spanner (called a Hammertite spanner) for this specific task. This has a ring spanner at one and a place to hit with a hammer at the other. If successful, the nut will undo by about one or two full turns before apparently locking-up again. You need to shock this anticlockwise again which will then prise the conical flywheel mount from the mating taper on the crankshaft; the nut is captive but rotates within the flywheel. |
||
2: View of Flywheel Assembly | It is tempting to try to remove the slotted screw head which is presented within the clutch housing at this time, however, it’s not necessary to remove this for a general clutch overhaul and, at time of writing, the author still doesn’t know if this is a left- or right-handed thread; the direction of rotation would suggest a left-hand thread to be most appropriate. But in summary, the screw’s removal is not fundamental to separation of the friction surfaces. Figure 2: View of flywheel end of clutch assembly. |
||
2nd Webb Push Model Restoration Query | Evening All, and Happy New Year. After restoring my Dads old Webb Witch towards to back end of 2019, I decided to buy myself a Webb to have another go at (Think I'm going to stick with the manual push mowers for the time being for practice) I was hoping someone may be able to give me some information regarding this mower compared with the WEBB Witch which I have recently done. Both come with the straight handles rather than the cross over handles. The 2 main differences are: On my current mower, the rear roller is smooth where as on the other model, it wasnt (What colour should the rear roller be when it is smooth?). Again, on this current mower, as you're looking at it head on, there doesnt appear to be a cover on the right hand side. Is this correct or am I missing a dummy cover. My last mower has 2 x covers which both had decals on. If I am missing it, can anyone point me in the direction of a replacement dummy cover please. Any information which could be passed onto me would be gratefully appreciated. Many thanks in advance Mark |
||
3 months of non running, am I causing problems...? | Well its taken a while but all parts are now ordered, fabricated, painted etc etc for the cutter reel sub assembly, should get round to assembly in the next month. (Commodore B17)
Whats worrying me now is I havent started it in 3 months, should I be concerned about fuel line, jet blockages due to degradation,any preventative measures I should be taking, I never ran it out of petrol, just drained tank. |
||
30 degree valve seat cutter | When I leave an engine, knowing I'm not going to start it for a while, I always squirt oil in the plug hole and close the valves. Sadly not all people do this. I need to purchase a valve seat cutter for doing BSA F & G engines; trouble is most kits don't seem to have a 30 degree cutter.
|
||
30" ATCO mower with 8 HP Tecumseh engine | Hi everyone This is my first post here so please be gentle with me! I have had many old lawn mowers in the past and currently have a 30" ATCO and a 24" Ransomes Marquis. Sadly neither of them is currently running. I have had the ATCO for many years but it stopped working nearly a decade ago and I have not had the time till recently (I retired last summer) to look at it again. It has been largely hidden under a tarpaulin. The Ransomes which I got last year ran for about a week and has not run since. I have been concentrating on getting the 30" ATCO up and running The ignition system of the ATCO was not working and in a recent trip to the US I got a new ignition coil and capacitor. I ave replaced the oil, spark plug and air filter. It has an 8 HP Tecumseh engine. To my delight I was able to get the mower up and running; sadly only for a few days, when it stopped working. On stripping it down I found that the flywheel key had shorn. There seemed no reason for this. I had understood that this normally happened when one hit a rock etc. but I think it was simply metal fatigue. There are two issues 1) I am struggling to find a replacement key. I found a pack of 10 611004 Tecumseh keys cheaply on Ebay ( a few pounds) but sadly they don't fit. I am struggling to find the correct key and would very much appreciate any help. The serial number have been spray painted over by a previous owner but I can probably clean them up if they would be useful. 2) The remains of the existing key seem to be seized to the shaft of the mower. It doesn't seem to want to come out. Any videos I have seen indicate the key comes out easily but it seems to be locked in. Possibly it is grooved and needs to be pushed out from the back. (This will require removing the points etc. so I havn't tried as yet). I would very much appreciate any help as to the correct key or advice on removing the old one. If anyone needs a 611004 Tecumseh key then I send you one if you contact me
Many thanks
Sean
|
||
30" Flail mower | Hello i am in need of a cyclinder head for this mower it is a 30" Flail mower powered by a MAG Motasacoche SA Geneve Switzerland petrol engine i have been told it is about 9 or 10hp
I have just got this from ebay and on getting it home i found the last owner has ripped the plug threads out of head. I know i can helicoil the plug hole to put the threads back in to it at a push. But if it goes wrong i would like to have a spare head at hand as a fall back as to say. If any one has one they would like to sell i would be most interested or if they know where i could most likley find one for sale.
Thanks alan |
||
35S Electronic ignition failure | Hi Does anyone have a working one that they might like to part with, or know where I can get one?
Thanks. |
||
35s Pull starter recoil assembly | I am re-assembling a Qualcast 35s for our cricket club, but I can't locate any of the screws needed to attach the pull starter recoil assembly. I've tried several local mower and hardware stores, but no one can help me find the proper size screws. Can anyone help point me in the right direction in order to find the 4 screws needed to complete my task. Thanks very much. |
||
35S went pop | Hi all, I've had a lovely '91 Suffolk Punch 35S that I've been playing with for a couple of years and finally got the carb tuned in nicely and the blades backlapped (I'm learning along the way). However a few weeks ago I started it up with no problem but a few seconds later there was a pop/bang/misfire and it stopped. Alas it wouldn't start again. Here is how far I've got... 1. It has spark, looks ok to me. Plug is a bit dirty but I think I was running it quite rich before I honed in the mixture over summer. 2. Replaced the carb with an eBay replacement, mainly because I've had the other off so many time to clean I thought I might as well treat it to a new one. 3. Added a thimble of fuel, have also tried carb cleaner, directly in to the cylinder to see if I can get it to turn over. No luck. The best I got out of it was some smoke from the muffler. I'm out of ideas now. Here is a picture of inside the cylinder if it helps, but there doesn't seem to be a fundamental flaw? Any ideas? Appreciate the help as always, Tom |
||
3: Clutch Assembly Removed From Engine |
Figure 3: Clutch assembly once removed from engine. At this point, the friction surfaces are seized and stuck together. In this case, it was possible to begin rotating the outer clutch body relative to the drive shaft, but with an insufficient clearance to allow the clutch to mesh and disengage to any useful degree. The main seizure problem was that the sliding release collar simply wasn’t (sliding) and was stuck fast to the drive shaft. The lubrication hole is of some use here because it allows penetrating oil to lubricate the engine end of the drive shaft. Note that the lubrication hole doesn’t duct lubricant on to the friction surfaces, but more lubricates components within the outer clutch body. Penetrating oil should also be introduced from the sprocket end in an attempt to free the release collar. |
||
3: Removing The Armature Back Plate |
To inspect or service the ignition system, it is easiest to remove the whole magneto assembly from the engine. Disconnect the H-T lead from the spark plug. Loosen the set screw which is behind the armature back plate and which clamps the back plate on to the engine’s crank housing. The back plate is also clamped to the crank housing with a support bracket. On some Villiers ignition system, there is an alternative clamping arrangement allowing some rotation of the back plate so as to “tune” the ignition timing. |
||
43 Cover | Bit of lazy question but have seen many covers on ebay that "might" fit a Qualcast 43. Has anyone experience of a cover that fits properly over this model and is relatively cheap, need to relieve it of its current motorbike cover as I am doing up a boat anchor Honda 250 bike which is coming on ok after being in a field for 7 years! Thanks for any replies as have seen some mixed experience with mower cover size/quality
|
||
43dl clutch,drive lever adjustment | Just finished adjusting the cylinder blade on the Qualcast Suffolk Punch 43dl. adjusted as per Wristpin,s instruction got a perfect cut on the paper. fired up the machine and it cuts beautifully but it has gone automatic with the drive engaged all the time,(the drive is normally engaged by lever on handle) To adjust the mower the wife and I had to lift it on to the bench as I cannot bend down due to new hip,Do you adjust the said lever at the engine end, or could we have dislodged something lifting it up and down.? surely adjusting the cutting cylinder would have nothing to do with it??
|
||
43S Engine/Clutch alignment | Afternoon, I'm in the process of fixing up a second Suffolk Punch 43S and have hit a bit of a stumbling block towards the end. When attaching the engine and inserting the centrifugal clutch into its housing, it does not seem to want to align correctly and once the engine bolts are fastened, it makes the chain very tight, making the blades stiff and also will mean that when the engine is running the blades will always turn. Clearly the clutch isn't aligning properly, but I can't seem to adjust this. There weren't any shims under the engine and I've tried adding some in various places but just can't get it right.
Any advice? |
||
43sl cutter bearings | Hi all, Got given a 43s 17inch cut mongrel machine, it had a very early iron engine fitted which has may have seen better days so removed that and started stripping down and now need cutter bearings and the felt pads, the bearings i removed may be ok with repacking but as it is apart i will replace, will a bearing outlet be able to match these up? although i will try and get the sealed type the markings on them are Japan, smt, r10. |
||
43sl roller side play. | Further to my post rear roller mishap i have reassembled the machine and have about1/8 to 3/16 side to side play on the roller, the cover plate over the pinion is tight and the roller turns freely, is this play acceptable given the pinion is plastic? |
||
4: Checking or Replacing The Ignition Coil | If the engine is suffering from a weak (or no) spark, then the problem may be within the magneto coil. This can be checked using a voltmeter (to measure resistance) but it is required to remove the wire connection between the coil and the points. The primary winding should have a resistance of just a few Ohms (measured between ground - either end of the iron core - and the socket in to which the points wire was screwed.) The secondary winding resistance should be 3-5k Ohms and this can be measured between the side terminal connection to the H-T lead and ground. The most likely scenario with an old magneto coil is that it has some internal corrosion and the secondary winding (which is wound from extremely fine copper wire) has broken. The coil can be removed from the “shoe” shaped laminated metal core ends by removing the nuts on the rear side of the back plate. You may need to use a screwdriver to counteract the torque on the corresponding screws which hold these core ends on to the back plate (see image). The core ends will then lift from the back plate and the coil can be pulled free from these shoes. Replacement coils can be sourced via the internet but ensure that you specify the correct length and end diameters as there are various models available. Replacements are not cheap (perhaps £50) and beware of untested items for sale on auction sites! With the flywheel removed, you now have excellent access to the contact breaker points and can provide a proper inspection. |
||
4: Removing Collar From Drive Shaft |
Figure 4: Holding the release collar whilst tapping the drive shaft free. The next operation is somewhat controversial: you need to begin working the drive shaft back and forth, applying more penetrating oil as necessary, so that little-by-little, the drive shaft begins to move relative to the release collar. I first tried a 3-legged wheel puller for this operation but found that I had applied so much force without any success that I feared breaking off pieces of the release collar. Figure 4 shows the sprocket retaining nut having been screwed on to the end of the drive shaft to be flush with the threaded end of the shaft. This can then be tapped “sharply” with a hammer to help shock the shaft free of the collar whilst supporting the release collar on the jaws of a vice. It has to be understood here, that there is a significant risk of deforming the threads of the shaft, so some judgment needs to be made as to how hard to strike the shaft & nut. Tapping the shaft and clutch housing in opposing directions with the aid of penetrating oil in this case gradually freed the release collar from the shaft and allowed disassembly of the mating clutch cone surfaces as shown in Figure 5. |
||
4A Marquis, BSA or Villiers? | Hi, hope everyone’s enjoying brown, dried grass. Just got MK4A Marquis and I’d like to know how to tell which engine it is. Is this done by the engine number which is: F12-02-01/31385. Regd; No. is DQ1149, or I think the ‘Q’ is correct, might be an O but there is a slight squiggle. Throttle cable seems too long and not sure about throttle lever either, here’s a pic. The engine ran after a bit of ghosting and then started on pull start, which I was surprised about. Cheers Nick |
||
59 colt | Hello everyone, I'm just adding some photos of my Suffolk colt I completed last year, I bought it in w.s.m for £13. Since buying it I became obsessed with them and travelled some distance to collect, the furthest was nottinghams (told the Misses I was working, she didn't talk to me for days) so my original was done and my other three were getting moved around the garage on a regular basis until I had to sell to fund stepsons scooter. (They Went to a father and son who were really excited about them so was happy to let them go). Anyway. I know not the right red as still in primer (thought it would look a bit garish bright red). But happy with the results. Start it every week and runs beautifully every time. (My favourite mower)sso. There we go, the 1959 suffolk colt 12 " self propelled lawn mower fetish that almost cost me my relationship. Lol. I'd never sell it. |
||
5: Contact Breaker Points Maintenance |
Disassemble the points by removing the contact breaker arm. This is held in position by a clip and spring. Note that the spring may easily be dropped on the floor – hence the need for a clean, well-lit work surface. Loosen and remove the two screws which hold down the brass strip and which also clamp the low tension wire and the connection to the condenser. This brass strip is isolated from ground by insulating posts which should be inspected for cracks or other degradation. Note the order of construction of these components so that it can be rebuilt easily. |
||
5: Release Collar and Cone Separated |
Figure 5: Release collar and its cone shown separated from main clutch parts. The main clutch components are now separated and can be cleaned and reassembled, noting that the retaining screw shown in Figure 2 needn’t be disturbed. Cleaning of the keyed drive shaft as shown in Figure 6 (being careful not to lose the Woodruff key) can now take place. Cleaning of the hole through the release collar clutch portion and its keyway should allow the release collar to slide easily along the drive shaft. Penetrating oil on a rag is sufficient to clean such surfaces. I didn’t bother cleaning anything but loose rust from the mating cone surfaces and assumed that the engagement of the cone surfaces during normal drive operation would adequately bed-in the parts.
|
||
6 inch Greens Silens Messor | |||
6" Greens Multum In Parvo | 1880sThe Greens Multum in Parvo was a small hand roller mower produced during the Victorian and Edwardian eras. The name means "Much with Little", reflecting the small size of the machine. The Multum in Parvo was produced for many years and the design changed many times, particularly in the layout of the gear wheels. Versions with chain drive were also available but are less common. Gear driven mowers were generally heavier than chain drive versions but could produce more "cuts per inch" which meant they could produce a finer finish on the lawn. Narrow mowers like this were mainly used on narrow paths between ornamental borders. They could also be used in confined areas with numerous obstructions such as graveyards although there is no real evidence of this use being promoted in sales booklets of the period. It is also possible that the narrow cutting meant the mower could be used to mark out tennis courts and similar sports areas when a line marker was not used. |
||
6" Hand Mower | 1870sThis hand roller mower has no manufacturer's markings. The maker's name was most likely painted on the handles or on a cast iron badge mounted on the handles. As the handles on this machine are not original it is therefore impossible to tell who made it and when. However, from the style of the design it is likely that this machine was made in the 1870s or just after. During this period many manufacturers decorated their mowers with intricate castings on the gear covers. Companies such as Samuelsons in the UK and Coldwell in the USA produced mowers like this and it is possible that this machine was made by one of these. Narrow mowers like this were typically used on the narrow paths that were often found between ornamental flower beds in Victorian and Edwardian gardens. It is also possible that narrow machines were chosen for mowing between obstructions such as gravestones or for marking out tennis courts when line markers were not available. Another theory is that smaller mowers were cheaper than larger mowers so people chose these when they could not afford full-size machines. This is unlikely because the price difference was not significant when considering that during this period mowers were generally bought by wealthy people who already had lawns and gardens. |
||
6' edging mower | Hi all, just got a 6' single wheel edging mower posted to me from Baltimore in u.s it was made in Minnesota . More details when I study it closer, cuts well though. Donal |
||
60 Years of Battery Power | Inspired by the comments by Ranso-mess in the technical section regarding fuel & the growth of 'Battery Power', I though it appropriate to highlight the battery mowers of 60 years ago. Webb introduced a proto-type re-mote controlled battery mower at the 1959 Chelsea Flower show, a year later they introduced the first walk behind battery mower, whist I have much information on this, spec etc, I thought perhaps comments from the initial review would amuse the 'Petrol Heads' out there. The image & quotes below are from early 1960 when the battery mower was introduced, Atco followed with their version I believe a couple of years later in 1962.
|
||
60's Atco | Just taken ownership of this beauty(?).
From lots of Googling and this site I think it's a 14" made in 1960/1. Most obvious things it is missing are an exhaust and the recoil starter. It came with a bit of knotted rope so the missing starter isn't a big issue... I've Googled the engine a bit and I think it's called a Villiers lightweight 50cc but I'm not sure what model number that makes it. Any idea where I might get a silencer to fit this engine? It looks like there are 3 studs shared between both the inlet and exhaust manifolds so I think it the flange needs to be a particular shape. Richard. |
||
6: Inspecting The H-T cable |
Inspect the H-T cable for continuity between the spring-loaded coil end and the spark plug connection end. Check also for cracks in the cable insulation. Replacement cables can be sought from the internet, but repairs can also be made to cracked or otherwise damaged H-T leads using appropriately-sized adhesive heatshrink. |
||
6: Splined Shaft |
Figure 6: Splined drive shaft showing the Woodruff key which transmits the driving torque from the driven clutch half to the drive shaft. |
||
7: Re-fitting The Flywheel & Final Set-up |
Hold the contact breaker arm open while refitting the flywheel on to its tapered shaft. There are timing marks on the flywheel which should be aligned with the notch on the crankshaft end. This will ensure correct spark timing. The flywheel nut will need to be tightened sufficiently to prevent any movement on the tapered shaft. If it is slightly loose, the flywheel may slip following a misfire, the timing will be compromised and the engine will run either roughly or not at all. Therefore, tighten the flywheel using the ring spanner and hammer arrangement previous described for removal, but this time for tightening (clockwise). Finally, re-set the contact breaker points gap. Check for a spark by unscrewing the spark plug, attaching the H-T lead and resting the threads of the plug against the surface of the cylinder’s cooling fins. |
||
7: Reassembly |
Figure 7: Reassembled clutch components. Reassembling all the components in the same order as they were removed completes the task. I gave the clutch spring a slight stretch before re-fitting it as I assumed that the passage of time and the elements would have weakened this somewhat. I also washed through the ball race with petrol and re-greased it prior to reassembly in the end frame of the Atco Scythe. Finally, you need to adjust the clutch release forks’ position and cable tension so that the clutch properly disengages (one doesn’t want the blade of an Atco Scythe to twitch when it should be stationary) and that the forks aren’t in contact with the release collar when the clutch is engaged. The video shows the Atco Scythe up-and-running after restoration. |
||
8" A H S sidewheel (cylinder re-ground - may not have bow irons/handles) | |||
8" Mowell | |||
8" Qualcast Model E | |||
8" Unknown make, narrow rotary mower, likely designed for cemetery use | |||
9" JP Minor (helix), c/w box | |||
9" Ransomes Lion | |||
9" Ransomes Lion, 1924/25 | |||
98cc Suffolk spares (crank and big end) | Hi everyone. I'm new you top lawnmower restoration and repair. I have a Suffolk 98cc aluminium engine that has massive wear in the big end and the crank journal probably because the oil pressure has broken off and was lying in the bottom of the sump. I am trying to source a new conrod and Frank in order that I can get get the engine running again as as the rest of it is in quite good condition.
I have managed to locate a conrod that has very similar numbers on it to my original but but the last part of the number on my rod is MCD2 and the last part of the con rod I hope to replace it with with is MCD1 and I was wondering if anybody knew you the significance of this number and if it made any difference to any of the specifications between the two rods and whether one would be a direct replacement for the other.
I have also so managed to find and a comparable crankshaft which has the number B2 stamped on it it where has mine original has B1 stamped on it. The other number that is also stamped on it are the same on both crankshafts so the same question occurs to me are they both the same and compatible. Any help or advice would be greatly received. Thanks, Jonnboys. |
||
98cc Suffolk stalls when loaded unless on choke | Hi all Picked up an old Suffolk super punch last year. Its a bit blunt but runs nicely most of the time. It tends to stall when it gets loaded up (long grass for example) even when moving slowly. If I keep the choke open (as when cold starting) it runs perfectly, although I’m sure it’s not good for it to be running rich all the time. The spring mechanism thing on the top of the carb appears to be moving around as it should, is this likely to be a carb problem or something else? Also, any ideas around what year this one was built? I can’t see any dates on it, but from what I’ve picked up I think it’s ‘60s. I’ve given it an oil change, new plug and had to replace the fuel tap (leaking after a bodged repair of the cork bit by previous owner) but it goes ok for an old bit of kit!
thanks!
|
||
A beginners problem with a replacement bottom blade. | Hi, This problem may seem obvious to most of you here but I am absolutely stumped. I have nobody to ask for advice and everything I know has been gleaned from experimentation so it was inevitable that I would get stuck at some point. At the moment I am renovating a mower for my grandad. He doesn't get on very well with his rotary mower as he finds that it tends to run away with him and if he turns the speed down it doesn't cut very well. So I have bought him a second hand Qualcast Suffolk Punch 35s (1991 model I think) and I am trying to get it up and running. I know this isn't exactly old and it definitely isn't a classic but this is my first project and I have more worthy models lined up. I have dismantled the cutting mechanism, replaced the cylinder with a refurbished one, cleaned and degreased everything and hosed it all down with a modern spray lubricant before reassembling it again. I have also bought a new bottom blade on ebay as the old one has a large dent in one end and I am told that they are such hard work to straighten that you may as well replace them. It was advertised as being for a qualcast 35s but the problem is it doesn't seem to fit. It is the same shape and width as the old one but it seems to be too thick. When I installed it I attempted to adjust the cylinder height using a method I found online (you doubtless know it, it involves a piece of paper). The problem is that the cylinder scrapes along the bottom blade along the whole of it's length, in other words it is too tight. I have loostened the adjustment bolts until they are rattling loose in their sockets and held the cylinder up by hand as I have turned it but it makes no difference, it still scrapes badly. The only way that I can stop it scraping is to loosten the bolts holding the bottom blade, but this is less than ideal as it could allow the bottom blade to move during use and affect the cut. I don't really want my grandad to have to check the blade before every use. The old blade seems to have a step in it, for about 9/10ths of it's length it tapers down to a thin edge, but the new blade does not. A blade on another model I have looked at is the same shape as the new one but it looks as though it has been bent to make it fit better, which is definitely not a good solution. I am stuck as to a solution. I would rather not have to buy another blade as I have very little money at the moment. Also how would I know that the new one would fit properly? I don't know whether to try and block out the bottom blade with something (but what? a washer wouldn't fit), to try and find a tool shop that could grind it down for me (no idea where to start with that one) or whether to just give up and put the old one back on and hope it doesn't cause too much of a problem. Any suggestions or advise would be gratefully received. Thanks. |
||
A Bit About Mower Boxes | |||
A Bit More About Boxes | |||
A blue American fuel tank, but off what? |
"Gasoline" instead of fuel or petrol convinces me it's from the USA. "Panther (?) 2 + 1/2 HP. cast iron sleeve" I think. No fancy tap or filter did I find, I sometimes use this as a small tank when working on motorbikes. Does anyone have any ideas? |
||
A Brace Of J&P Lawnmowers | I thought I would start another thread as I can't seem to upload the photos on my last post. i have two early J&P cylinder mowers, an early pre war Maxees model and the rarer Major model with the serial number 71 stamped on it making it prewar too. Interestingly, the Major (on the right) is the smaller of the two models and in my opinion is the better quality of the two models. Sadly I'd o not have the grass boxes for these two lawn mowers. If anyone got one please let me know. I am not sure whether to restore them to their former glory or to rejuvenate them as they are with their patina as I would like to use them to cut my lawn. Either way, they are safe here from the scrapman. |
||
A Brace Of J&P Lawnmowers | I thought I would start another thread as I can't seem to upload the photos on my last post. i have two early J&P cylinder mowers, an early pre war Maxees model and the rarer Major model with the serial number 71 stamped on it making it prewar too. Interestingly, the Major (on the right) is the smaller of the two models and in my opinion is better quality of the two models. Sadly I'd o not have the grass boxes for these two lawn mowers. If anyone got one please let me know. I am not sure whether to restore them to their former glory or to rejuvenate them as they are with their patina as I would like to use them to cut my lawn. Either way, they are safe here from the scrapman. |
||
A brace of Ransomes Marquis - Restoration | The finish line was in sight for my Atco / Suffolk Super Colt and I wanted to get something lined up for my next project. I spotted a Ransomes Marquis 18" non runner due to no spark (here we go again!), and when I went to look at it, the chap also had a running Marquis which was a slightly newer model, but had a fuel leak at the carb. Needless to say I ended up getting them both in the back of the car, with assistance!, and brought them home. I'm not going to go to the lengths I went to with the Atco - as good a learning experience as that was, I now want to keep the mowers cosmetically as they are, bar a couple of little touch ups here and there, but overhaul them mechanically to get them both running well. Hopefully I can use one of them as my regular mower as the 18" cut will hopefully make things easier around the garden, and I do like the look of these mowers. I would like to get an idea of manufacture date for both, and one should be easier as it has the plate on the side which says Mk4, but they both have the same BSA marked F12 Sloper engine Mower 1 - Ransomes Marquis 18" Mk4 - Reg No. DC 398 No numbers on the exhaust side of the block like the other mower, however the sump drain plug side has the following - RS 119 B 1979 K
Mower 2 - Ransomes Marquis 18" Mk??- No ID Plate |
||
A BSA fuel tank that I don't recall just what it fitted. | I must have had this for at least thirty years already, I got into the habit and picking up interestingly looking bits and pieces like this in my teens. Top one is from a Howard rotavator I believe. Grey one I'm not sure either. But 'BSA power units' Antelope maybe? But most had a BSa sloper engine with integral tank, so maybe not. Anyone? |
||
A Christmas Elf found working late! | |||
A couple of questions | A couple of questions Been navigating the site trying to find as much info as possible on push mowers My aim is to get my recently acquired Ajax cutting as best as possible in order to get my lawn up to bowling green standard In reality the latter I know is a lost cause but if you don't have a goal then you are not going anywhere! Is there a common source for NOS spares, cylinders, bearings, bottom blades, rollers? A go to place where you can pick and buy? Is there a list of recommended companies who can sharpen cylinder and bottom blades? Has anyone used this company on EBay and can they recommend? Ebay Number 303946459040 Did the Ajax ever have as an option a multi blade cylinder, that is a greater number of blades than standard? I've checked through the forum and can't seem to find a buy and sale area? Is there a How To on dismantling the Ajax, including pictures. The rear roller appears to have some form of diff which I'm assuming with the split rollers is to aid turning at the end of the run. Im an engineer of 50 years experience, 30 gained as a Chief Artificer in the Royal Navy. I'm confident I will get it rebuilt but if someone has been there before then I would prefer to tread that path! What is the correct green and where can it be obtained for reasonable cost? The grass box has a few dents but pretty good nick still with no rust and the paint mainly intact. I have oxy-acetylene and will have a go shrinking the metal back to remove the dents. There is the remains of a Ransomes decal, where can these(can they) be obtained? Finally(and thanks for your patience) what is the general consensus of the Rolls Royce of mowers, especially the small garden push type. My Father swore by his Webb but I was abroad when he passed on and the Webb was sold. The Ransome is well made from a time when British companies had a pride in their products and renown the World over. Perhaps why I'm attracted to it, the build quality, the means to maintain it(oiling points, bearings rather than sleeves) and not of the use and dispose typical of these times Thanks in advance Russ |
||
A couple of Ransome's 24" oil seals, but where do they fit? | Came from an auction when our local big mower centre packed up about ten years ago. I doubt I've seen bevelled oil seals fitted to anything before. Any ideas? |
||
A few Allen Scythe experiences. | My very first remembered encounter with these beasts was about 1970, a friend's father asked me to help him cut the B.W's canal towpath from Braunston to Coventry, I had no idea of how long that was or how long it would take, but was unemployed and it sounded like a good idea at the time. We had no long handled fork required for flicking the vast amounts of grass off path (my job) so I had to make a decent rake before the job stat, I went to my local DIY and bought about ten feet of 2X2 pine, I cut about 2' 6ins off one end and drove in five inch nails after having drilled eighth inch holes firstly. I also put in three longish wood screws, one each end of rake part and another in the handle to give it strength, I ran a piece of galvanised wire around the screws to tighten the head end up. The machine was owned by British Waterways and was a four stroke, fairly reliable too, except where the bank had given way and machine went into the canal a few times! A strip down of the carb. generally had her going again in a short while, we once lost the float holding steel pin and only found it again after trimming a yard square area of grass by hand! My father and brother in the 80's did some gardening for a local Sir and told a good story about another machine that sometimes stayed in gear, the only way to stop it was to aim it at the nearest apple tree! My next door neighbour was the local allotments assoc. chairman/treasurer and asked me to look at theirs, fault was occasional backfire which sent engine backwards and loosened off flywheel, I did the usual service, air filter, plug, oils, check of points, capacitor etc. to no avail, every time I thought I'd fixed it, it was OK for up to a minute or so, then it would do the same, the next time my finger inadvertently touched the HT lead I got a "belter" as one of my brothers in law calls a nasty shock, yes, the old rubber covered HT lead had tiny cracks in it and was useless, a length of modern car type stuff fixed the machine permanently. I did some sub contract work for a mower business a mile or so from Milton Keynes, one job was on a Allen Scythe, owner himself told me how this was a real head scratcher as he'd actually stripped it out himself, his workforce being young men didn't really want to work on it. Within minutes I'd found the main fault, he'd only shorted the points and capacitor out permanently! He seemed surprised to hear it barking away so son and wanted to know what I'd done, as I'd used no parts at all, when I told him he wasn't very pleased, he seemed a bit vexed that I was somehow questioning his mechanical abilities, which to me then weren't very high! When I found out I'd only been set on to make another employee make his mind up to leave or stay and he'd almost run out of work for me to do, I left, but that's another story. Despite their obvious drawbacks of noise, poor manoeuvrability, etc. I do have a sneaking regard for the old things still. Have just remembered that the canal one used a piece of knotted rope to start, not much fun when a 'dunked' engine is having an 'off day'. But with a good flat run and damp grass or weeds, it's amazing just how much stuff you can cut. I can still recall carrying my home made rake in one hand and the spare cutter bar on my shoulder, with the sharp blades very close to my fingers, friend's dad kept changing his mind about where to have bar, you can mount them centrally or to either side, but you have to move the part that drive part engages with, he used the heads from big nails to do that, five or six inch ones. It was a bodge, but it worked, the correct rivets would need heat to get them fixed correctly I now believe.
|
||
A Fine Pair | I picked up the baby brother (12 inch) to my enormous 18 inch Flexa on the way back from the Shuttleworth Vintage weekend. A great little addition to my collection. I really love these mowers as they are super quality with that amazing Art Deco look. I hope you enjoy the photos. |
||
A Flymo Turbo Lite 330 | |||
A Good Excuse Not To Mow The Lawn |
Leaving aside the time of year, and the end of the mowing season, one of the UK's politicians this week suggested that we should mow the lawn less often to protect the bee population. |
||
A happy ending from our classified adds | Hi everybody Firstly i will re-introduce myself to the forum as i havnt been active in a few years(i was one of the early forum users),my names Ricky and i have been a member for about 4/5 year but still not made it to mk yet! Anyway i digress, on monday i followed up the classified add on our website for the remains of a Ransomes mk14 20" mower. This was a dream find for me in a lot of ways. Firstly it was in the next village over from me, secondly the price was small and lastly, it told a story. The machine was at the gentlemans late mothers estate that has stood empty for some time. It belonged to his grandfather who got it from the local cricket club when they upgraded. The machine has had some mods over the years to keep it running ,like the red tank on the handlebars which is the oil tank as the original oil/fuel tank had become pourous internally. It has stood in an old lean-too stripped down. I collected it in many parts and on thursday evening assembled it purely to see whats there and whats not. I did not fit the clutch unit as its all gotta come apart when i rebuild the engine. Its totally complete and original so im not sure whether to restore or preserve. After the pictures where taken i rubbed some parts down with oil and it actually has started to look a lot happier with life |
||
A hens tooth | . |
||
A Honda Flymo | |||
A little direction on the Ransomes Leo 12" bearings |
A new learning curve question, I want to clean out any dirt from the bearings but require direction to achieved this safely. As you can see from the picture the small dust cover is missing and as a result it was full of cuttings and dirt hence the reason to inspect and clean, I can only guess that you pull away the circular cap on the side to achieve this? I would be grateful for the advice in this particular area of interest please.
|
||
A Little History Of British Gardening | Order Now | ||
A little lawnmower interest... | ...at about 3.30 in. Don't ask me what the models are, other than the manufacturer, and I have no idea about the side wheel. Oh, and if you are of a nervous disposition, don't watch anyone starting an engine either, at least 3 people don't put their thumb under the handle. If you can resist the temptation to fast-forward to 3.30, there's also a Villiers two-stroke which puts in a very brief appearance in an unidentified vehicle. https://www.youtube.com/watch?v=2_QSHIAg8XU
|
||
A mower coupling part set I can't identify. | I've had these for decades, but like a lot of my 'treasures' I have no idea what they fit, except that some parts look vaguely like 24" Atco ones. The aluminium piece that rubber sits in is made by Picador, this firm used to sell cheap basic type lathes at one time, using their own pulleys and bearing blocks etc. is about all I can venture. |
||
A pair of ATCO's | Hi all, I have been visiting this site for some time now so thought it was about time I contributed something! My main interest is in vintage stationary engines which I restore and display at vintage rallies but more recently I have become interested in old lawn mowers as well. First of all I bought what I'm told is an ATCO medium weight Deluxe 14". It's great fun and now I have got it running well it is a joy to use. I believe these date from around 1935? http://i915.photobucket.com/albums/ac358/wolseleyphill/SDC11180.jpg http://i915.photobucket.com/albums/ac358/wolseleyphill/SDC11178.jpg The kick start spring needs replacing at some point, but it does the job. In a few days time I'm also going to collect a 1922 ATCO Standard, a 22" cut model with Senspray carburetor. I believe this is quite an early model? It has a 247cc Villiers mk6a and looks like a lot of fun. It isn't running but that shouldn't be too big a problem, it's all there and the mower itself really only needs a good clean. http://i915.photobucket.com/albums/ac358/wolseleyphill/KGrHqNi8E5d4gmnrBOhWufvjSQ60_3.jpg http://i915.photobucket.com/albums/ac358/wolseleyphill/KGrHqZjE5dyh0jTpBOhWuWZew60_3.jpg I expect most members here get a bit tired of seeing these "common as muck" ATCO's but I hope this is of some interest all the same. Regards, Phill |
||
A picture is worth (or paints) a thousand words! | Or ten thousand words depending on where you look this up and it may have been said by Napoleon Bonaparte or an American sing called David Bates and several others in between! Whatever - the point that I would like to make is that a lot of posts to this forum would be a lot easier to follow if they were enlivened by a few images. I know that the image posting procedure on this site is a bit convoluted but it's not that difficult and would brighten things up a bit. Just saying.....!
|
||
A Pre Covid Steam Engine Rally | I thought it was time to see a Pre Covid Rally,just to jog every ones memory,and all the fun we use to have! This is Mike Duck from The Hall & Duck Trust with our 1907 Patent 30 inch Motor mower,which was new to Somerset County Cricket Ground.The scene was the Late Bill McAlpines birthday bash. Come on lets see more rally shots Kind regards Andrew
|
||
A recent Addition | I recently aquired a mower that is quite rare, Known as the Victa Compact, it represents one of Victa's more experimental times. The Compact & Lightweight mowers were the only push mowers victa has ever released below 125cc (infact the 125cc engine has also now been dropped) they also have a very unique engine design for victa. Comming in at 85cc, the most interesting thing about the Compact, is not the mower itself, but how it came about. In the Mid 70's, victa released a 170cc twin cylinder 19" rotarty push mower, known as the 500 Twin. This mower had 2 cast halves to the engine, each half comprised of the head, bore and 1/2 the crank case cast as one, the 2 halves fitted together over the 2 pistons of the horizontally opposed crank, and the 2 cylinders fired together. Along side this came the Compact, where the front 1/2 of the engine was simpy replaced with a plate that completed the crank case. I picked up this one for an absolute steal (AU$10) from a local tip shop, all it needs is it's dress cowl and tank, and I will be able to get it working (The starter is part of the dress cowl) Here it is: Here is a complete one, that belongs to a friend, along with the Lightweight, which came out a year or so later, with revised ignition. |
||
A recoil starter for an elderly Atco? |
I made the mistake of asking one of my sons to help me get an elderly Atco cylinder mower going and now I’m going to call him the Gorilla because by attacking the mower in such an enthusiastic manner he managed to break the top off the bolt that runs through the Recoil starter. I have been looking for a recoil starter for a 14” Atco 1970s cylinder mower for a few days with no success, can anyone point me towards where I may find one?
|
||
A sad inheritance | I may have briefly in this forum referred to the possibility last year that I would soon acquire my father's Atco Balmoral lawnmower due to his failing health. Sadly he has now passed away aged 90 and the Balmoral has now come into my possession. As he was a meticulous keeper of documentation, it came with a receipt dated 19-3-19 for a full service including new plug, airfilter, oil change, new pull cord and blades sharpened. Unfortunately, having just spent a fruitless hour or so trying to start it, this may not have been the exact case as you can see on the attached photo, the plug looks anything but new and in fact was quite coked up and oily. I know for a fact that the mower was not used after it's service, because sadly he was by then too frail to use it, resorting instead to a lightweight Flymo. This must have saddened him, because his lawn was very important to him. So, the mower, although nominally freshly serviced has been standing for a year. I drained the old fuel, cleaned the plug up and put in some new fuel. I checked that there was a spark. however it did not start. I then took the float bowl off the carb and it was practically dry. My conclusion is that the year's standing has gummed up the carb, so it needs a proper clean. Oh well, add that to the list of jobs to do... Good job I'm at home eh? The mower itself also comes with it's original invoice which shows that it was delivered in May 2000. I am looking forward to getting it going, not least because it will be far better than my current rotary. Then there's the ATCO Standard to get on with restoring. |
||
A showing of Shanks | . |
||
A simple welding repair to a Villiers silencer spigot. | Not sure what engine this came off, it's just a lump of rust to be honest, but I often derive pleasure in seeing how easily you can begin 'restoring' old parts that would have gone straight in the bin, before MIG and TIG type welders were in common use. Old threads had been snapped off close to stem, I ground away what was left, drilled a hole and used an old roof bolt with Whitworth threads on, cut it shorter for the job, bevelled the end to help the weld penetrate etc. To finish off I need to find or make two cup shaped pieces to form the outer two halves that surround the pipework. |
||
A slow restore/ rejuvination of Suffolk "super"" punch 17" | As a very recent new owner of a Suffolk Punch (i have wanted one for ages), an opportunity arose to get hold of one so i bought it as you can see, its in a sorry state, i was told i had ran last year but was leaking fuel from the carb... my plan is to hopefully disassemble, general clean up an get it back to its former grass cutting glory. Im a lawn mower amateur so i apologise now for daft question in the future! |
||
A wonderful day at the British Lawnmower Museum + BARGAIN! | Hey all. Well... I'm back after a very busy and exciting day at the lawnmower museum in Southport. WOW... What a day! All I can say is thank you to Brian and his gang for a great 3 hours spent raiding the sheds, etc for equipment, as well as spending time feeling the old mowers and studying the designs. It's really heart warming being in touch with the past. from old mowers which have served their time. I mentioned a bargain... yes that's right a real bargain.. I came to pick up the decal for the AJAX but also to hunt down a few machines to take on. Shame my dad's car couldn't take much more than 2 machines. So... I bet you're guessing which ones I picked up..... Well... first off, a Ransomes Auto Certes with the BSA sloper engine fitted and what appears to be a 12 blade head, 18 inch cut. There's some work to do on her and I'm happy to undertake it. I need to re fashion the box as I have a box with it that is smaller than needed, so a bit of fabrication is in order. The 2nd a qualcast super panther in good condition. with grass box. needs a little care and attention. in other words. a full strip, repaint, blades regrinding, a bit of welding on the box, etc. still no worries there. All for the sum of £140 inc VAT also including decals for the auto Certes, etc. On a side note... does anyone have a cylinder grinder for sale at a decent price? I'm looking for one to undertake work or if not, an old lathe I could mount a grinder on. My local machine service centre is run by a cowboy who's done some damage to parts before and he charges a minimum of £60 per cylinder then extra for knives. cheers folks and have a great day. If ever you want to dig deep into lawn mowers, go to the museum. it's at Lawnmower World on the 1st floor. a Great little place to spend time in and understand the heritage.
lew |
||
A1 | A 1940s version of the pre-war Follows & Bate "Magic" sidewheel mower. Marketed under the "Folbate" name after that firm had been acquired by Qualcast. |
||
A98 Engine Zenith13 TCA-2 Carburettor Damping Spring | I seem to have lost the damper spring that connects on to the groove of the extended throttle shaft and then to a small bracket. Is there supposed to be a hole in the shaft to connect a new spring to, or does the damping effect come from the friction of the spring in the groove ? I think the part number is F016L08694 from an earlier forum post. Thank You
Chris
|
||
A98 engine?? | Evening all, i can see from the operating manual for the qualcast Suffolk punch, that the engine is an A98, as described on page 17 of the manual, but i cannot find a engine maintenance manual for that specific engine, and i dont know who the actual engine makers were? Any ideas chaps? Buick 29. |
||
ABNER | German makers of the "Perfection" ("Perfektion") sidewheel mower c1908. |
||
About The Club |
The Old Lawnmower Club promotes the collection, preservation and display of lawn mowers made from 1830 onwards. Anyone interested in the history and development of the lawn mower can join.The aim of the club is to generate interest in old lawn mowers and enable members to contact each other and share their common interest. It is very informal. |
||
ACE [Eclipse] | A 1930s sidewheel mower made by the Eclipse Lawnmower Co. Similar to the "Lady". |
||
ACE [Ransomes] | A product of Ransomes, Sims & Jefferies this was a sidewheel mower made in the late 1930s. This was advertised as an "easy running machine for small lawns. cutting cylinder welded to ensure long service". It had ball bearings, of smaller size than in the more expensive Leo, and was really an updated version of the 'Cub', which had pain bearings. Made in three sizes it sold from 41/3d in 1939. The "Ace" was also available as a bank mower with a 75 inch pole handle. In the 1950s, after the alloy-framed 'Lioness', as ferrous metal supplies became less restricted, the Ace re-appeared as Ace Mark 2, with tubular steel handles similar to those on the 'Ripper'. |
||
ACME [American Die & Tool] | An early 20th century sidewheel mower with 11 inch drive wheels and roller bearings, made by the "American Die & Tool Co." of Reading, Pennsylvania, USA. |
||
ACME [Blair] | A late 19th century product of the Blair Mfg. Co., Springfield, Massachusetts, USA, this was a sidewheel machine with land wheels at the rear of the cutters. The 24 inch model had four such wheels and the smaller models three. |
||
Acre | Good evening. I was returning my mowers back into storage and in the corner of the garage was a sign I acquired quite a few years back, it’s a casting for a Suffolk Acre, circular in shape around 10 inches to a foot in diameter with 4 fixing threaded holes, now I’ve had it hanging on the wall for years, I always thought it was off a line marker but having bought two Suffolk line markers recently, I don’t think it’s from one, Google hasn’t really helped, it’s a wonderful ornament but I would like to know what the machine it came from looks like, anyone have any info I would greatly appreciate it. Thanks |
||
ACTO 1765 MADE BY CHARLES H PUGH - WHAT ENGINE? | Hi, My father has recently aquired what he believes is a ACTO 1765 (MADE BY CHARLES H PUGH). As he has recently retired he plans to restore the mower. Someone recently advised that the engine that was on the mower was not the correct one, however they did not know what the correct engine was. I was hoping someone here could advise on this. I have attched some pictures that will hopefully shed some light on the situation. Thank you for your time.
|
||
Acto 18" power propelled rotary. | <img src="/sites/default/files/memberuploads/user7668/IMAG0164.jpg" width="600" height="1067" alt="" /> Good evening all, I have recently bought this old lawnmower as I wanted a cheap petrol mower for my son as he refuses to use an electric mower in case he runs over the wire. Anyway when I went to look it over it started and ran just fine so I was very happy and took it home with me. Now as I'm a bit of a tinkerer I thought I'd check it over and I spotted a drop of fuel on the bottom of the carb so gave it a wiggle and jiggle then the little thing snapped off in my hand. I didn't get to upset as I was thinking it may need a new carb seeing as this 1 was leaking so I loaded up good old google to find my part and this is where it started and how I found you guys. Many many thanks, Sarah<img src="/sites/default/files/memberuploads/user7668/IMAG0151.jpg" width="600" height="1067" alt="" /> |
||
ACTO B14 Deluxe - clutch screw ? | Hi, I have a ACTO B14 Deluxe with the 98cc engine (I think), I am looking for the left-hand thread screw R361? as mine seem to be threadless Here a similar diagram showing the screw in question: Thanks in advance
|
||
Acto balmoral 17s | Hello I have a balmoral 17s which recently stop propelling The pulley moves backwards and forwards when push/pull the mower with the roller removed if you turn the spindle I was expecting the roller to move around but it doesn't so I'm guessing it should and that probably some gear or cogs have worn inside also after removing the main roller I can't seem to see how to dismantle it fully any ideas ? I've ordered a new pinion however the old one looks ok |
||
Acto Grass box holder | Hi
I have a Atco Royale B24 mower and grass box, however I dont have the bar that holds the grass box in place, does ayon know where I could buy one or whether its possible to make one fron cooper tubing?, if so what would be the method to fix it to the mower, thank you
|
||
Addiction? Only gone and bought a super colt 25a! | Hi folks :)
Well.... without purposely searching eBay for a part for my 17" super punch I came across a suffolk super colt 25a not too far away from where I live and at a low price so decided to put a small bid in... to my surprise I won! Meaning I now have 3 suffolk engined machines in my shed, 2 varying degree of repair So.. picked it up having been sat in the previous owners garage for 5 years or more untouched. The owner said a relative had an interest in old lawnmowers and aside from the usual things ( fuel tap, pipe and cables) needing to be changed its quite a strong and good honest example I think. I changed the throttle cable, throttle arm, clutch cable, suppresor cap and spark plug. Went to change the oil and found no oil * good job I didn't try and run it haha*. So with fresh oil, fuel pipe and fuel tap... with a few slow pulls without the lead connected to introduce fuel to the engine... listening out for the note change, lead back on the plug and a steady pull had it running! Original plug and suppressor cap didn't show a spark however a quick change showed a healthy spark so the points were good as we're the coil :). I let it idle and run for a few minutes and listened for any noises but sounded good. I also checked both side cases, the chain is a little rusty but gave it a good spray with gt85 for now and then checked the belt and found it to be falling apart. I took the belt tensioner and pulleys off and cleaned the casing and the pin the tensioner rotates on ( split pin holds it in place) it appeared a little seized all screws and bolts etc cleaned threads and gt85 applied and carefully put back together. The belt was glued with epoxy as the v section had peeled away just for test purposes really. With it running and warmed up it needed a few little adjustments to the governor spring setup and an adjustment to the idle and now it seems pretty good. I did manage to cut the grass with it too well... up and down 4-5 times about 50ft in total before the rear lost drive.. belt gave up haha. So I need a new belt... where is the best place to buy one?. So with the belt removed, I decided to put it back together and set it running and carefully wash the dead grass and oil etc off it and it came up well.. although. The points got wet as it quickly died despite being carefully and checking I found no.spark from the plug so.. decided to leave it to dry out and hopefully it will fine tomorrow. I was really happy at finally having a classic lawnmower that actually manages to cut the grass.. something the super punch failed to do from the start The super colt is also a little bit more manageable in my size garden too and the noise isn't quite so loud I have found.. The condition between the super colt and the super punch is kind of obvious... the super punch should have been used for spares I think which could be the reason why it is a little more difficult to get running correctly and parts are that little harder or more expensive. Anyone have any pictures of their super colt:) anything I should know or have any words of wisdom?. I'll take some pictures tomorrow The best thing I found was.. I brought it home for just £20!
Thanks Rob |
||
Adding Comments | Adding comments to a discussion topic (also called a thread) is very easy. Once you are logged on find the forum, topic and message where you want to add a comment. Click on the Add New Comment link which will be at the bottom of the panel on the right hand side. A new page will open where you must enter a title. Type your message into the "body" section and then click on the save button at the bottom of the screen. Your message will then appear in the forum you have chosen. |
||
Adding Images | You can add a small image to any entry in the Directory. This is a new feature that was not possible with the old version of the booklet. Images can be added when you create or edit a Directory entry. In the section of the editing page below the Body box, look for the Picture section. Click on the Choose File button. Browse your own computer for any JPEG, GIF or PNG format image to upload. Ideally you should select JPEG (or JPG) images. When you have found the image you want to upload click on the Open or Select buttons on the file browsing panel (specific terms will vary depending on your browser). Click on the Upload button next to the Choose File button. The image will be uploaded to a special directory on the website. You do not need to choose a location. The system is set up to limit the size of the image file to 800 x 600 pixels. If the image you have chosen is too large the system will tell you and/or will automatically reduce it to a suitable size. You do not need to change any settings. After the upload is complete the image will appear in the editing window. You must click on the Save button at the bottom of the screen to ensure the image is saved with the page or entry. You do not need to add an image to an entry. Any images that are uploaded will be visible to web visitors and will also print out with the paper version of the book.
|
||
Adding Images: Already Uploaded - Browse Server Insert | This tutorial explains how to insert an image that is already uploaded to the Club website.This might occur when:
We'll assume you are already in the editing panel to start a new topic or reply to an existing post.You can enter some text into the panel to start your post (but this is not essential).Click on the Image icon (it's mountains with the sun or moon above) in the row of icons just above the editing screen - below where it says Body (summary).The Image Properties dialogue box will appear.Click on the Browse Server button.The File Browser dialogue box will open.Towards the left hand side you will see a small navigation structure showing the memberuploads directory and, underneath, a directory with a name similar to userXXXX where XXXX is a unique number that corresponds to your personal account identity on the website. Click on that directory name.Assuming you have previously uploaded some files to the website, you will see a list of those to the right hand side of the dialogue box. If you have not uploaded any images yet this area will be empty.Click on the image you want to use.A preview of the image will appear at the bottom of the dialogue box.You can insert the image into your post in three different ways:
The Image Properties dialogue box will appear.Click OK.Your image will appear in the post.To change the size of the image, right click on the image and select Image Properties from the pop-up list.The Image Properties dialogue box will appear.Change the Width or Height of the image to resize it.You can also change other settings for the image in the Image Properties dialogue box but this is beyond the scope of this tutorial. Feel free to experiment.Repeat the process to add further images.Don't forget to save your post when you have finished. Your post and images will then be live on the Forum. |
||
Adding Images: Link Insert | One of the quickest ways to insert an image into your post is by linking to another picture on the web.Find the image you want to insert. For this tutorial we are using an image from the Club website but you can choose any image from any website.Right click on the image you want. In the pop-up box there will be a line that says something like Copy Image Address. Click on that line. This will automatically copy the web address (the URL) of the image into your clipboard.Go back to the Club website and open a new forum topic or reply to an existing post.This opens the editing panel.Click on the Image icon (it's mountains with the sun or moon above) in the row of icons just above the editing screen - below where it says Body (summary).The Image Properties dialogue box will appear.Paste the URL of the image into the URL box.You can also type the address of the image into this box instead.Click on any part of the dialogue box and a preview of the image will appear in the preview area. You do not need to do this specific step but it can be useful because it confirms that the image you want is accessible.Click on the OK button and the image will be inserted into your post.To change the size of the image, right click on the image and select Image Properties from the pop-up list.The Image Properties dialogue box will appear.The Image Properties dialogue box will appear.Change the Width or Height of the image to resize the image.You can also change other settings for the image in the Image Properties dialogue box but this is beyond the scope of this tutorial. Feel free to experiment.Repeat the process to add further images.Don't forget to save your post when you have finished. Your post and images will then be live on the Forum.Remember, when you use this method to insert an image you are only linking to an image in another location. You are not physically copying or uploading the image to the Club site. This means that the image will disappear if that other site is not working or if the image is deleted from that site. Nevertheless, this can be a useful way to include an image in your post or comment. |
||
Adding Images: Normal Insert | This short video explains the basics of how to add images to a forum posting using what shall call the Normal Insert method. Written instructions are included below.The following instructions take you through the same process step by step. On first reading it will appear laborious and long-winded but we have tried to give as much information as possible to make it simpler.We'll assume you are already in the editing panel to start a new topic or reply to an existing post.You can enter some text into the panel to start your post.Click on the Image icon (it's mountains with the sun or moon above) in the row of icons just above the editing screen (below where it says Body (summary)).The "Image Properties" dialogue box will appear.Click on the "Browse Server" button. This will open another dialogue box. Towards the left of this dialogue box you will see a small navigation structure showing the memberuploads directory and, underneath, a directory with a name similar to userXXXX where XXXX is a unique number that corresponds to your personal account identity on the website. Click on that directory name.If you have previously uploaded some files to the website you will see a list of those to the right hand side of the dialogue box. If you have not uploaded any images yet this area will be empty.Click on the Upload button towards the top left of the dialogue box.This will open a small dialogue box. Click on the Choose File button.Browse to the location on your PC, laptop, tablet etc where the image you want is located.Click on the Open button towards the bottom right of the dialogue box.The name of the image will now appear next to the Choose File button (red line, below).Click on the Upload button (blue line, below). This will upload the image to your userXXXX folder on the Club's website. This usually takes just a few seconds.When it's done, a short message will display and the name of the file will then appear on the right hand side of the current dialogue box. If you click on the name a small preview will appear underneath.Now click on the Insert File button (next to the green tick) at the top of the dialogue box. Alternatively, you can simply double click the name of the image you want. You can also double-click the preview image.This will bring you back to the Image Properties box.To insert the image into the post simply click the OK button at the bottom right of the dialogue. The image will now appear in your post.Repeat the process to add further images.To alter the size of the image before you click the OK button, change the Width or Height settings in the Image Properties dialogue box.To alter the size of the image after you have clicked the OK button, right click on the image and then choose Image Properties from the pop-up box. This will open the Image Properties dialogue again.You can also change other settings for the image in the Image Properties dialogue box but this is beyond the scope of this tutorial. Feel free to experiment.Don't forget to save your post when you have finished. Your post and images will then be live on the Forum. |
||
Adding Images: Resize | When you add images using the Insert method, the size will depend on your choice in the Style dropdown selector in the File Information panel of the Add Images section. Various size options are available and you can experiment with them to get the best effect on your final page. However, there is another trick you can use, especially if you have uploaded a large image. On the Style dropdown, choose Original Image and insert it into the Body panel of the editing page as per the usual instructions. When the image appears in the Body panel of the editing page, click on it and then right click. This will open a small dialogue panel with Image Properties at the bottom. Click on Image Properties and find the Width box and the Height box in the dialogue panel. In the Width box, delete all numbers and replace them with 100% (as this is written). Delete any numbers in the Height box and leave it empty. Click on the OK button at the bottom of the Image Properties dialogue panel to close it. Complete your post or comment as normal and don't forget to click Save at the bottom of the Editing Window to publish it. Your images will now expand automatically to fill the maximum available space on the page but without spreading out over the rest of the screen. This is a good way to give other site users the best view of your images. |
||
Adding Images: Upload & Insert | This short video explains the basics of how to add images to a forum posting using the Upload and Insert method. Written instructions are included below.We'll assume you are already in the editing panel to start a new topic or reply to an existing post.You can enter some text into the panel to start your post.To add an images, scroll down the page until you get to the section marked Images (see below).Click on the button marked "Choose Files". This will allow you to choose an image stored on your own PC, laptop or tablet etc. Browse to find the image you want to upload. Once you have found it click on the Open or Insert button (depending on you OS and browser) in the file browser window. The Images section will now look like the panel below.Now click on the Upload button. This will transfer a copy of your image onto the server used by the Club website. You should see a small version of the image you have chosen (as below).Now decide on the size of image you want to insert. Click on the small black down arrow in the Style box. You will see a selection of preset sizes (below).You can choose any of these or simply leave the setting as Original Image.To insert the image into your post simply click on the Insert button. The image will be inserted into your post at the last position of the cursor.To make sure your post and images are saved, you must click on the Save button at the very bottom of the editing window.You can add as many images as you like in this way, there is no limit. However, each image must be no larger than 10Mb otherwise it will not upload.Don't forget to click the Save button at the bottom of the screen when you are ready to post to the forum. |
||
Adding Links | The system is set up to make it very easy to add links to other entries in the Directory. When creating a new entry or editing an existing page highlight the text to link to another page or entry. Click on the Link Button at the top of the text area. This is identified by the icon with the chain (usually on the right of the second row of icons). A pop-up box will appear. Select Internal Path in the Link Type box if it is not already visible. In the Link box simply start typing the name of the entry or page of the directory to which you want to link. After a second or two a list of possible pages will appear. This list is a filter of the titles of all pages currently in the Directory. The list only shows 10 possible entries. If the one you are looking for does not appear keep typing so that the list selects the one you want. You do not need to type the title from the start because the system will search for words in the whole title. For example, typing Sims will show all pages with Sims in the title even though this word does not appear at the beginning of the title. When the page or entry you want is visible click on that entry. Click OK at the bottom of the blue pop-up box. The link is created automatically and you are returned to the main Body editing page. Carry on adding or editing text as normal or click on the Save button at the bottom of the editing area. Note: It is also possible to add links to other pages on the site or to any other page on the web. However, the aim of the Directory is to be a self-contained document. Do not therefore create links to pages outside of the Directory. For this reason this guide does not explain how to do this. |
||
Adding New Content | The easiest way to add new content is to use the links in the Editor menu (left hand side of screen). Pages should only be added to the main section headings:
The Directory is organised with three main sections, as outlined above. Individual entries are included as sub pages to these main section headings. Add a Title for the page. Ideally this should be different from all other entries. Use the same format for titles as existing entries (eg correct use of capitals, short titles etc). Sometimes you might need to add a page with the same title as another entry. This would occur, for example, if a model had the same name as a mower from another manufacturer. In this case, add the name of the manufacturer (or some other unique identifier) in [square brackets] in the title. This will help readers (and editors) to identify different manufacturers and/or models in the listings. There are already some examples in the Directory. Use these as a guide of how to do it. Once you have added the title move to the Body section and type in the text for the entry. You can format the text using any of the buttons immediately above the Body box in the editing area. Do not add images into the Body area. When adding your text you can also create links to any other entry in the directory. You do not need to add links if you do not want. Links can be added later by editing the entry. After you have added the text and set any links, move to the section below the Body window. There is no need to change any settings here except in Publishing Options click on the box next to Publish. A tick should appear. You can also add an image to the entry if you want. See here for more details. After you have added all the information don't forget to click on the Save button at the bottom of the screen near to the middle. |
||
ADIE | Late 19th century makers of a lawn edger and "automatic shears" consisting of ratchet-driven shears attached to a small roller, the machine being pushed along by a pole handle. Registered office was at 13 Charterhouse Street, London. The price c1890 was 22/-d. |
||
Adjusting j.p minor cylinder advice And removal for sharpening | Everning all Just wondering if Anyone can tell me if when adjusting the mower cylinder should it make slight contact with the cutter blade on the bottom, also how do I remove the cylinder for sharpening? Thanks |
||
Adjusting mixture on TK FC-11E1A carb | Hi, I have a 1998 Atco Balmoral 17S, with a TK FC-11E1A carb (picture below). It's running a bit rich at the moment. Could anyone advise how to lean the mixture, please. Many thanks, Peter. |
||
Adjusting reel on Atco deluxe 14 | Hello, Now that my Atco 4 stroke 14" Deluxe is running I was trying to adjust the reel. The adjusting screw on the left (when looking from the front) seems to have a cam action i.e. it moves the bearing housing back and forth. Is this correct or is it just a bent screw? I don't see any hole to oil the bearings. Also if I want to backlap how is the reel turned? Thanks |
||
Adjusting the clutch on my D7 ATCO. | Hi all wonder if you can help . What is the correct way of adjusting the clutch on my mower , as the clutch is engaged , Even when it is meant to be out . I have a constant drive to the blades and roller , |
||
ADMIRAL | A 1990s product of ATCO, this was a 16 inch rotary mower with electric start. |
||
ADVANCE | A late-1940s American sidewheel mower made by the Eclipse Lawn Mower Co. This was available in 16 & 18 inch sizes and like other mowers from the same company had the Adams self-sharpening device. |
||
Advert Listings Added | We've added a new feature to include a selection of adverts on the site. This is not designed to replace the advert section in Grassbox and we will continue to publish details of mowers for sale there because that is where most members want to find them. In general, the mowers listed for sale on this site will be included when the person offering the mower cannot wait until the next Grassbox is published. |
||
Advert Submission Success | Thank you for submitting your advert. This will be included in the next edition of our Grassbox newsletter which will be sent out to all of our members at the end of October 2012. We will contact you if we need any additional information. |
||
Advert Submission Success | Thank you for submitting your advert. This will be included in the next edition of our quarterly Grassbox newsletter which will be sent out to all of our members during July 2022. We will contact you if we need any additional information. |
||
Advice | Hi All I remember reading in one of the early posts with regards to a 10 or 12 blade cylinder mower. Could someone enlighten me please, as i cannot find the post now lol. If i was to use a 10 or 12 cylinder mower does it give a better cut and what makes it so and what makes would you look for and why? My lawn is about 50 foot by 20 foot so not very big, but i would like to use a mower that gives the best regards Dave |
||
Advice | I have just picked up an old push mower which has a damaged wheel,is it worth looking out for another wheel,and is it worth restoring. |