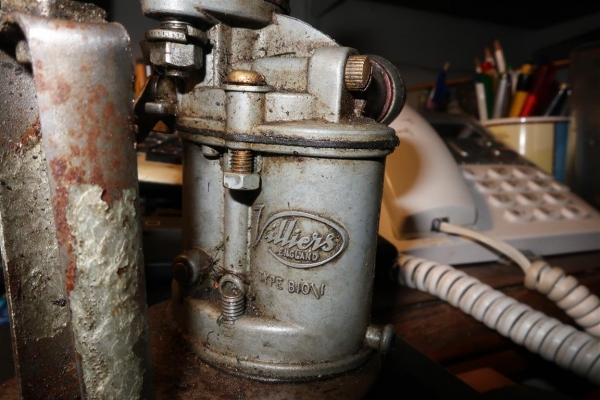
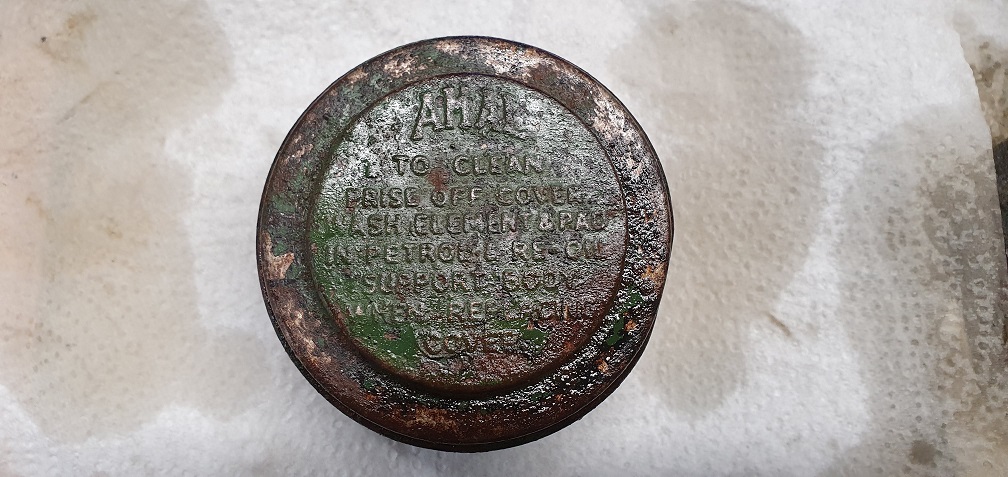
Amal 379 Carb leaking petrol / Overhaul
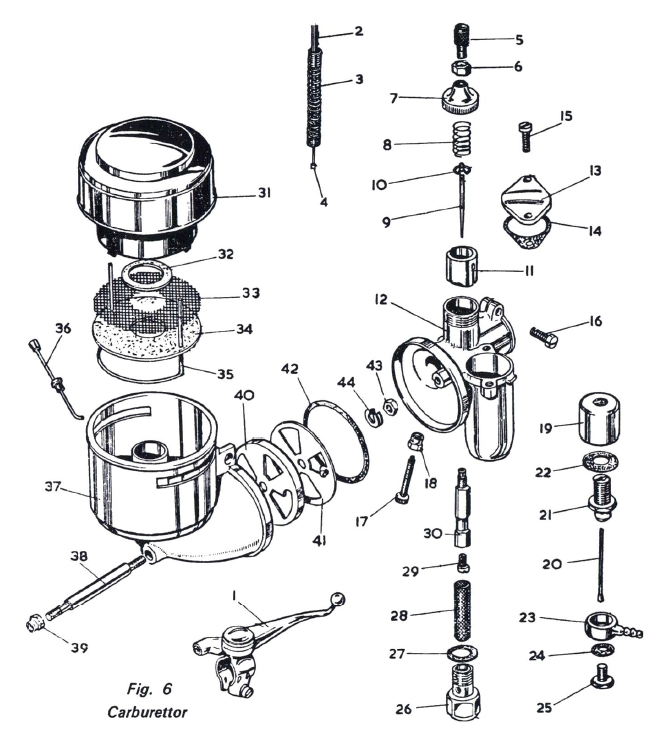
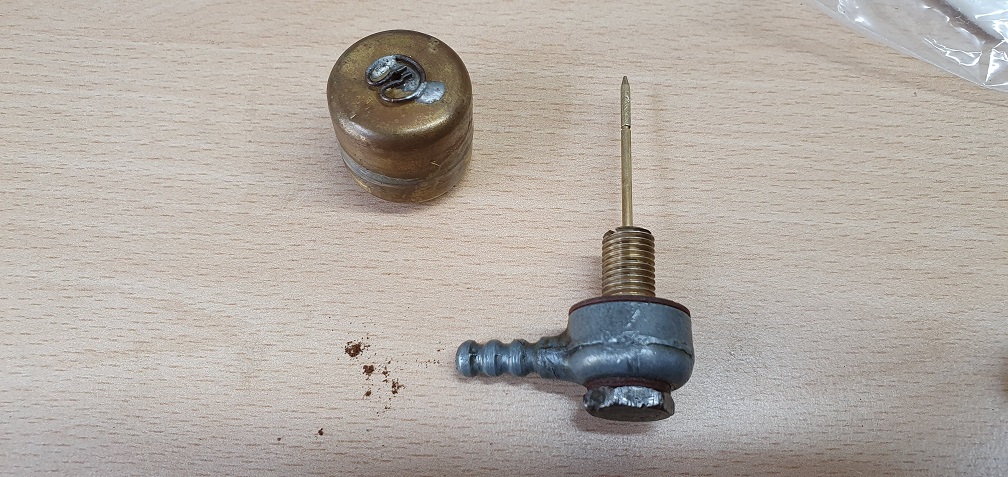
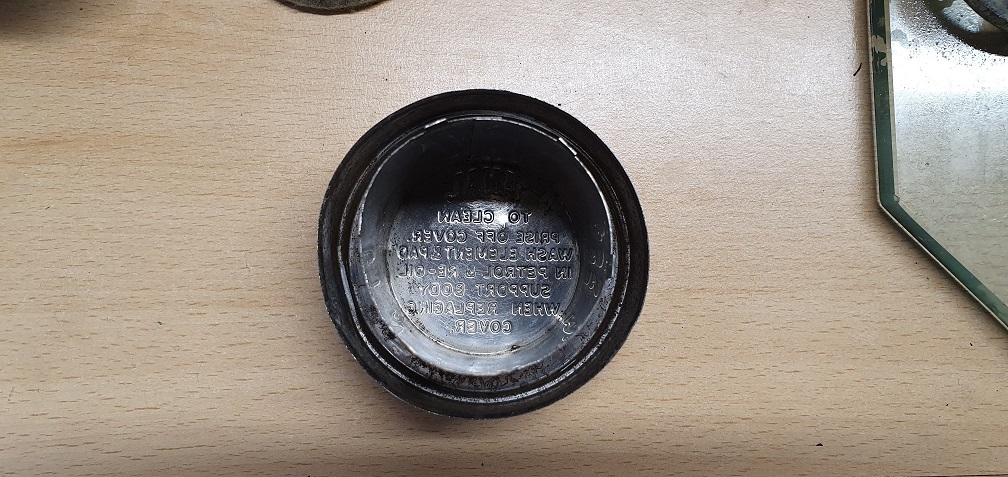
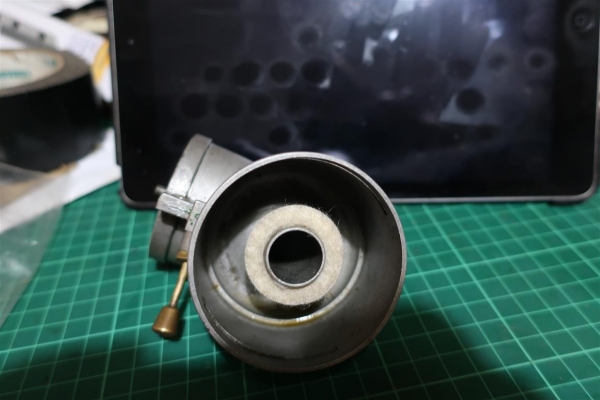
I have recently taken ownership of a Ransomes Marquis which has the F12 Sloper engine fitted. When running at idle, a lot of petrol is leaking from the carb. First thought is a sticking float, but are there any other possibilities before I get started? I'm planning on removing the carb for a complete strip and clean using the US tank. I've downloaded the F12 sloper engine manual from the site so I can see all the parts of the carb. Taking the float chamber cover off shows the following
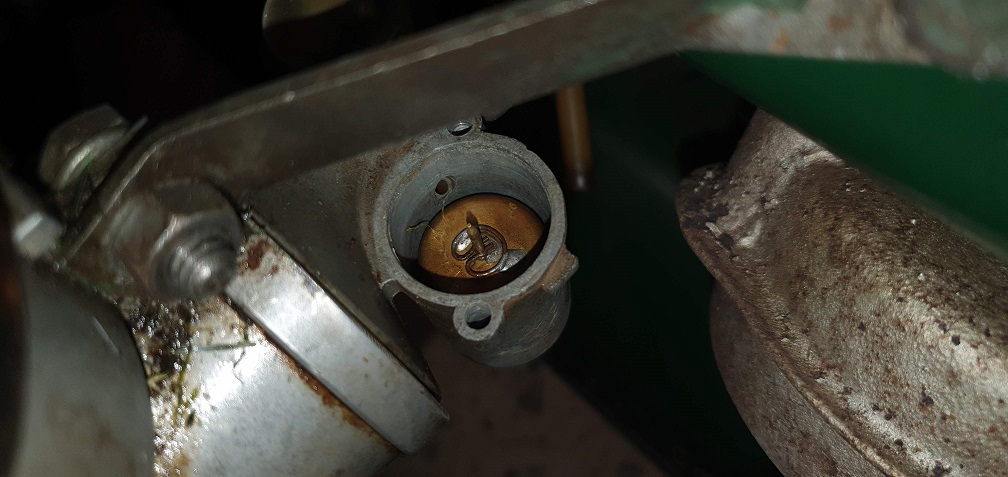
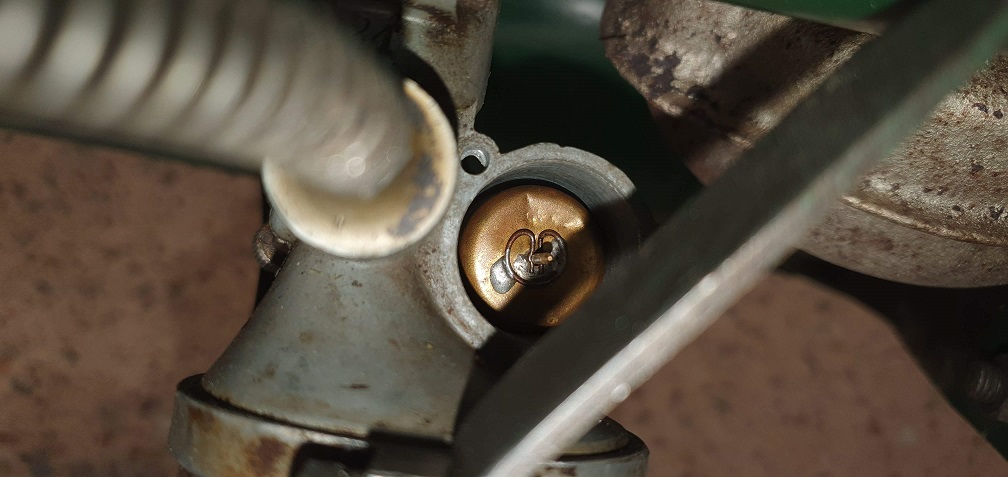
I have a feeling the solder may not be 'factory'?! If there is a clip which clips around the notch in the float needle, the only reason I can think that someone would have soldered the clip to the brass float, is to stop the float from being able to move/slide on the float needle, perhaps due to wear in the float body? I can't see the clip on the parts diagram for the carb though?
The dings in the top of the float would perhaps indicate that the float is sticking and someone has been striking the top of it previously to free it up?
Forums

As per Hortimech's advice but
As per Hortimech's advice but if cleaning without dismantling doesn't work , try this. Push down on the needle to disengage it from the clip on the float and catch it before it hits the floor. Carefully unscrew the needle seat using the correct size of spanner or socket. Its a thin brass hex and wont repay abuse!
Put a bit of metal polish such as Sovol Autosol or Brasso on the taper of the needle, enter the needle into the seat and with light upward pressure twiddle it between thumb and forefinger and lap it against the seat. Wash off every trace of polish from both the needle and seat and try again.
PS the soldered clip is perfectly normal - don't "overthink" these things!
Thanks very much Hortimech,
Thanks very much Hortimech, appreciate the explanation and reassuring the float is standard. After closer inspection I see the clip is part of the float and explains why it isn't shown on the parts diag.
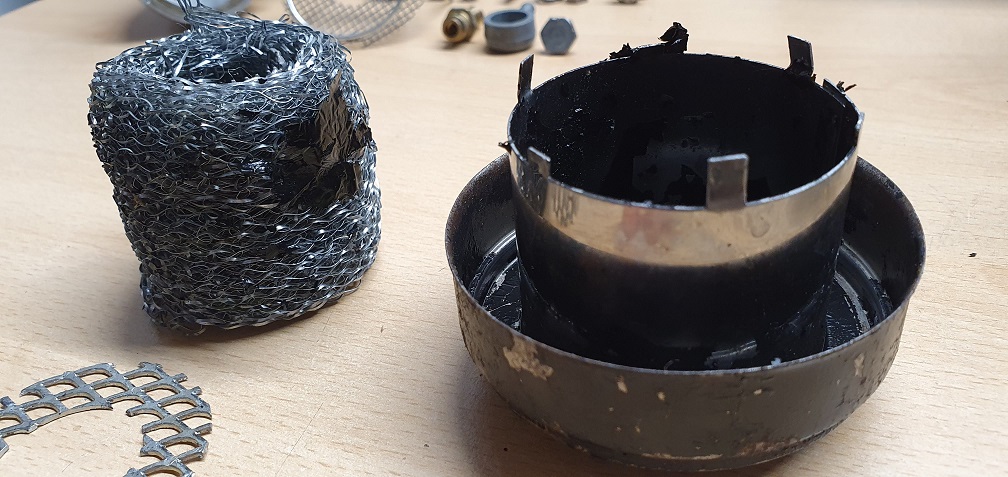
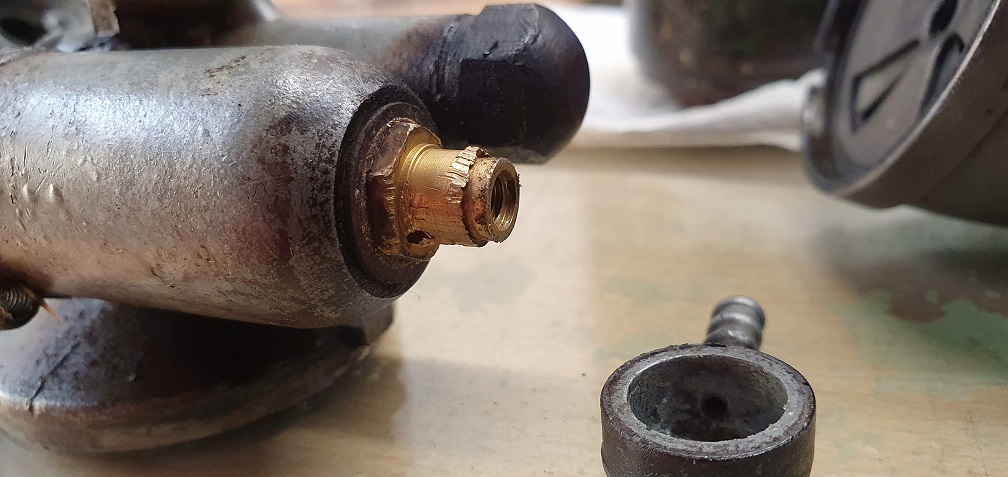
I've completely stripped down the carb, partly to understand the carb better, and also in preparation for a good clean in the tank
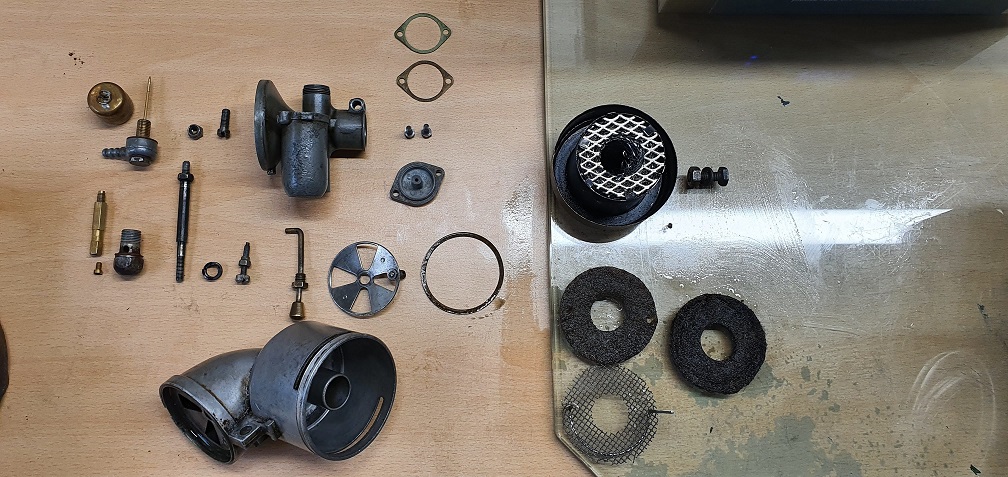
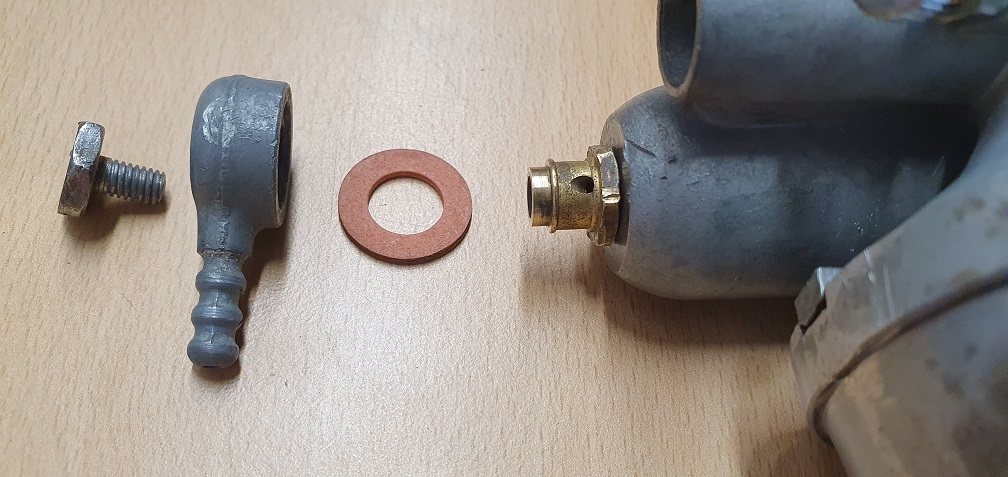
The fuel outlet/Banjo looks to be quite blocked, and just putting it on the workbench resulted in dried up debris coming out

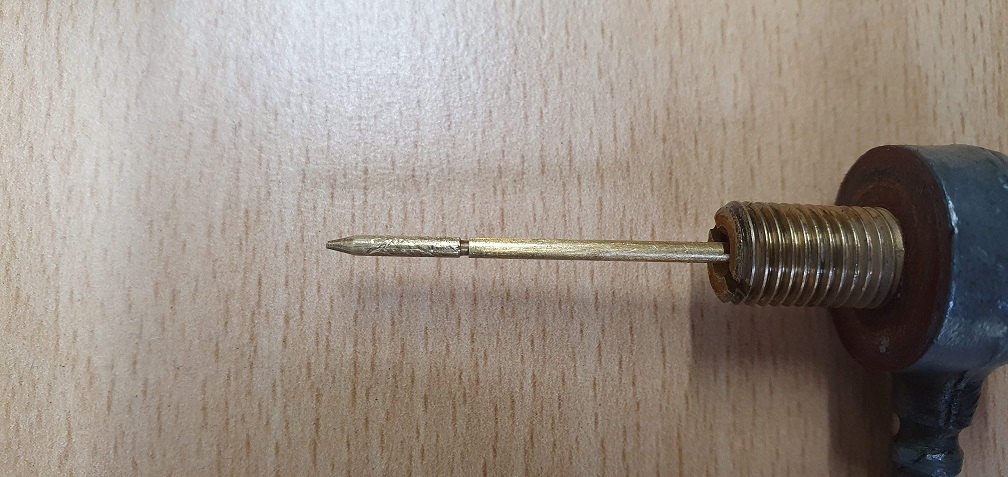
The float needle has a few marks and is blunt at the top end, but I assume this is irrelevant as the seating takes place at the other end which Hortimech explained
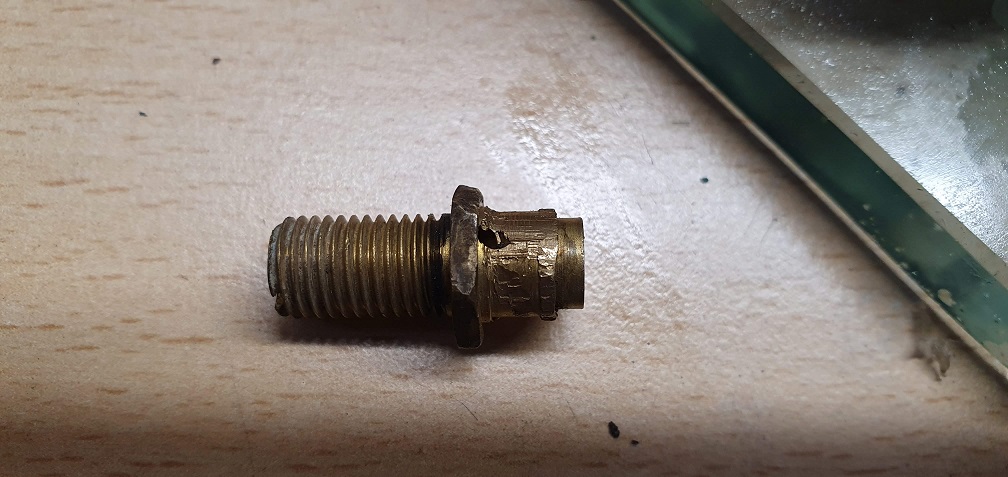
How is the needle seat removed from the banjo? Under the fibre washer on the banjo I can see a hex nut(?) which is part of the seat but turns with the banjo bolt?
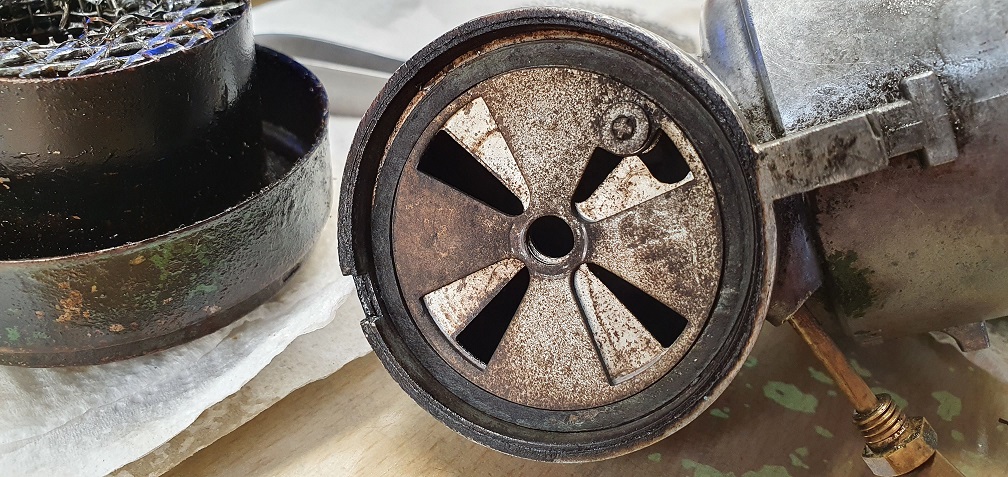
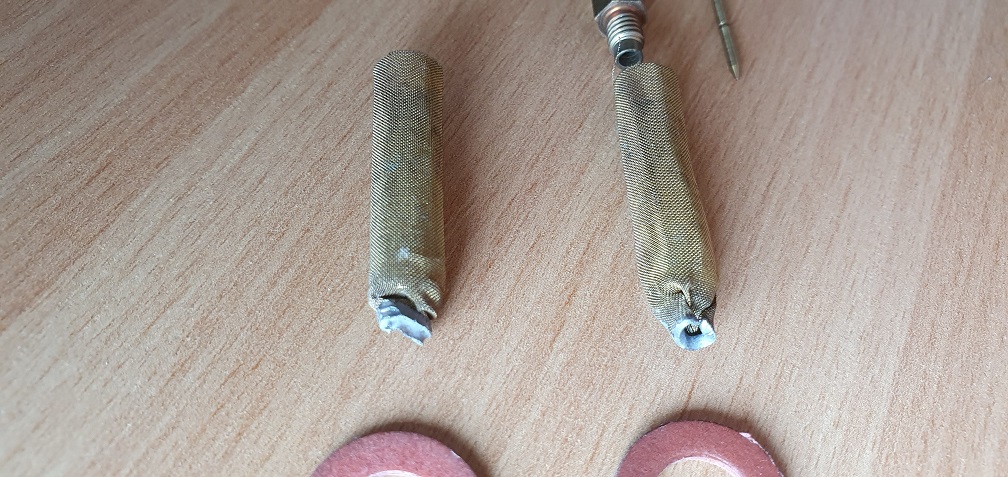
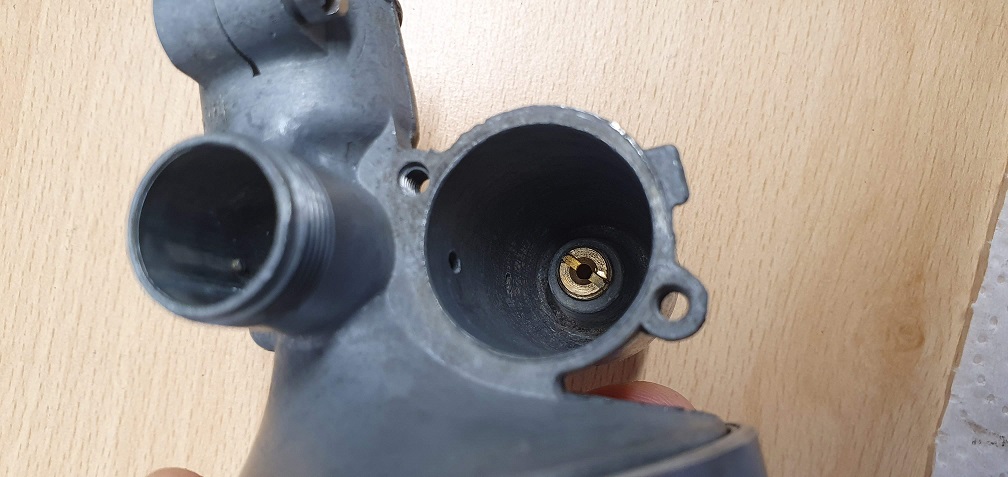
Part 28 - Filter - is missing - should that be present on this version of the carb which has the oil wetted gauze air filter?
Thanks Angus, you beat me to
Thanks Angus, you beat me to it before i could reply! I'm probably being a bit over cautious following so many things bodged on the last mower!
Pulling the needle up into its seat and gently twisting it around, it feels quite sticky/stiff, so I'll try as you suggest :)
Rats, I take it you tried to
Rats, I take it you tried to undo the bolt (part 25) and the seat unscrewed instead. Somehow you need to hold the seat without damaging the threads and then try to undo the bolt, perhaps find a couple of nuts and lock them together on the set threads ?
Exactly :( OK I'll see if I
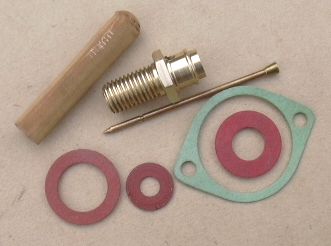
Exactly :( OK I'll see if I can carefully remove the seat if I can find 2 appropriate threaded nuts, although my imperial sized spares are pretty limited! I've found a picture of the seat, so at least I know what it looks like and what I'm trying to remove now - also the picture shows the fuel filter which sits above the jet plug, and as nearly all of the fibre washers have disintegrated, I'll probably need to get a carb overhaul kit to replace them and get the missing fuel filter too
Take care of that gauze
Take care of that gauze sleeve as the last time I ordered some, a couple of years ago , there were none to be had anywhere.
Thanks Angus - sorry which
Thanks Angus - sorry which part are you referring to?
Top left in your image of the
Top left in your image of the o/h kit. Perhaps it’s missing from your carb, they often are.
Ah yes I'm missing that one.
Ah yes I'm missing that one. I will check the carb on the other Marquis, which has no spark, and see if it has one that I can borrow!
Also, my carb has 2 gaskets
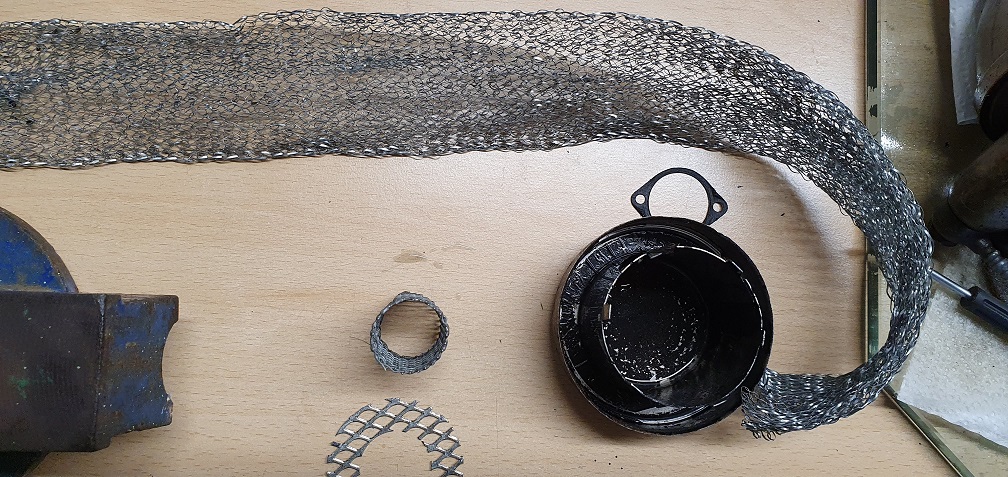
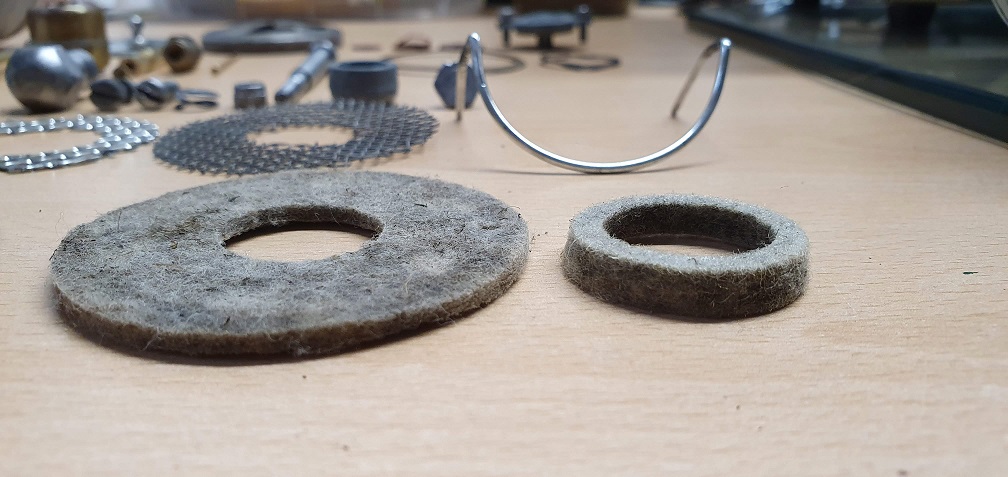
Also, my carb has 2 gaskets for the float chamber cover, as well as 2 oil soaked felt pads. There should only be one of each of these items shouldn't there? I can't see any benefit of having a second oil soaked felt pad sat in the base air filter body? Unless it should be there and the diagram just doesn't show it. It's identical to the one held between the metal gauze and the gauze extractor
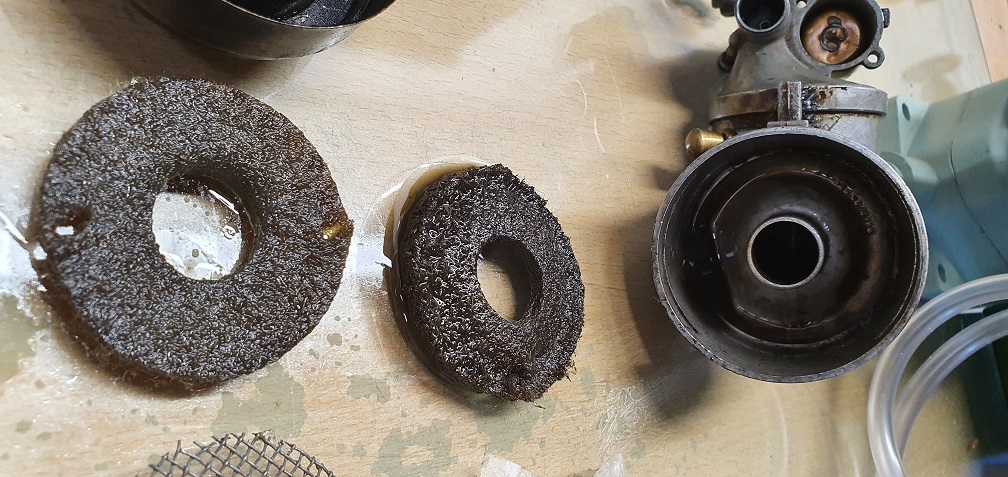
One Gauze and one matching
One Gauze and one matching felt but there should be a smaller felt ring. Perhaps your smaller felt was used instead.
https://www.dropbox.com/s/gp20v5w5nkh26h6/Amal%20379%20parts%20and%20ad…
Great, thanks Angus. I've
Great, thanks Angus. I've removed and opened up the other carb on the second mower and this one does indeed have the small felt washer
It also has the plastic version of the float
and much better condition screws which haven't been mauled with incorrect size screwdrivers over the years!
The right hand screw holding the float chamber cover on screws down all the way but then just turns and turns, meaning the cover isn't nipped up on one side - could be the reason for the second gasket, and a possible source of the fuel leak? Looks like the thread has been overtightened at some point and looks smooth near the bottom
The float chamber body on the second carb is fine and the screws tighten up properly, so I can certainly make one good carb between them. In order to fix this however, would I need to tap a new thread of larger diameter down through the hole? There's enough meat there to go larger, however I've not done this before. Would I try and source the closest size possible to the existing hole and then find a suitable length and diameter screw?
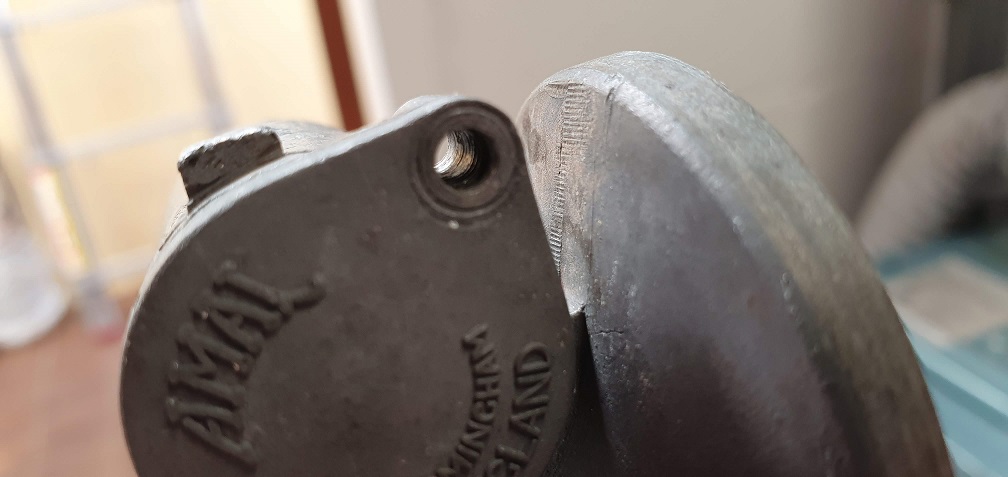
Carb lid. The original screws
Carb lid. The original screws are BA but You may find a metric screw that is just a bit bigger. Alternatively, I attach an image of quite a neat "get out of trouble job" that I found on a carb in a box of spares that came with a recently purchased Auto Certes with the later A10 Sloper..
Thanks for the info about the
Thanks for the info about the original screws being BA Angus, the thread would no doubt have stumped me. That's a good solution in the picture you've posted! Looking at my carb body it doesn't look like there's enough room to get a nut sadly
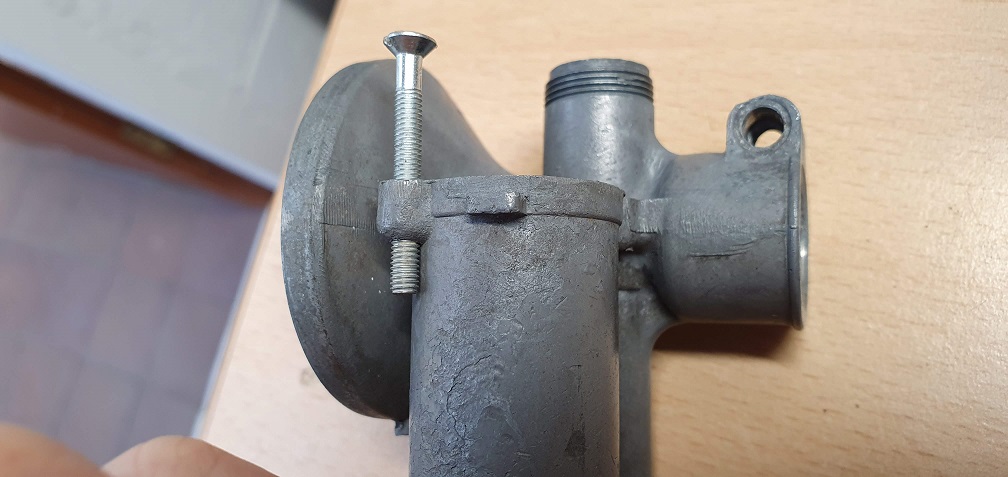
Thankfully the carb body on the second carb I have has the threads in tact for the cover, so I can use that body for what will be my working mower, and keep the other one for the project mower. I would like to fix this at some point, but it looks as if it may need tapped, but then any larger diameter will start to interfere with the wall of the carb body as the screws comes though the other side.
Could re-tapping the same size thread work, or would there not be the metal required to make that size thread anymore? Excuse the ignorance, I've never tackled thread tapping before....
Two options that may smack of
Two options that may smack of bodge but worth a shot.
1. Thoroughly degrease the stripped thread lug, fill the hole with JB weld or another brand of epoxy metal , drill and retap to original BA size . Just be very careful not to over tighten it in the future. It only has to keep the lid in place and with a bit of grease each side of the gasket , should keep the dirt out.
2. Find a nut to match your screw and trim it down just clear of the threaded hole or even just into the hole . Hold it, flat side against the wall of the float chamber and carefully do up the screw. Again, there should be enough grip to do what's needed.
Thanks Angus, I couldn't
Thanks Angus, I couldn't think of any options therefore the two you have suggested are very welcome! I can see what you mean about the slight whiff of bodge, but I think If I can sort it out using option 2 with the nut, if done neatly, it's the least invasive option. To be honest, if the cap is only really there to keep dirt out, and isn't expected to keep the flat chamber 'fuel tight' (there's an overflow hole anyway) then it would probably even suffice as it is, as the other screw tightens down nicely, and the screw in question screws down the whole way and only turns round and round at the very bottom. Nonetheless I'll see if I can sort it with a nut for peace of mind.
Opening up the second carb certainly was interesting - a glimpse into the abuse that these old mowers can suffer over the years in the wrong hands, or hands with the wrong tools..... A few pictures for anyone interested - I couldn't find any resources online to look at for these carbs in terms of stripping them for cleaning, so this may help others...
One air filter cap gone slightly out of round!
Showing how the choke works on this model - brass knob pulled out to close the airway off and pushed back in to open - picture shows midway point
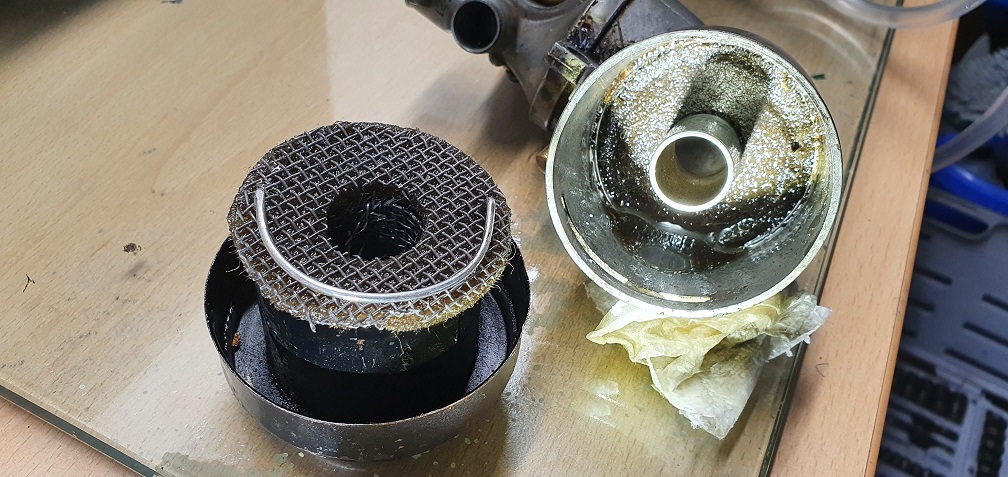
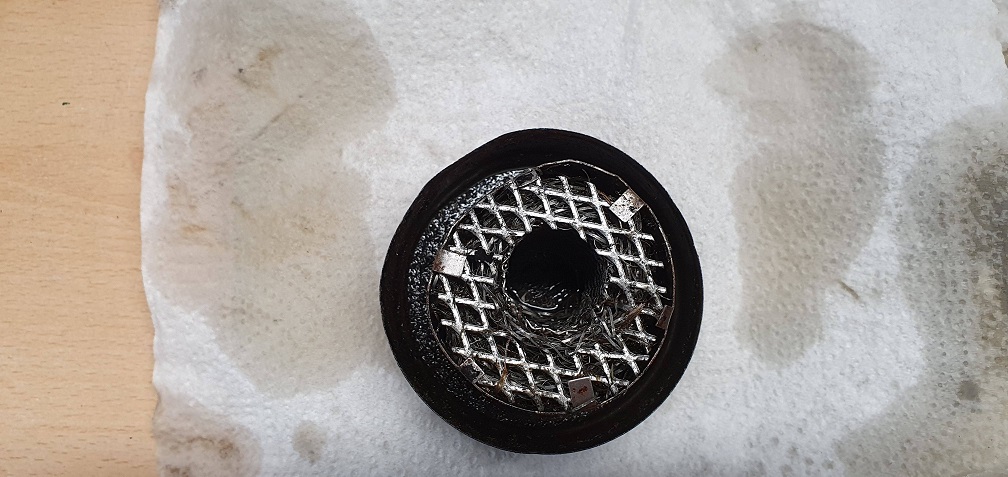
Not sure if these air filter caps were painted black on the inside from new, or a tidy up job by a previous owner, however the black paint was flaking badly inside the cap and the wire mesh air filter element was choked with black flakes
If you are still awake, things get a bit more interesting..
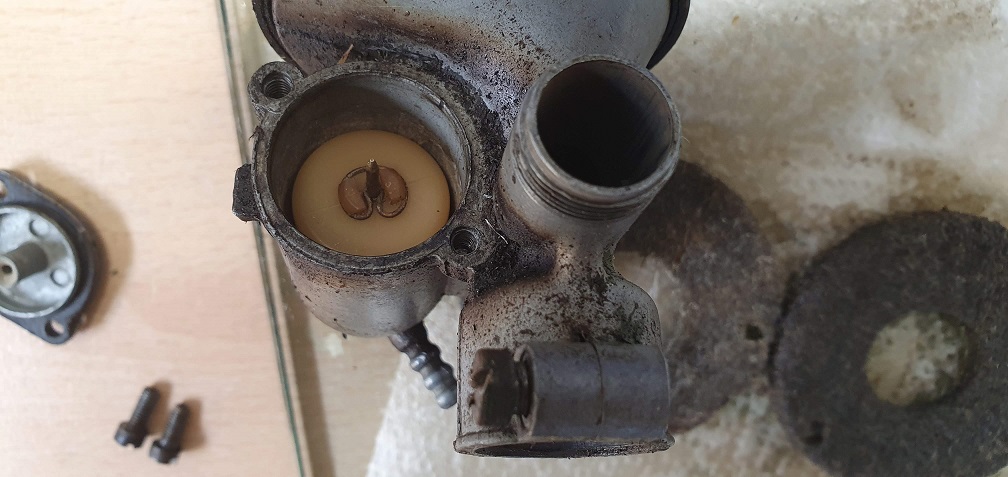
Needle seating absolutely mauled
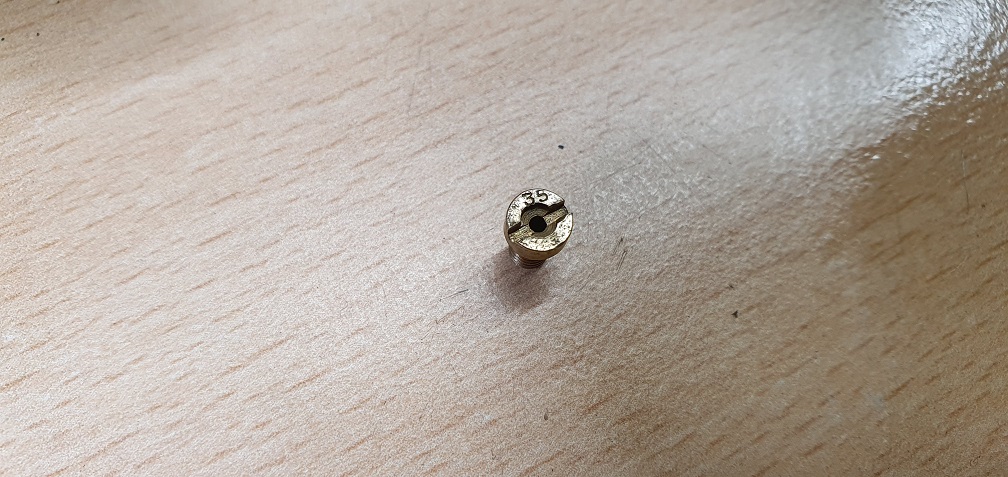
Needle jet not much better
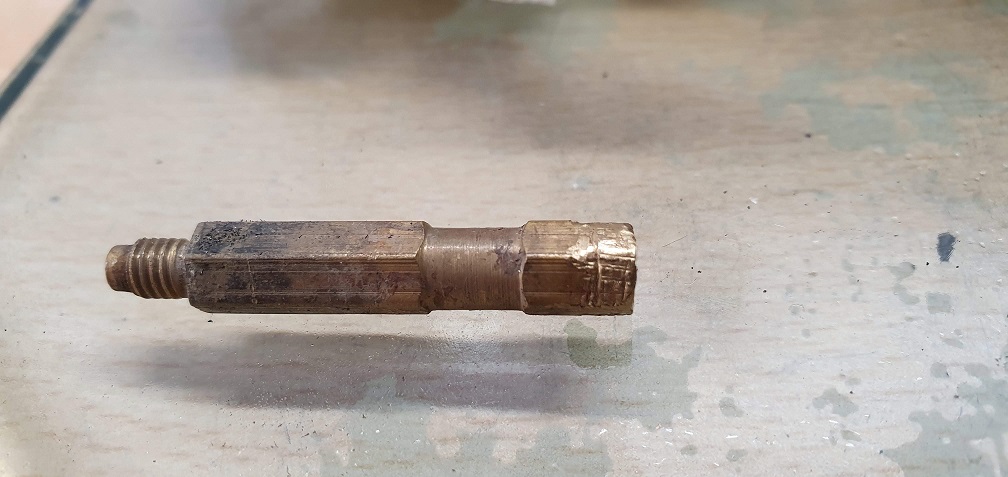
and the Main jet - so mauled you can't even see the flow rate engraving (35cc)
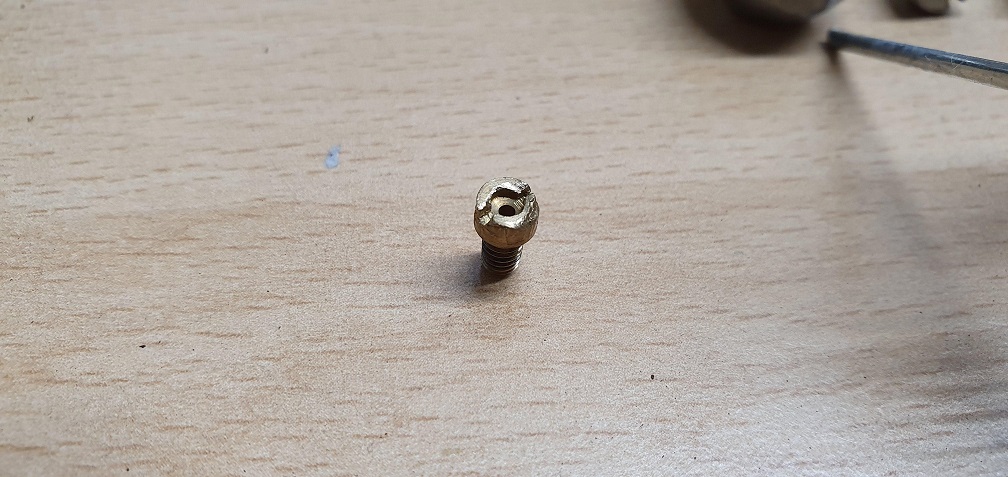
Here's how it should look, from the other carb I have
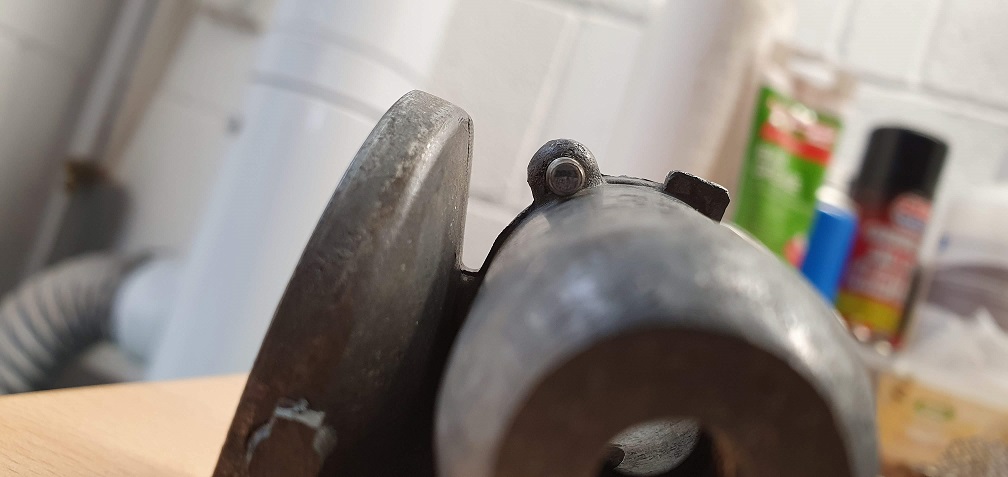
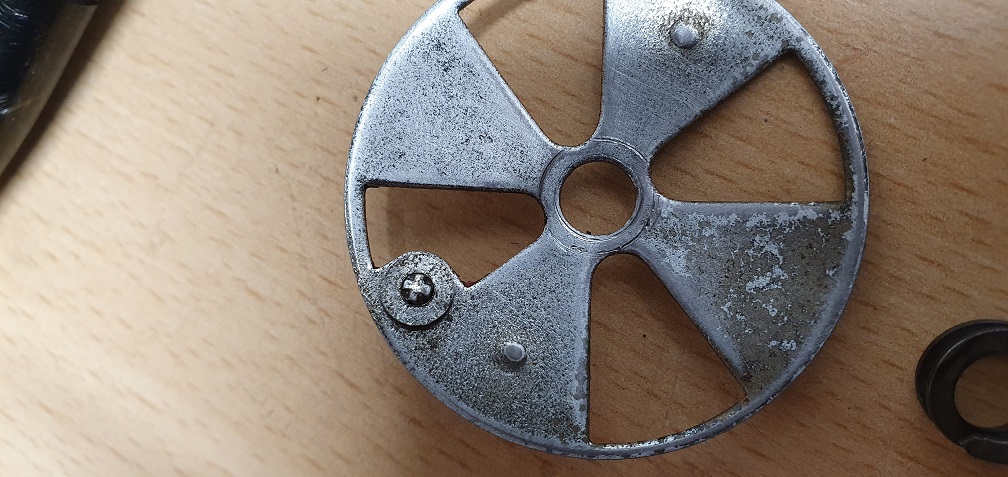
Interesting to see a slight difference between the 2 carb bodies regarding the 'key' for the throttle valve - unless the small brass item is an aftermarket modification?
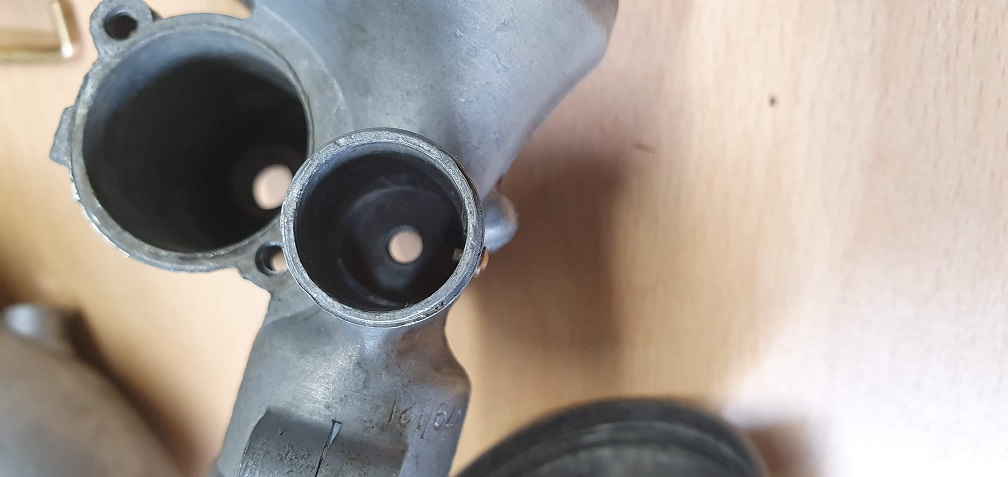

If it is a modification, it's certainly very neat indeed, and does the same job as the other one which has a key that runs down to the bottom of the chamber
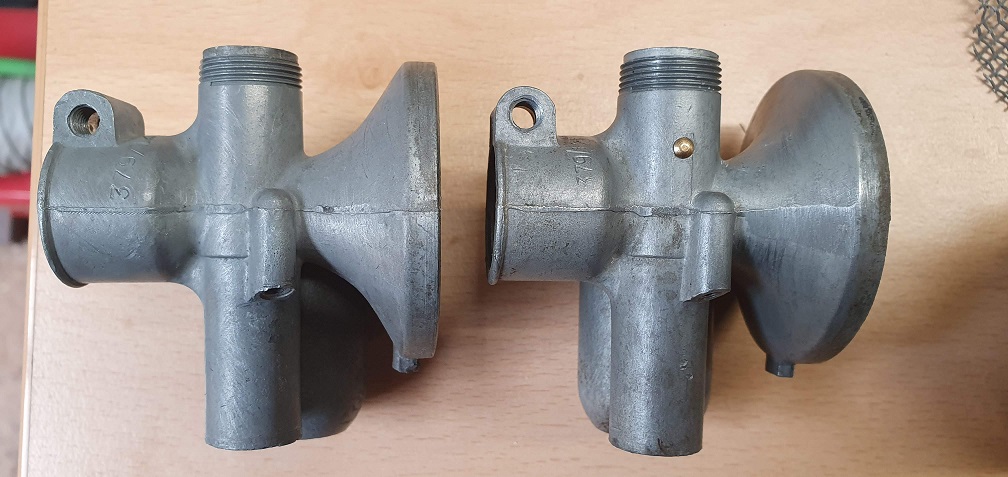
Other variations are left and
Other variations are left and right handed float chambers and different sized Venturi .
I never unravel the air cleaner mesh, just give them a good dunk in petrol.
With the mesh, it was the
With the mesh, it was the only way I could get all the flakes of paint out of it - from the ones you've dealt with, do you know if the black paint inside is standard? Is the brass 'pin' just a variation rather than a modification? Thanks for the info on the other differences!
I'm realising how few of
I'm realising how few of these carbs are kicking around as spares - certainly compared with the likes of the Zenith carb from the colt/punches! The few pictures I have found do all have weathered air filter caps, or have been painted black. The paint on the inside has certainly preserved the metal and it's nice and clean, so I think I will recoat in some suitable black paint before reassembly, and while I wait for the replacement parts to arrive. I should have 2 fully working and overhauled carbs after this. One doesn't have the bracket which holds the carb to the engine cowling but at least I have a template to make a replcement from.
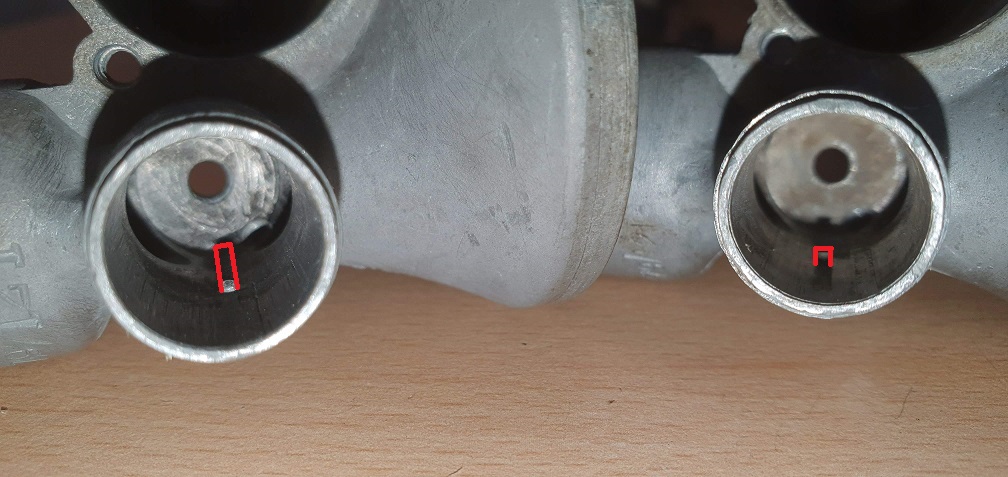
I don’t recollect ever seeing
I don’t recollect ever seeing that pin and neither of my two spare carb bodies nor three built up carbs on swap engines has one. If it was placed there as a substitute for the cast in key it raises the question of what happened to the key; was there a whole batch without them? Have either of your carbs got a number stamped into body just adjacent to the manifold pinch bolt; Such as 379/121? EDIT. Silly question , I can see that they both have but can’t read the complete number - both the same?
As you say, those carbs are getting a bit thin on the ground and the ones that appear on the auction site are creeping up in price . I’ve tended to buy when I’ve seen one even though not having an immediate need. In pre CV days the local once a month collective sale of horticultural machinery would often produce a Marquis complete with Sloper and carb for less than £20 and sometimes less than £10.
There certainly doesn't ever
There certainly doesn't ever appear to have been a key there, and I can't see any reason a hole would have been drilled right there and then filled with that little bronze plug, so it does look genuine and is exactly the correct width for the throttle valve keyway. It certainly does the job and locates the slide perfectly, so I would be surprised if there weren't a couple more out there somewhere with the same bronze key.
Both carbs have the identical number 379/121 stamped on them, although each in a slightly different 'font'.
Sounds like wise investments buying them when you've spotted them in the past. I must see if there are any local sales like that around here, for when we are eventually post-CV!!
Going to see if I can reproduce the small felt ring using my one as a template, so that I can fit the second carb with one, as they don't seem available to buy anywhere.
Managed to straighten/reshape
Managed to straighten/reshape the air filter cap
Small felt washer no longer produced
2 complete carbs, minus 1 x small felt washer and 2 x petrol filter gauzes - managed to find replacements so on order along with new fibre washers, needle seating, jets etc
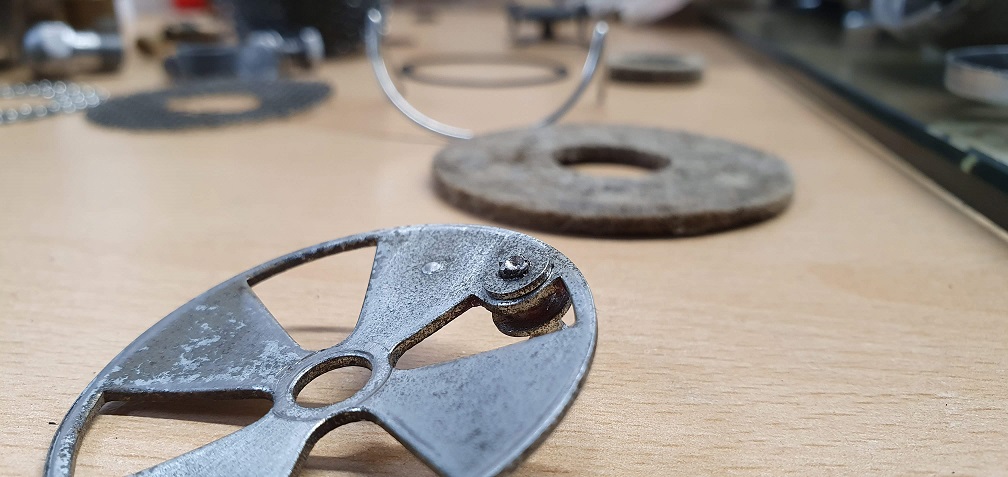
One question, and I'm sure this will be an easy one for those more mechanical/engineering minded, but there is a small washer that fits over the top of a cross shaped pin here, which holds and attaches the rotating choke pole
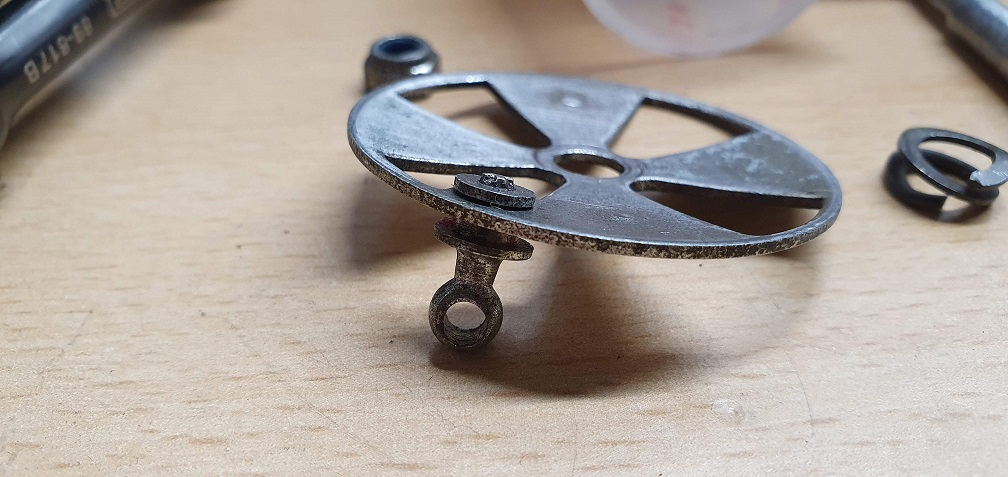
It seems to be a simple 'interference' type fit over the top, but it seems to gradually work itself off the top after a few push/pulls of the choke knob. What would be the best way of preventing this tiny washer from coming off, but still allowing the shaft it sits on to rotate?
The cross shape was to allow
GThe cross shape was to allow it to be spayed a bit during manufacture so that it was too big to pull out of the washer. The difficulty now is replicating that action without doing collateral damage to the eyelet on the other side. Do you have a spring loaded Centre Punch? You could try putting a close fitting nail or twist drill through the eyelet across the jaws of the vice then using the punch to “ fire” into the cross end to splay it a bit more. Alternatively degrease it thoroughly and try Araldite or JB Weld.
That smaller felt washer. I believe that in the past I’ve used a Ransomes one that did the job. I’ll have a look in the “stores”.
Edit. Nearly!
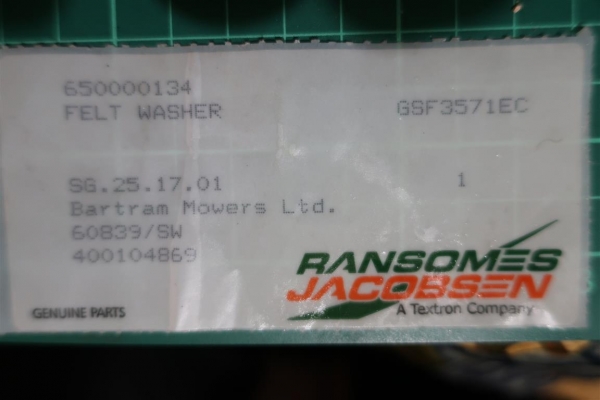
The number, top left, is current and supercedes the GSF number top right. Bartrams is now owned by Ernest Doe.
Very helpful as usual, thanks
Very helpful as usual, thanks very much! I don't have a spring loaded centre punch, but I think I may well have a try with a regular punch and possibly an extra pair of hands just to try splaying it ever so slightly - certainly doesn't need much to keep that washer in place. Failing that, a drop of JB Weld might well be the answer - although I did wonder about a couple small blobs of solder... Hopefully the punch will do the trick.
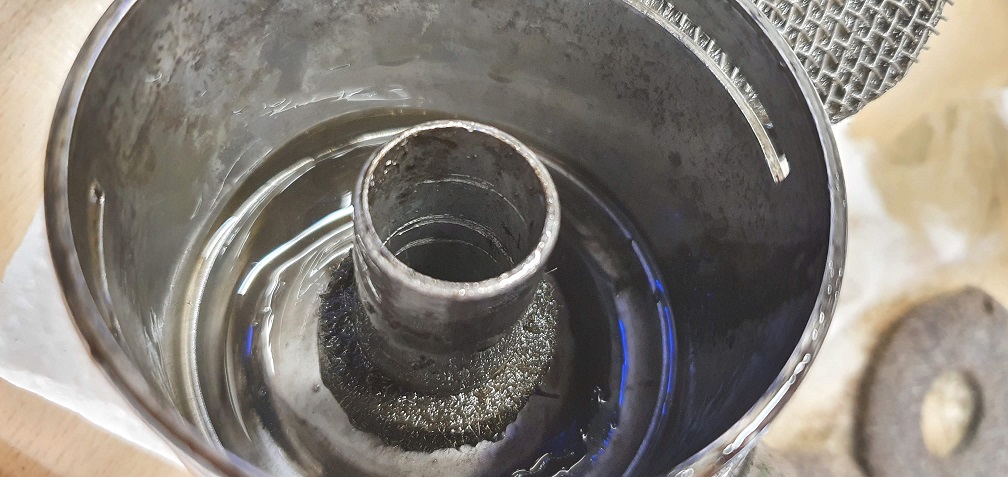
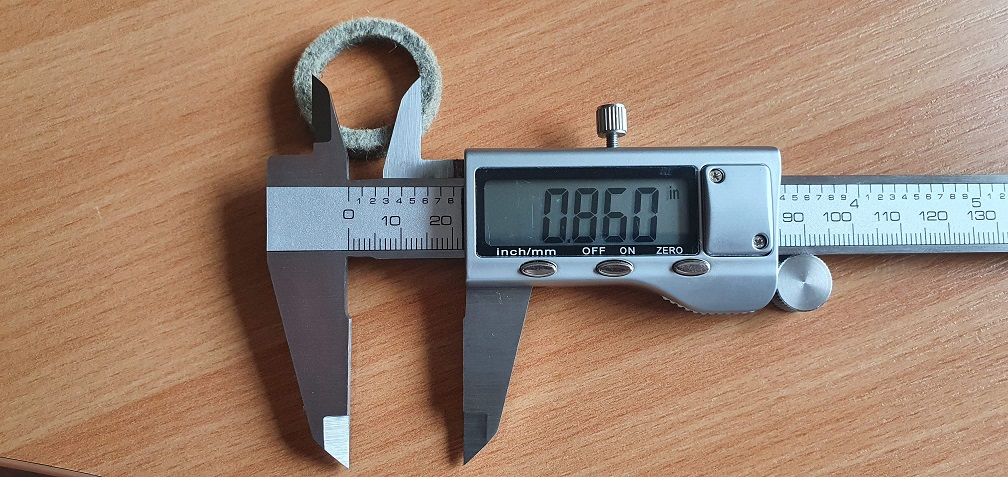
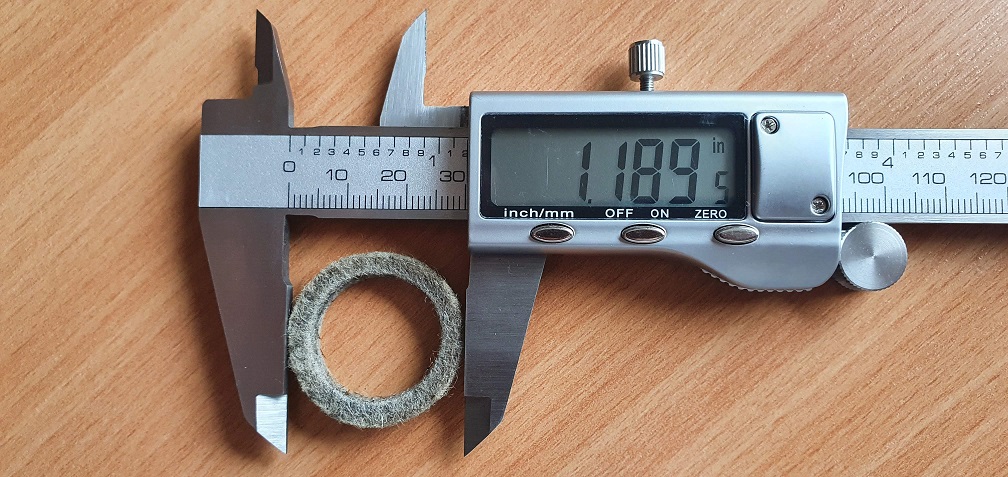
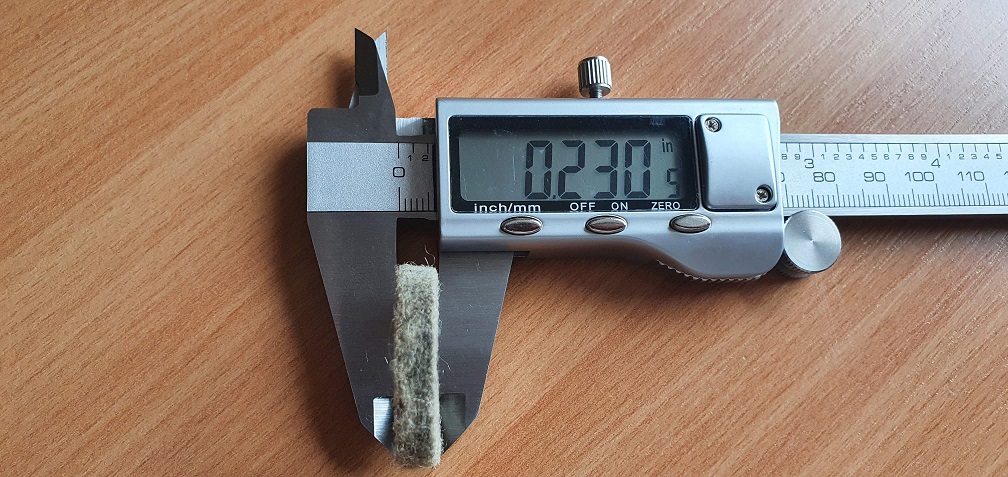
Thanks for the part numbers for the Ransomes felt washer. I've made some enquiries with Bartrams (Ernest Doe) so hopefully they can help. Failing that, and for anyones reference that may need to make the required washer from felt, a couple pictures showing the dimensions - as near as I can get while trying not to deform the felt. I did find another thread on here form a couple of years ago where someone was asking about these felt washers, and they mentioned about filling the air filter body with oil up to the level of this felt washer - is that correct? I know the larger felt pad has to be soaked in oil after cleaning with petrol, but the Villiers F12 operating manual I have read doesn't mention this?
I usually fill the empty body
I usually fill the empty body just up to the swage line below “Pull to choke”. When the engine is running it sucks the oil up into the mesh to trap dust .
If you can get hold of one of these manuals you will find it very useful.
Thanks Angus. I'll keep an
Thanks Angus. I'll keep an eye out for one of those manuals as no doubt I'll come across more questions as I start fixing up the 2 mowers.
The centre punch option done the trick :) Splayed the top just enough and now the washer is held firmly in place and the eyelet and shaft can still rotate freely
Does nobody read this website
Does nobody read this website ? ;-)
https://www.oldlawnmowerclub.co.uk/sites/default/files/opmanual/Villier…
Clearly ;) As I've already
Clearly ;) As I've already said that I have that document!! It's the maintenance manual as per Wristpin's picture that I am talking about...
A few new parts to replace
A few new parts to replace the mauled and missing pieces...
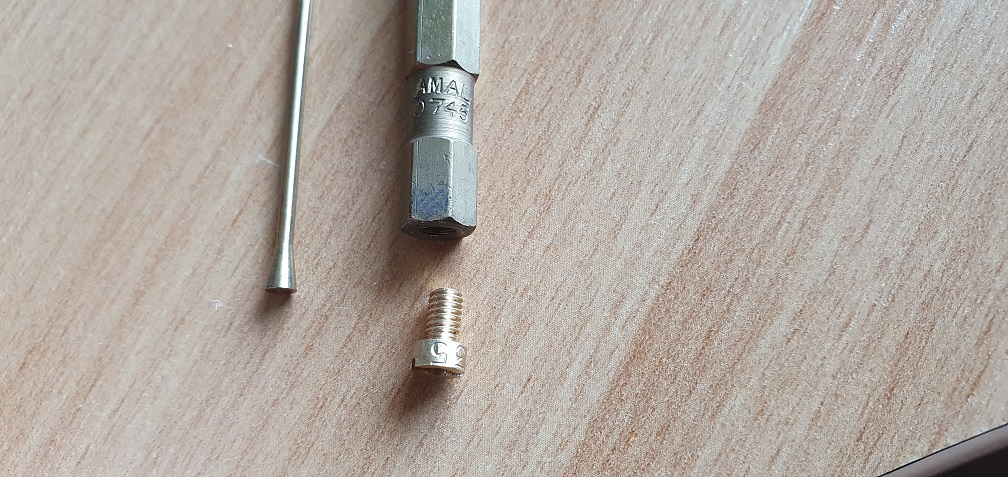
Is the needle seating supposed to be tightened up into the float chamber casing, before then fitting the fuel banjo around it and then finally the banjo bolt tightened up? Curious as to why there is a slot in the top of the needle seating?
Tighten it up onto its fibre
Tighten it up onto its fibre washer using a proper fitting spanner or socket onto the hex so as not to maul the corners as per the previous owner. When next trawling an auto jumble keep a look out for any grey Melco tube sockets. Many will have been abused but you may find a good one or two that fit those Amal jets.
Thanks Angus, will keep an
Thanks Angus, will keep an eye out for those tube sockets - although the deep 1/4" socket I have managed to do a good job snugging up the jet. Just leaving tightening up the banjo bolt fully until once the carb is back on the engine so I can line up the outlet to the hose. Hopefully sourced a felt washer from Ransomes with the help of that picture you posted.
Looking at the parts diagram the felt washer sits up inside the the air filter lid, rather than down in the oil bath as I found it - is that correct?
From the bottom up, big felt,
From the bottom up, big felt, gauze, smaller felt.
Looks standard to me, what
Looks standard to me, what you have to understand is that the float needle works the opposite to the carb on your Atco. The fuel shut off part is at the bottom of the needle, see items 20 & 21 on your parts list. Check the taper on the bottom of the needle for grooves and/or a corresponding groove in the seat (item 21), hopefully it is just a piece of grit, which you shouldn't get if the fuel tap is fitted with a filter.