Shay 4 in hand
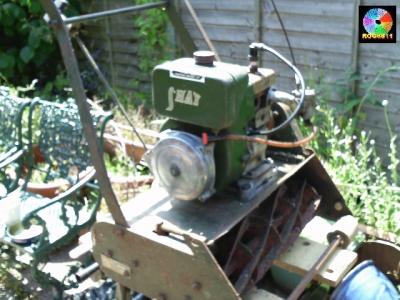
Hi Folks, I find that I cannot resist free engines, I was offered the above mower with its Villiers MK7. I took it on as the alternative was the local tip.
This is how I find myself here, signed up to yet another forum! The engine doesn't run as there is no spark. From everything I read the most likely culprit is the magneto coil, which is an EM-2612 batwing type. It has continuity on the secondary of around 3Kohms which I believe is a bit low. I have found replacements for around £50 but to be honest I am not prepared to pay out that much for an engine that may still be a scrapper.
I have found the cheepo coils on ebay and wondered if anyone had tried to rebuild bat wing coils with one.
My thinking goes thus-ly:-
- build a jig in two parts that bolt together with shoulder bolts/dowels to bolt the coil to.
- drill out the iron rivets that locate the coil armature
- split the jig, splitting the coil from the laminated wings at the same time (I hope)
- push together with new coil
- re-machine rivet holes in the armatures, re-rivet or screw together
Does the above sound feasable?
Forums
Most forums seem to like
Most forums seem to like pictures of projects so here goes.
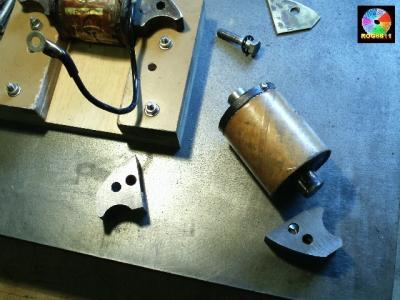
I had a closer look at the existing coil and realised that the laminations go right through the coil so the design is completely wrong for modifying. I decided instead to start from scratch. The first thing was materials, an old grey iron slideway would give me the bits I required.
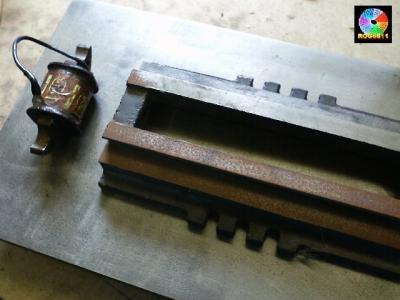
The end was cut off
The part has a couple of tapped holes that will hopefully be used for grub screws to hold the replacement coil. Next the machining starts. Milling the sides parallel.
A template was made from brass the same size and shape as the wings on the existing coil.

Holes drilled and tapped to hold the template in place when shaping the blocks. these will be drilled out for the fixing screws when the time comes to fit it to the engine.
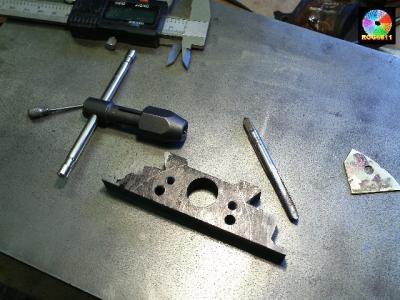
The curved area were roughed out by hand then it was onto the mill to get the shape a bit closer, the final shape was done by hand.
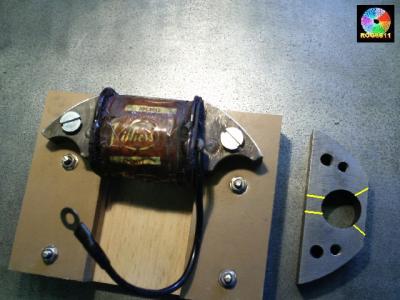
I have made an assembly jig that fits the existing coil, the iron block is finished but for the holes to insert the coil armature and separating (marked with Yellow lines) before final assembly.
The replacement coil is on order and as soon as it arrives I will get this under way again.

Shay 4 in hand
Hello and a belated wellcome to the OLC Forum, I think that the lack of respones to your original post could be due in part to the technical aspects of the subject. i.e most of us don't have an answer. Judging by the photos that you have posted you deserve success by virtue of the effort that you have made, only time will tell on that. Re the Shay mower I have found a copy of the operating instructions for the Four-in-Hand mower. It contains very little information relating to the engine but if you would like a copy let me know an email address and I can send you a copy. Ray.
Thanks for the response, I
Thanks for the response, I was wondering if degree of difficulty might be the reason for not getting any replies. I am about to udpate my build post with where I am now ![]()
Thanks for the offer of the manual, not too sure where I am going with this at the moment, I may be in touch again.
The next day
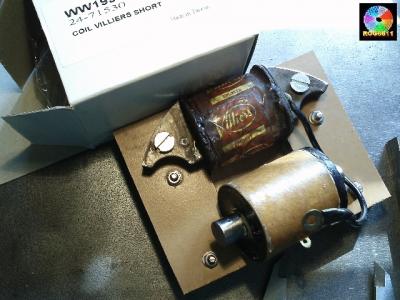
While I was out back in the workshop the postie was delivering a box containing a new coil, HT lead and supressor cap. so today I took the next steps.
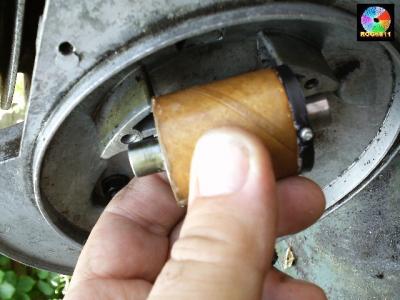
The coil was, as expected 2 mm longer than the existing one so I had to modify the jig and, to get it to fit the engine, 5 minutes with a scraper and a file had it fitting into the flywheel housing.

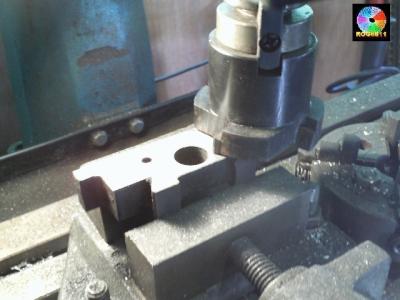
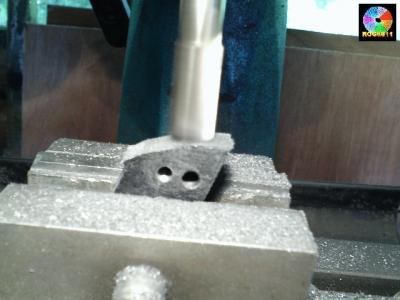
The iron end pieces (still in one piece) were set up in the mill and the holes were drilled to insert ends of the armature.
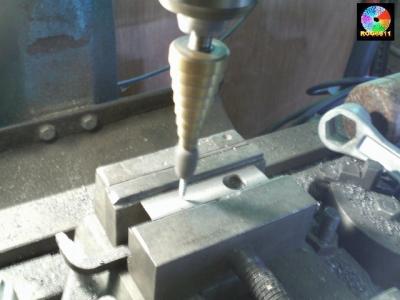
End pieces were than sawn apart ready for trial assembly.
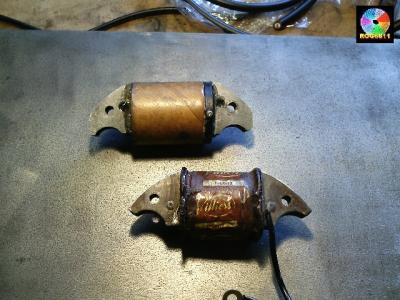
Once the fit was adjusted I mixed up some epoxy with iron dust (from machining) and stuck it together. Ground was checked to both coils with a meter and it was ready to go, here it is alongside the old one.
Time to fit, connect and test it on the motor!
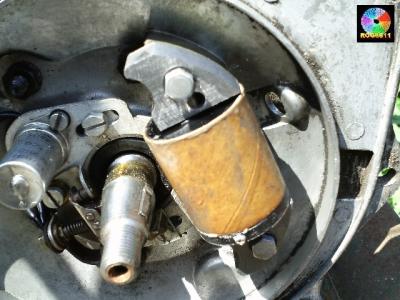
I put the flywheel on, spun without any scraping noises, and a spark was seen at the end of the HT lead. I then fully reassembled the engine.
I put a bit of fuel in the tank, tickled the carb and closed the choke.
First pull a couple of fires so off with the choke.
Next pull and it was running! As there is no exhaust fitted I turned it off after a few seconds but I think I can safely say that my efforts have been amply rewarded.
I hope these posts may be usefull to others in the future.
Regards rog8811
Shay 4 in hand
Well done, I would think that having cracked this little problem the rest of the mower should not give you too many problems. I have not heard of too many Shay cylinder mowers in the hands of collectors so yours is worth preserving, do you have the grass box for it?
What to do?
Hmmm, I took this on as I wanted the engine, I never intended to fix up the mower I am afraid ![]()
I would happily swap the mower with the engine still in place for a running engine of a similar type (doesn't need to be villiers) if someone wants it, I may still be able to get the grass box as well.
So if anyone wants to organise an exchange Please leave me a message. The mower is in Berkshire.
Regards rog
last chance
I am away until a week thursday, if I come back to a message offering a swap of some kind I will be very happy to go that route.
If I have no offers the motor's coming off and the rest will be scapped as it is the engine I need for another project.
coil rebuild
I think I will assume that no one who has read my post knows if I will be able to do what I am suggesting, I will let you know if it works.........