Suffolk A114 spruce up
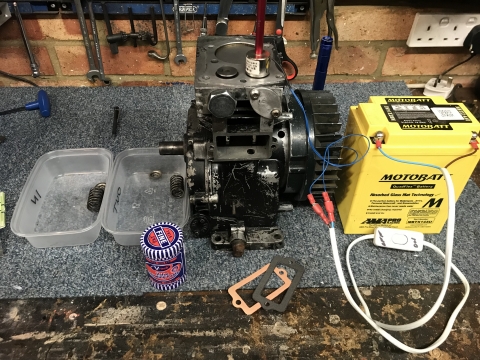
Stared a spruce up of an A114 Suffolk Punch engine.
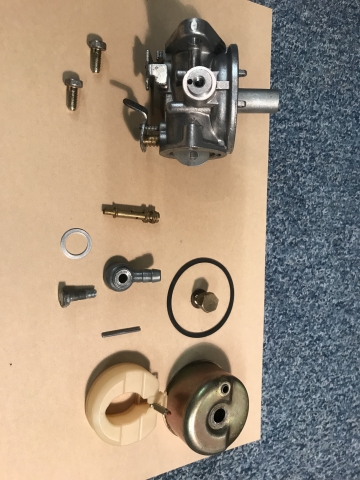
The whole carb including the float bowl had been painted in some black goo which mercifully came off with a nylon brush and thinners. Then a strip & thorough ultrasonic clean and airline.
Forums
Lapped the valves a bit which
Lapped the valves a bit which have come out ok and in spec.
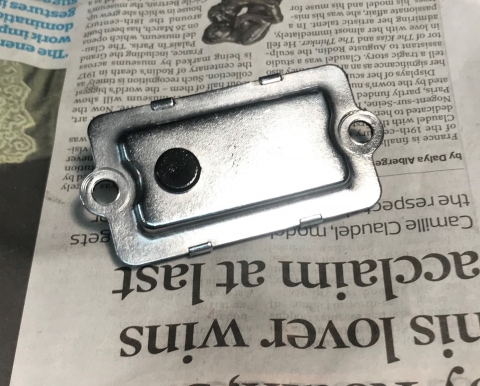
Valve cover was a rusty mess,
Valve cover was a rusty mess, so polished it up and finished wth engine lacquer - no I don't know why I bothered either :-)
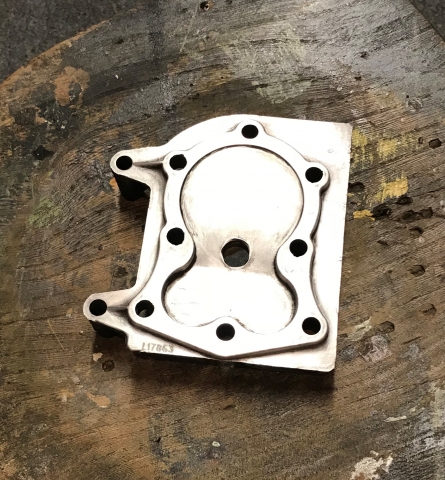
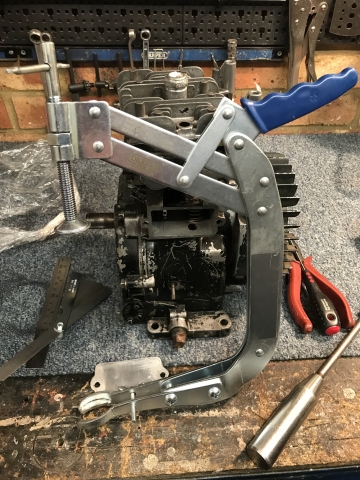
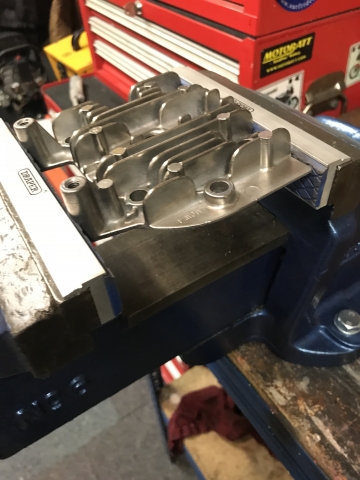
Moved onto the cylinder head
Moved onto the cylinder head cover now which also has heavy coked deposit, but my biggest issue has been removing the gasket, which did come off in one piece still attached to the head cover but will not come off no matter what I have tried so far, I have soaked the whole head cover is a bucket of diesel for 3 days and its zero difference. It is rock hard.
I have been able to take off tiny shavings with super judicious use of a v sharp wood chisel, but its taking ages and dangerous if I slip or dig through to the ali surface. I am currently boiling the head cover in a pan of water which has been on low simmer for an hour or so and will see if that has made any effect. I have a new gasket and note they are thick (2mm)
I've never come across a gasket this stuck solid. Any other tips?

Loctite (I think) used to do
Loctite (I think) used to do an aerosol of gasket remover which was reasonably effective but I've also heard of people using Poly something wall paper releaser.
Roloc disks are pretty effective but can be a bit harsh and I did read somewhere to be aware that they leave abrasive residue.
https://www.zoro.co.uk/shop/abrasives/surface-conditioning-products/153…;
Good tips and have got me
Good tips and have got me thinking.. the Roloc disks are a good idea, I usually use scotch bright by hand but will have to get some of those for general buffing. Even hand held scotch bright pads leave residue fibres, its how you clean up which is important.
I stated looking just now at the active ingredients of gasket and paper strippers like Locktight and it appears at 50% mix with water that vinegar and or fabric softener are erstwhile replacements.
I really want to give this a crack tomorrow as am away all next week, other wise I would have ordered the locktight aerosol which has decent reviews. Will report back on the effectiveness of vinegar / fabric softener which isi supposed to break down the bonds. The simmering pan has had a marked effect also btw and it is starting to soften, never known a gasket like it, I think the diesel soak was counter productive, too thick and sticky to penetrate.
Given my other half would be horrified if I was simmering a lawnmower head in the kitchen I am doing it in the workshop with a camping stove. My first uncontrolled fire in there ever which given gas / mig welding and other nonsense I get up to is amazing in it self. Did not close the valve properly on the butane bottle and by the time I hit the stove ignition there was a nice fire ball - had me running round putting things out for a bit :-)
Given my other half would be
Given my other half would be horrified if I was simmering a lawnmower head in the kitchen
Not in the dishwasher then?
Dishwasher? whats one of
Dishwasher? whats one of those haha - I'm lucky if the heating comes before Christmas let alone a dishwasher :-)
I don't know if the fabric softener and vinegar mix made a big difference but the cycles of simmering, plastic scraper and finishing with scotch bright got it all off eventually.
Next flat plate with 600,800,1200 +paraffin and I think that will do. Making a valve chest cover blank plate off next, then start thinking how I will strip the existing finish.
Got a lot to do before I put the motor together but I see the A98 head bolt torque figure is 17, seems high compared to the F15 but I guess the A114 is the same at 17?
I have had it with my
I have had it with my enormous draper valve spring compressor, just about managed the sloper valve refit with it, but its just way to big for mowers really and really struggling with these Suffolk valves.
Would appreciate recommendations on where to source an erstwhile / generalist mower type. Have seen this one below, seems pricey but do I just need to bte the bullet? or are there better cheaper sources?
Cheers Chris
https://www.ebay.co.uk/itm/Valve-Spring-Compressor-For-Briggs-Stratton-…
Hi Chris, I used this type on
Hi Chris, I used this type on my Marquis, mainly because I already had it, although the retainers were a slightly loose fit and the arms could do with being a little longer it did the trick. Could make an insert out of a washer. I’d have thought if you can make a flywheel puller you could make one of these.
Nick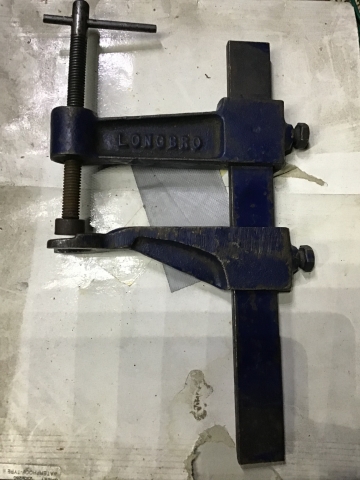

Try this as an alternative
Try this as an alternative supplier, definitely a more agreeable price.
I have used one for many years and if used correctly works fine, the build quality is good also.
http://www.briggsbits.co.uk/acatalog/19063-Valve-Spring-Compressor--787…
Hi Nick, I hadn't thought of
Hi Nick, I hadn't thought of making one, but you have me thinking...Like your Record looking Longbro!
Just my opinion, but the overhead clamp type are all well for compressing to remove, but not so workable when you want to present the compressed spring with cup / retainer / what have you back into the chest to put the pin or circlip onto the valve stem. I am going to modify / slim down the big draper for easier removal as it will work better for that, also the wing nut bolt is poor and to weedy so will tap a larger wing nut in that. I will get the model Hillsider has pointed out, I think those are much better at presenting the compressed setup into the chest.
Hillsider, many thanks for that, looks ideal and best price of any I have seen!
No problem for reference, it
No problem for reference, it is a Briggs and Stratton service tool that has been around for a long time so should be ok. The jaws on both arms are adjustable to help with supporting the springs and cups while installing them.
Regarding the cost my understanding is that official B&S dealers are required to follow the pricing structure set bŷ B&S so you should find the cost similar at other dealers, obviously not the case with some internet based suppliers.
Can I point out that by the
Can I point out that by the time you have adjusted whatever valve spring compressor you choose, you could have removed the valve using just two screwdrivers.
You are not wrong re using
You are not wrong re using two screwdrivers or even a suitably sized spanner, I have done the job that way many times when removing valves, but the compressor does seem to make reassembly easier/ safer.
Can I point out that by the
Can I point out that by the time you have adjusted whatever valve spring compressor you choose, you could have removed the valve using just two screwdrivers.
If I possessed 3 pairs of hands I'd be exploiting my dexterity in other ways :-)
Joking aside, I don't have an issue compressing the spring, its holding it there while fiddling around trying to fish the pin / circlip out or putting it back in..
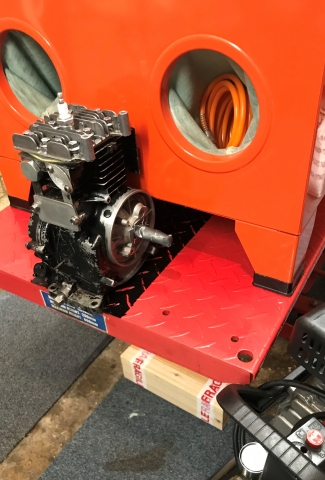
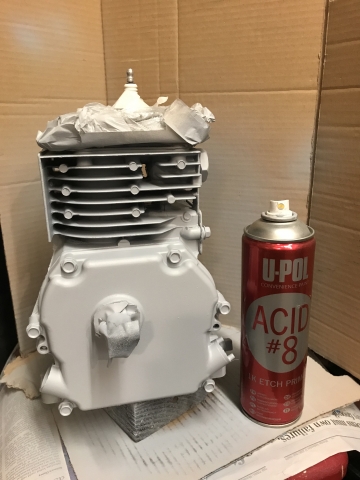
Blanked off / taped up - Have
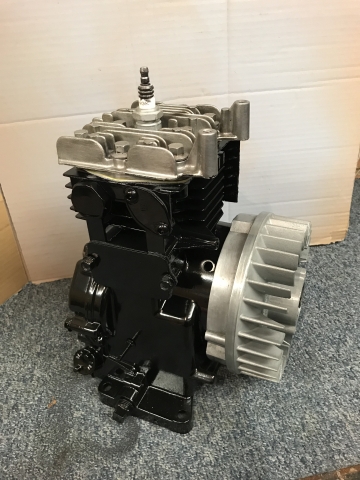
Blanked off / taped up - Have a pretty decent steam cleaner but was surprised how little of the gunge it removed from between the fins, blasted with 200-400 UM glass bead which got all the dirt off and virtually all the paint. Have air lined it hard but will steam clean and airline again to make sure all dust is removed.
The main block I am going to do in gloss black, the head top I will brass brush to make it shiney and clear engine lacquer so hopefully it won't oxidise.
I will admit it takes a
I will admit it takes a little bit of learning to get the hang of using the screwdrivers and, if a pin is involved, you might need a pair of long nose pliers.
Lets see if anybody can answer this, what engine requires a compressor to remove the valves ?
Hi, a bit pedantic maybe but
Hi, a bit pedantic maybe but do you mean air compressor or valve compressor?
I am guessing an air
I am guessing an air compressor, and I am already throwing in the towel :-)
L********r sleeve valve?
L********r sleeve valve?
Edit. Come to think about it, you may have something nearer to home in mind.
Can you get gloss high temp
Can you get gloss high temp paint? I can only find Matt black.
Gloss engine paint... I know
Gloss engine paint... I know everything there is to know :-)
Aerosols that is.. PJ1 used to be brilliant but pricey, it is now environmentally useless. Techcote is rubbish steer clear, there are others which are pretty crap too. Frosts restorations do some good stuff apparently but I have never used them and are also pricey. The best I have used over the last couple of years are VHT which did not have a good rep 4-5 years ago but are excellent now. VHT SP124 engine gloss enamel - and the best place to get it... Bedford :-) John Woolfe Racing, £7 a can
Hi Chris, jar are only 10
Hi Chris, jwr are only 10 mins away. £7/can. 400 or 500ml cans? Do you not have to etch ali? I think frosts import a lot from the states, as well as plants, although I suppose jwr do really.
Nick, indeed VHT comes from
Nick, indeed VHT comes from Ohio, about 312 a can, bit mingy but good coverage. Caswell was the brand from Frosts I was thinking of but never used it and V expensive from what I hear. I've had similar results with and with out etch prime but depends on the quality of the surface, have had good results with sand blasting bike cases which were good to start and not used etch, VHT don't stipulate its required either, but for the Suffolk I have. Fills a bit and leaves a good grab finish.
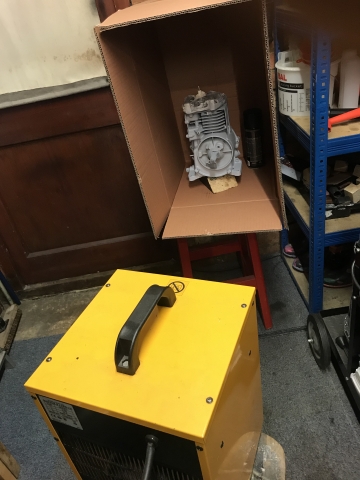
Once it gets the gloss it wil go in the oven at about 90c for 30/40 mins which will harden it all off.
Patent pending on my high tech spray booth, although I may loose in the courts I fear ..:-)
Nice booth but where’s the
Nice booth but where’s the extraction, proper daylight tubes,, heat and won’t the walls catch fire @ 90 deg? Is it on a rotary table coz you might struggle to get all the way round.
I thought etch had to be used on aluminium and then primed. Only going on car refinishing but principles surely the same and you can get a wet on wet primer, although that’s for two pack.
Inbetween the fins look like fun to get a decent finish on.
Yes, I did mean air
Yes, I did mean air compressor, sorry about that ;-)
It wasn't a common engine, but if you didn't have an air compressor and an adaptor to replace the sparkplug, you would never remove the cylinder head and you had to remove the valve springs before you could remove the cylinder head.
I will give you another 24hrs
This is rich in clues now,
This is rich in clues now, and I am still clueless .. I'm assuming its agricultural not old aviation motors?
How many more clues do we get in the next 24hous :-)
I can’t even find the answer
I can’t even find the answer by goggling.
OK, times up ;-)
OK, times up ;-)
It wasn't a common engine, in fact I only ever saw it in two machines, A very strange thing called an Argocat, a 6 wheeled floating ATV, and a version of the Toro Greensmaster 3.
It was a single cylinder OHV and to remove the cylinder head, you have to pressurise the cylinder to hold the valves closed, at this point you can remove the valve spring. This then allows you to remove the lower valve cover to reveal the hidden cylinder head bolt.
Of course, the problem was, if you couldn't get the valves to seat, it was nigh on impossible to remove the valve springs.
Oh and before I forget, it was an OH160 Tecumseh
Not what I expected!
Not what I expected!
I worked on both Argocats and the 8 wheeled Supercats in the early 80s but the only OH Tecumseh that I ever did serious work on was on an elderly three or maybe five gang Toro retired to a more leisurely existence in a large private garden where it had been run short of oil. I seem to remember that the units were lifted by winches and cables. It was a bit of a beast so it was left where it stopped and the engine removed to the workshop and this is where it gets interesting. I have no memory at all of encountering any difficulty in dismantling it and certainly none of having to resort to an air line to hold the valves up. However last paragraph on the attached page from the workshop manual ,3-C-2 does say that " it may be necessary to hold both valves etc etc" , and then goes on to say that "access can usually be gained through the exhaust and inlet manifold (ports?"
This makes me wonder whether the use of an air line was a locally developed trick either by the dealer or the then UK Tecumseh distributor to make life easier, particularly if the use of usually implied that there could be access issues if, for instance, the engine was still installed in the machine.
https://www.dropbox.com/s/6fv0ghbbqyvdftl/Tecumseh%20OH%20valve%20remov…;
I bet those tank type ATVs
I bet those tank type ATVs are a hoot
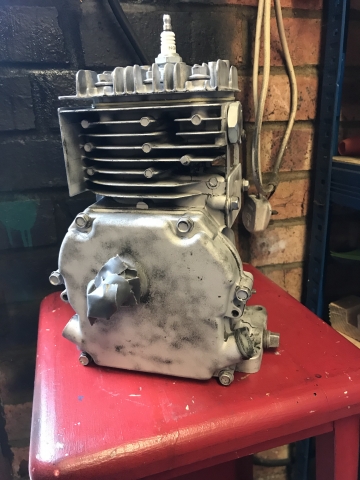
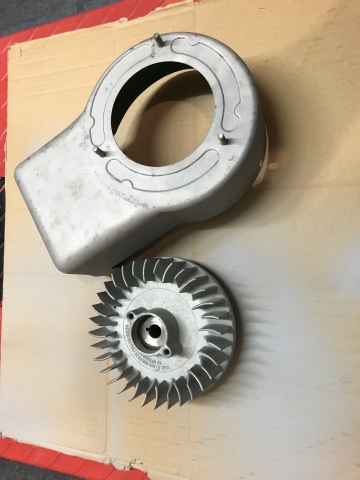
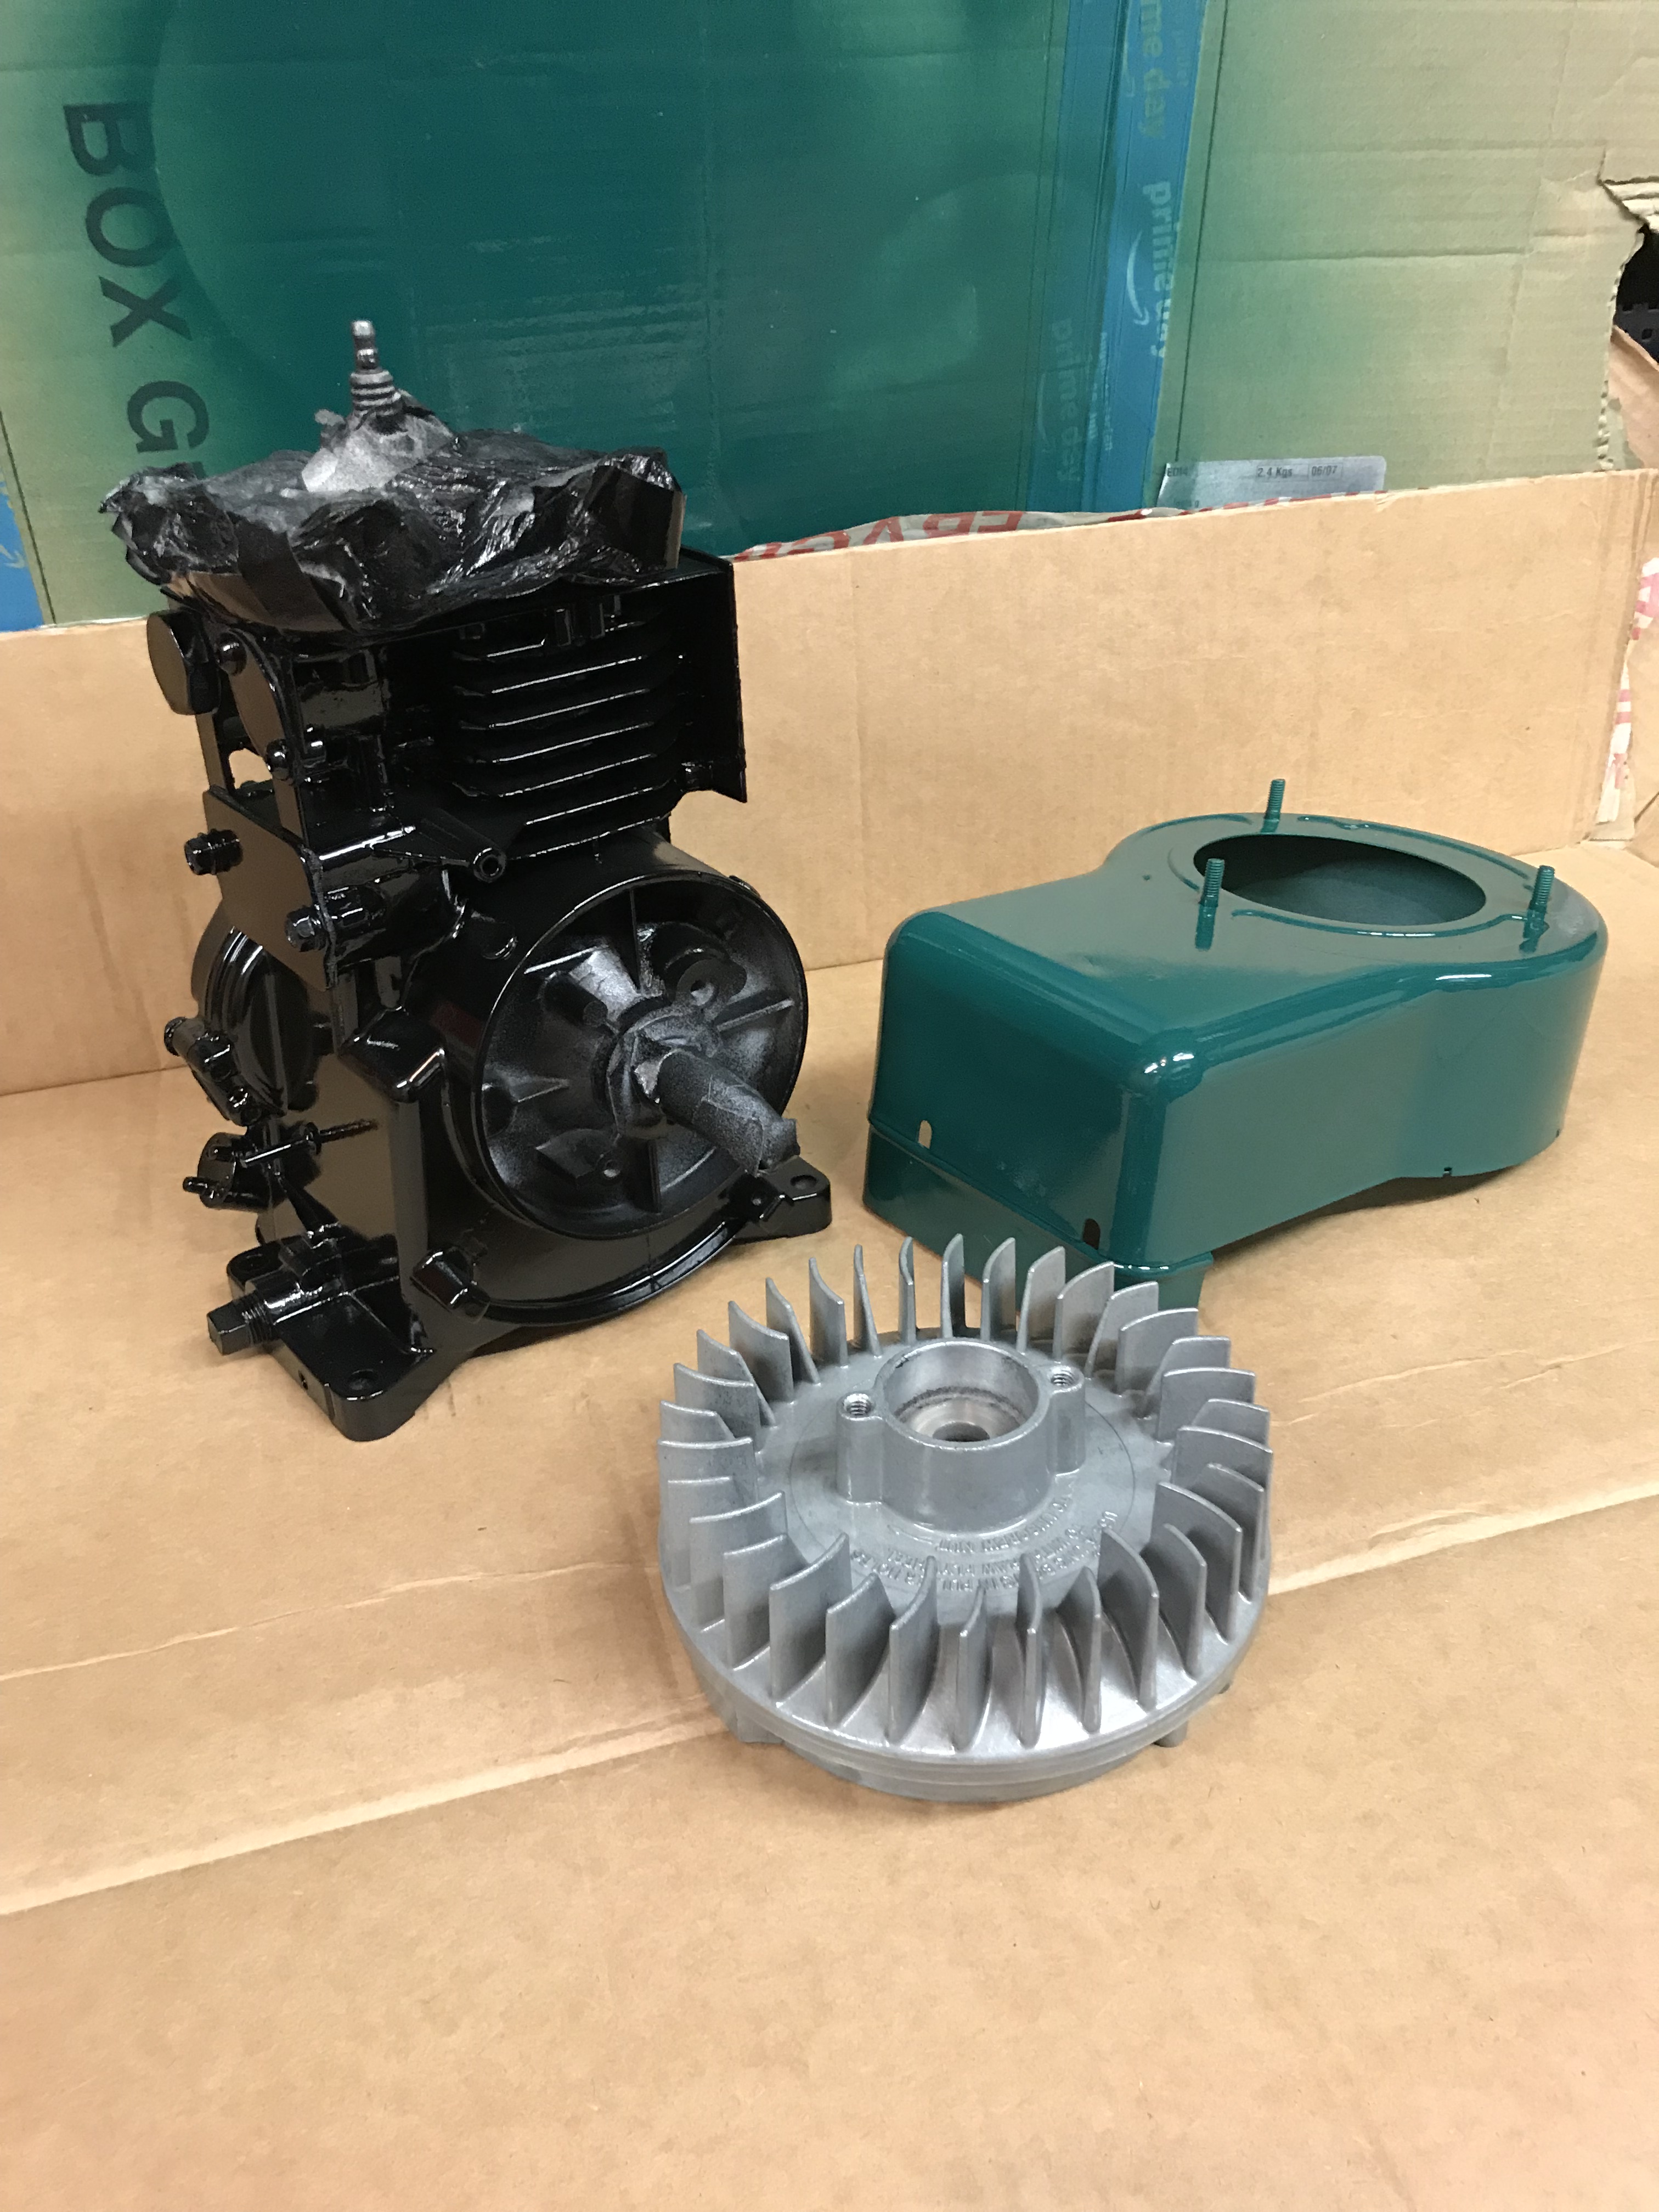
Sandblasted cowl and flywheel
Sandblasted cowl and flywheel. New improved paint booth, pleased with how the engine came out. Engine lacquer on flywheel (which won't get seen..) and racing green on cowl.
Didn't mask off the engine top too well but that will all brush down nice and silver I hope and then lacquer.
Got a working matching 3 pole coil off the donor, result!
Need to cure off the engine paint in the oven tomorrow at approx 95c for an hour, I would hope that will be ok for the flywheel and output shaft seals, would guess they get a lot hotter than that in operation...
I bet those tank type ATVs
I bet those tank type ATVs are a hoot
Particularly the amphibious ones!
New improved paint booth,
New improved paint booth,
Do you mean a bigger, new cardboard box.
Paint job looks good, hope you used a guide coat on the cowl at least.
I can let you have the patent on this booth if you like.

I see you even have a light
I see you even have a light in there? very posh :-) I do prefer a wooden base block turn table tho..
I'm not skillful or patient enough for details like guide coats, after blast and prime on the cowl I just biffed it a bit wih a scotchbright pad to smooth off then on with the green - and it shows haha, no awards.
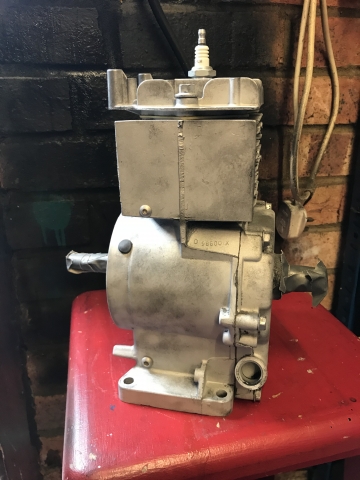
Head top polished up ok & lacquered, its all in the oven now :-)
Next will be thinking about tank and exhaust, and I don't want the governor gubbings back on so need to think about the throttle control on carb
Can this be done?Exclude
Can this be done?Exclude govenor on engine.
Can this be done?Exclude
Can this be done?Exclude governor on engine.
Technically, no reason why not but in a fixed throttle set up the engine will not react to changes in load and if the carburettor can supply enough mixture can possibly over-speed and fly apart.
That said, the good old BSA/Villiers F12 Sloper did very well without a governor in its more usual application on a lawnmower - aided by a heavy auxiliary flywheel and a practiced hand on the throttle lever..
Yes Wristpin, that is the
Yes Wristpin, that is the engine, though I never saw it any other Toro other than the GM3. The machine you referred to sounds like a Toro 76 and that was normally fitted with a Wisconsin engine, If it was fitted with an OH160, it may have been fitted as an after market replacement. To be honest, the OH160 wasn't a very good engine, well not in the GM3 anyway, it was only fitted for a short while and Toro soon went back to a Kholer K301.
Yes, the manual did say you had to hold the valves up through the ports, but you learnt the easy way to do it on Tecumseh and Toro service courses.
I would definitely have the
I would definitely keep the governor if it was going back on a mower, but I have not changed anything which means it could go back on if I tire of this folly :-)
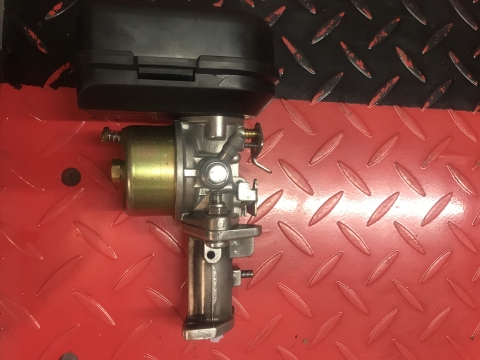
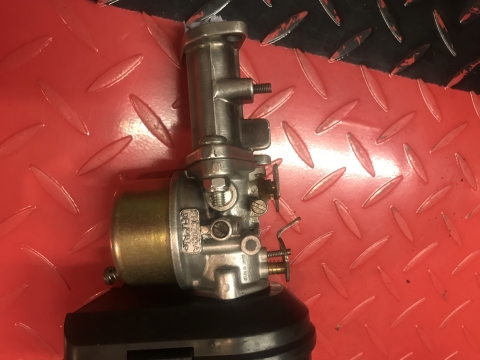
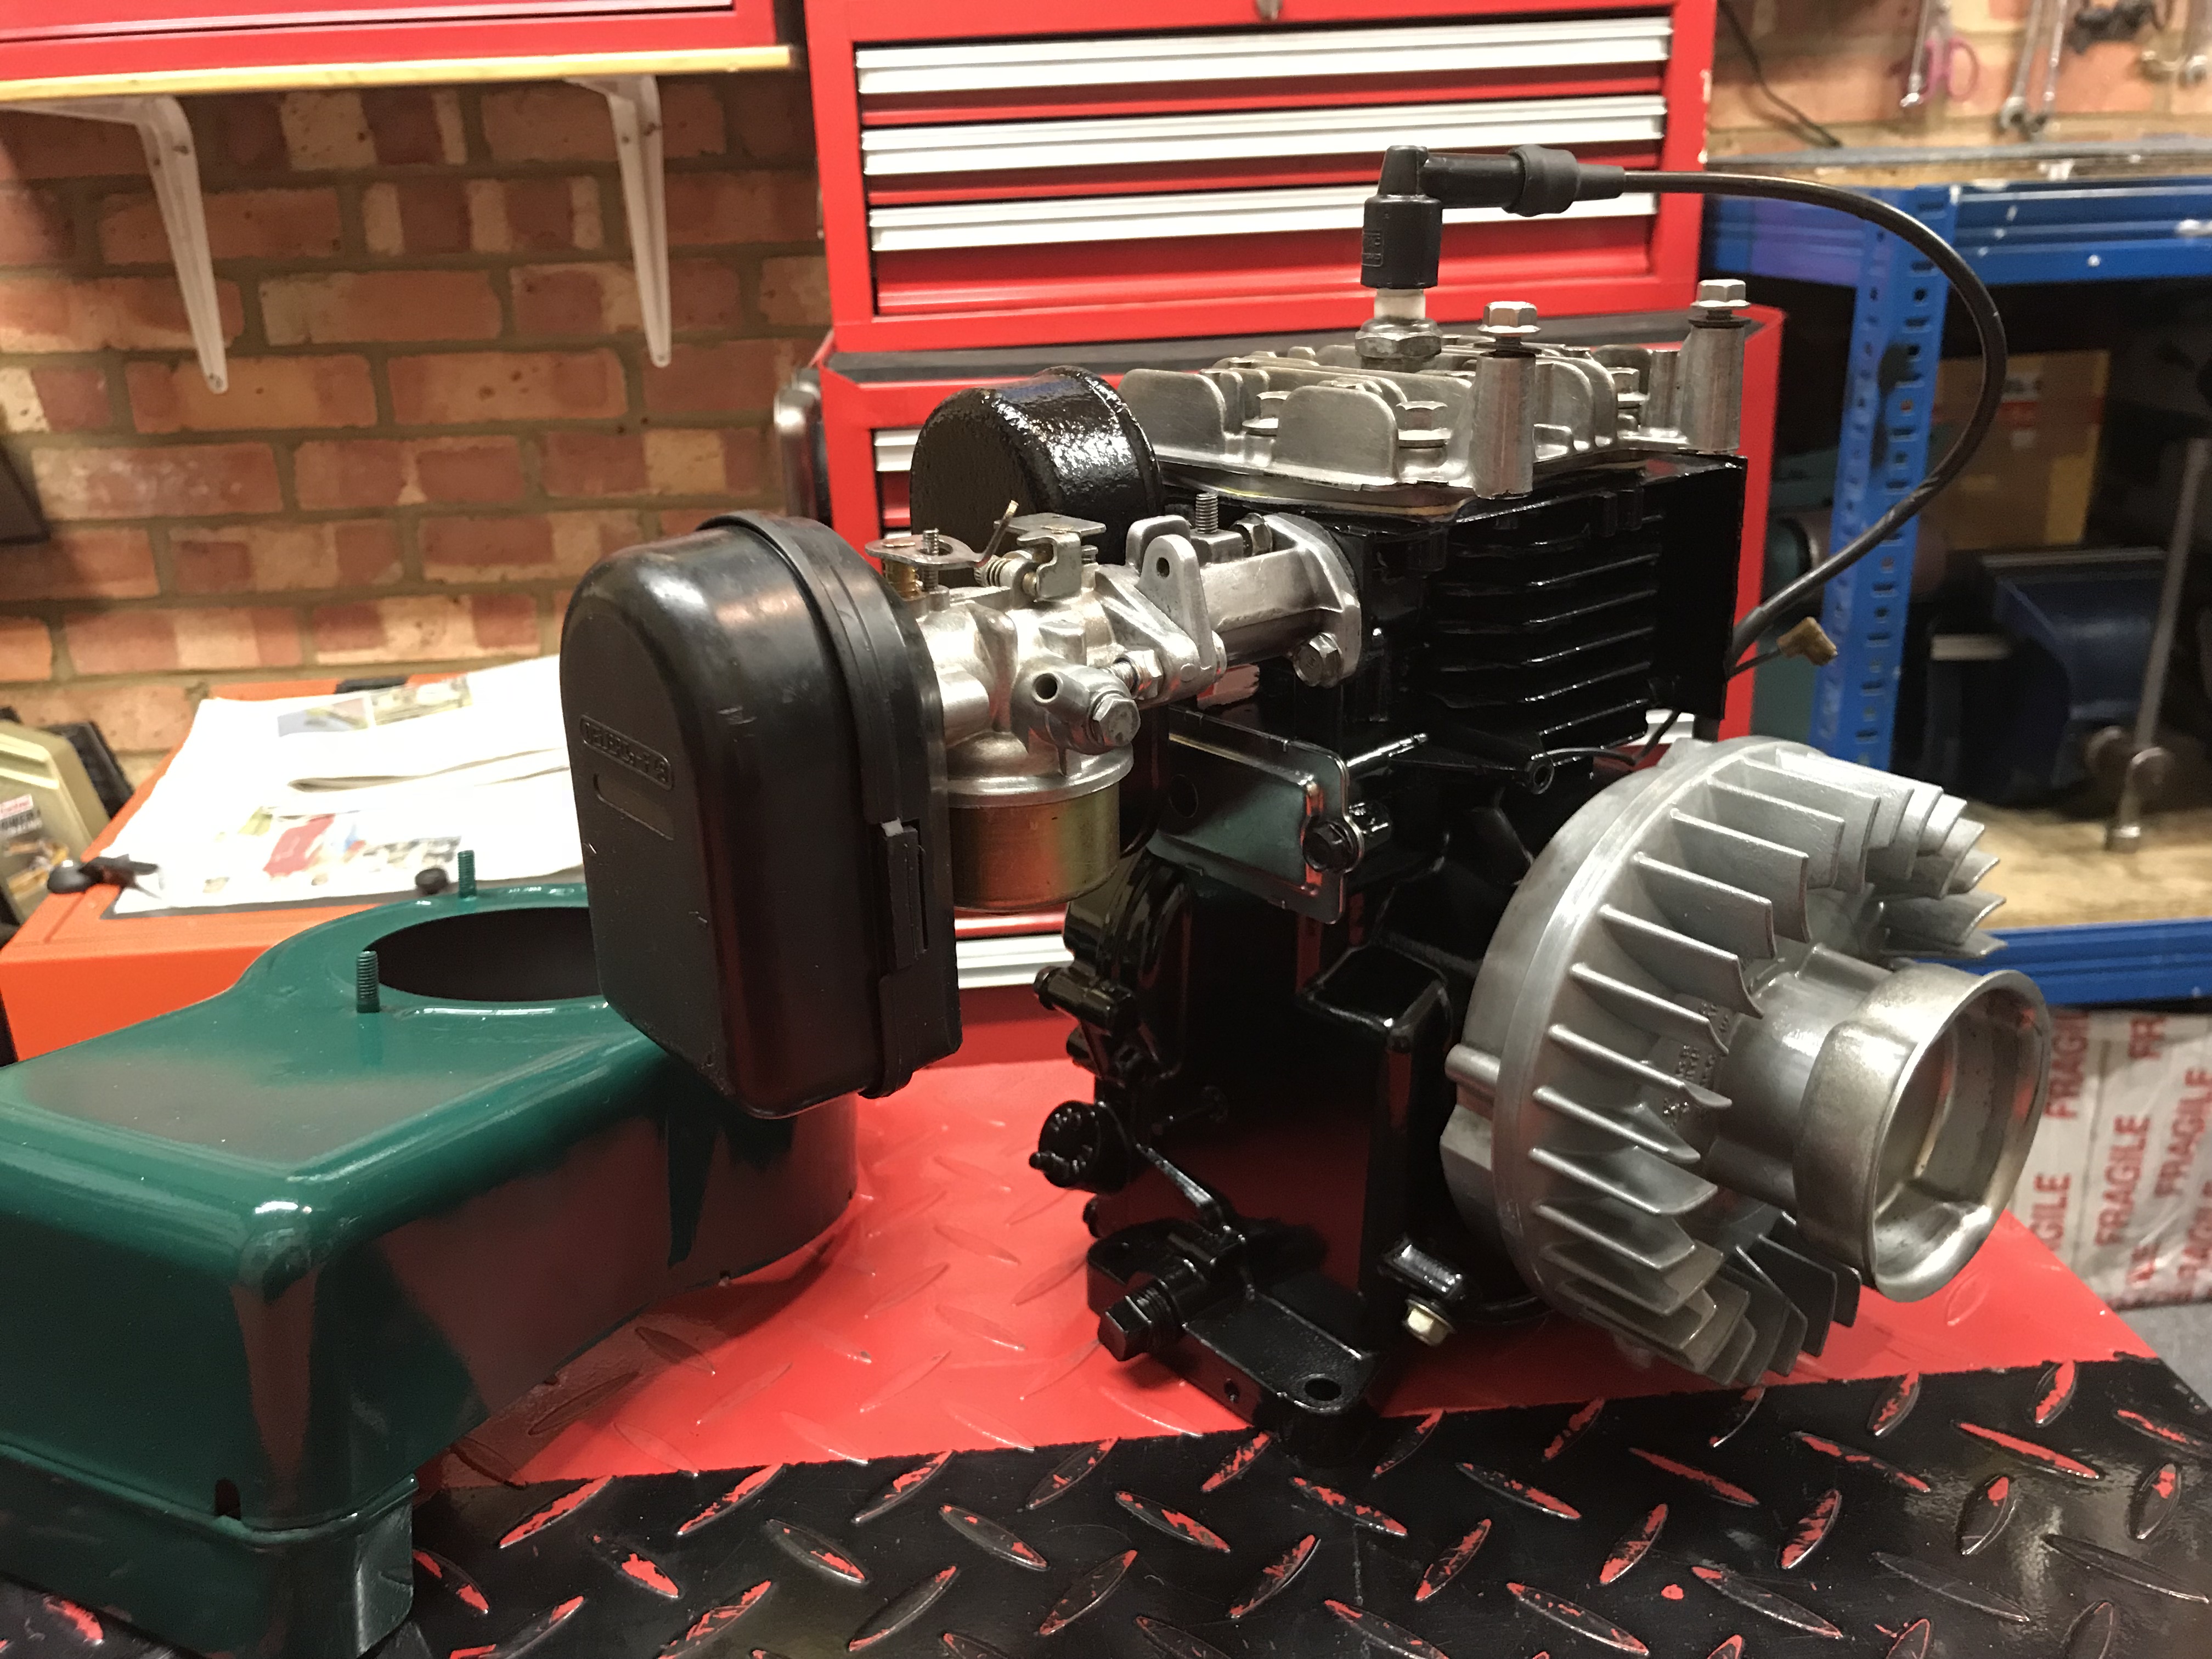
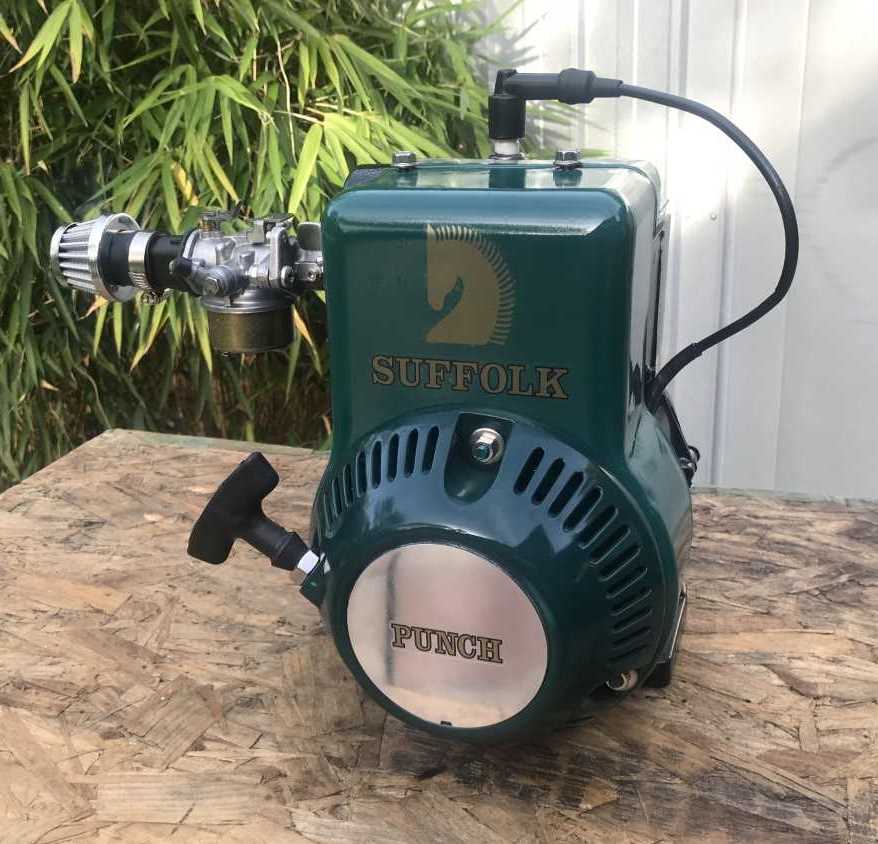
Bit more done, oil in, carb on, coil and flywheel, original exhaust and air filter for now.
Going to fit an on/off switch on the cowl ala Marquis. Have an idea for the tank to either use original or something else.
More messing around in the
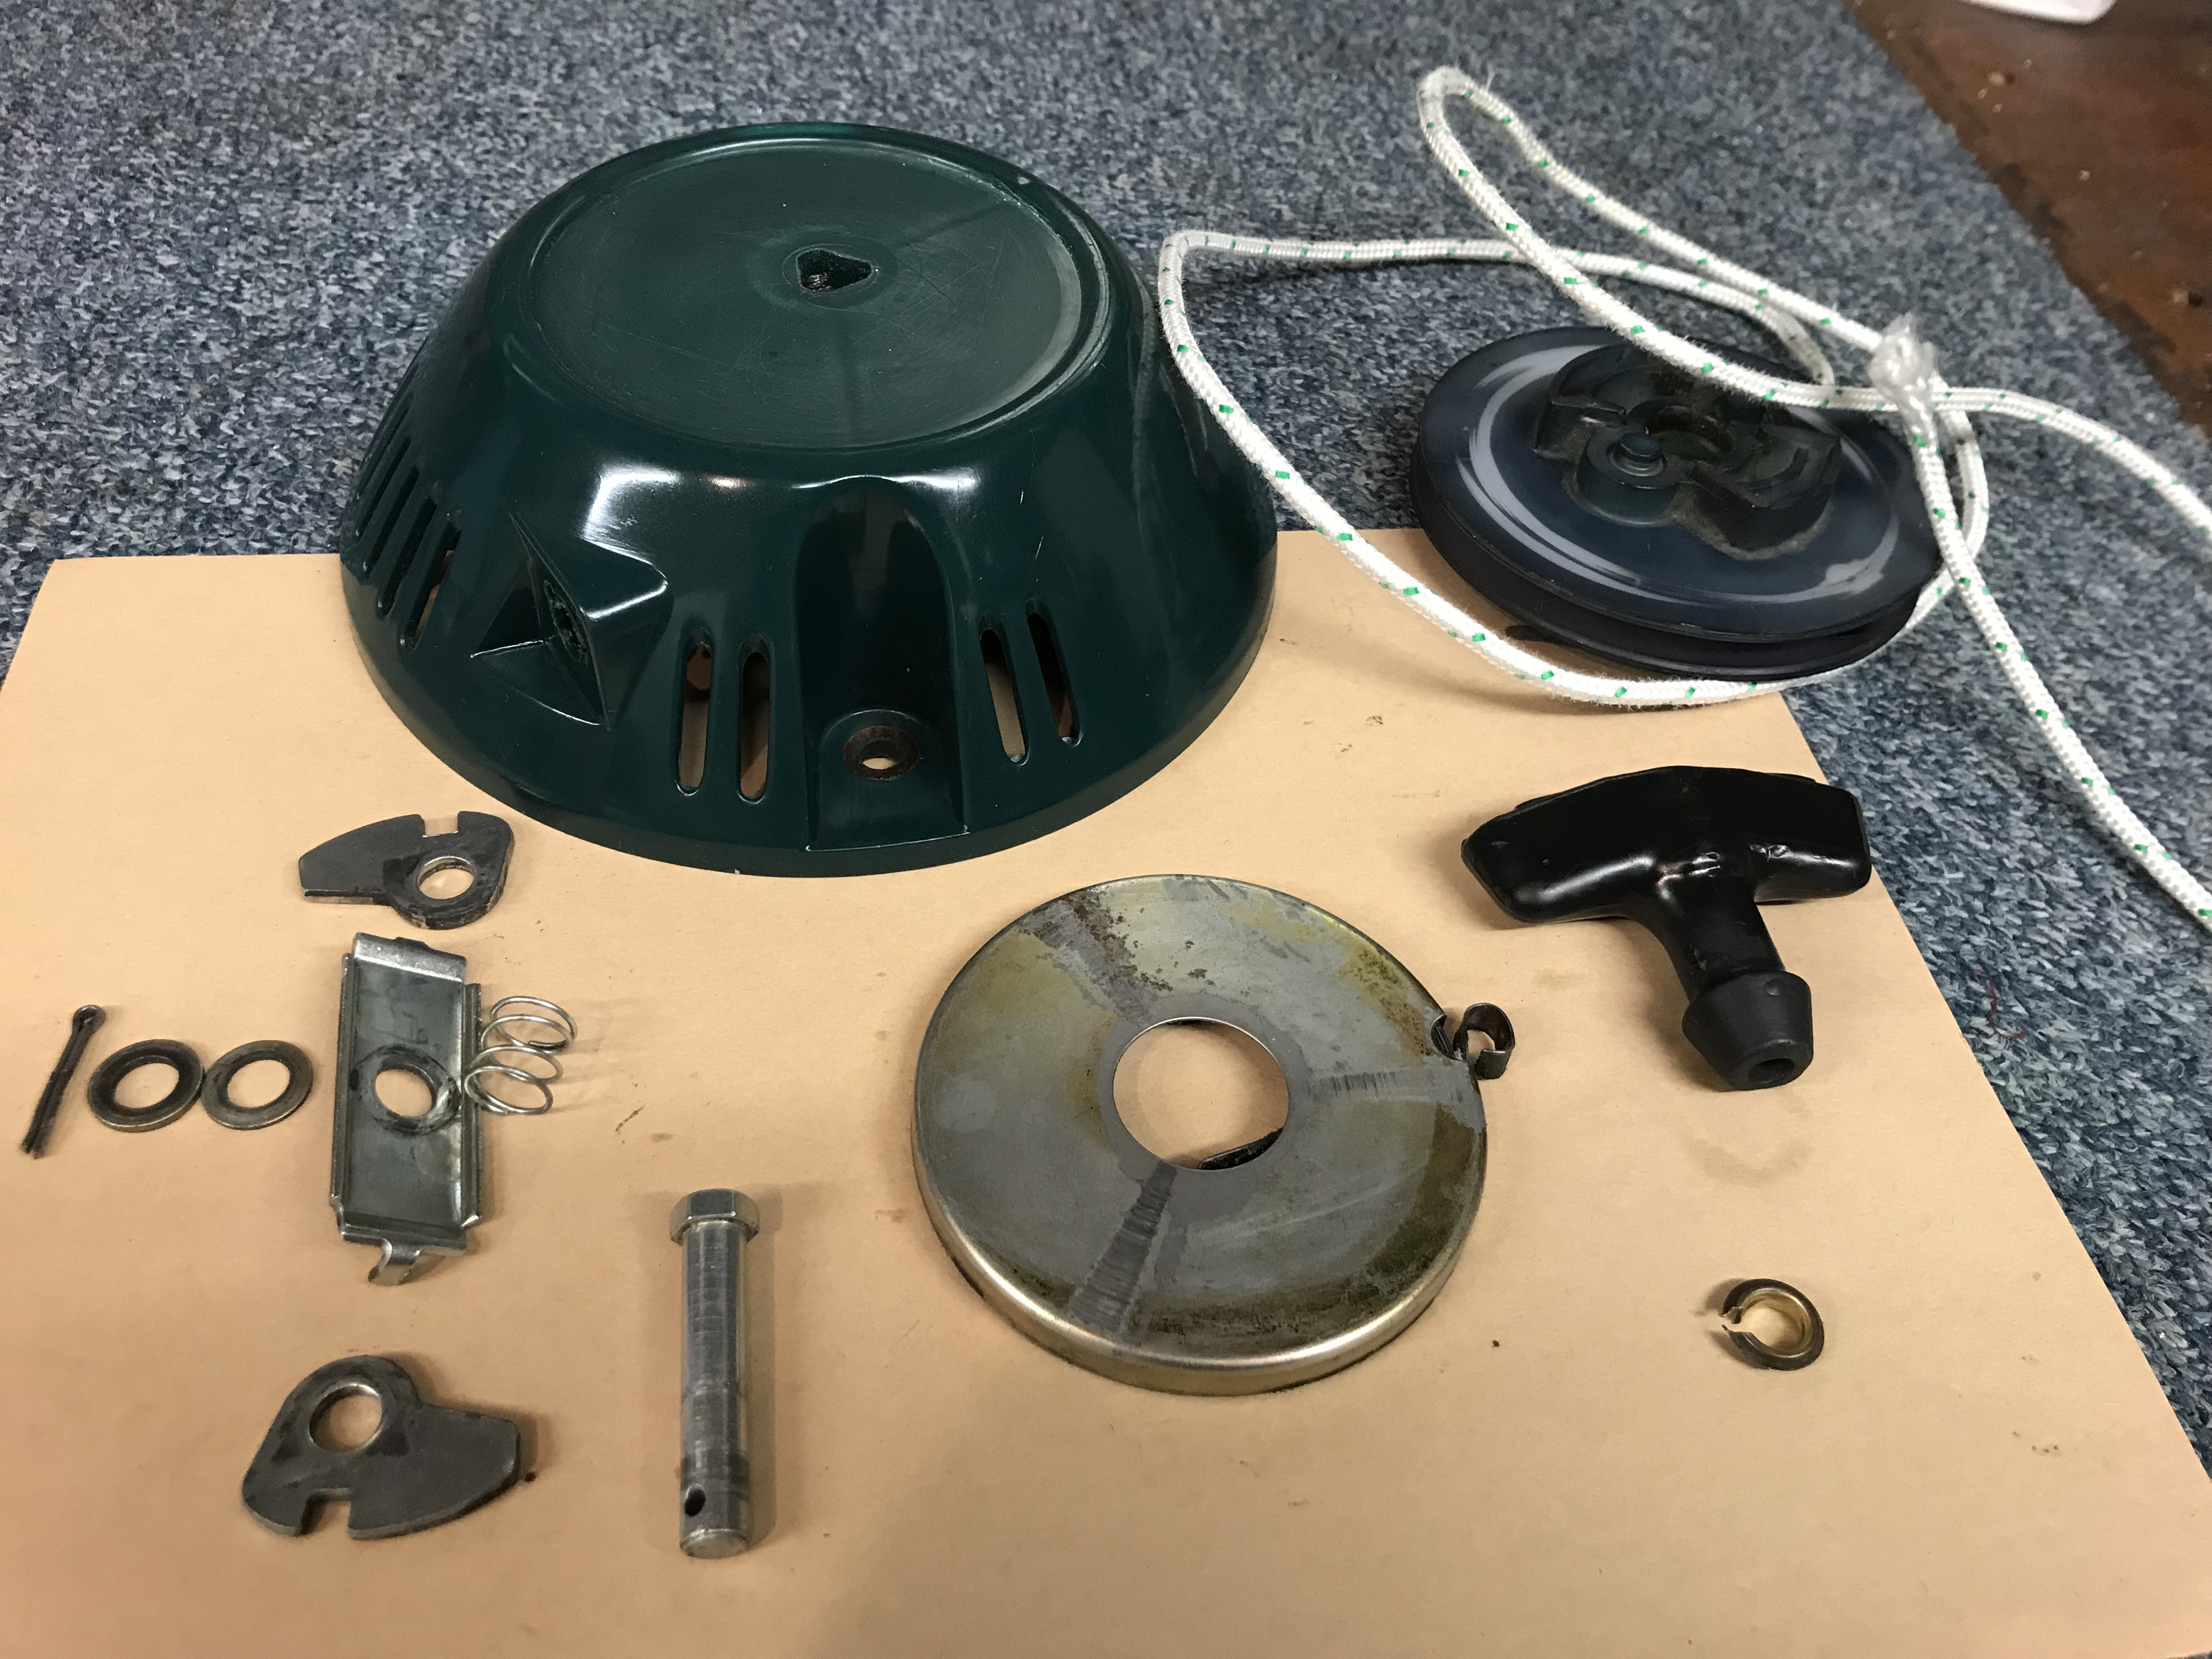
More messing around in the shed. Toggle switch arrived and mounted, not that impressed for the money, does not have that lovely clunk that the marquis switch has, bit weedy compared. Nide decal from Colin - thank you!. Stripped and cleaned a recoil which was really quite scabby, bleached the cord (skinflint) and polished up the plastic cover on a buffing wheel. Surprised at how well it came up with the mild mop and buff wax, took all the scratches and sun bleach out.
Given that the pull cord handle will retract to the recoil cover, I've ordered some M12 threaded hollow bar and will sandwich that with a nut above and below and cup the upper nut with a step drill bit so the starter handle end rests in it (I hope) Should make that area stronger and less stress on the recoil cover.
Opting for an original tank, best donar one I have has poor solder work to the neck and is pretty scabby externally great nick inside, will look to mount it off ali flat bar struts from the cowl top bolts.
I'm thinking of putting a K&N on it haha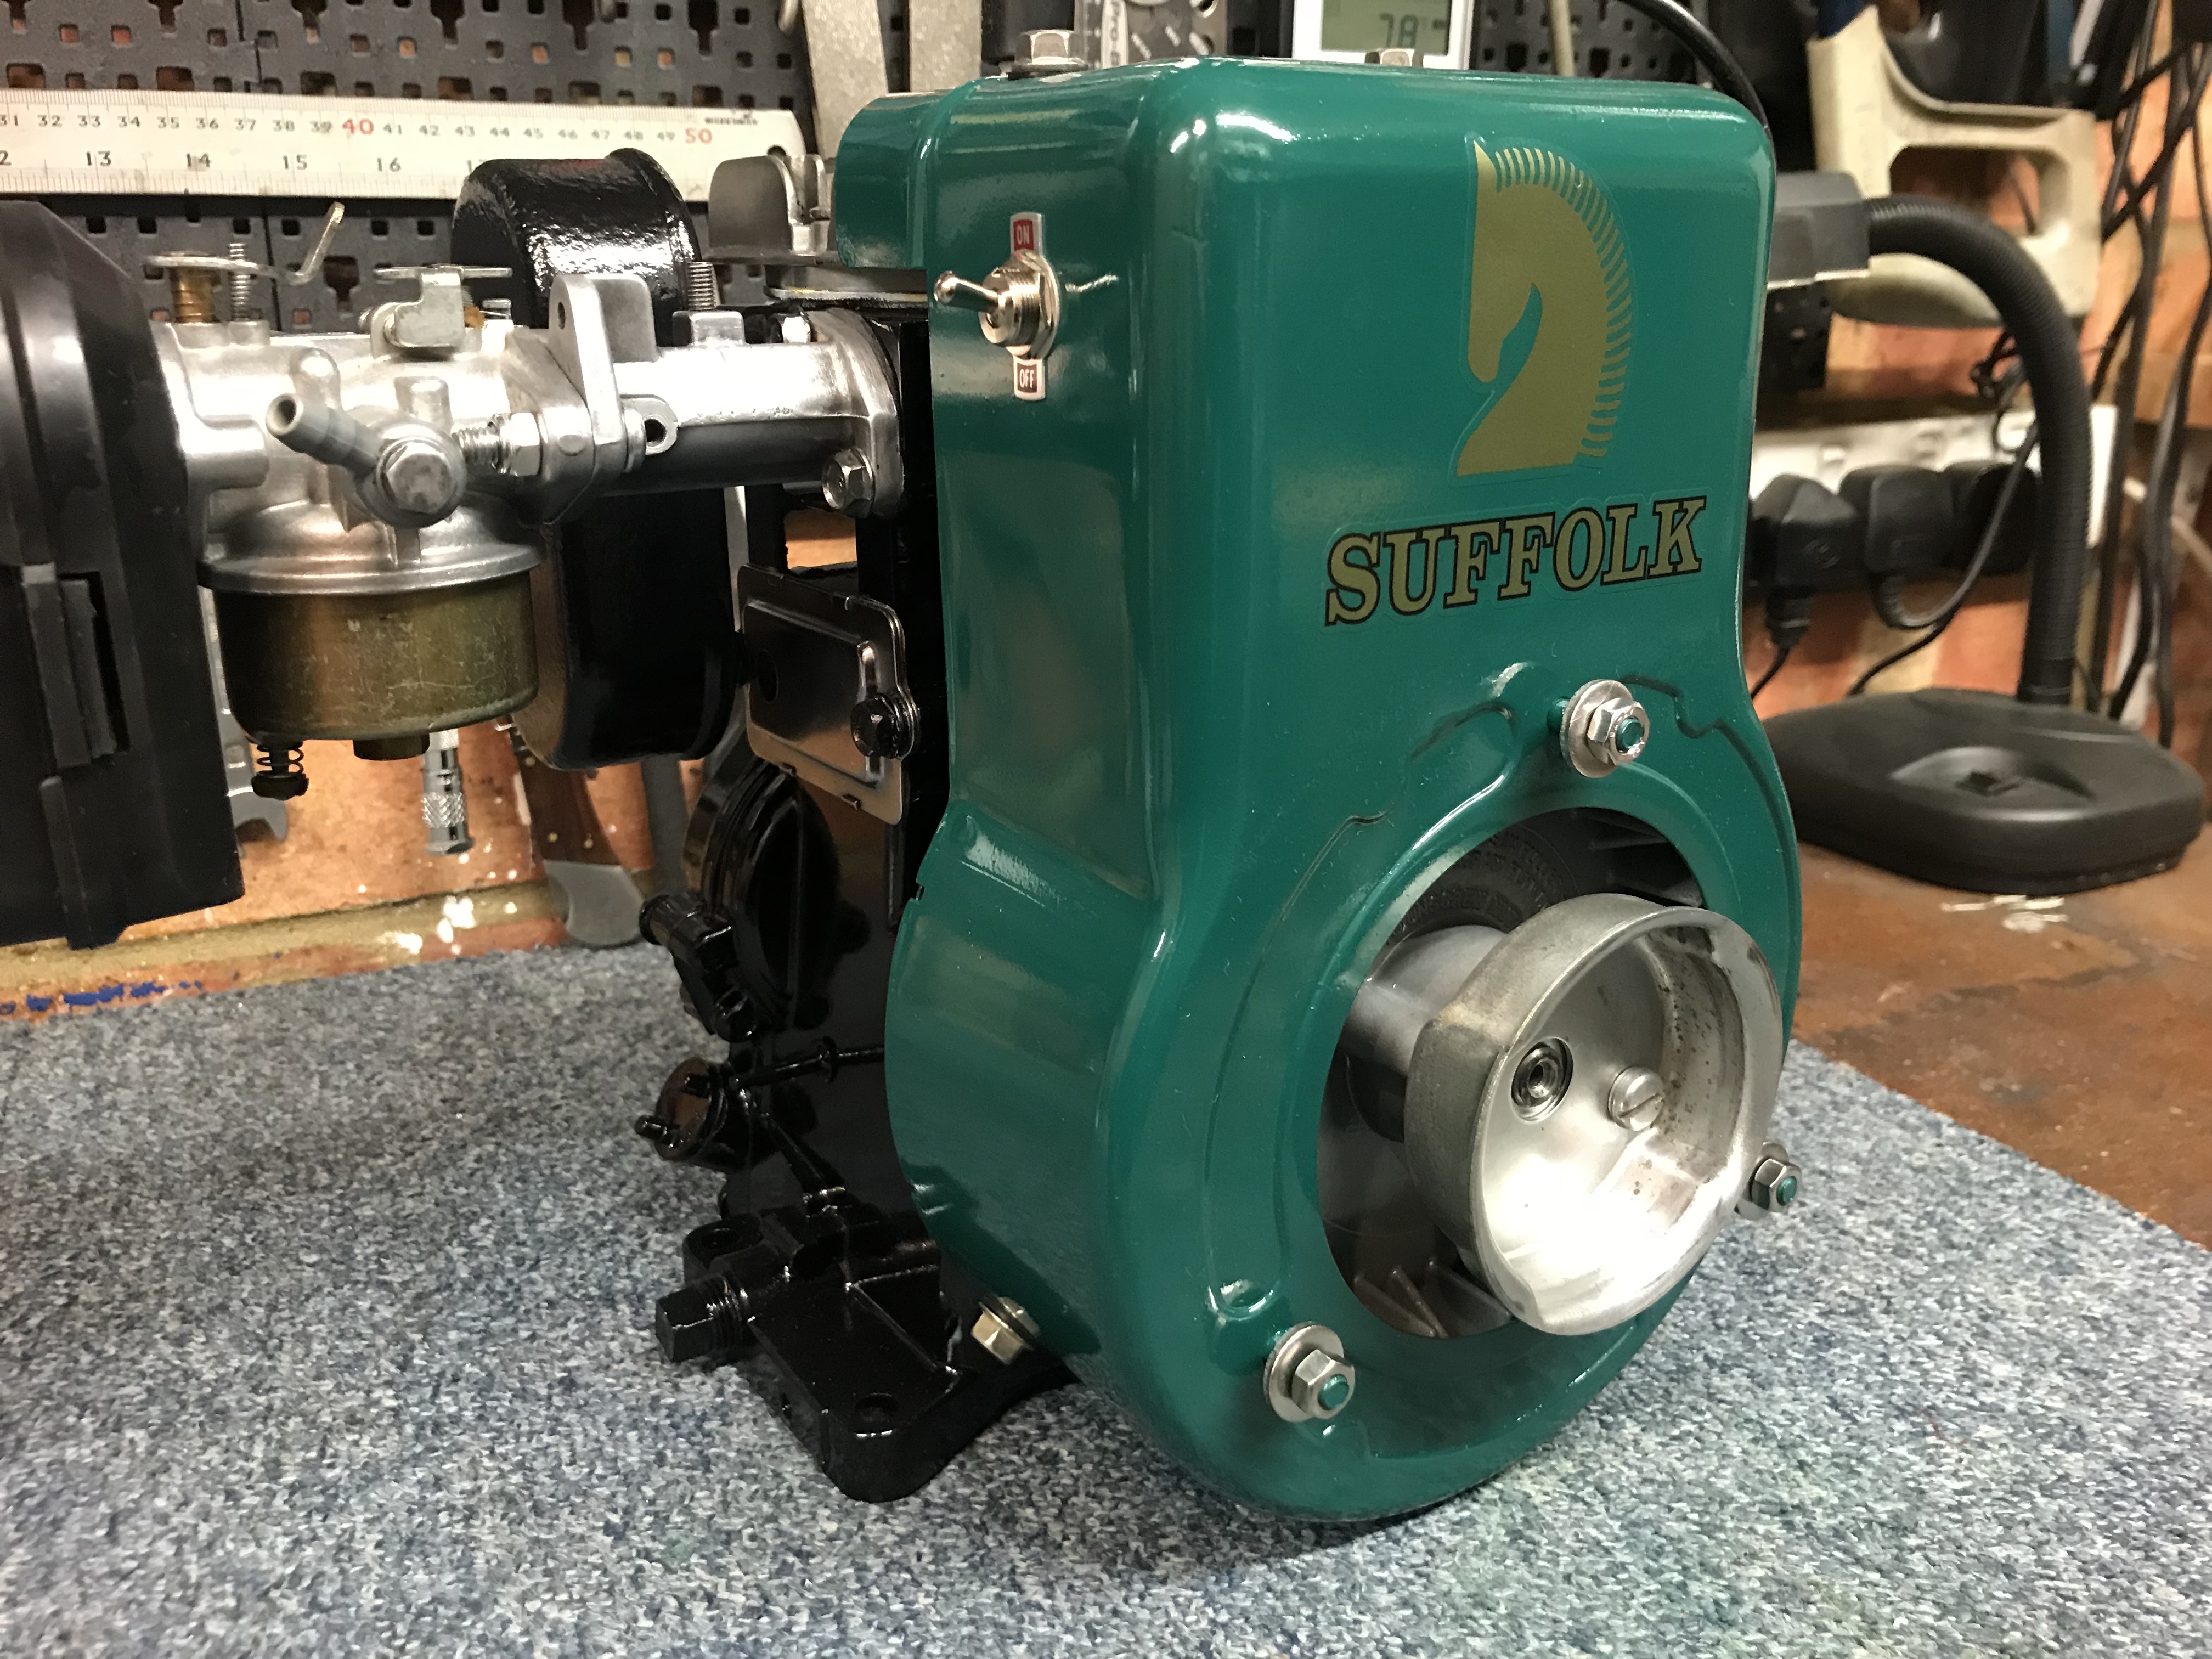
Very smart, but rather lost
Very smart, but rather lost track of what it's all about!.
"No profit in paint" as a friend would say, but he does run a very successful earthmoving business!
So have I if I have to be
So have I if I have to be honest..but needed something to do with 3 spare motors picked up for next to nothing
In the end it will be a good working motor, tank and ancillaries which could be ported to a working mower deck with little fuss.
could be ported to a working
could be ported to a working mower deck with little fuss.
So why discard the governor?
I know, I know, But let me
I know, I know, But let me fail first..
I am going to try to use it as a show pony stationary engine, running "I don't know what yet"
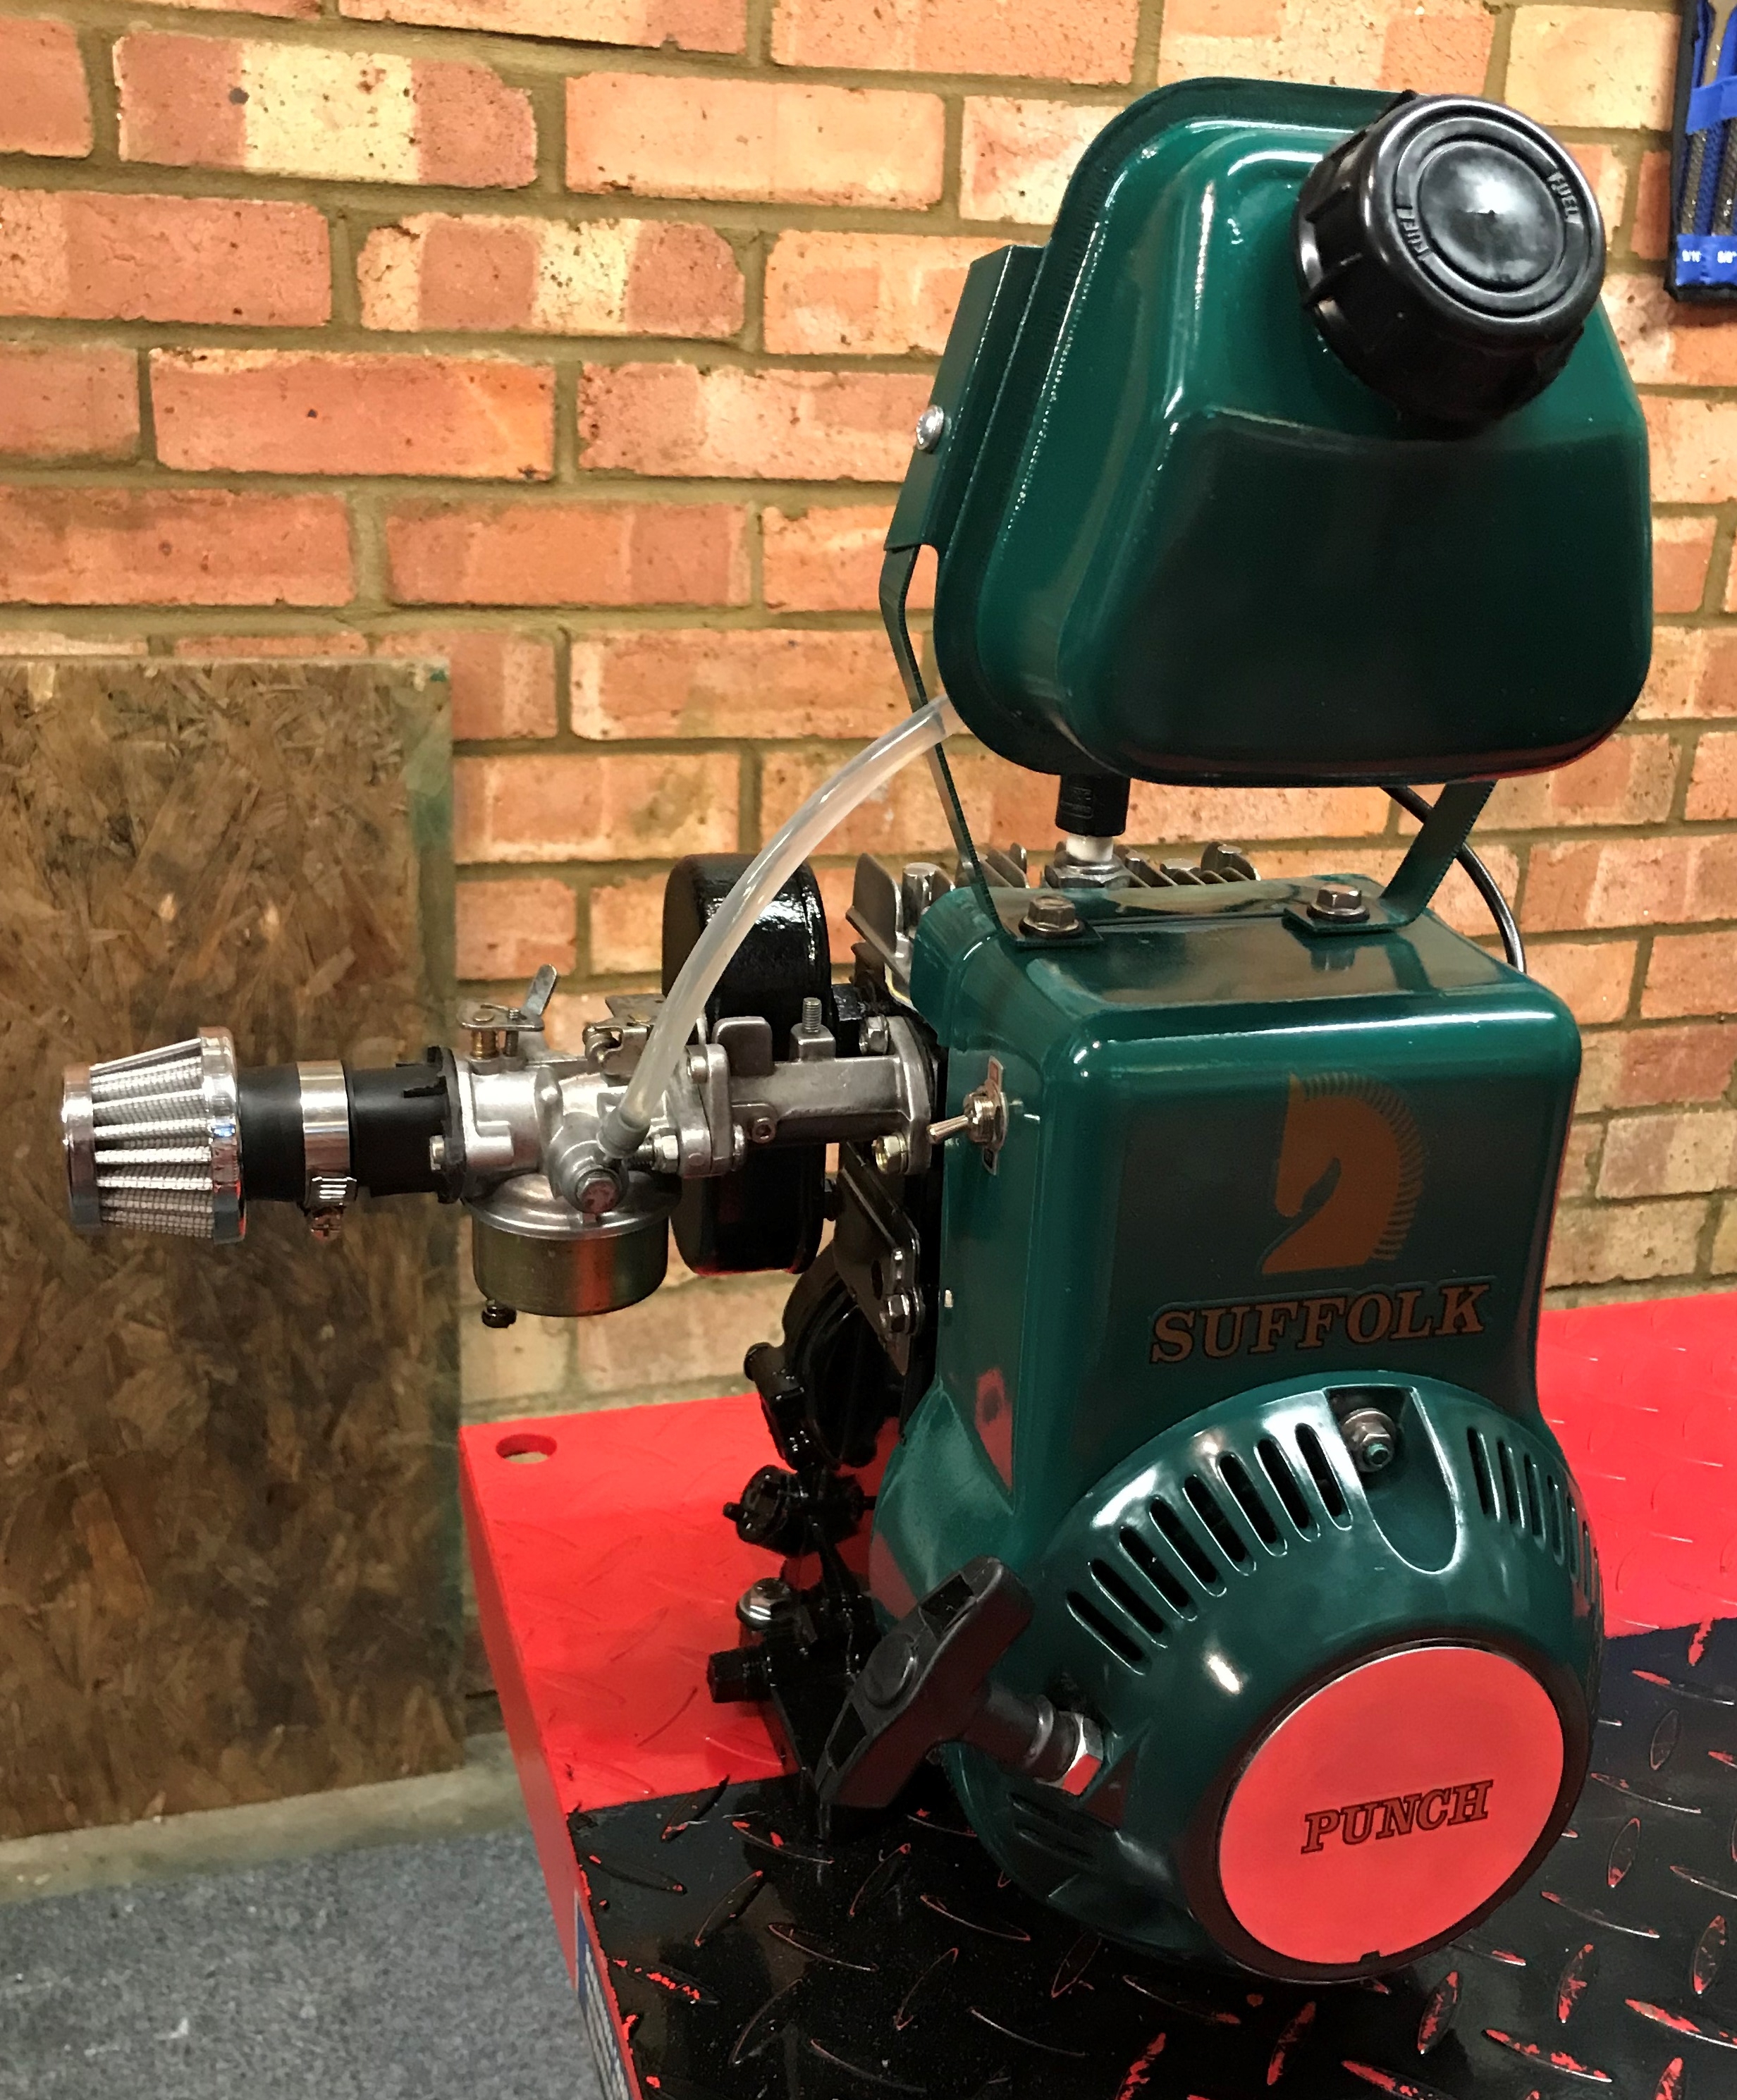
More shed folly - Tank on
More shed folly - Tank on tomorrow I hope, and if it starts.... what to drive off the output shaft - super fast washing line maybe
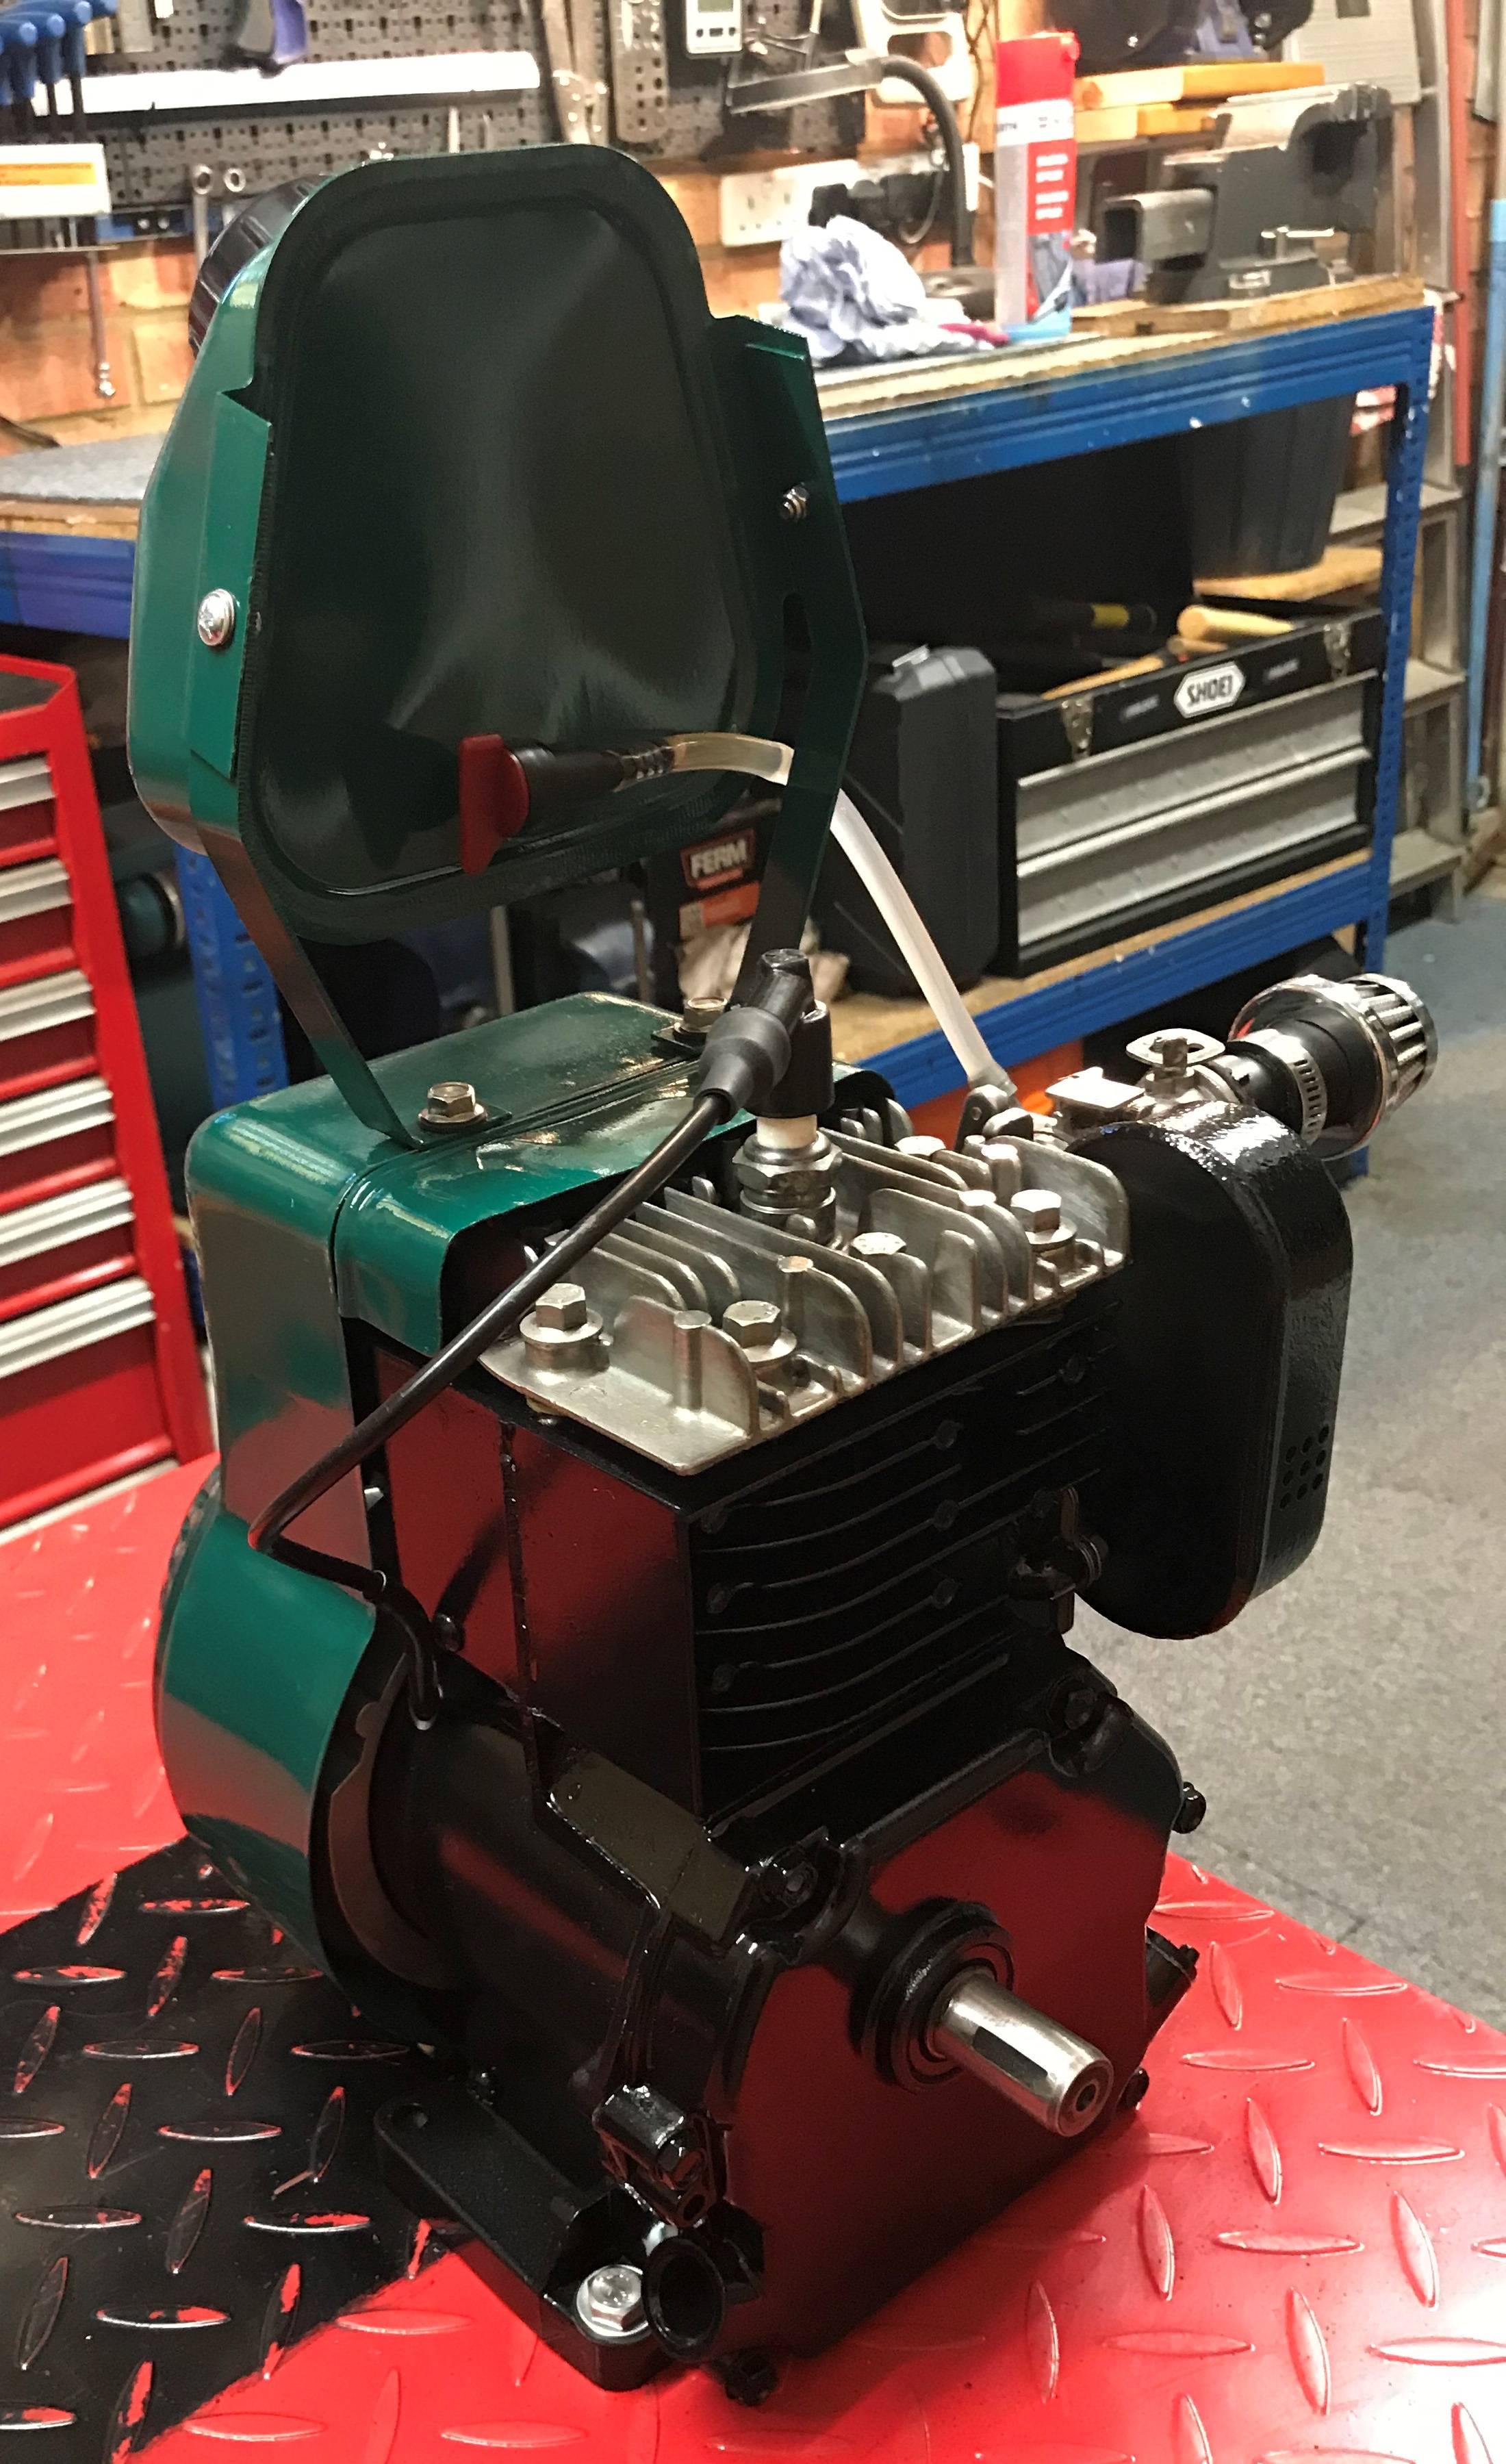
Running motor at last tonight
Running motor at last tonight, made brackets for the tank which were a bit more tricky angles than I thought, then painted tank & brackets. The recoil mech off one of the donor machines looked like new but caused me no end of head scratching, finally worked out that the actual coil had been inserted the wrong way round, took me no end of times to coil it back into the cup this way and the other to work out that it had been inserted incorrectly. The other strange issue was what appeared to be some sort of vacuum lock in the carb, fuel would not get through, stripped the carb again and could see nothing wrong and clean as, resembled and left the fuel on for a while and it started first pull. Going to run it up hot and change the oil again and store it as a good working spare. I have another mower at least out of the 2 1/2 untis I picked up so may make another working one up for a friend.
Appreciate this as been a bit of an OLC departure in places, but hope it may be of use in parts to 43 engine owners. Also have plenty of free model spares for this if anyone is in need.
I will now get my coat, if I can remember where I left the bastard thing :-)
Top end is a bit of a mess,
Top end is a bit of a mess, lot of very hard coked up stuff to remove.
Very boring but pleased with the finish