Project Anzani
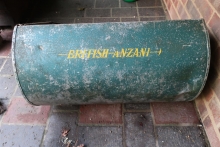
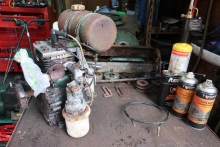
It's all Clive's fault for posting details of a British Anzani Powermow 24" in need of a home , especially when its only 20 miles away. The story is that the machine was the former property of a local Vicar who presumably lived in one of those large old vicarages with a big garden. The vicar was retiring and gave the machine to one of his parishioners who restores old motorcycles. All well and good except that said parishioner has a smallish garden not suited to a 24" mower . The mower was pushed to the end of the garden and stood on a sheet of polythene with the grass box inverted over the engine . There it remained for for enough time for the front rollers to disappear and some heavy rusting to affect the lower steel work. On the plus side the grass box is alloy and is in good condition. I dragged it from its resting place last week , brought it home and set about dismantling it.
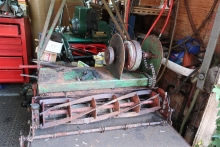
A couple of days later, after lots of heat and Plus Gas, its all apart . On the down side - missing belt guard, missing transmission cover and totally seized cutting cylinder bearings, plus ouf course some heavy rusting. On the plus side , the engine is free and it is a simple well built machine , so watch this space.

Forums

Very interesting project!
Very interesting project! Without being an absolute nitwit, how should it look like when assembled? There is very little footage available.
You must have missed this
You must have missed this thread!
https://www.oldlawnmowerclub.co.uk/forum/history-and-technical/mower-history/british-anzani-0
Yep. Will read it now. Thanks
Yep. Will read it now. Thanks!
Aah that one, got scared away
Aah that one, got scared away from the pictures...
:-)
New home that is wristpin I presume?
I like the Stanley Kubrick / The Avengers styling these machines have. Futuristic.

A bit of an update.
A bit of an update.
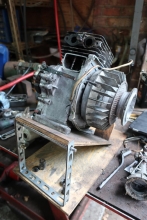
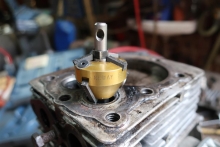
While the very rusty steelwork was at the blasters it was the turn of the engine. Pitted contact breaker points were given a clean up with a carborundum slip stone and the totally dead condenser replaced courtesy of Paul at Meetens who also found a replacement special shoulder bolt for the starter pulley which had been attacked by some animal with a cold chisel.
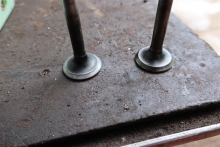
The valves themselves were in good shape but the seats need a bit of a clean up and narrowing down a bit. However some strange things have been done within the valve chest where one of the spring retainers has been replaced with one from a different manufacturer and the anti splash baffle hacked about to clear it. Presumably some one lost the correct one and had to dig out of trouble with what ever was to hand. I'm on the track of a spare engine which will, hopefully, render up the correct parts, but meanwhile it has gone back together "as is".
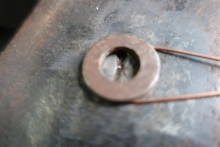
The exhaust muffler was rotted away and extracting the remains from the pipe elbow resisting all attempts to unscrew it despite being given the red heat and cold quench treatment a couple of times, so it was cut off slightly proud of the elbow and internally longitudinally slit with a hacksaw blade, crushed and peeled out. A bit crude but effective! The engine is running a bit rich which will need investigation but doesn't make any nasty noises, so fine tuning can wait.
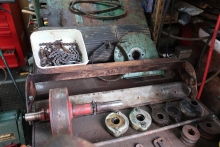
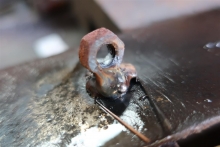
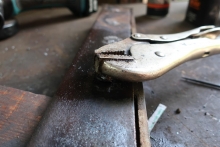
Bottom blade carrier and blade screws. The carrier is an alloy casting and all the steel countersunk screws were frimley corroded in place - another result of the machine having spent untold years abandoned in the bushes! Despite heating each screw head to cherry red a couple of times they wouldn't budge with as much force as I dared give them with the impact driver - remember that alloy casting!! It was then a case of Mig welding a thick washer to each screw head and then an old nut to each washer to be gripped with the Vice Grips, flooded in Plus Gas and worked back and forth in increasing increments until a complete rotation was achieved. Probably about quarter of an hour per screw but all out without incident .
More later.
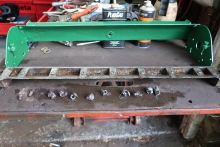
After "sand " blasting, the result of years spent exposed to the elements. Call it Patina! However the machine is built like the proverbial brick outhouse so there's plenty of strength left.
.
That's patience with the
That's patience with the bottom carrier which paid off, must have taken ages! great progress and enjoyable reading. Look forward to the next update.
In the last report I
In the last report I mentioned that there had been an interesting modification (bodge) to the engine's valve gear. Thanks to OLC member Hillsider for sourcing a similar engine from the depths of a friend's shed I discovered that the obvious visible bodge was not the only issue. Briefly, after a struggle to fit the correct parts it eventually dawned on me that the valve guides were protruding too far down into the valve chest - confirmed by comparison with the "new" engine. With the aid of a piece of threaded rod, several large washers and a couple of nuts the guides were repositioned and everything else went back together as it should. I now have a running engine.
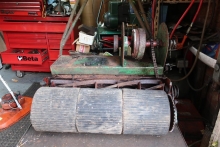
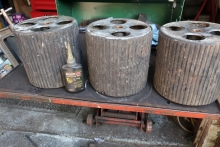
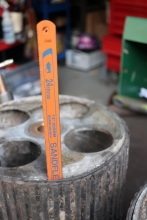
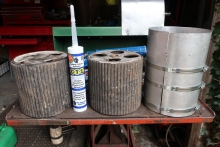
Rear roller. This consists of three cast alloy drums with a bonded on ribbed rubber covering on each drum, mounted on a chain driven shaft with individual free wheel units. As a result of the machine's long sojourn in the undergrowth moisture had crept in between the alloy drums and the rubber and the consequent corrosion had loosened most of the rubber covering and the "growth " of the corrosion had bulged it in places. With the aid of a hacksaw blade and compressed air I managed to clear most of the powdery residue and then pump in CT1 "hybrid adhesive sealer". Each roller, in turn , was given that treatment and clamped up to spread the CT1 and keep as much as possible of the rubber in contact with the alloy drum. Seems to have been a success and with certainly be adequate for demonstration and exhibition purposes.
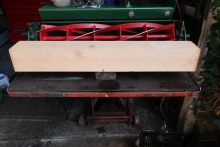
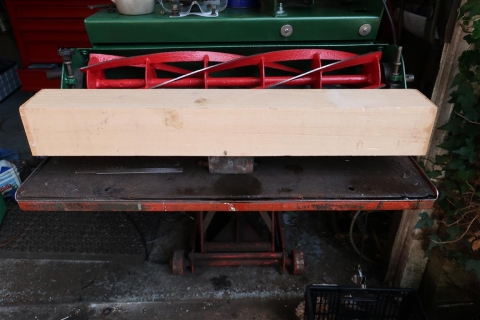
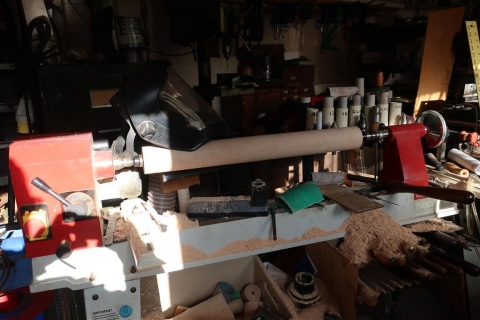
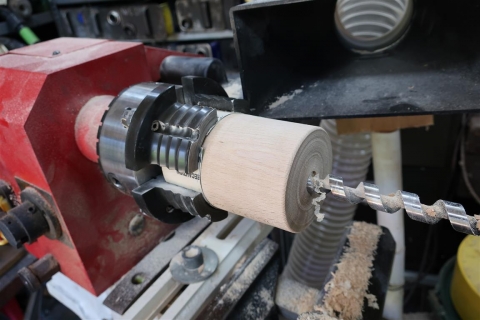
This afternoon I've been making shavings! Front roller manufacture. More to follow.
PS. Should have said that there was just about enough lip left on the old bottom blade to take a grind, so it was refitted, faced off and amazingly the cylinder cuts paper all the way along !!


Your project Anzani is
Your project Anzani is progressing well considering the condition it was in when you collected it. The repairs to the rear rollers is a very good example of an engineering solution to a problem that has been shown on this forum in the past.
Good to hear that the Donor engine was helpful, that makes two machines helped back to life by that engine.
Hello wristpin,
Hello wristpin,
May I suggest in enlarging the pictures (a lot)? I find this a very interesting project (and the quality of workmanship is mind boggling) but the photos are tiny on a 27" monitor... :-)
Photos. Can do but didn’t
Photos. Can do but didn’t want to overload the forum.
One more front roller to make and treat with colour and preservative etc and then another update.
Excellent work so far, just
Excellent work so far, just wish I had the time, but running my operation museum/charity leaves very little time for hands on stuff.
If you have taken a liking to Anzani's I have a surplus 24in Lawn Rider with good box & in much better condition that the powermow ready & waiting????
Could even consider it on a commission basis.
A bit more engine reassembly
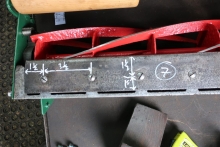
A bit more engine reassembly done and the recoil starter to do. Rollers completed and trial assembled, the originals had completely rotted away. Thanks to two club members for supplying the roller dimensions .Anzani fitted a spring between each roller and now that I know the length it will require another visit to the bay of evil. As with some of the other metalwork, the roller shaft suffered badly but was a snug fit inside a piece of 15mm stainless steel tube so the rollers were made with a suitable clearance .
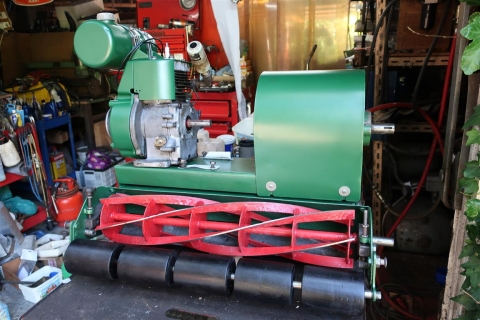
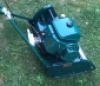
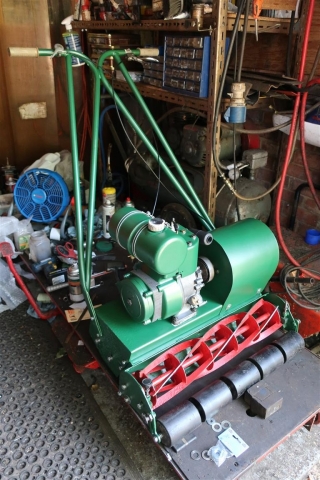
Getting there. All assembled
Getting there. All assembled with a running engine. Belts to be acquired - don't suppose anyone knows the original belt size ?
Three recoil starters supplied all the parts needed to build up one correct good one . Each of the three had something missing, fortunately not the same parts in all ! The spare engine produced a good starter cup , the original having badly worn engagement lugs - probably the reason that the starter was handed over in a dismantled state.
The only outstanding item of consequence is springs for the centrifugal clutch . The originals are too weak and the clutch engages early. Hundreds of springs on ebay but note quite the right combination of length, diameter and wire cross section. Springmasters appear to have a standard spring that is suitable and reasonably priced per spring until it comes to their minimum oder charge + p&p+ vat . Presently investigating springs from heavy duty brush cutters. However, if worst comes to worst, the carrier complete with shoes and springs from a Suffolk Colt fits both the Villiers crank and the Anzani drum.

A remarkable transformation
A remarkable transformation from the wreck you started with.
Stunning... on photo almost
Stunning... on photo almost new. Superb work there wristpin.
Great work, indeed. Very
Great work, indeed. Very inspiring.
Very nicely engineered
Very nicely engineered restore, and a bit of wood turning to boot! For someone who does not like to paint, well.....great result
Thanks for the kind comments,
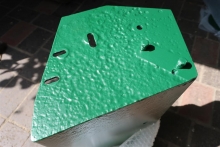
Thanks for the kind comments, but I can’t take the credit for the paint . The mower was so far gone that it had to be “sand” blasted and I was then going to paint it, but Paul at Rye Metal Finishing had some green powder coat left over from a special order that is a very close match to to the un-faded original under the handle grips.
Its sometimes the smallest things that are the most problematic. In this case it was two little springs for the centrifugal clutch. Dozens on that auction site but none offering the correct combination of length, diameter and wire cross section to provide the necessary controlled take up. Finally I had to bite the bullet - SpringMasters supplied the exact specification; just don’t ask about their minimum order and astronomical post and packing charges!
Good to hear that you have
Good to hear that you have found springs to suit, re the minimum order charge at work we used to dodge that by including an assortment box on to the order that usually made everyone happy, job got sorted and the workshop gained a box of springs.
With all the major work done
With all the major work done I'm now picking off both the outstanding jobs and going back over things that could be done better or just tidied up. One job , the nearly worn out bottom blade was on hold while I searched the trade for an original, but it was not to be. Garfitts would make one to pattern but not to measurements but I had a bit of a hang up with parting with my reference blade should it go AWAL in transit. Perhaps spooked by another supplier sending stuff to the wrong post code and the courier delivering some correctly addressed, urgently needed parts, deciding that I had "moved" and returning them to his depot with the consequence that "Next Day" became 4 days!
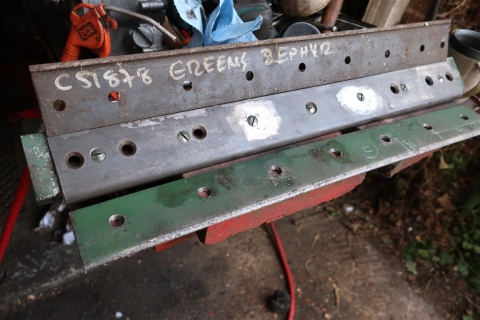
So I sorted through a stack of bottom blades left over from the business and found one for a 24" Greens Zephyr that looked promising . The centre hole matched exactly and was in the correct position front to back. With the exception of two other holes that slightly overlapped the Greens there was enough virgin metal to drill and countersink to match the Anzani sole plate. The two offending "near miss" holes were filled with weld, redrilled and countersunk - job done.

One outstanding job is the question of the belt guard. Some old Powermow advertisements show a guard but none of the on line images of surviving machines have one. My machine has a hole in the side frame corresponding to the top mounting in one of the publicity images and in an image from a review of the machine in Amateur Gardening of , November 1962 - kindly sent to me by another Club member. So, if anyone has, or knows of, a Powermow with a belt guard , please let me know.
That is a good example of the
That is a good example of the art of re engineering, by modifying the blade to fit your mower you have made good use of skills that we were taught as apprentices and all without the aid of a computer.
Any news yet on the replacement drive belt saga? also a tale that may interest followers of the tale of the restoration.
The belt saga is resolved.
The belt saga is resolved. The issue was that the remains of the belts that came with the wreck gave no indication of size and the only literature to hand just said "belts" - again no size. Using the belt size calculator on the excellent Simply Bearings website suggested that a matched pair of A27 belts would do the job and a chat with their sales advisor confirmed that I'd done my sums correctly. The belts arrived the next day and although they fitted, all the adjustment was taken up, leaving nothing for stretch. No problem, return them using the downloaded pre paid label. So this time we went for A26.5 but strangely they didn't seem to be that much shorter so I made the executive decision to go for an AX26 matched pair. The X meaning that the belts were cogged or toothed enabling them to adapt better to the Anzani's rather small diameter pulleys. Bingo! The Axs fitted snugly leaving all the available adjustment to accommodate stretch. However there was as they say in all the TV engineering programmes - a problem. Ordered as a matched pair the two belts should come from the same batch and bear the same batch number. Once again SB provided the means for returning them and I now have a pair of tight fitting matched belts.
Proof, if any is needed that dealing with an established business with more than adequate stocks pays dividends; and they are no more expensive than some anonymous auction site vendor who couldn't give a .....!
Due to other jobs, not the least of which has been trying to "put the garden to bed" I've not had much workshop time to re-visit the Anzani and tackle one of the major outstanding jobs - a very smokey exhaust. Rain stopped play today so it was time to pull the Villiers Lightweight apart. Before going any further it should be noted that this machine will only be used "for fun and demonstration runs" and not for a serious day's work so it's not getting a by the book recon or, as we used to say, "heavy overhaul". Not only that but I already knew that it "had history" having found some rather unorthodox goings on in the valve retaining department. That said, having sorted the valves it started easily and ran with out any perceptible knocks or groans - just smoke.
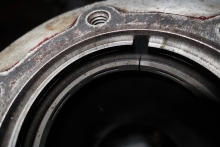
So what was found. Big end bolts barely tight , crank pin a bit rough, conrod big end bearing a bit rough and mega ring gaps - the oil control 5mm!!!!
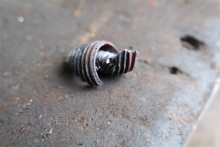
The top ring is the existing one with the 5mm gap and the lower one is the new ring with a somewhat smaller gap!
All the old rings

Taking into account the light use that it will get, the bore will be de-glazed and I will fit the new ring set that's been "in stock" since around 1985. The crank pin has been polished and I'm looking for a better conrod. Oh, bits of the original valve spring retainer were in the sludge in the crankcase!

Good to hear that the belt
Good to hear that the belt problem has been resolved, as you say a little bit of patience and dealing with a good company works wonders.
You made a timely discovery re the slack big end bolts, far better to find the problem now than during a demo run when it let's go. The new old stock ring set will save the day re burning oil is concerned a good thing that they had survived in storage and not been disposed of during a cull of stored parts.
Been busy with other things
Been busy with other things but got back to Anzani yesterday, refitted the engine after its re-ring and finally sorted out the carburettor control linkage.
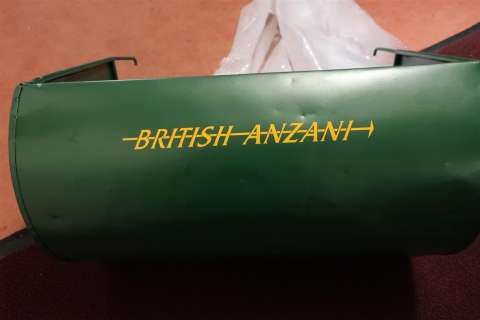
I brought the clutch cover and grass box in doors yesterday for an overnight warm up before applying the excellent decals supplied by "Titch" Sanders of Machinery Decals. These are not just vinyl stickers but individually cut letters supplied on a mounting strip to aid alignment. They were produced from some fairly rough images taken from the old grass box and some period advertising material. The result is very pleasing and I can thoroughly recommend Machinery Decals.
If they look crooked, its the camera angle!!


A good result there
A good result there especially when you consider the mowers as found condition.
They do look very good,
They do look very good, almost painted in. Have you felt the need to protect them at all, like a matt clear coat?
They do look very good,
They do look very good, almost painted in. Have you felt the need to protect them at all, like a matt clear coat?
I’ve considered it but will ask the supplier first. Don’t want to be standing there, can in hand, watching the letters curl up !

Hi Wristpin Just wondering…
Hi Wristpin
Just wondering what you did to prepare the grassbox before painting - it looks a great finish you have achieved.
I need to prepare and paint a lawnrider box, and am thinking I will wire brush/sand off the existing loose paint and then red oxide it, followed by a primer?
The brackets to attach it to the mower look to be steel, whereas the rest of the box is aluminium I think, but thought it worthwhile red oxiding in any event?
Any tips appreciated.
Many thanks
Nick
I cheated! Blasted with a…
I cheated! Blasted with a fine soft medium, and then powder coated.
Not sure that's cheating...!…
Not sure that's cheating...! I'd love to be able to sand blast mine.
"That's another mess you've
"That's another mess you've gotten me into" you might say, but what better chap to bring this mower back to life.
Looking forward to more instalments.
Will let you know if I come across any more information re the Powermow.