First ever Restoration - Suffolk Super Colt - Lots of questions!
Hello all, I've been browsing the site more and more recently - mainly from search results while googling for information. After giving up cycling recently due to health problems i needed something to help pass the time and something to fettle with! I've always carried out servicing and repairs on my own cars and bikes, learning along the way and reading up about things i didn't know how to do, and like to think I’m mechanically competent.
There has always been something about engines that has intrigued me, and so i decided to see if I could strip down and refurbish a lawnmower. One came up nearby on the bay, a 'Suffolk Colt' which was advertised as spares / repairs due to 'No Spark - suspected coil'. I figured it was worth a punt and would be a good learning experience even if i can't manage to get it running. Looking online, Colt's didn't seem to quite match the look of my mower, which led me to discover it's actually a 'Super Colt'.
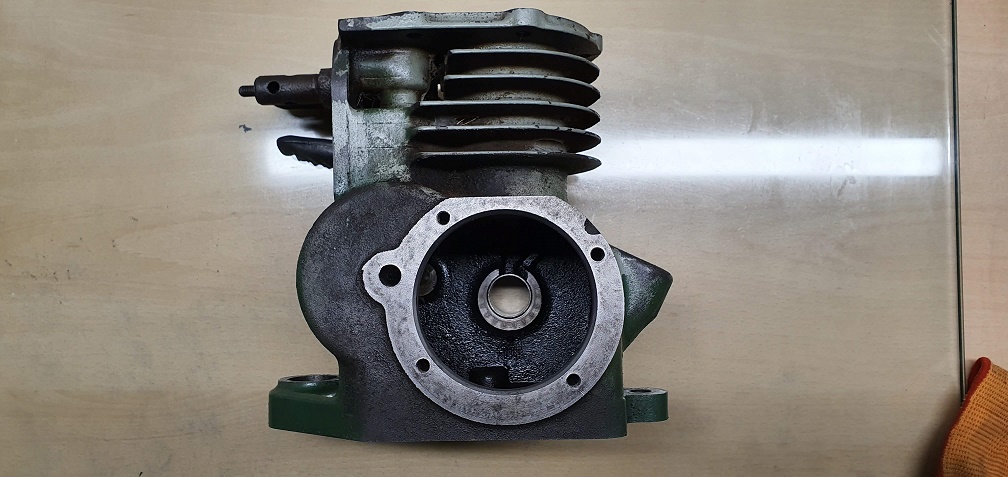
What started off as a simple 'Let's find out why it's not sparking' quickly resulted into a complete strip down of the entire mower and lastly the engine!! Taking plenty of pictures along the way, and bagging up nuts and bolts with labels so as not to forget what went where, I've now stripped the entire thing down so that I'm left with the engine block, and an exhaust that is well and truly welded to the block - thankfully it doesn't appear damaged, just rusty, so It can stay where it is (frustratingly for my OCD).
I'm going to test the waters here to make sure I can upload pictures properly, and once I can, I'll post up a few pictures I've taken during the strip down. I've come across quite a few things I’d really appreciate some advice with so anyone interested in looking/reading can hopefully help me out - which I’m hoping will help others out in future who are thinking of tackling the same sort of project.
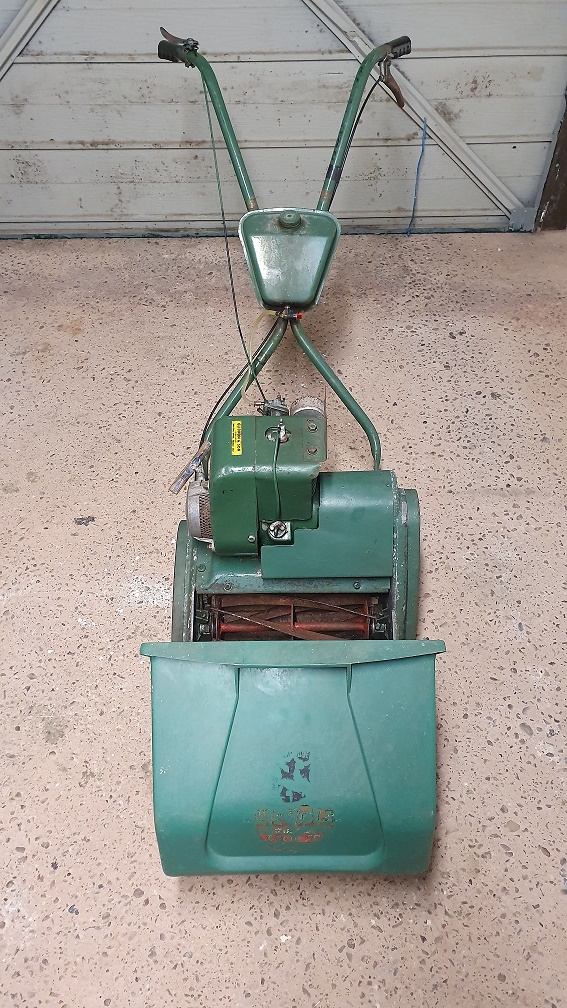
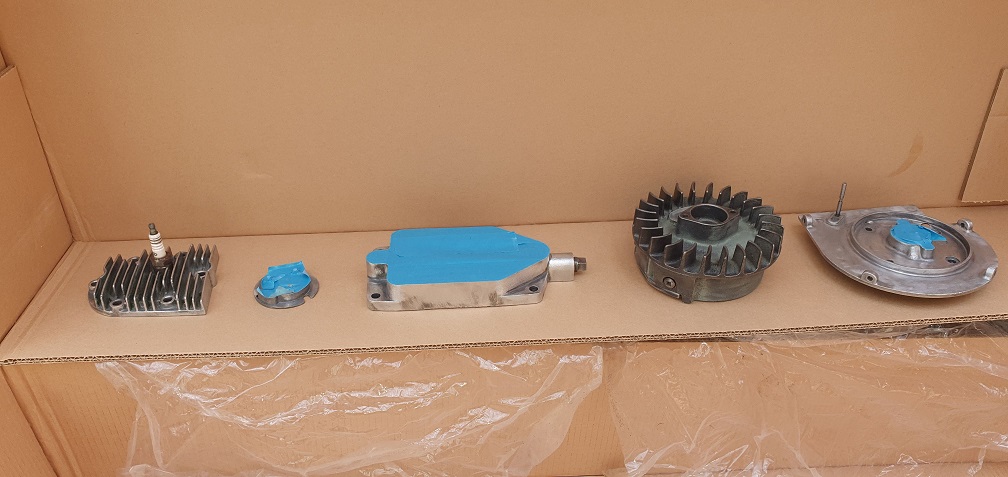
Here is a Picture of the mower after collecting it
Forums
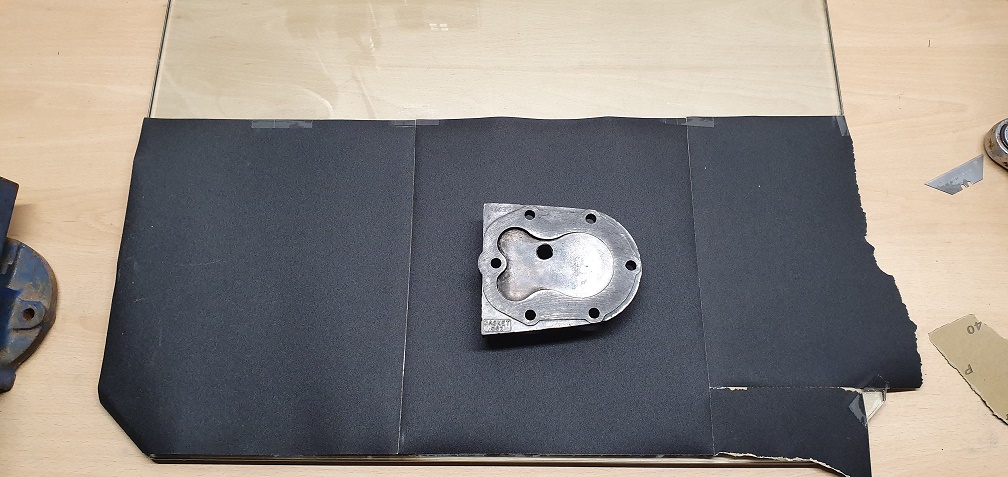
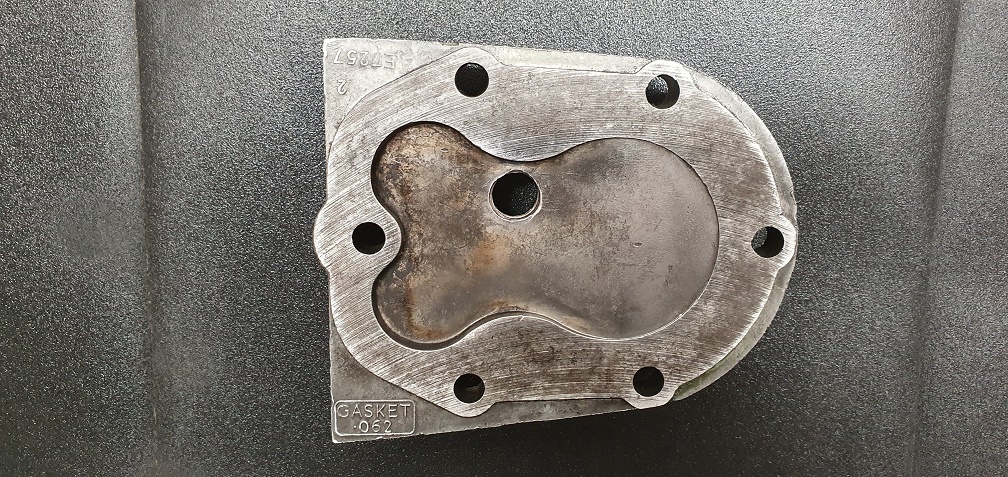
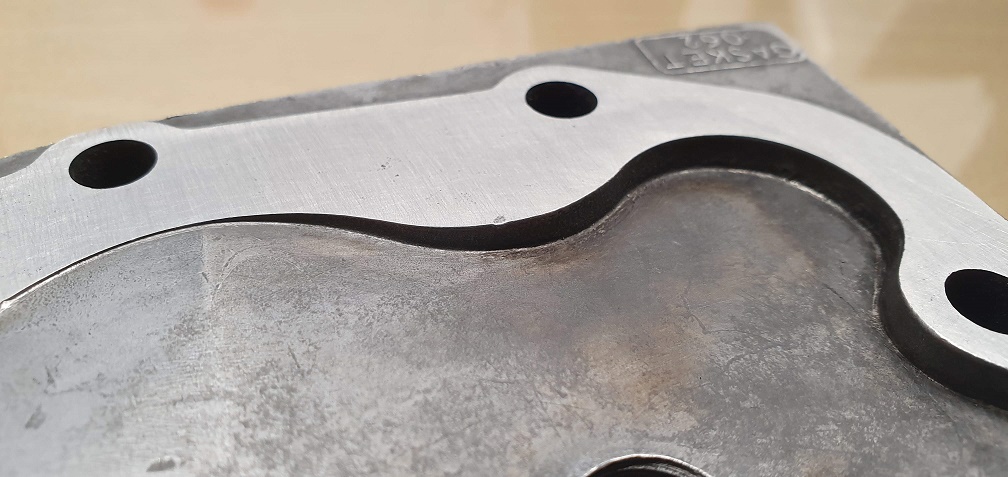
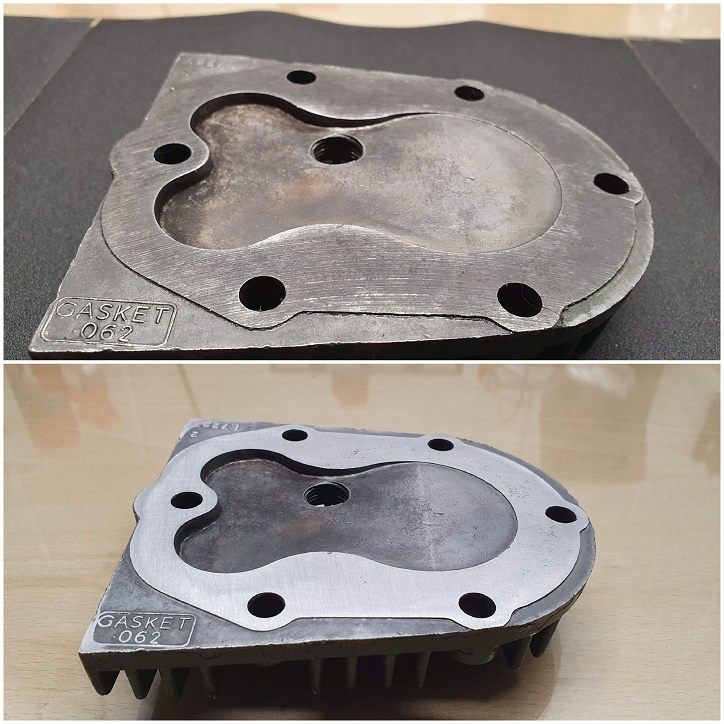
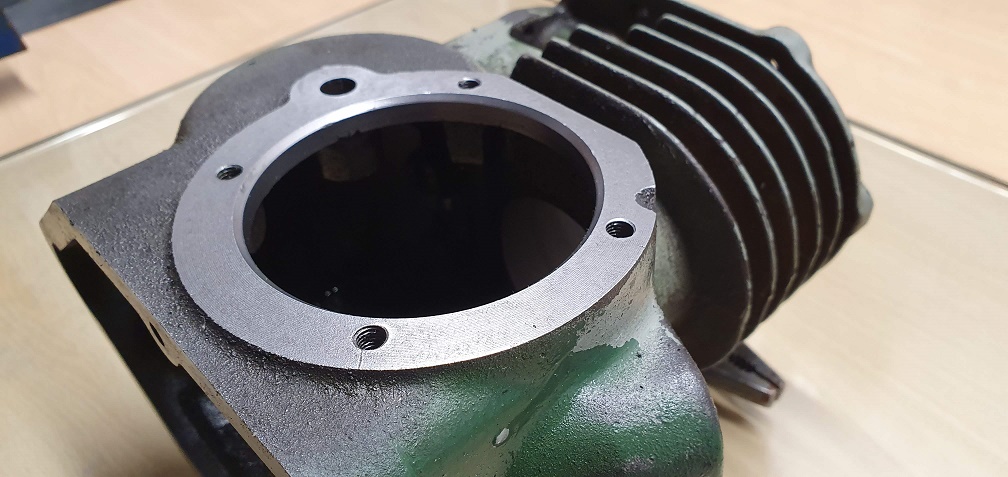
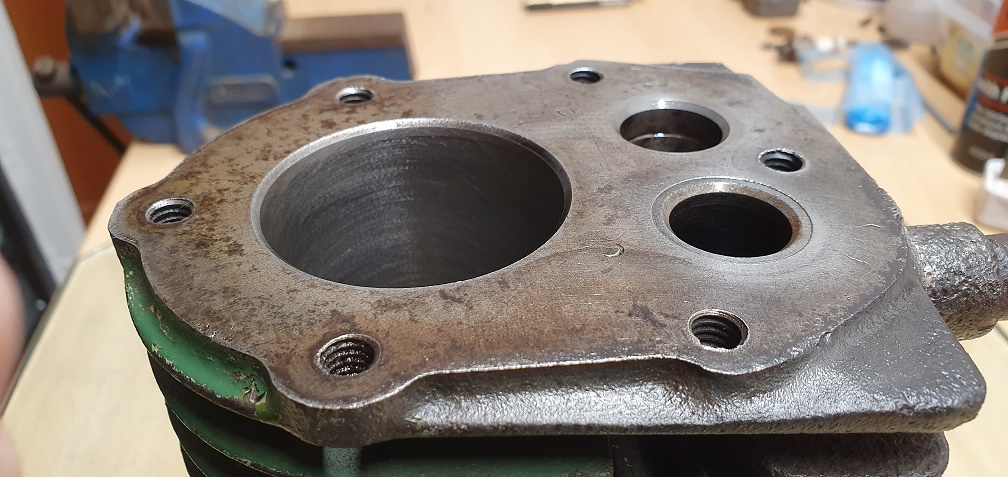
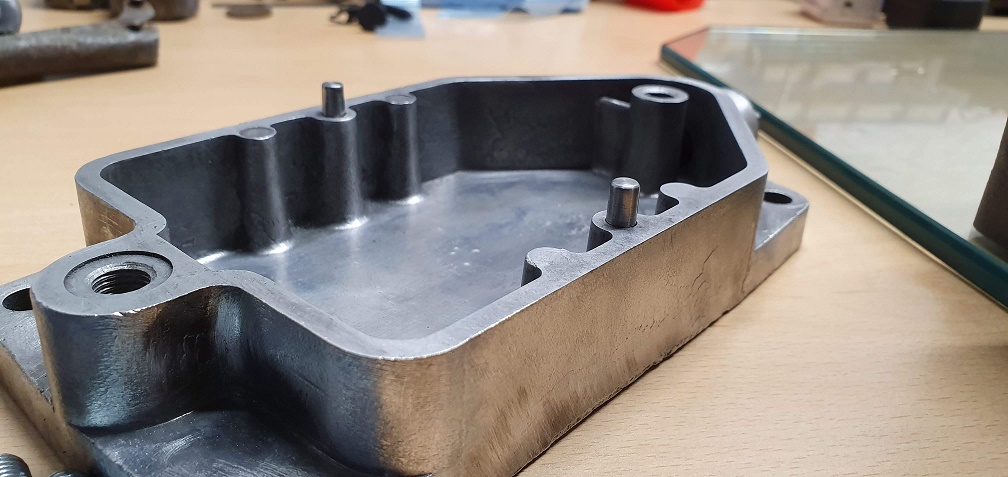
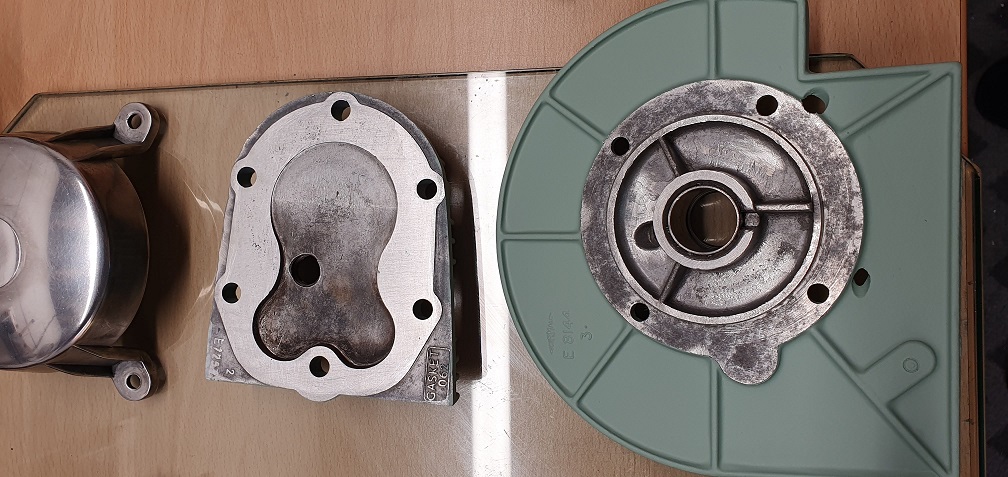
Using my new 'surfacing plate
Using my new 'surfacing plate', I've also now sanded most of the gasket surfaces to remove old residue and remove any high spots
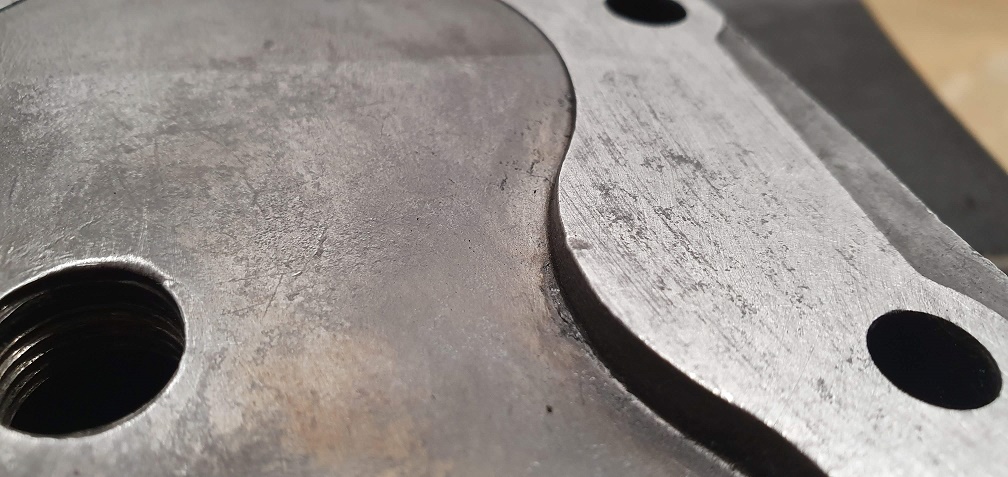
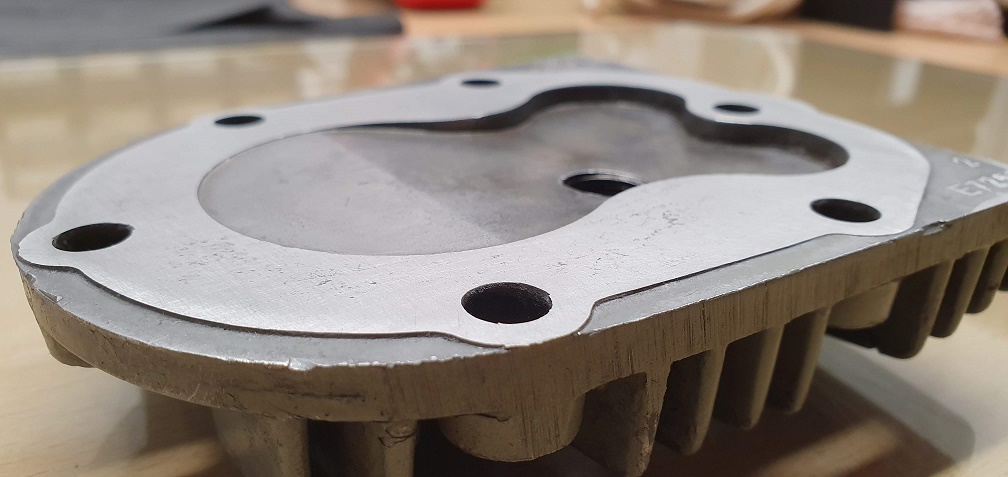
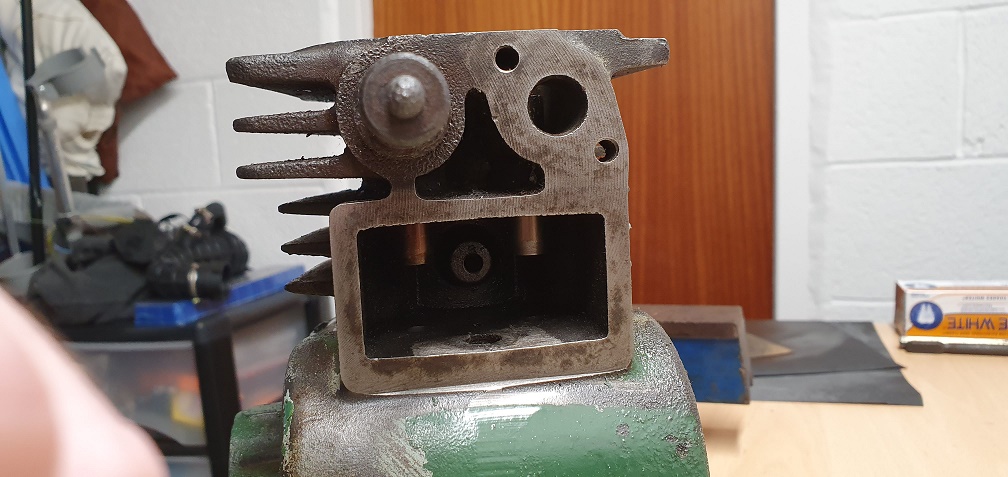
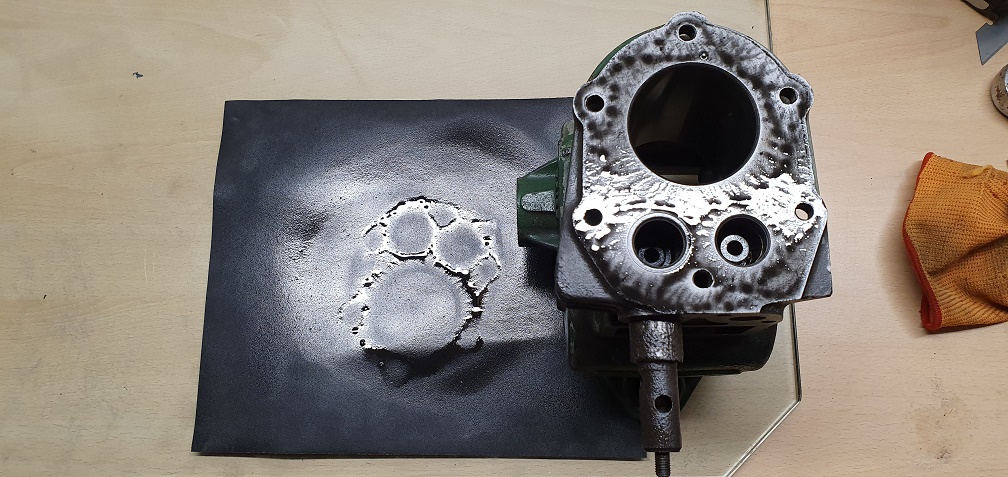
Other than looking like some
Other than looking like some sort of 'Robot pirate' the valve chest area is a little trickier to clean up with the rusted exhaust still in place, but I'll work around it

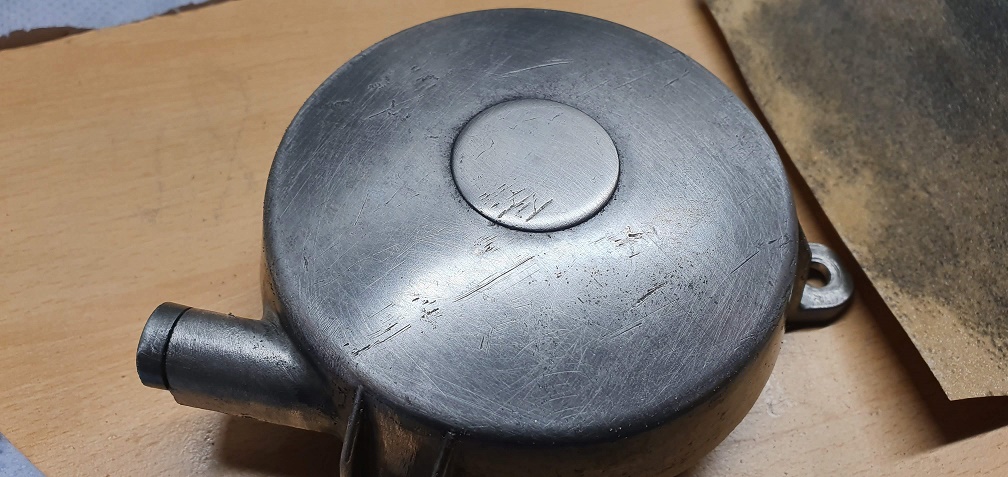
Really excellent photo
Really excellent photo quality throughout . I'm not sure the metal recoil starter began life on this mower - I would have thought the Atco Standard would have had the plastic starter and hence the plastic rotating screen. The very early Super Colts with the metal starter had the " mazak " type zinc alloy flywheel as I recall.
As stated previously these engine will run pretty no matter what the internals look like , with any oil and on parafin ( when warm ) or waste diesel/petrol mix . A friend of mine, finding he had no engine oil, put chip oil in the sump with no apparent ill effects . They really are an amazing design. Only the dipper breaking off, or having no oil at all, stops them
Thanks Villiers98, that's
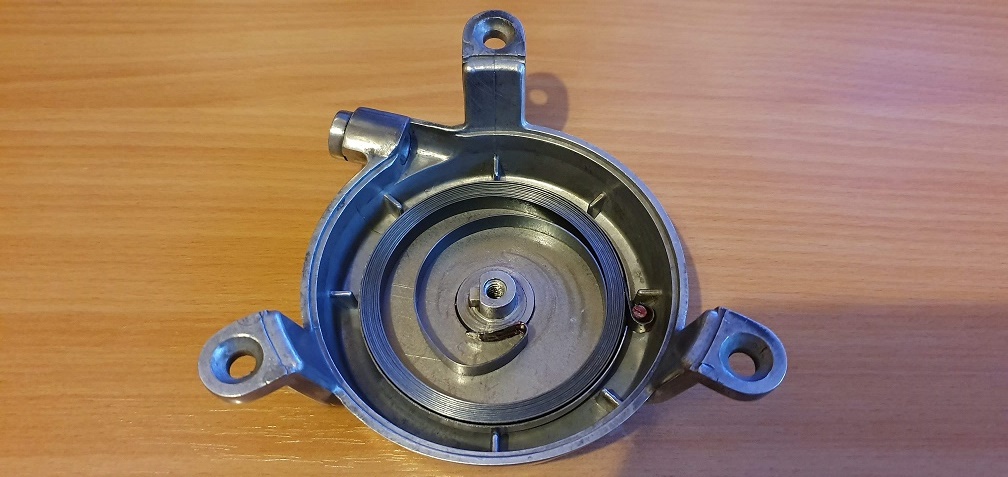
Thanks Villiers98, that's interesting to know about the starter. It's so difficult to know what was original and what was changed at some point throughout it's life. After rebuilding the starter it certainly seems a lot better put together than the plastic variety, so I think I'll stick with the metal version for now at least. Some pics of the metal starter rebuild
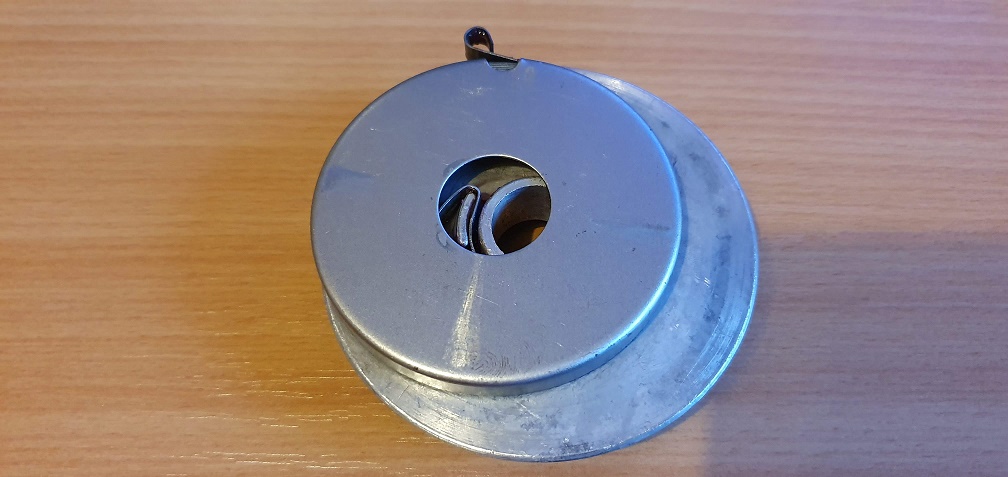


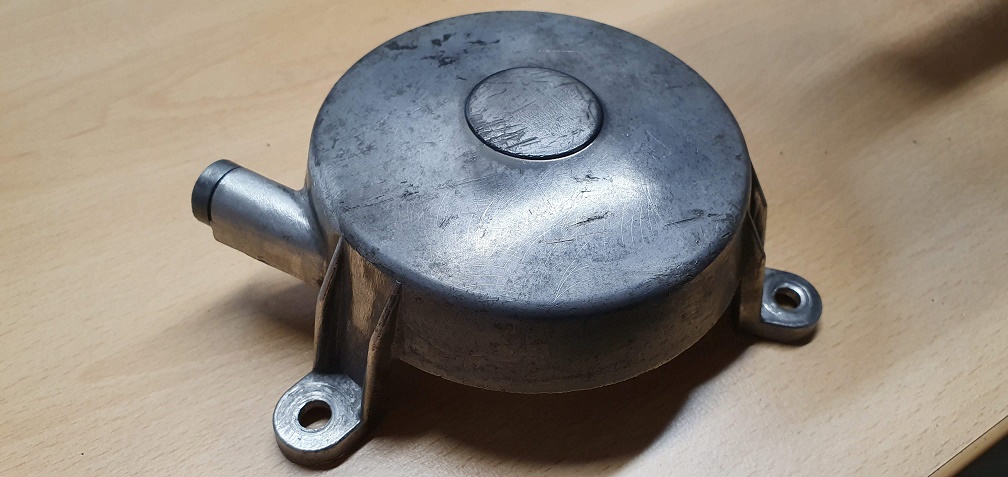
The metal casing had some nasty gouges in the surface, so I spent some time (a long time!) sanding it down to get rid of these. I didn't want to take it to a mirror finish as it wouldn't have been like that originally, plus trying to keep it that way would require very careful manoeuvring of the mower, and knowing my luck, I'd catch it on something sooner or later! I opted for a smooth satin finish instead using finer and finer grade wet and dry
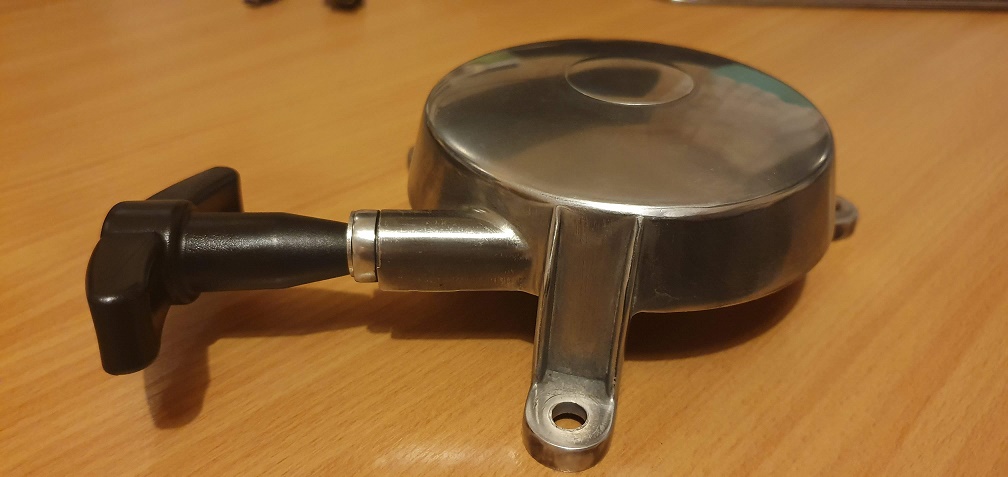

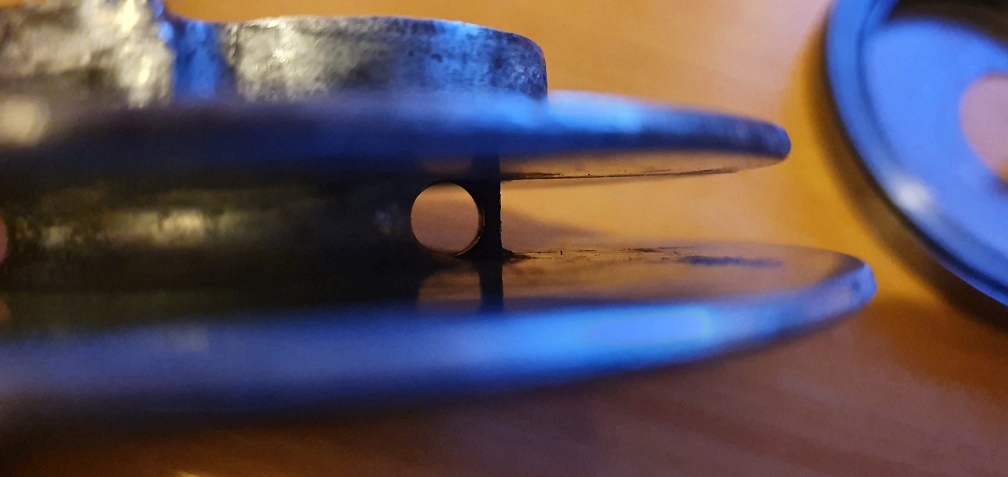
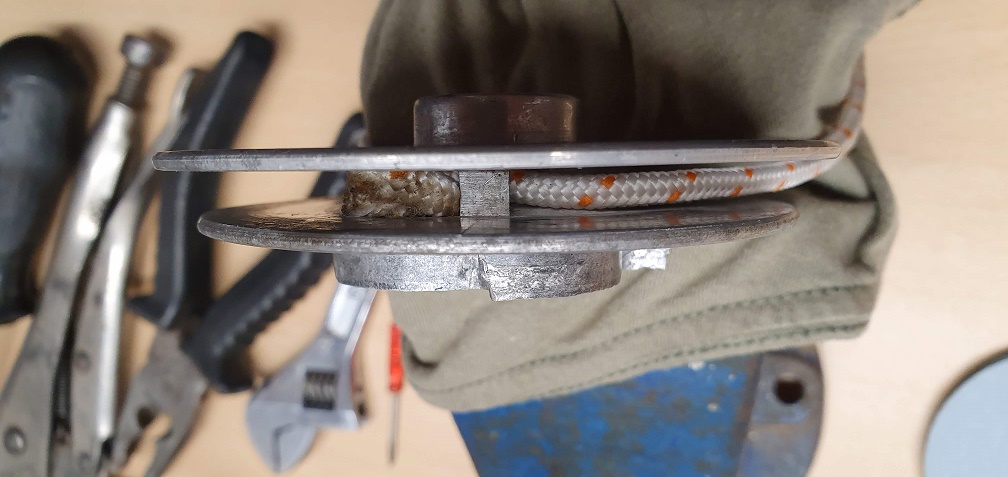
The washer behind the handle seems to just fly up the cord when you pull the cord out - not sure on it's purpose - perhaps the washer hole needs to be a fraction larger so it remains on the starter body while the cord is pulled out through it?
That is the shiniest Suffolk
That is the shiniest Suffolk starter I have ever seen ;-)
The washer under the starter handle should not be there, but there should be one under the double knot in the handle
The starter is probably original, the plastic ones came out roughly at the same time the alloy engine was introduced.

I’ve only ever seen a couple
I’ve only ever seen a couple of units with that washer fitted. Could be wrong but I don’t think that they were original.
Edit. I was slow on the keyboard and H beat me to it! Double knot, aka “ figure of eight knot” is essential to prevent the rope pulling through.
Thanks, as shiny as it looks,
Thanks, as shiny as it looks, I really wanted to stay away from bling and just have a smooth pleasing finish with no visible damage. What would be a good way of preserving the finish of the aluminium now?
Thanks for the pointer on the washer too - it was fitted this way when i dismantled it, but, right enough, the parts diagram shows it under the knot in the cord behind the handle, so I removed it and changed the position so it's correct now with a figure of 8 knot in the end of the cord which just fits snugly into the recess of the handle.
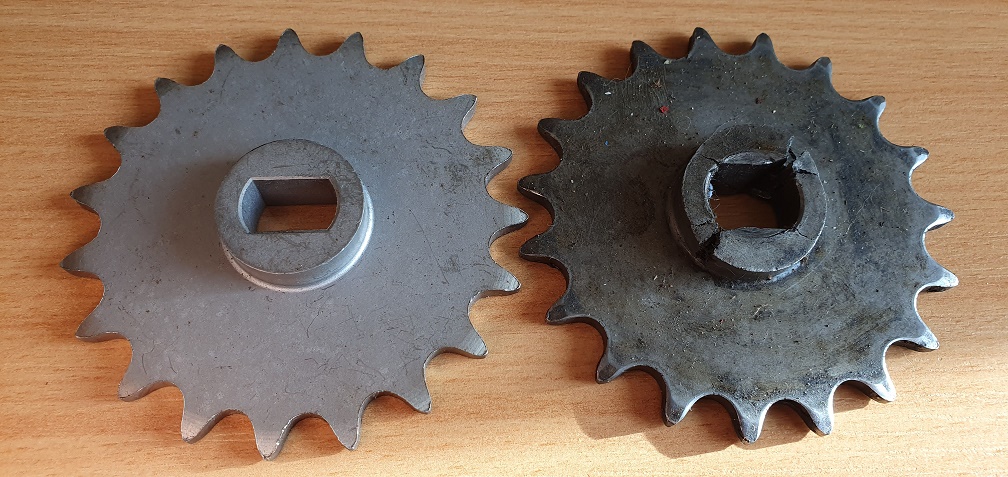
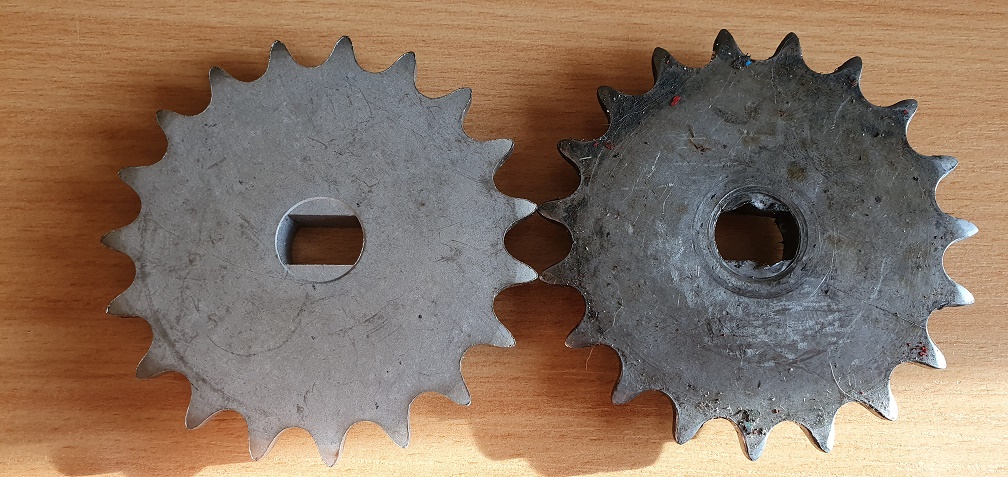
Also another update - I managed to get hold of a replacement 19 tooth sprocket which was brand new - cheaper than some of the second hand ones on offer!
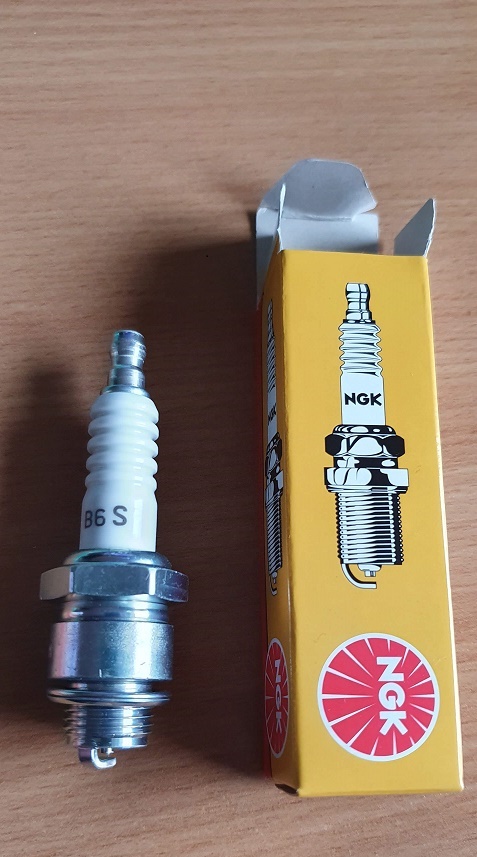
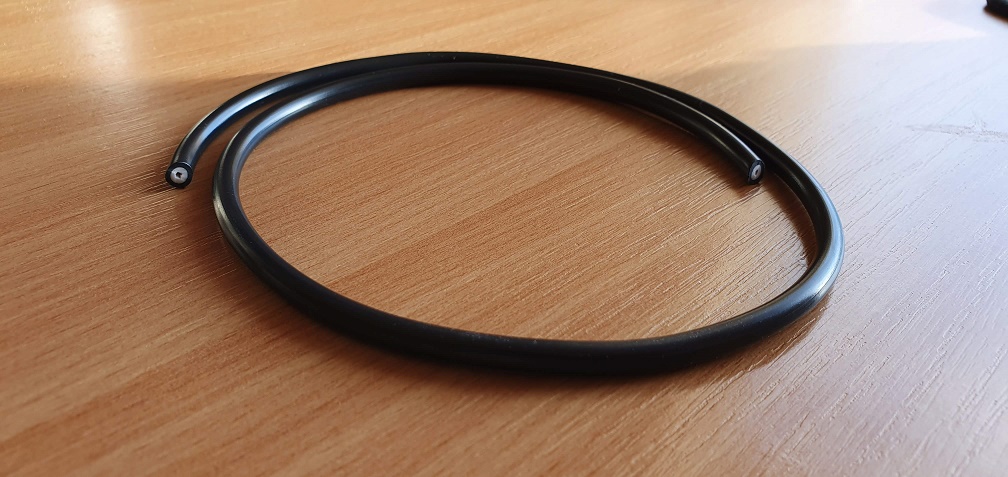
A new spark plug - NGK B6S - and length of HT lead
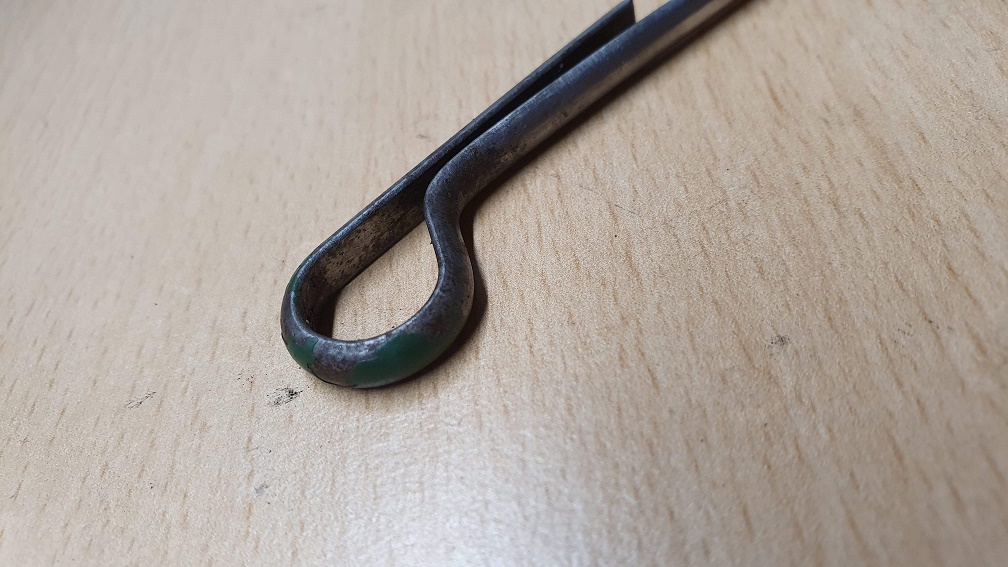
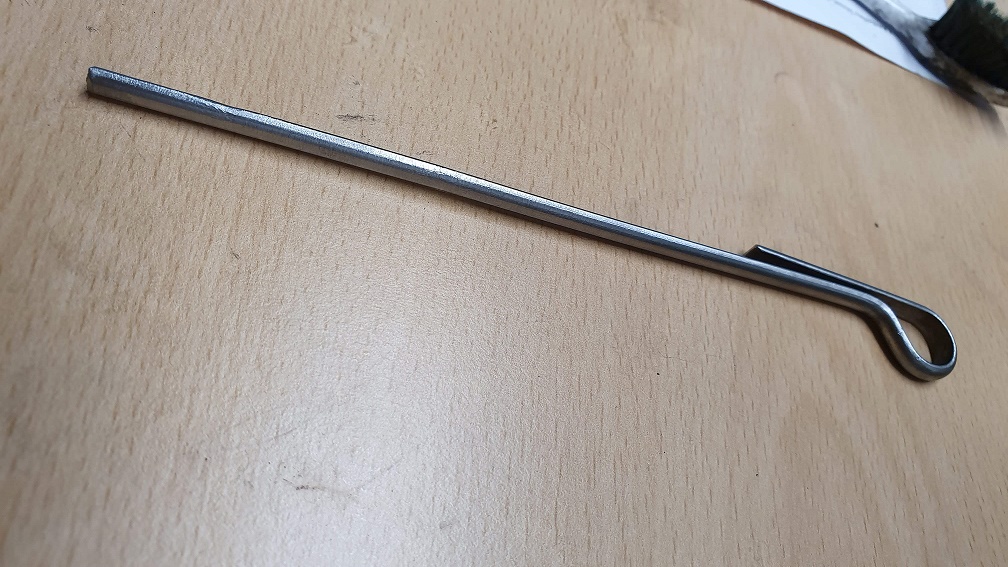
Cleaned up and removed the rust on the metal dipstick
Either paint it with a matt
Either paint it with a matt clear lacquer or matt silver paint, they were never shiny, well , not the ones I have ever seen (and I have seen a lot).
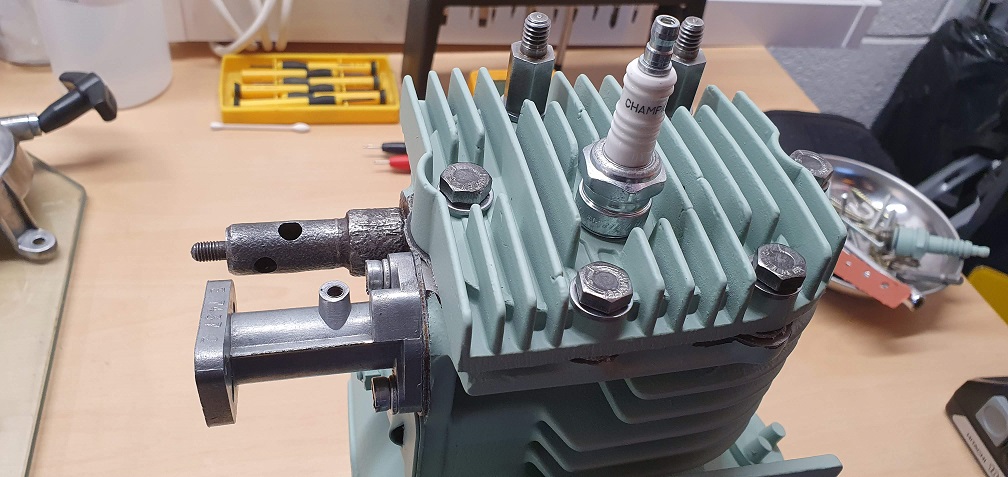
Also, if you are really trying to make it authentic, it should be a Champion J8c sparkplug ;-)
I would just let it “weather”
I would just let it “weather” naturally . They were never that shiny when new. My biggest “hate” is machines “restored” to a greater degree than when they left the factory. By all means restore correctly as per H’s observation re the correct plug. That goes for the plug connector and cut out strip as well - both type and position for the latter.
Thanks for the heads up
Thanks for the heads up regarding the plug - I'll get a champion plug ordered and keep the NGK one as a spare or find a creative use for it! I need to also order the screw on HT lead connector also so will get those sorted next.
Upon reflection (!) I have gone a couple of grades too far with the wet and dry. No intention of bling so will revert it slightly do a dull but clean and smooth finish. It works with a lovely smooth action now after the rebuild.
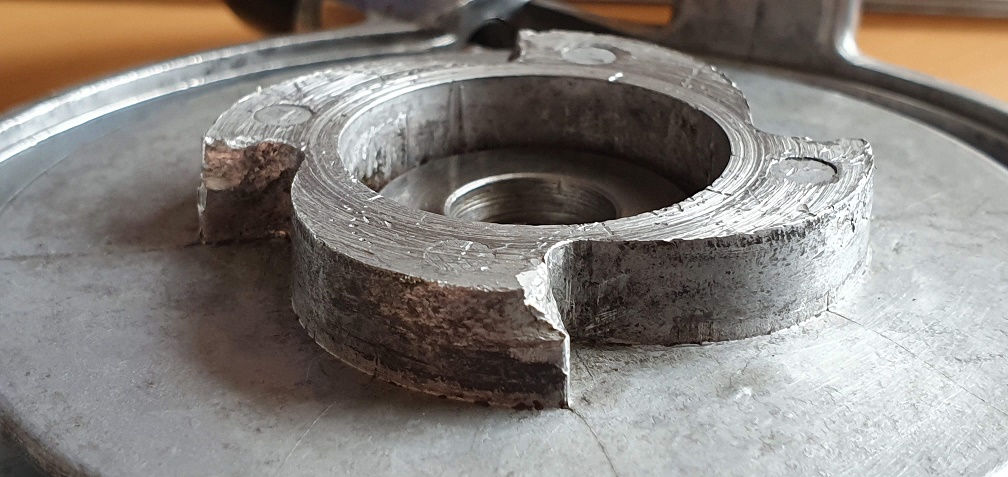
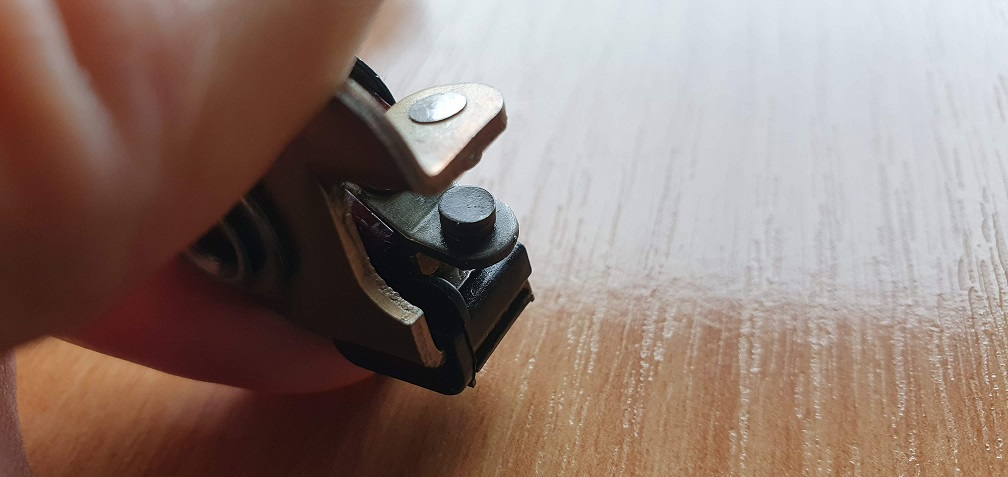
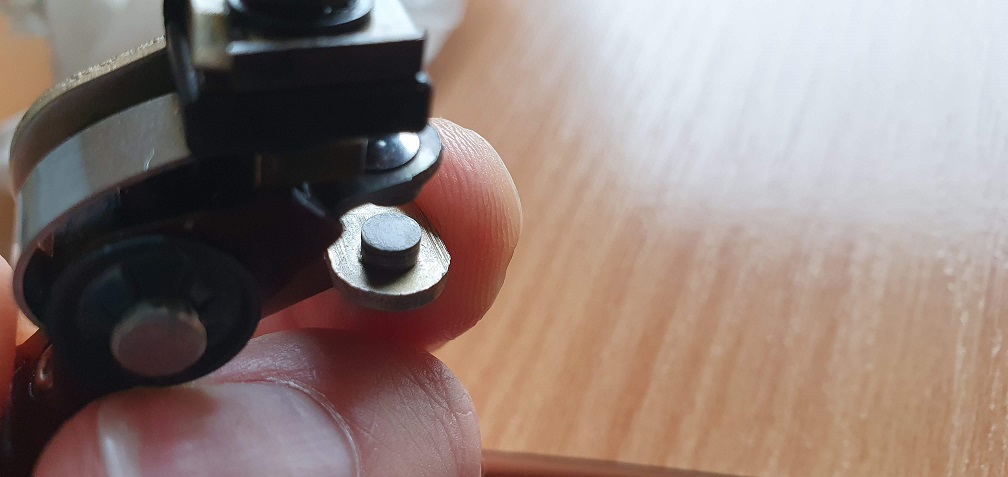
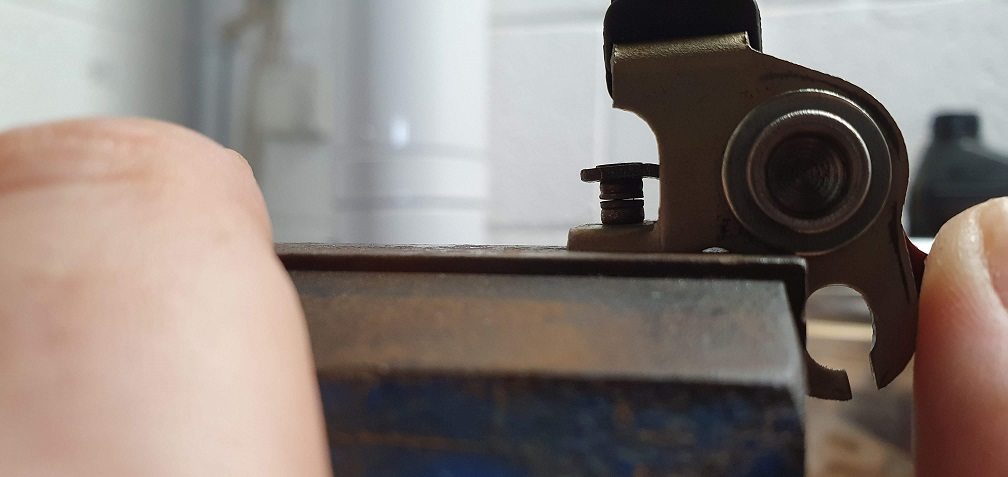
More butchery has happened at
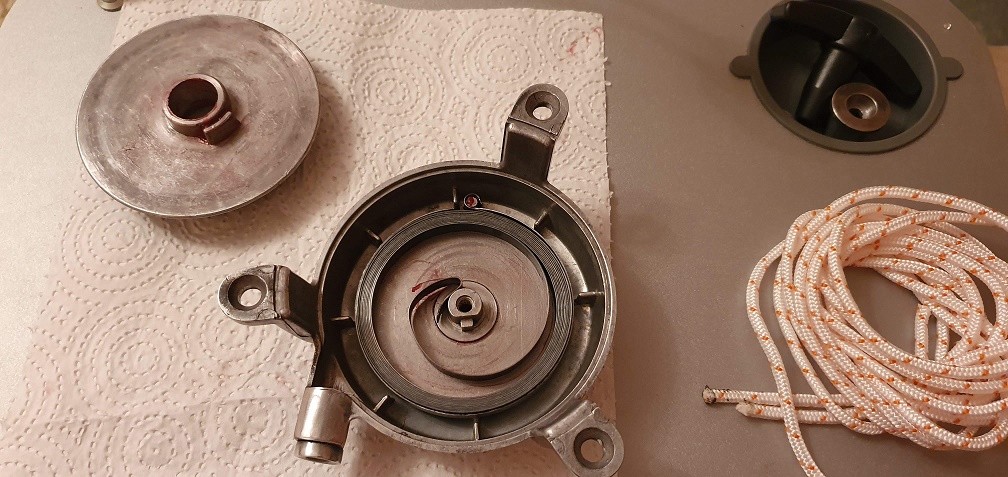
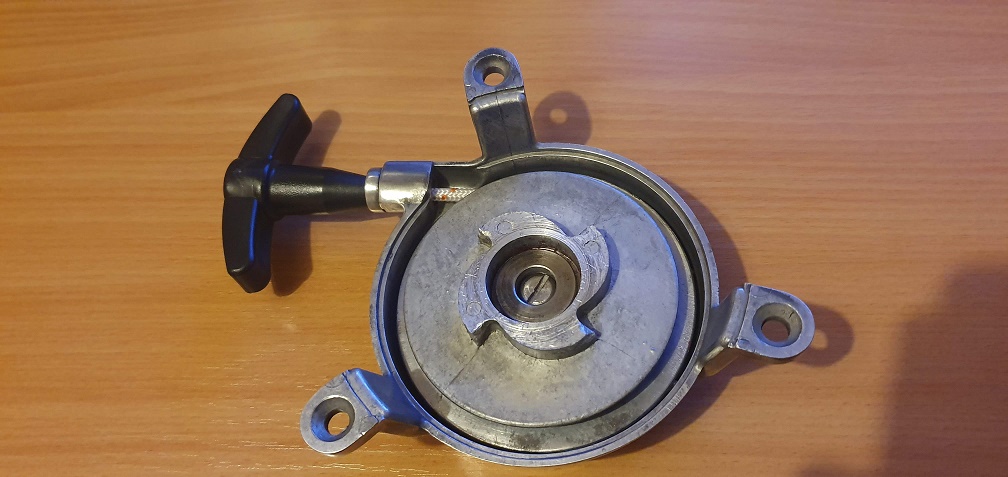
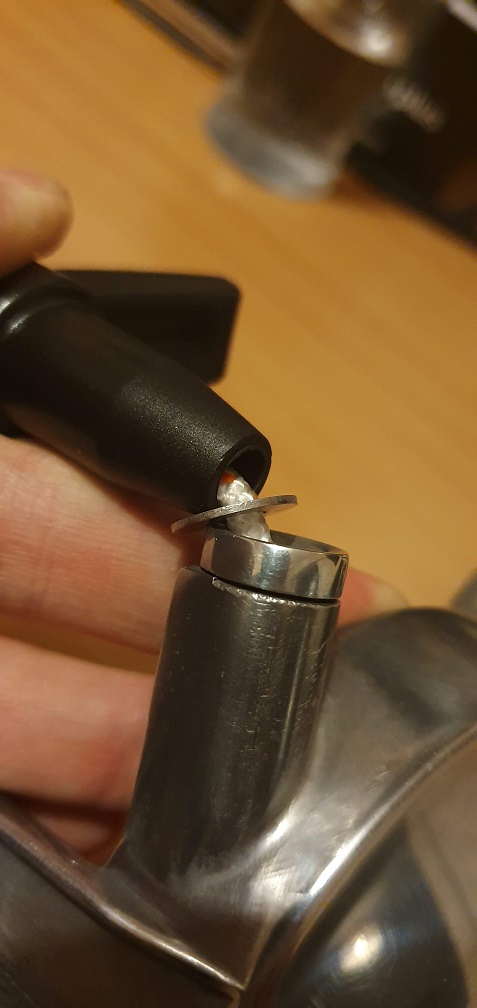
More butchery has happened at some point in the past with the starter pawl hub assembly and retaining screw/s. The hub has some material removed next to the screw holes
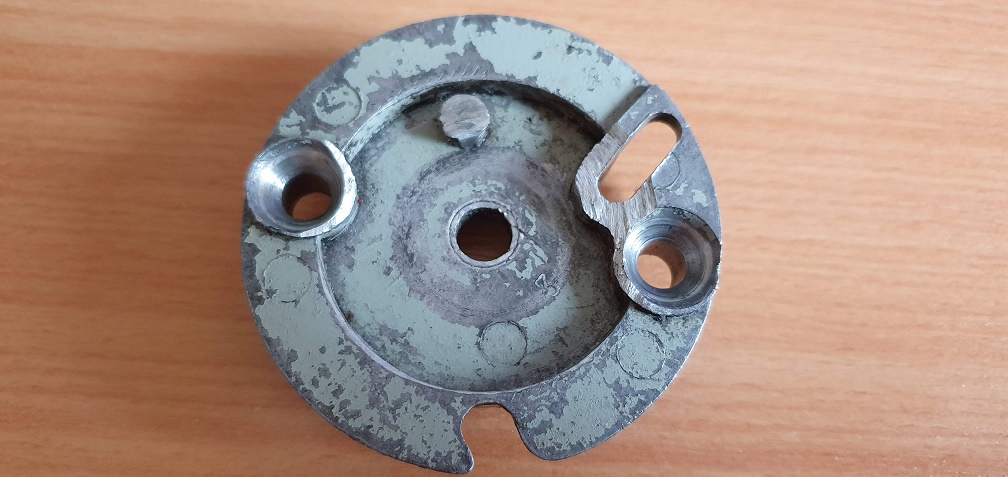
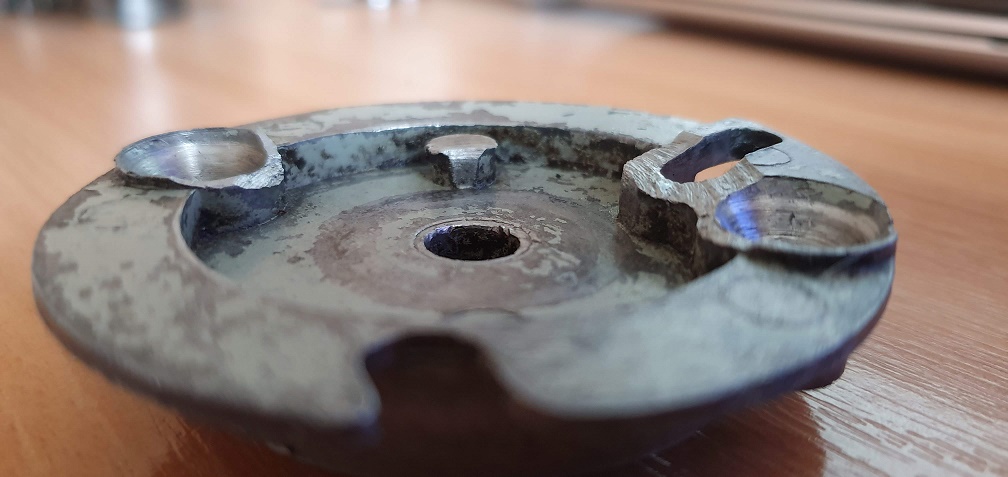
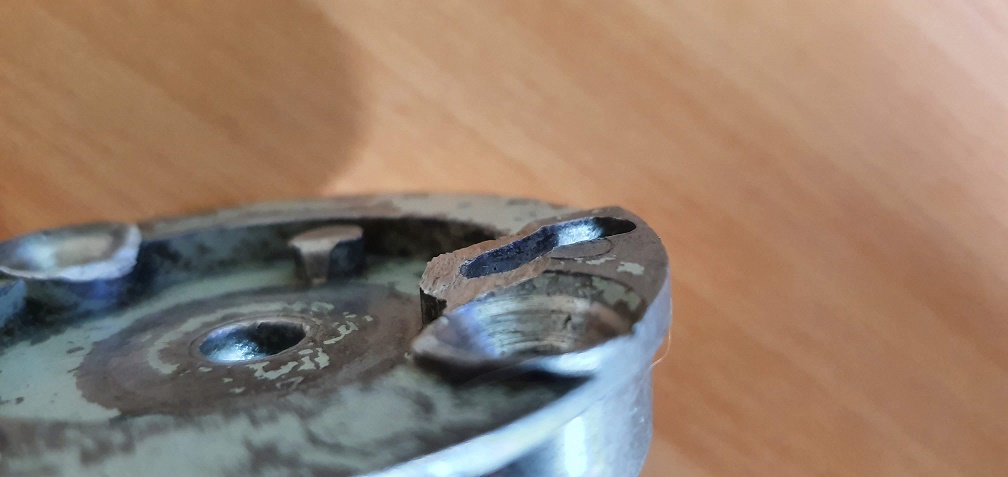
I don't know if this has been shaved down for some reason, or if the 4 'claws' on the back of the ratchet pulley have cut away at this, seeing as someone had the plastic grass shield from the plastic recoil starter housing fitted, they may have had mounting depth/spacer problems? One of the retaining screws has been shortened by a good 6 or 7mm also which seems odd??
The 'claws' on the back of the ratchet pulley have the top corners worn down by about the same depth of the as the pawl hub rub marks
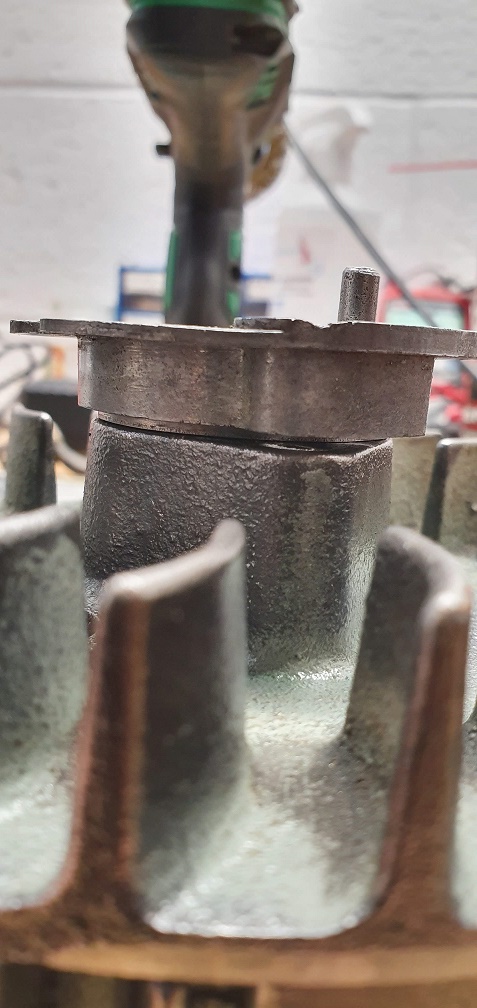
Once you get into the mix and
Once you get into the mix and match situation without appreciating ( the former owner) the result of using mismatched components there’s a risk of such damaged . Way back on this thread I pointed out the absence of the steel spacer used with the metal pawl carrier.possible. Basically, the L shaped sliding dog needs to fully engage with the scroll cut outs on the rear of the pulley. Assuming that the correct spacer is fitted behind the pawl carrier, some adjustment of the engagement may be made by moving the whole cowling on its four slotted holes.
Thanks Angus, yes I remember
Thanks Angus, yes I remember you mentioning about that spacer, it was post #109 and I confirmed it was present so with the incorrect plastic grass shield our of the way, hopefully the sliding dog should fully engage with the full depth of the scroll cut outs. I'll check this is the case when re-assembling. I don't hold much hope of finding a replacement screw to replace the shortened one, as searches for part number 1H335A only bring up an online parts site with stock in the Netherlands and although the screw is less than a Euro, postage takes it to over 20 Euros!
Could this be one of the slowest super colt restorations of all time? Its feeling that way...
Finding a screw should be
Finding a screw should be fairly easy, just take the good one to a local bolt supplier and they should be able to match one for you, even if it is a bit longer.
As for the length of time it is taking, it will take as long as required, but I will say that I (when I was working) used to be able to winter service one of these in about 3 and a half hours, I didn't go quite as far as you have, but it was close ;-)
Finding a screw should be
Finding a screw should be fairly easy, just take the good one to a local bolt supplier and they should be able to match one for you, even if it is a bit longer.
Not that easy in these parts, even the last "traditional" iron monger only stocks metric now. Namrick fasteners can possibly help .
Wow 3 and a half hours - I'll
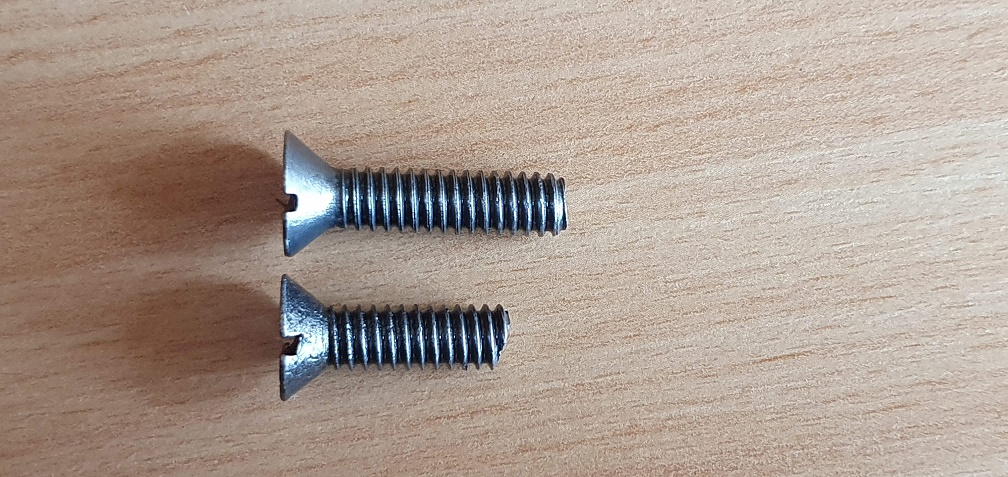
Wow 3 and a half hours - I'll be lucky to finish this in 3 and a half years at this rate! Well I know that the 2 screws I have are measuring 5.99mm diameter thread, but they should be 1/4" sized, so I don't even know if they are correct/original or not. They have 20 threads per inch and are UNC thread. The longest is an inch long exactly. It looks like you can get the correct machine screws in 1/4" online, but if anyone has one of these motors and happens to have the cowl off, it would be really useful to know what the screws should be like.
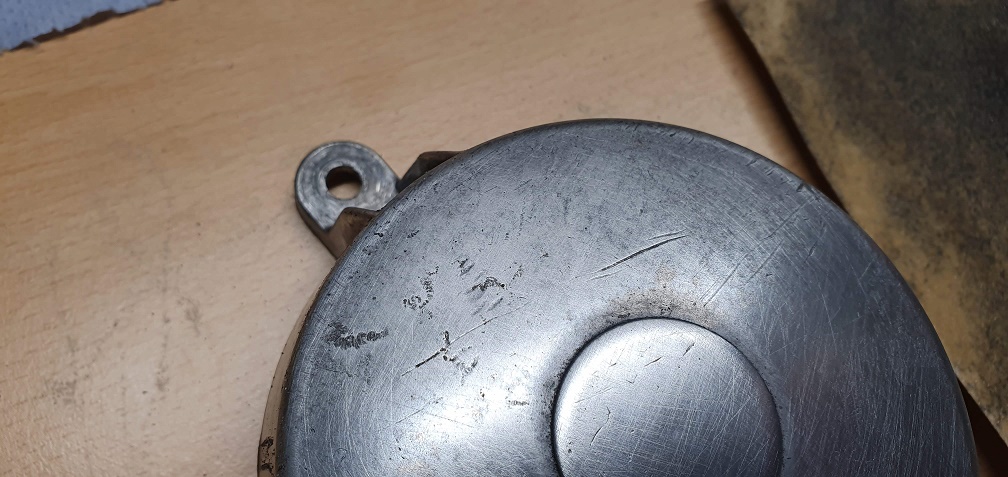
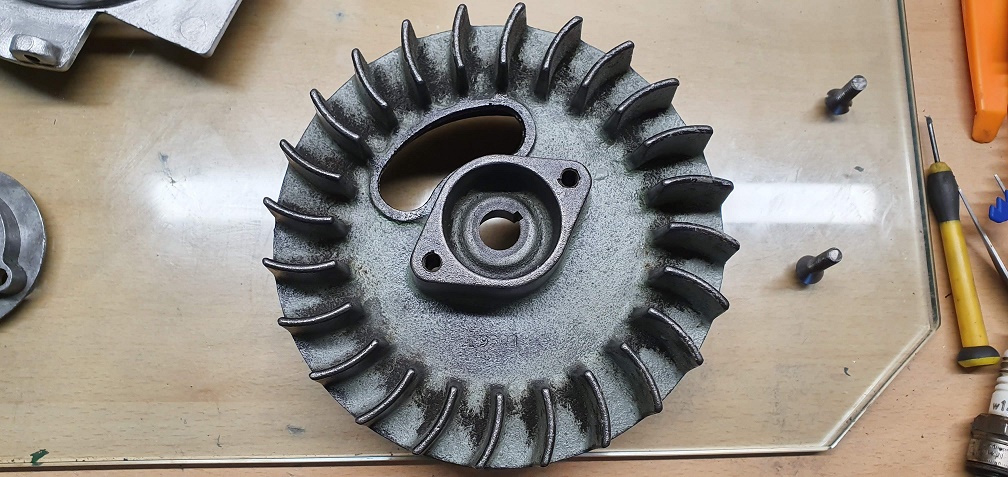
The flywheel has no markings cast into it in relation to the threads, as I believe some of the older models of flywheel had on them.
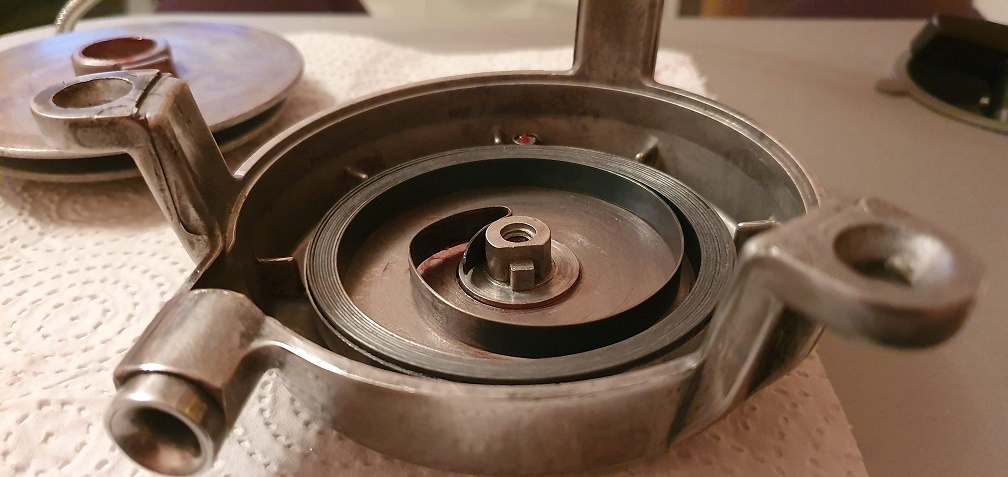
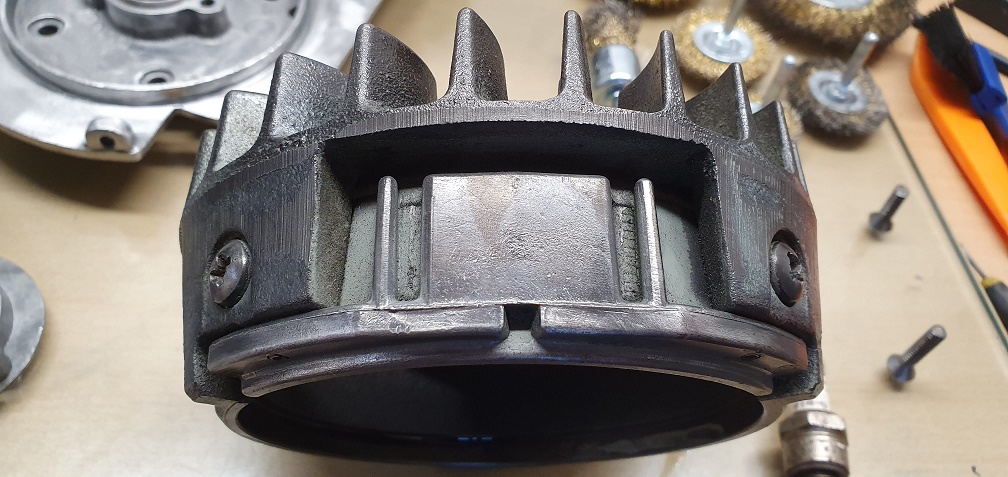
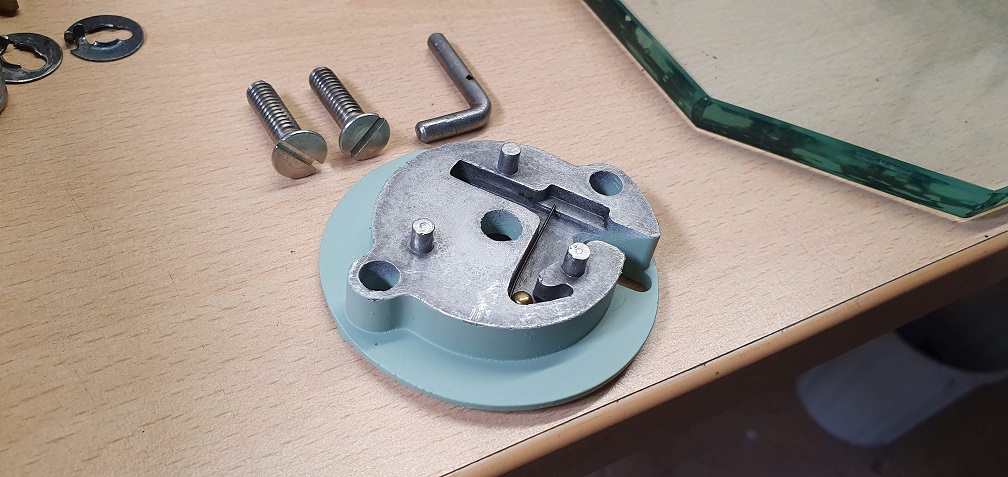
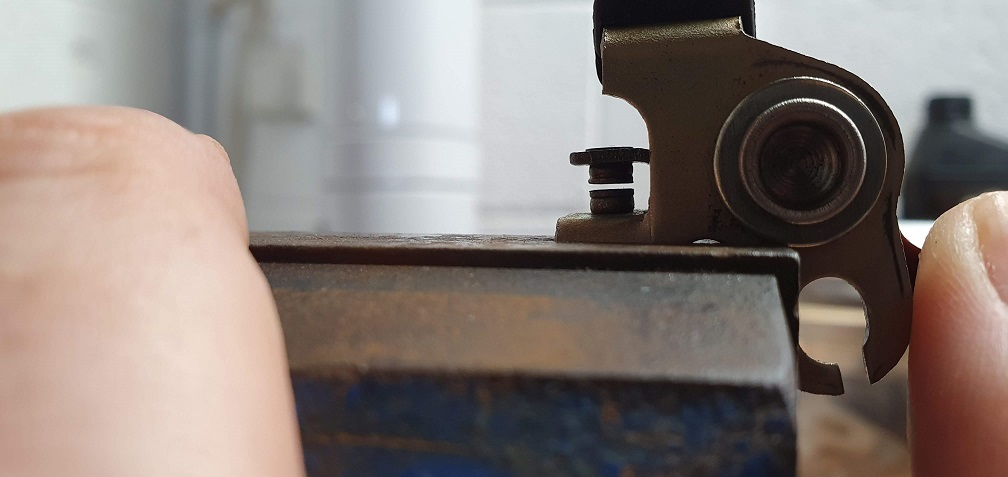
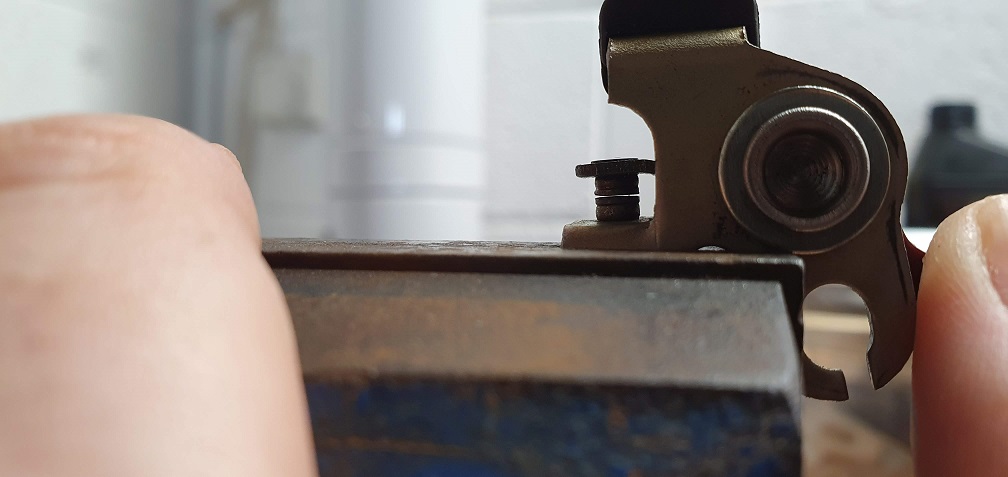
Hub assembly on top of spacer on top of flywheel mounting point
Correct Spark plug :)

Piston cleaned up and the new
Piston cleaned up and the new rings fitted
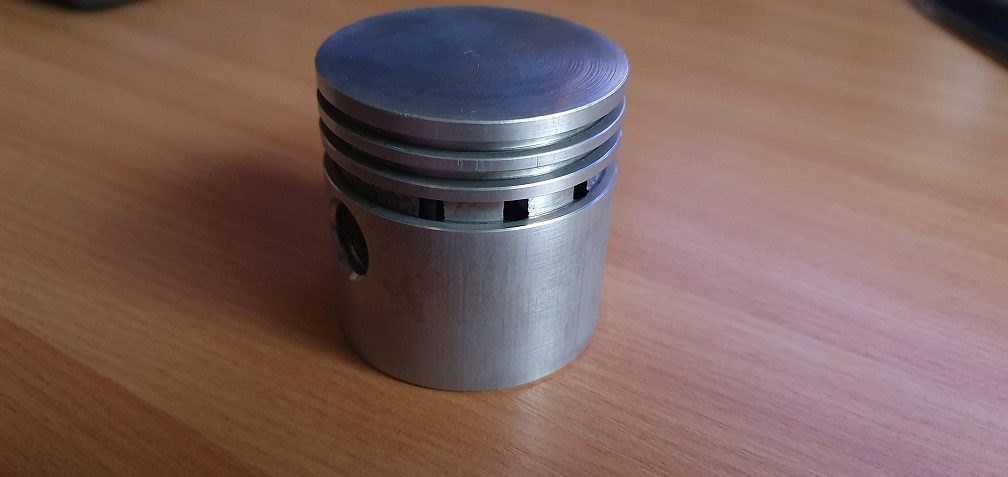
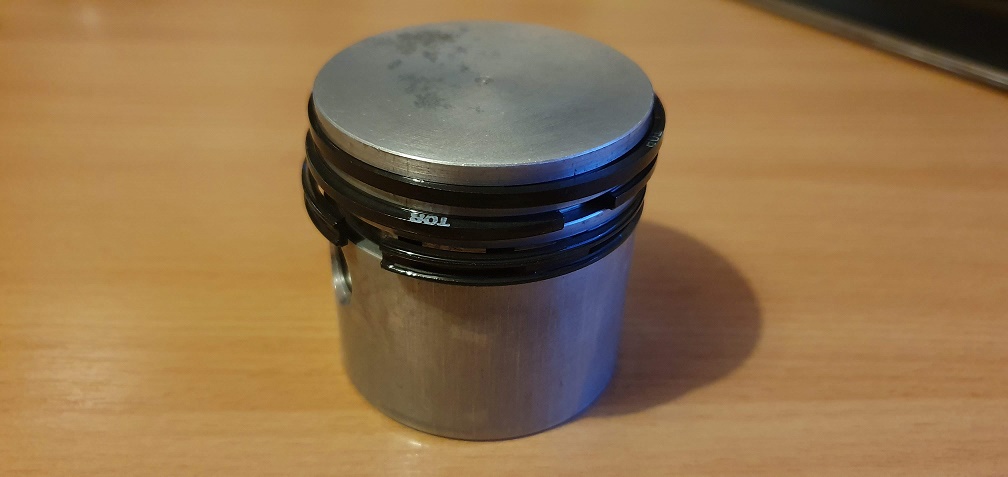
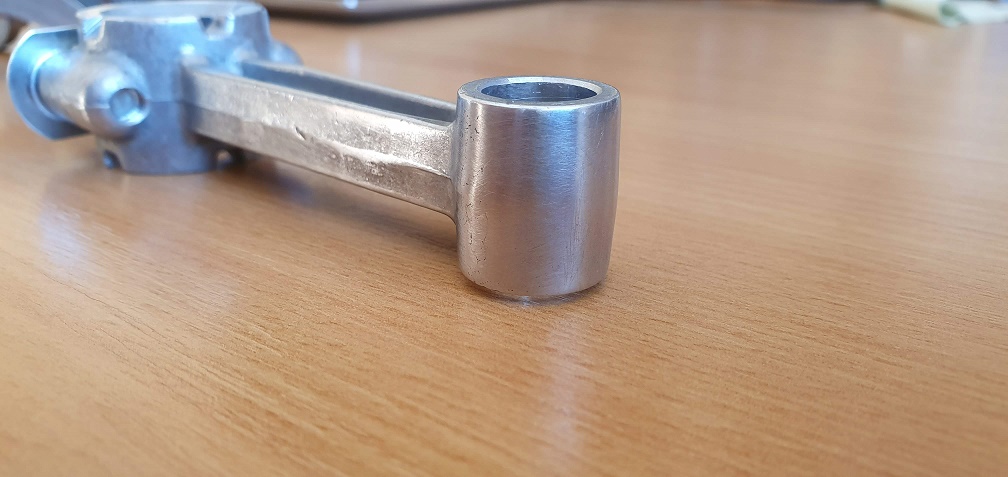
Also removed the casting spurs on the con rod small end which were very thin - don't want them coming off into the oil (probably being over cautious)
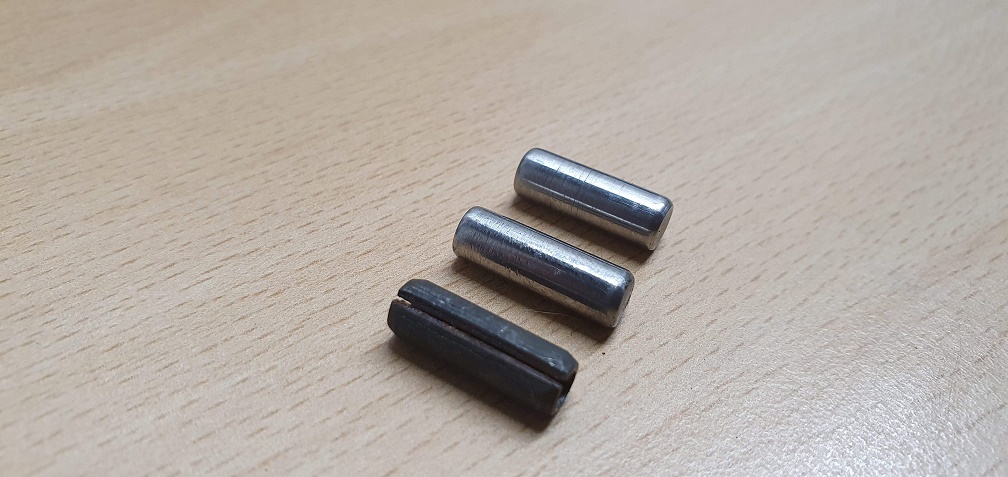
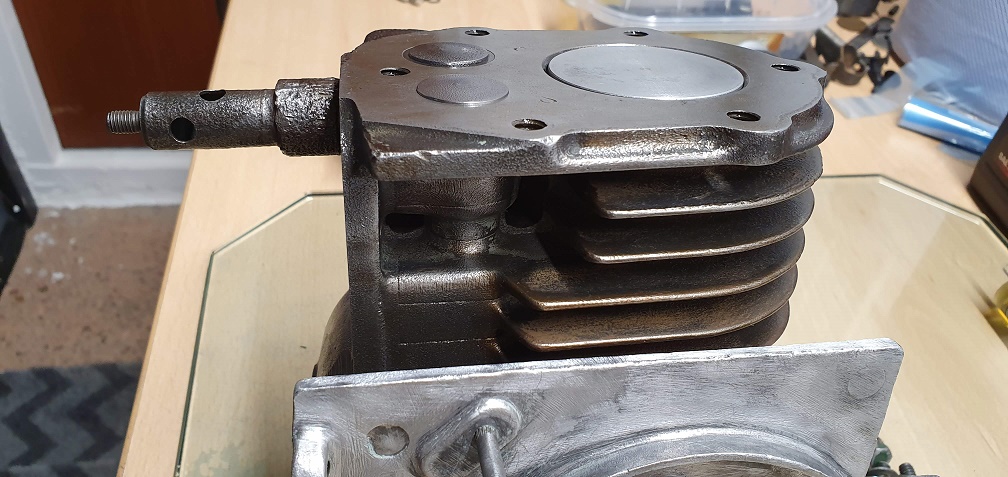
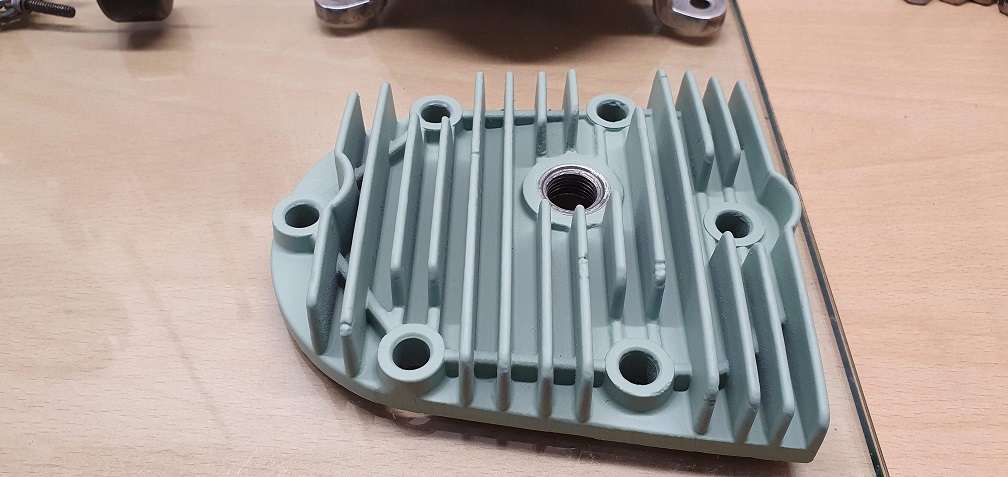
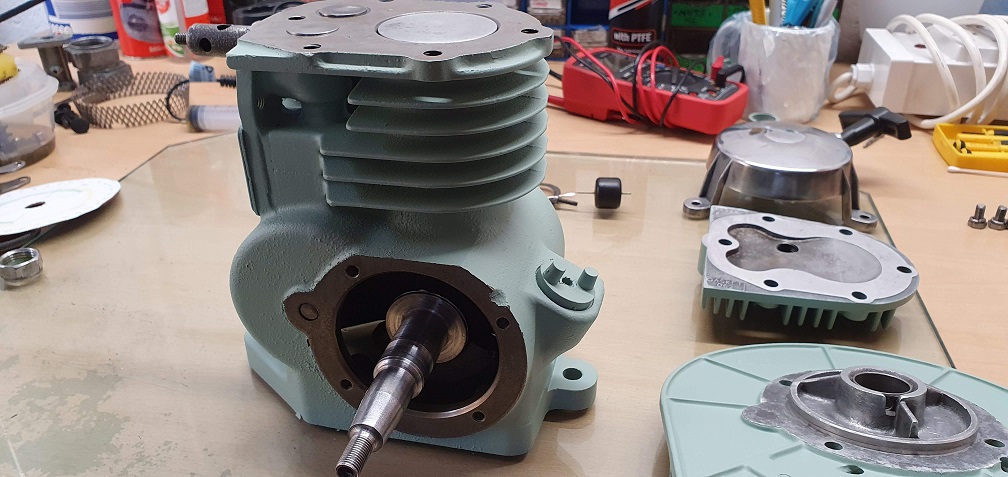
The engine block, head, sump, flywheel and backing plate are now all cleaned up with paint removed and ready to be reassembled as soon as I can sort out the dowel pins. My order from the far east never turned up after nearly 2 months so I ordered a 100mm length of 6mm silver steel in the end and will grind it down to the correct (7/32") / 5.75mm diameter that the sump and block holes seem to require, although the holes definitely have a slight internal taper.
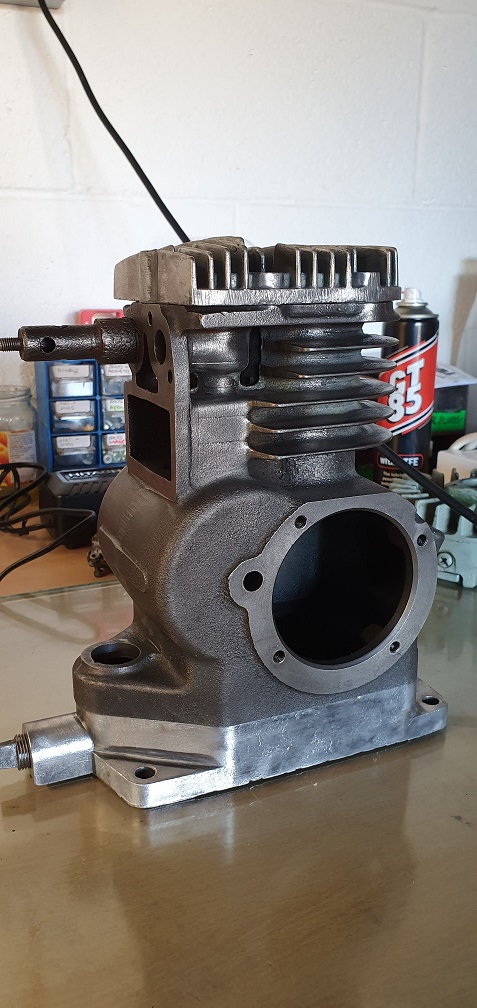
I really like the natural colour of the cast iron block and think the other parts painted to match that colour would look nice, however as I'm keeping everything else as original as possible, I'll still go ahead with the planned colour as near as I can get it to the original green/grey colour
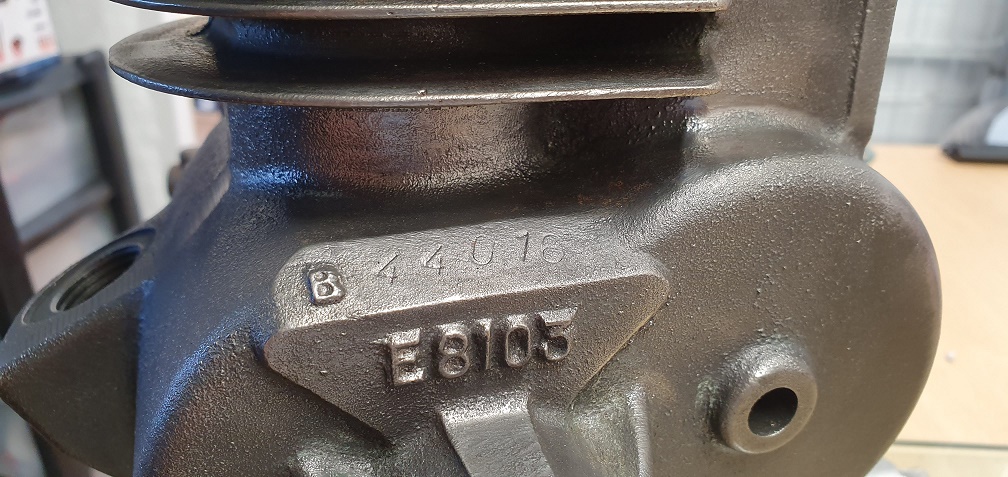
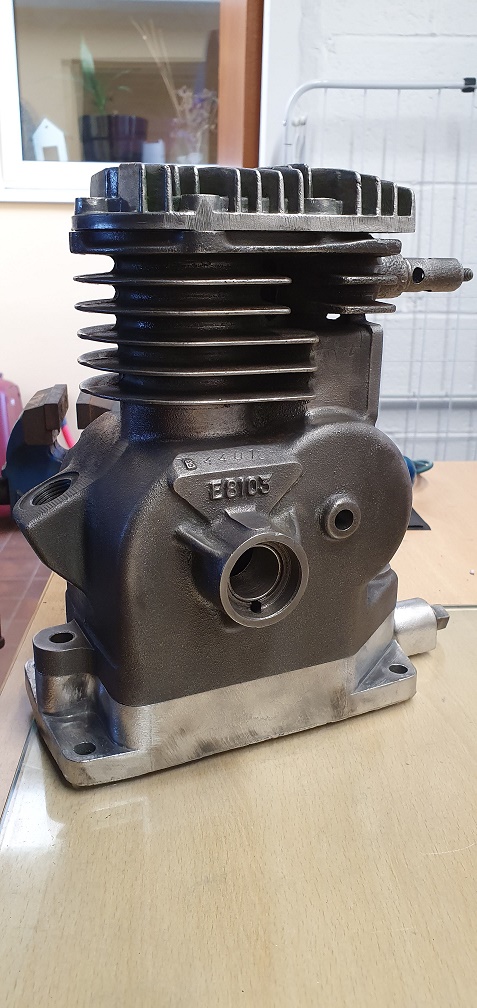
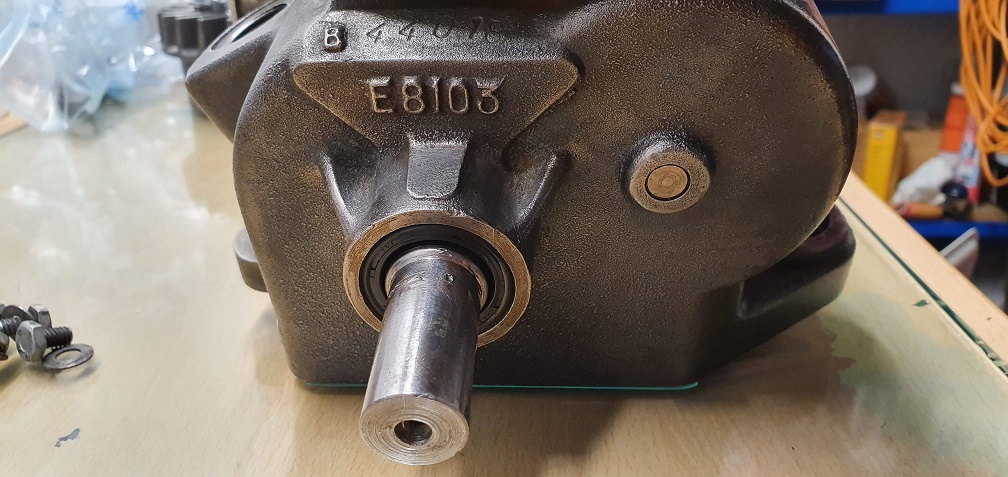
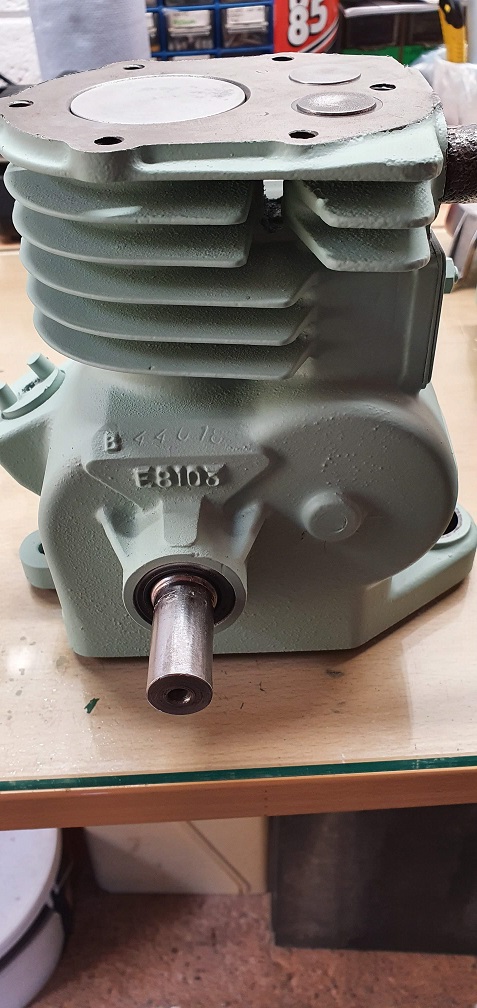
With the letter 'B' cast into the block, this leads me to believe the engine, at least, was built in 1979 according to the letter reference guide in the Atco standard manual
I've used a length of 6mm
I've used a length of 6mm silver steel and ground it down to the required 5.75mm for the two sump dowels. Put a chamfer on the ends and they fit perfectly into the sump and block - replacing the cracked incorrect spirols that were in there originally
I think I'm ready to start rebuilding the engine now. I've thoroughly washed it inside and out to remove all the machining grit from honing, lapping etc and dried it all. Amazing how quickly the iron block starts to flash over with rust!
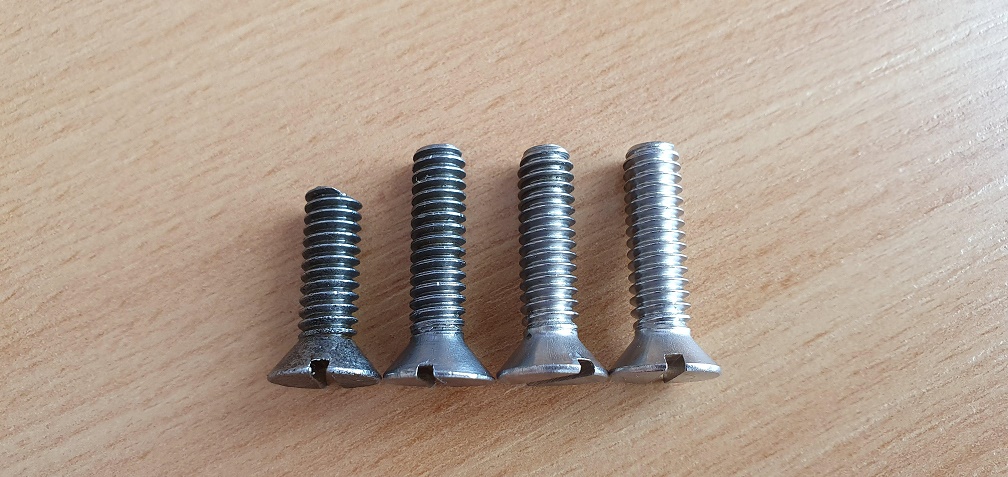
2 new replacement screws for
2 new replacement screws for the starter engagement hub assembly
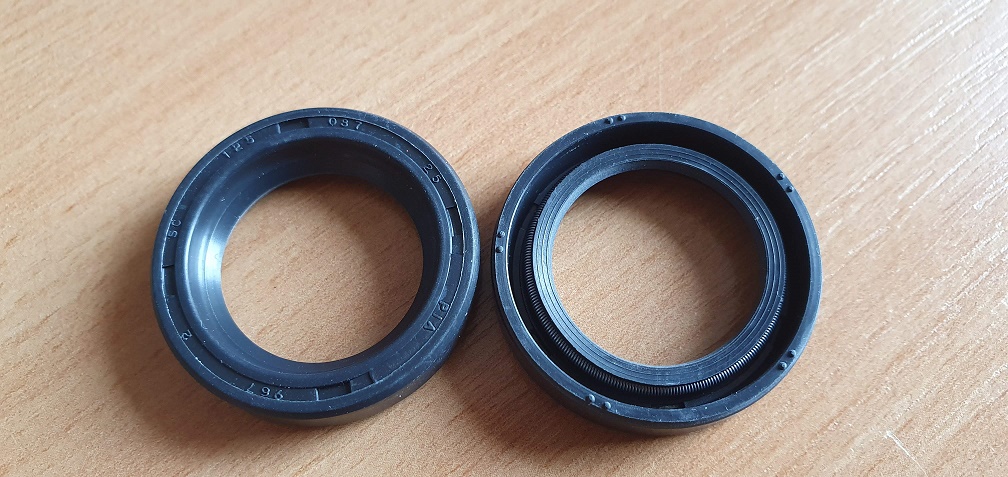
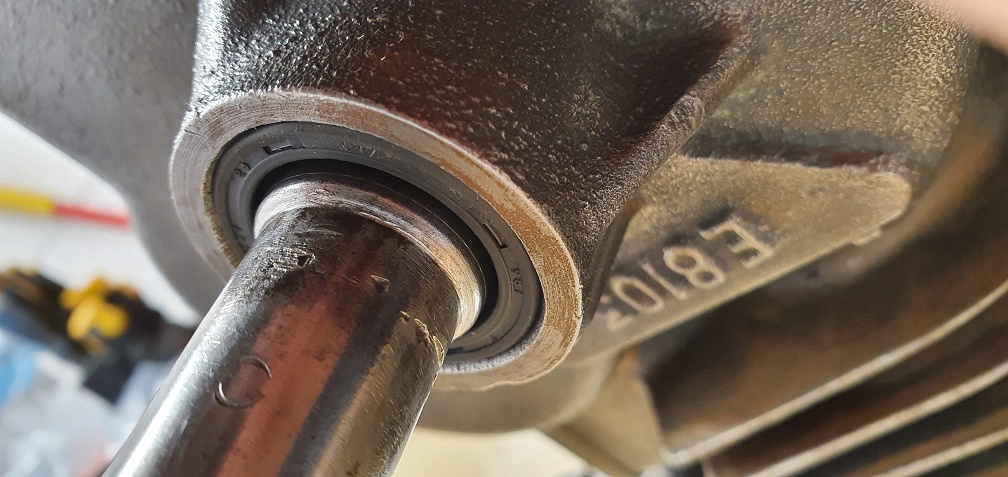
New crankshaft oil seals fitted
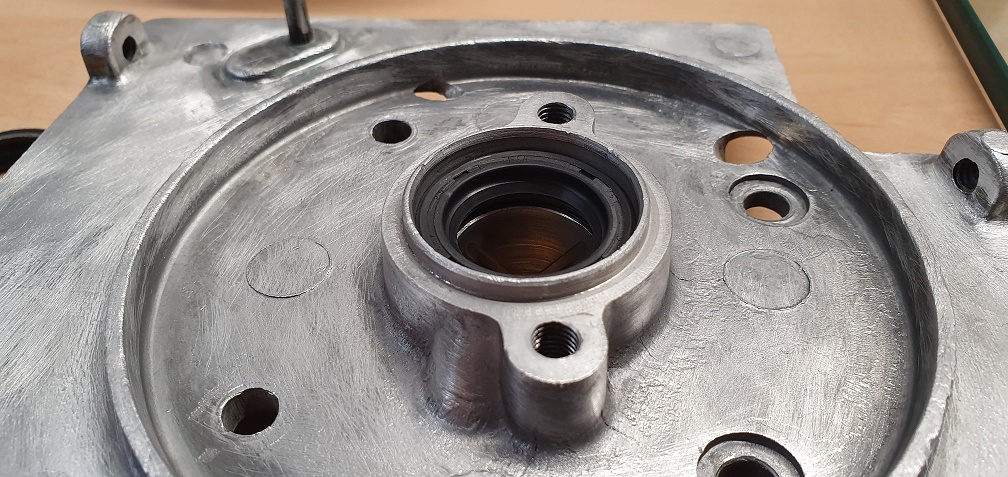
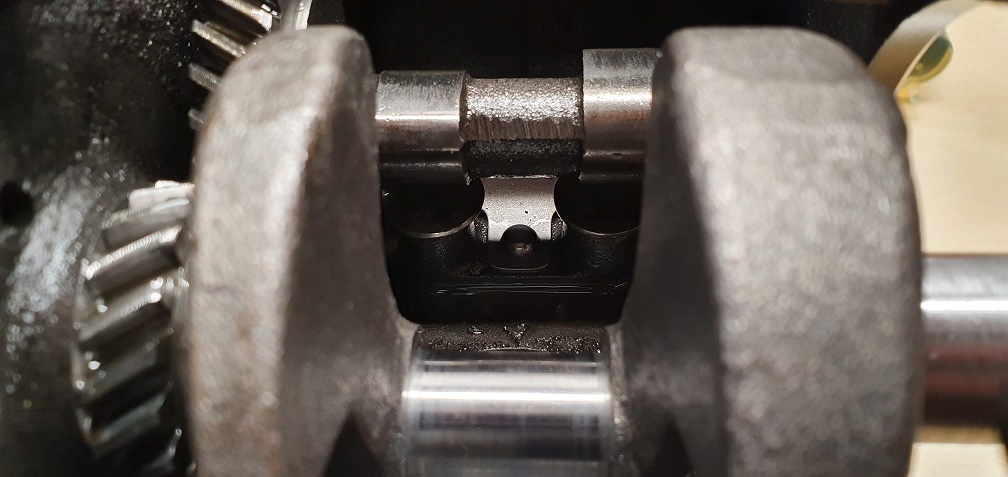
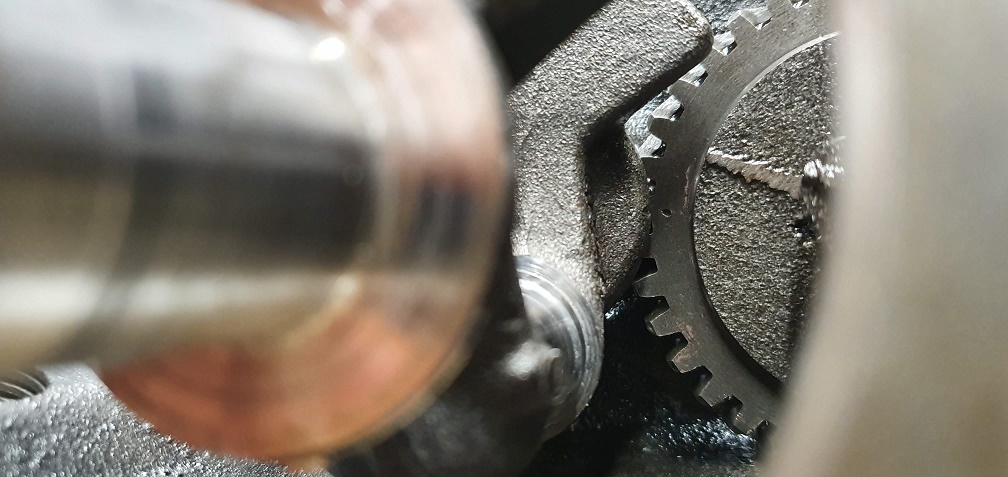
Cam followers, camshaft and crankshaft fitted, making sure the cam timing marks lined up
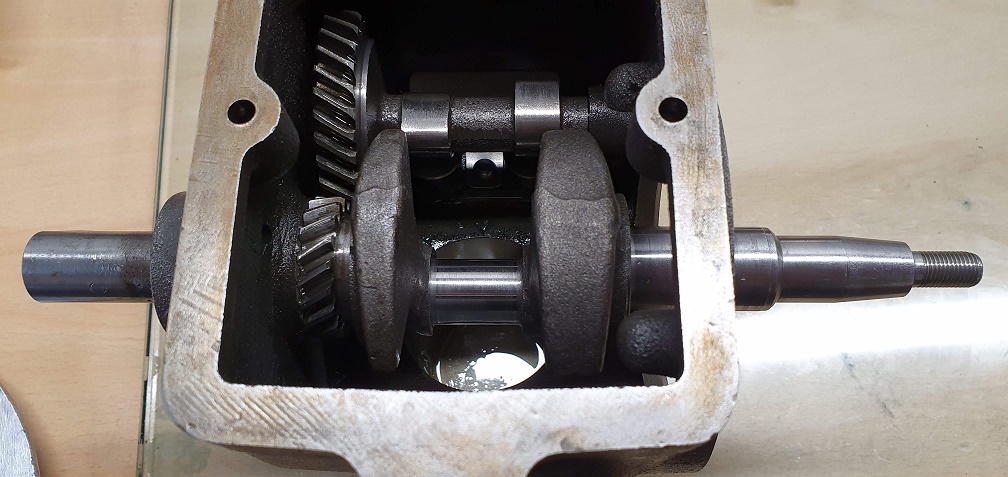
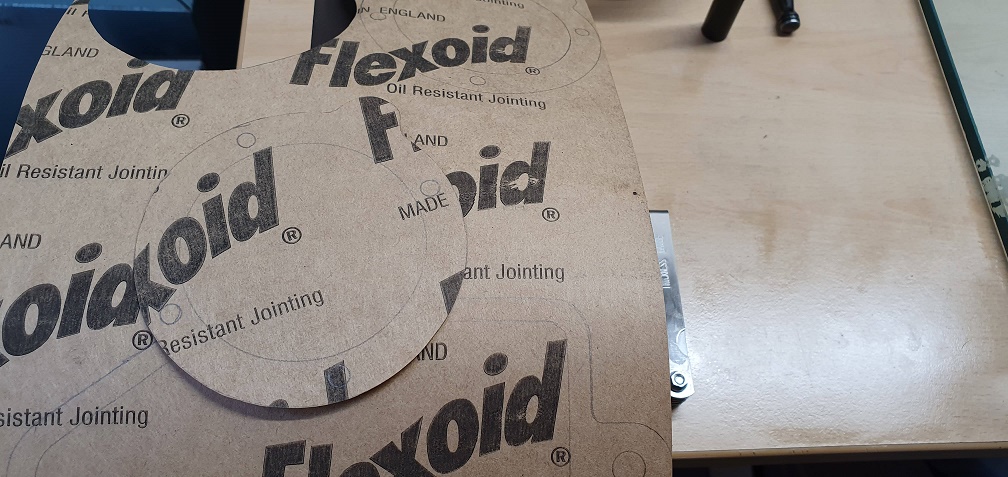
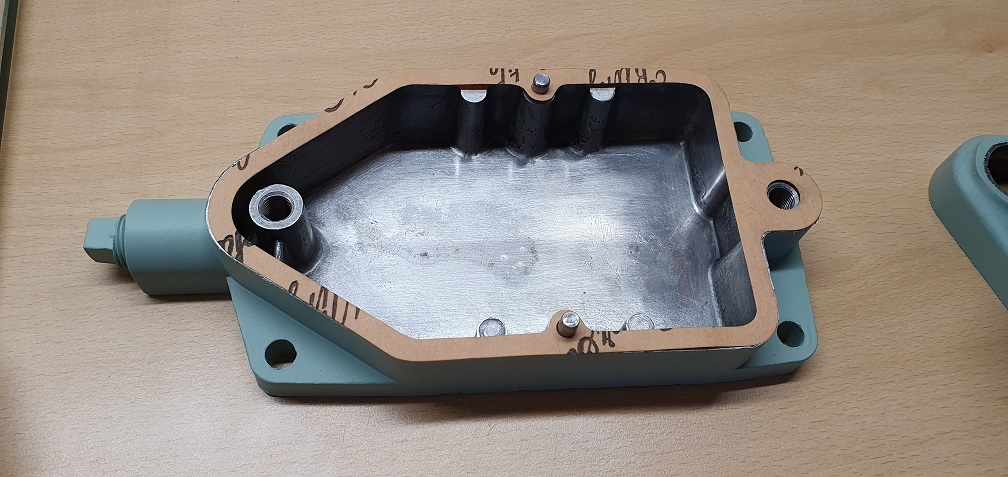
I bought some gasket material to knock up a few extra gaskets - mainly so I could achieve some end float on the crankshaft, and a spare sump gasket should I need one in future
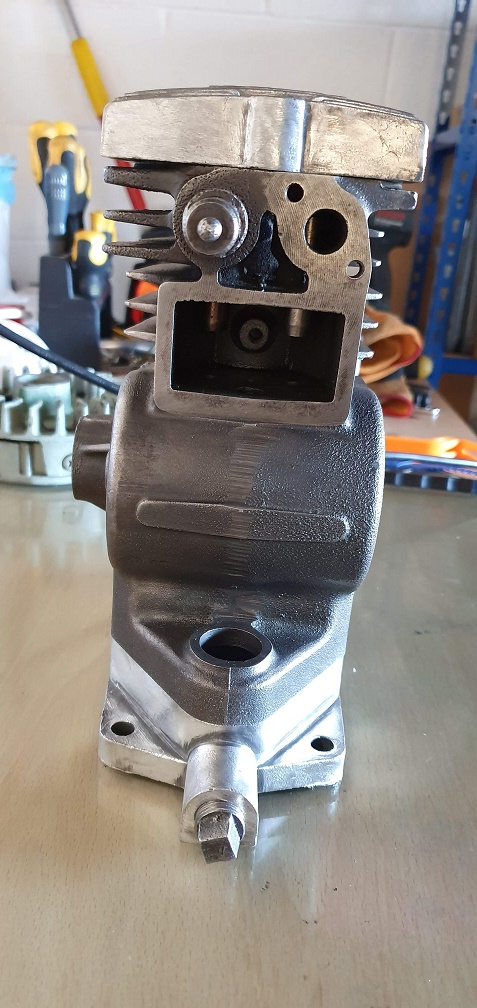
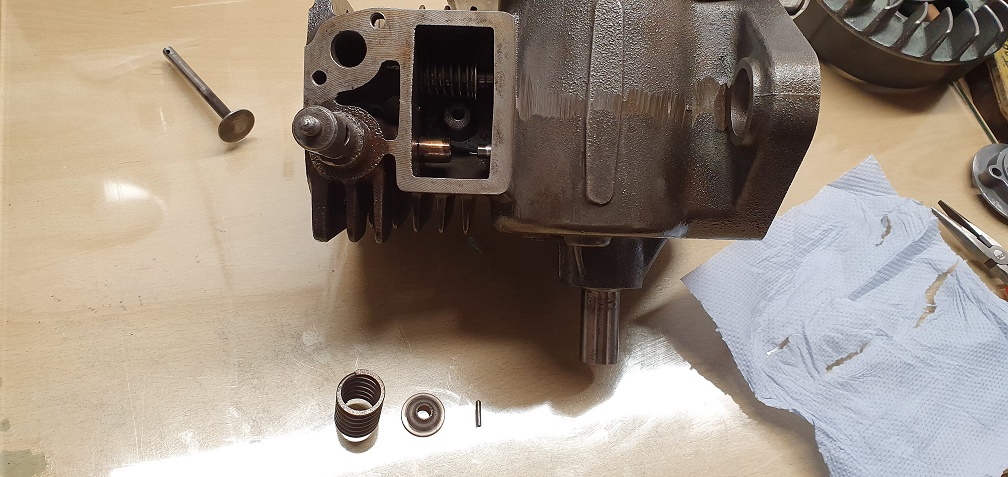
With the piston at TDC I inserted the valves into the guides so I could check and adjust the valve clearances. According to specs, the inlet should have 0.007" and the exhaust valve should have 0.015" clearance. As a fair bit of material had been removed from my valve faces to clean them up, I was left with no clearance at all. Using the grinder I carefully removed material from the bottom of the valve stems and rechecked several times with the feeler gauges until I achieved the correct clearances.
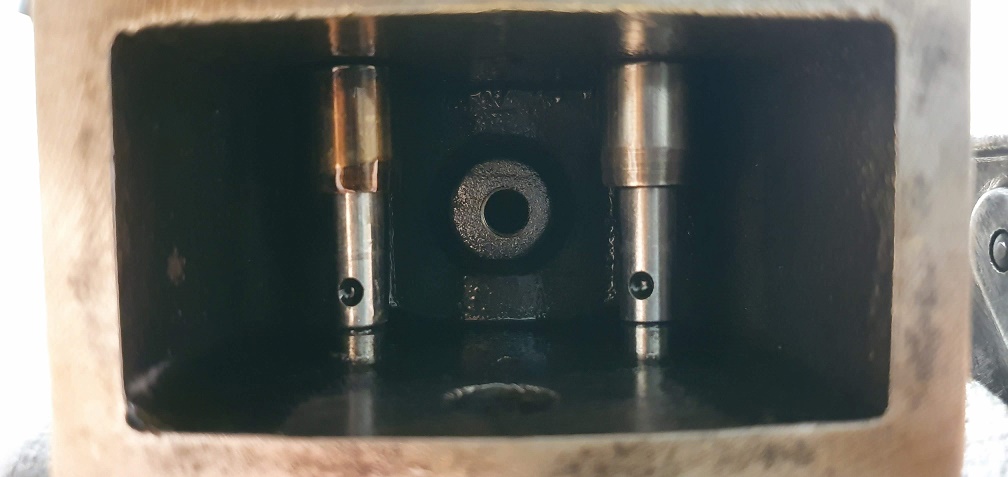
Then the valves were lubed and inserted with the valve springs, retainers and cotter pins. With no valve spring compressor tool, the inlet spring is nice and easy to compress and fit, and the exhaust spring could be compressed easily enough with 2 cable ties to hold the coils together while fitting the retainer and pin
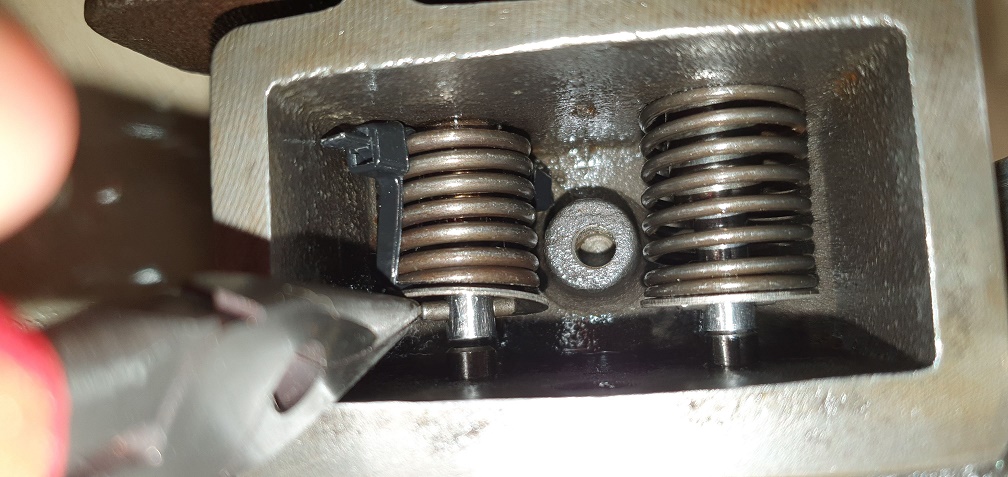
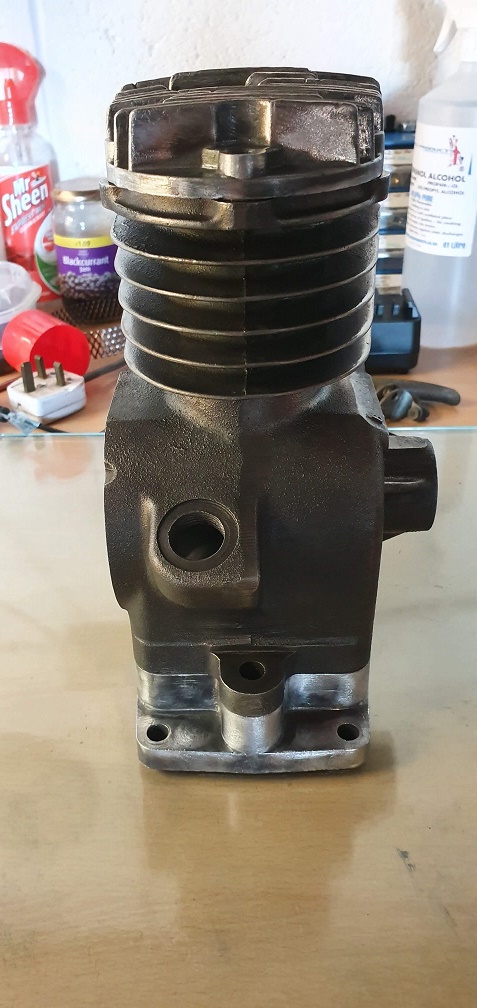
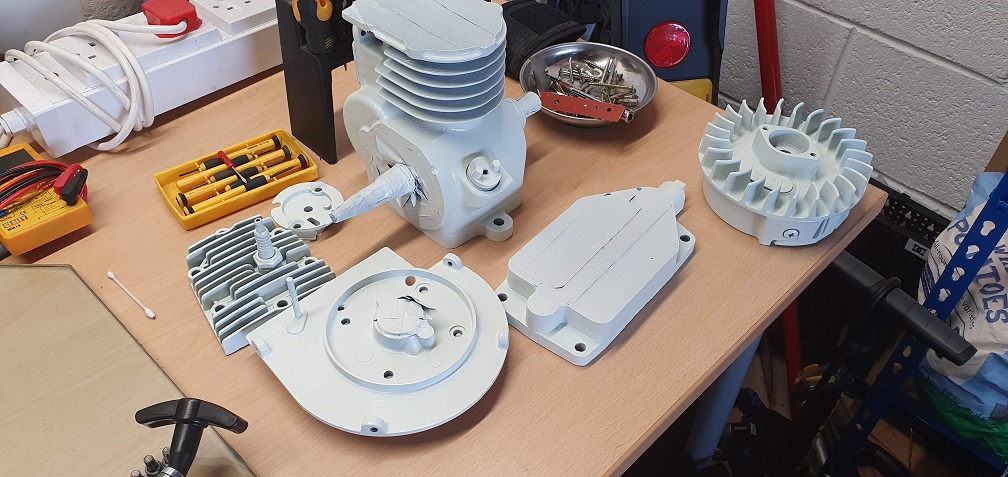
Valve clearances checked again just to make sure and all still correct. So now I am at the point of needing to paint the magneto stator plate and the engine block, as there are parts of these that the paint won't reach if I paint it as it is. The first round of paint will be the sump, engine block, cylinder head, stator plate and flywheel. Looking at Etch primers as i'm down to bare metal, followed by a 1-pack paint in as close a match to the original colour as possible, to achieve at least some resistance to oil/heat. Going to be weather dependant so I'll get the paint ordered and wait for a couple of days of low humidity - might be a while...
The letter 'B' in front of
The letter 'B' in front of the engine number does not, as far as i am aware, indicate year . It is the machine/ chassis number where the 'B' indicates the build year. Early 75 cc engines had no prefix, then some with 'A' and 'B'.
Thanks for clarification
Thanks for clarification Villiers98. Do you know where the machine/chassis number would normally be found on an Atco standard with a suffolk engine if there is no 'engine plate' with info on the cowling?
The model / chassis number
The model / chassis number was most likely on an adhesive foil label - long gone.
Thanks Angus.
Thanks Angus.
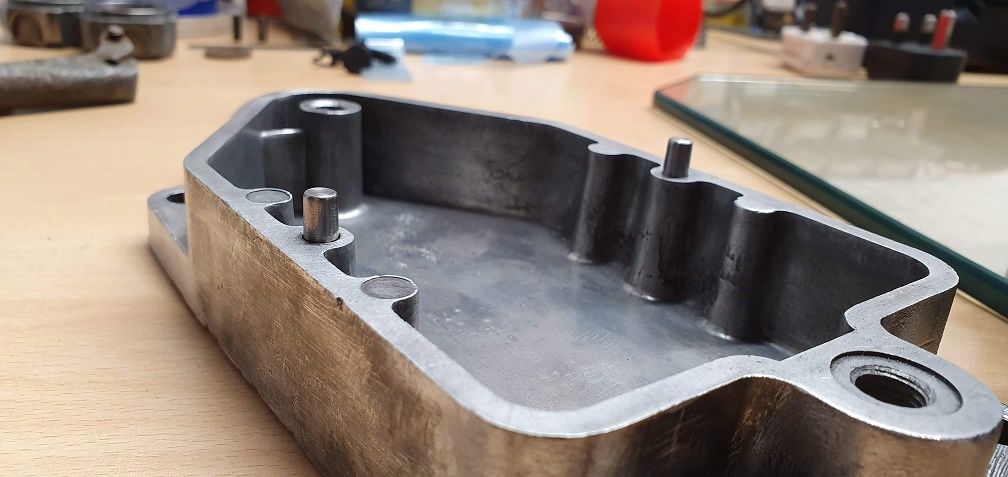
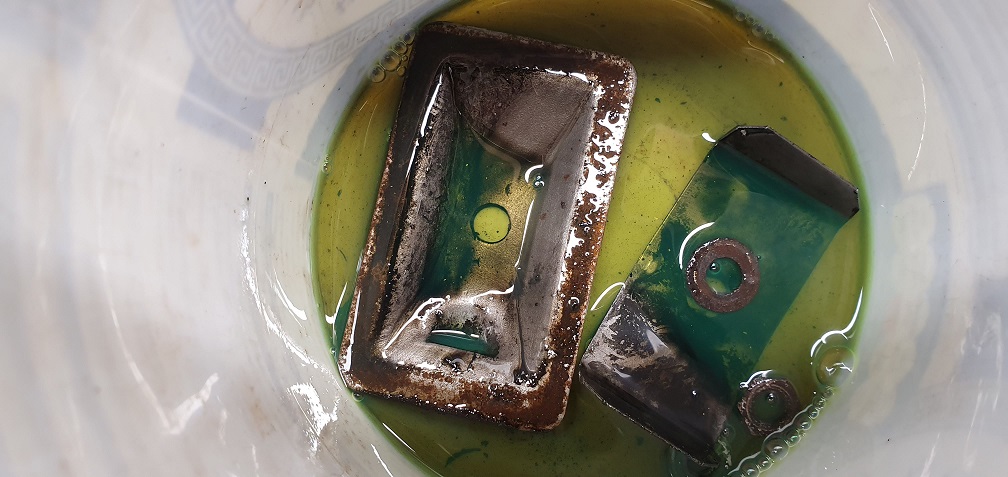
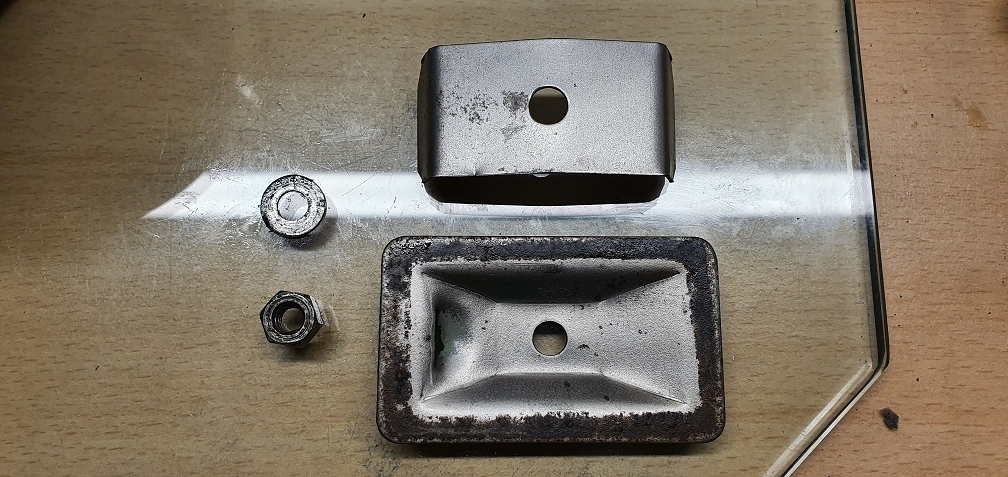
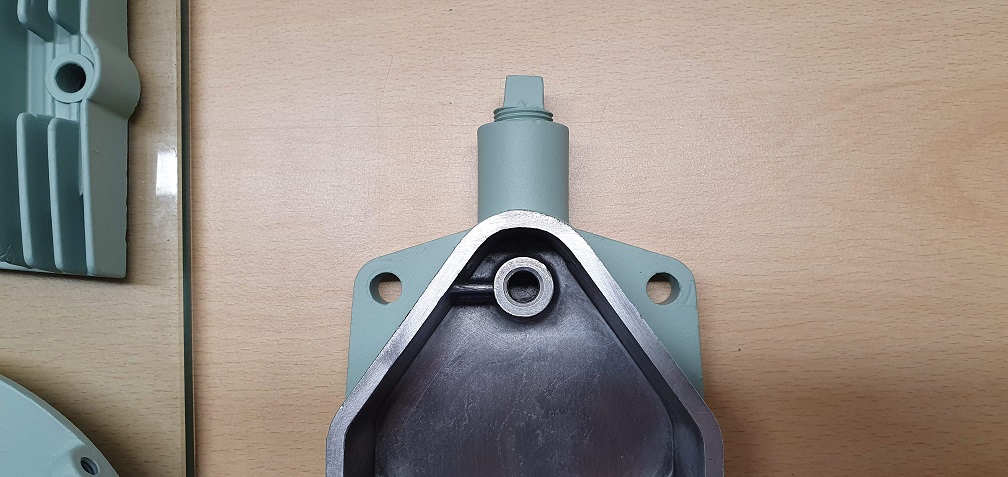
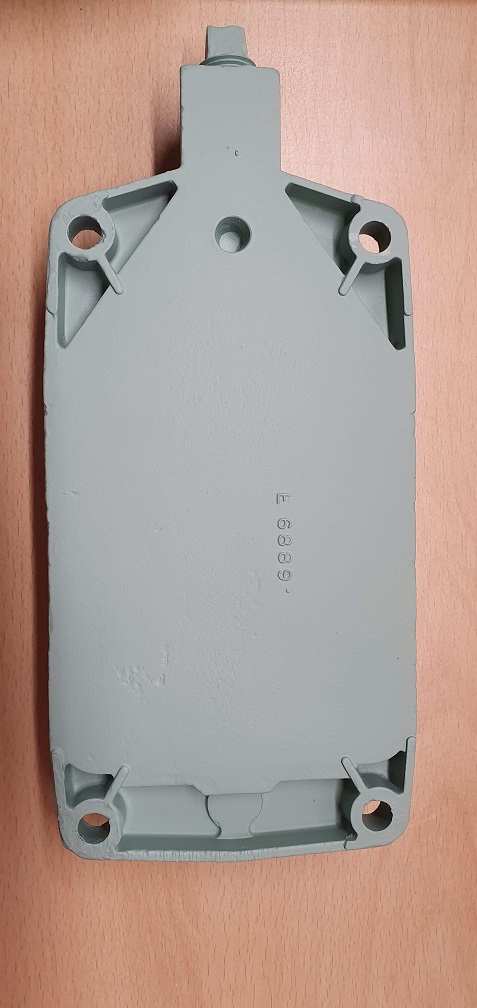
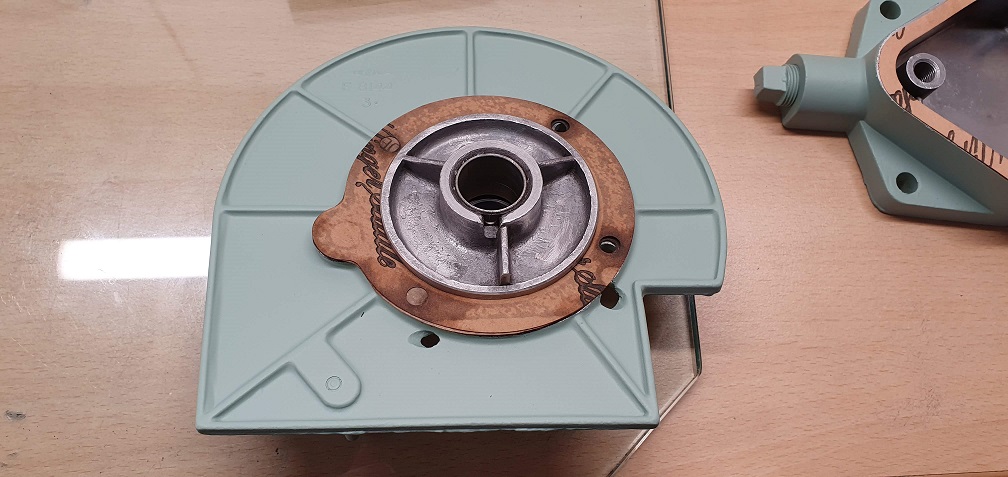
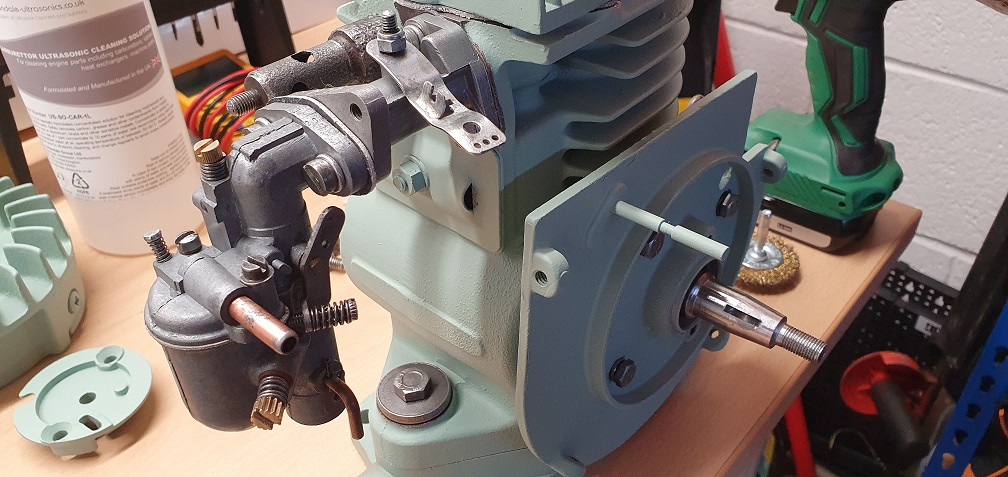
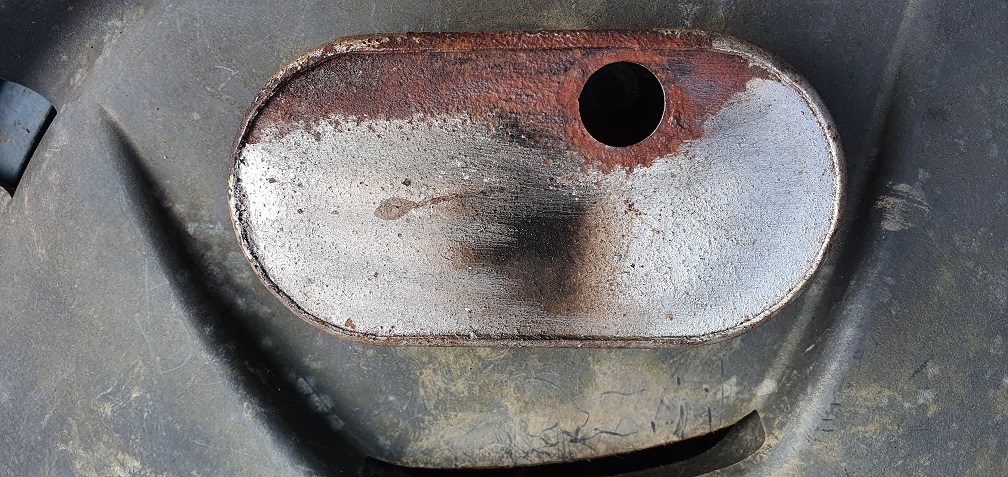
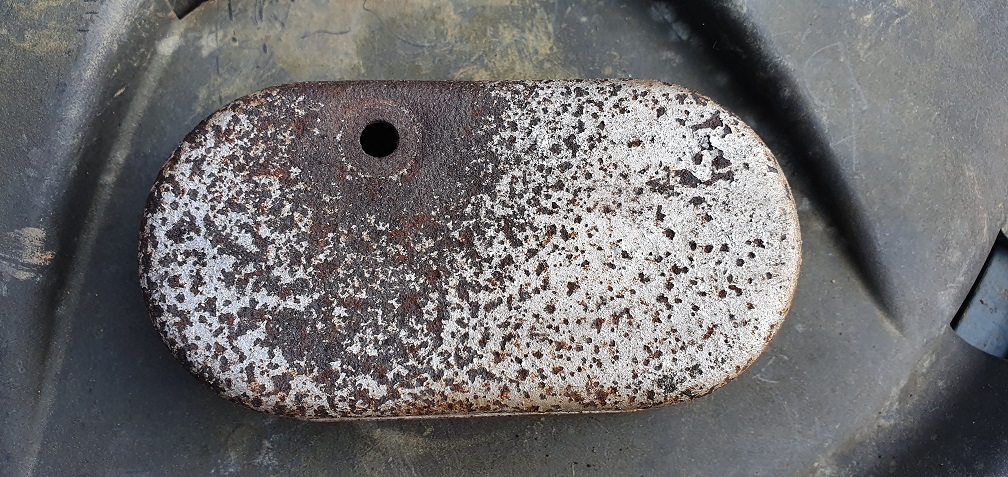
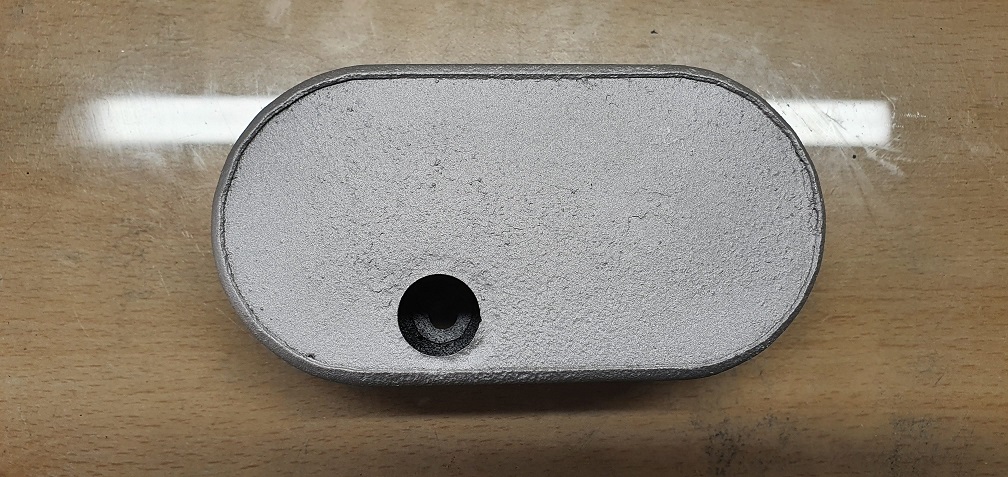
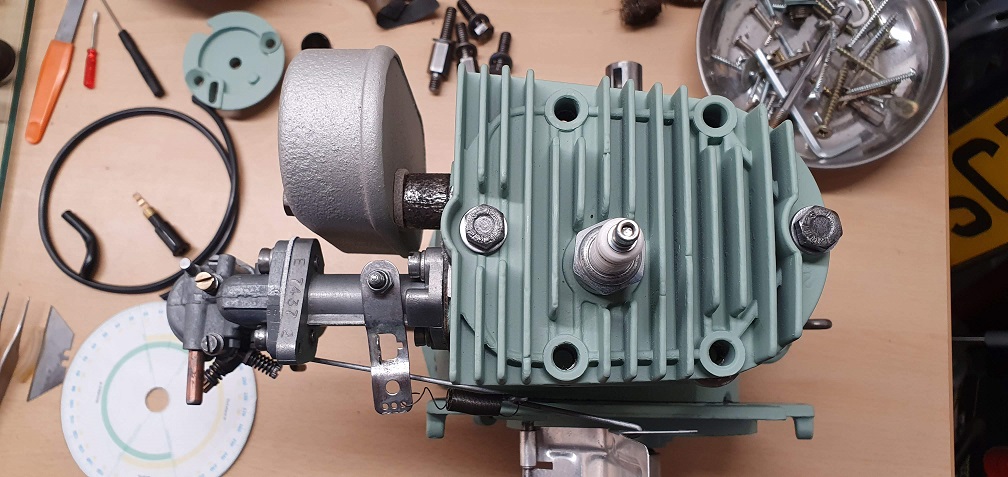
A few more updates. Crankcase Breather cover and deflector had a good clean up to remove grime first, then the old gasket material, and around 50 shades of green on the front
Getting the flywheel cleaned up ready for painting
While masking up and preparing the engine parts for primer, I'm trying to find as many parts that need to be engine coloured as possible so I can do it all in one go.
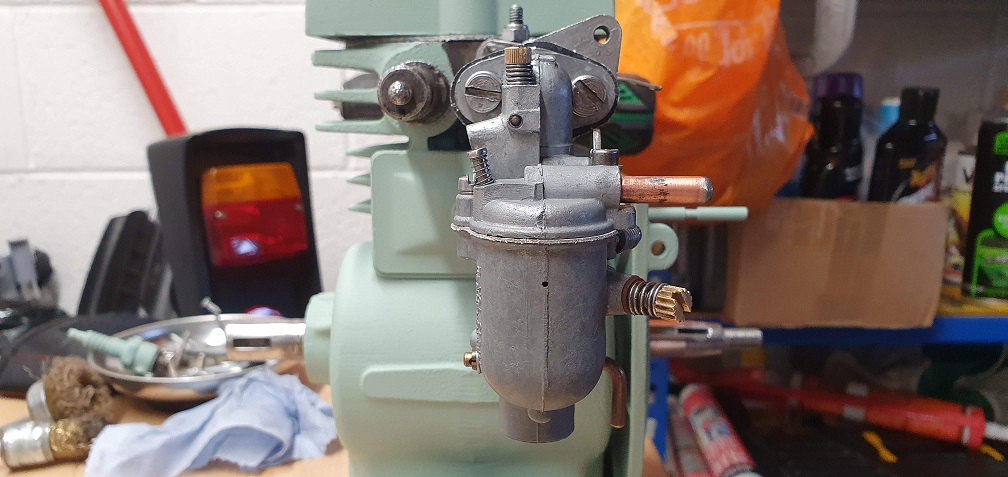
Regarding the Zenith carb and the inlet manifold - would they have both just been left their natural metal colour originally? There is the wrong colour green on the inlet manifold, but I can't see any of the original engine colour on there, so thinking it should just be bare metal?
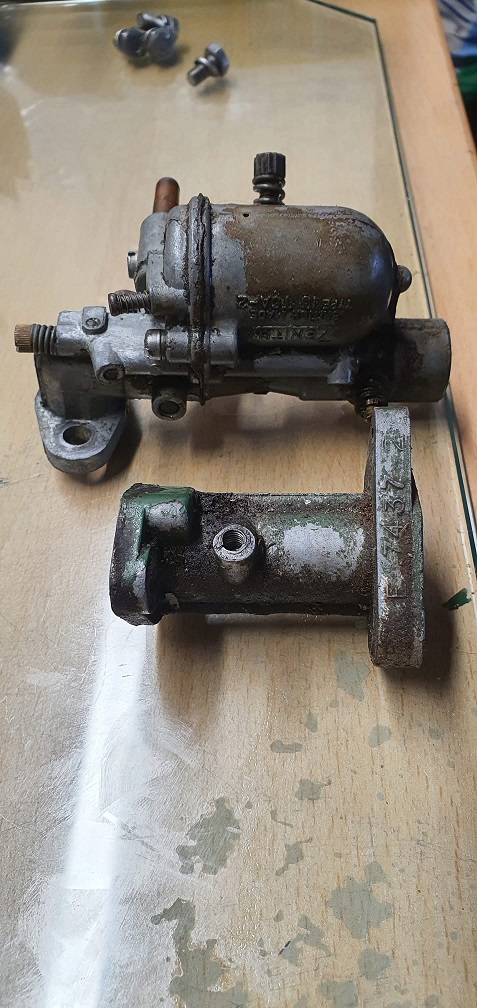
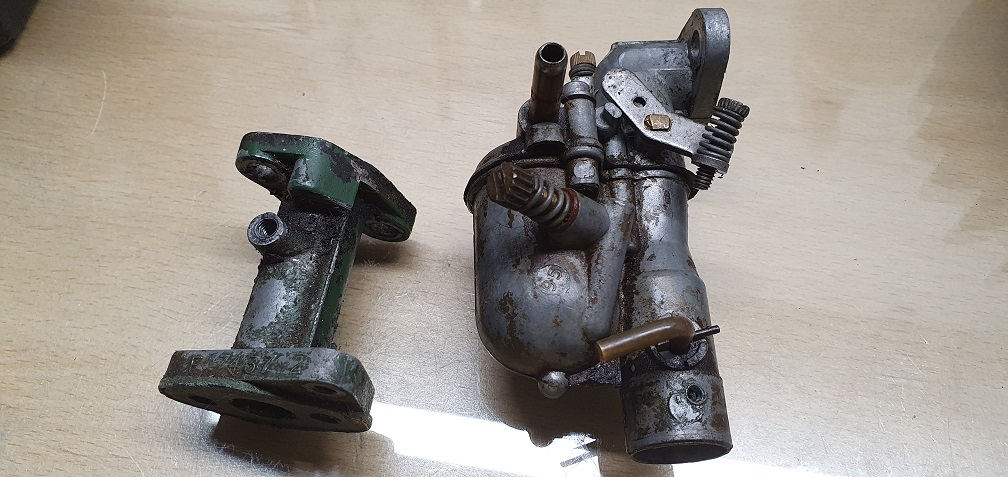
I would say the manifold has
I would say the manifold has a bit of overspray or clumsy paint marks, wouldn't attempt to paint carb or manifold, just a good clean of both and leave.
Thanks Lee, I'll just clean
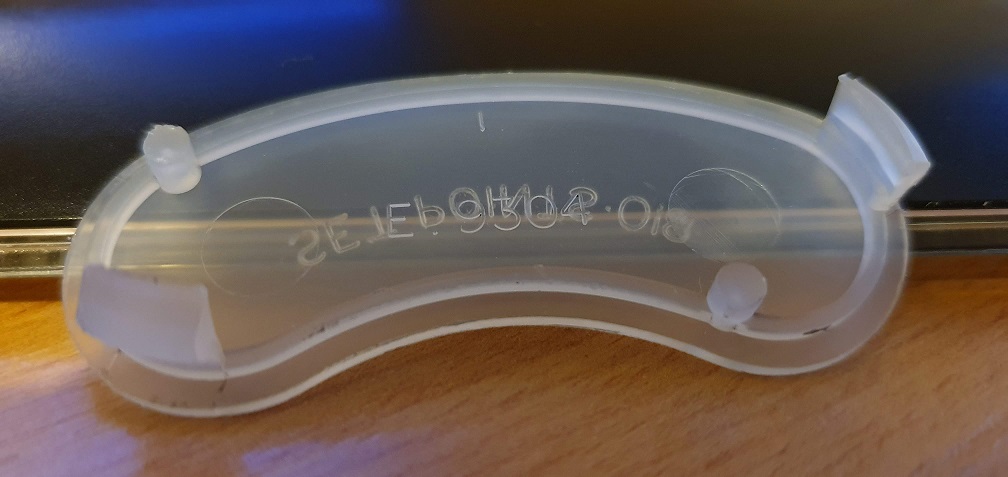
Thanks Lee, I'll just clean up both and leave unpainted in that case. It looks like another modification has taken place at some point with the air filter housing - someone has used a screw to secure the housing to the carb air intake
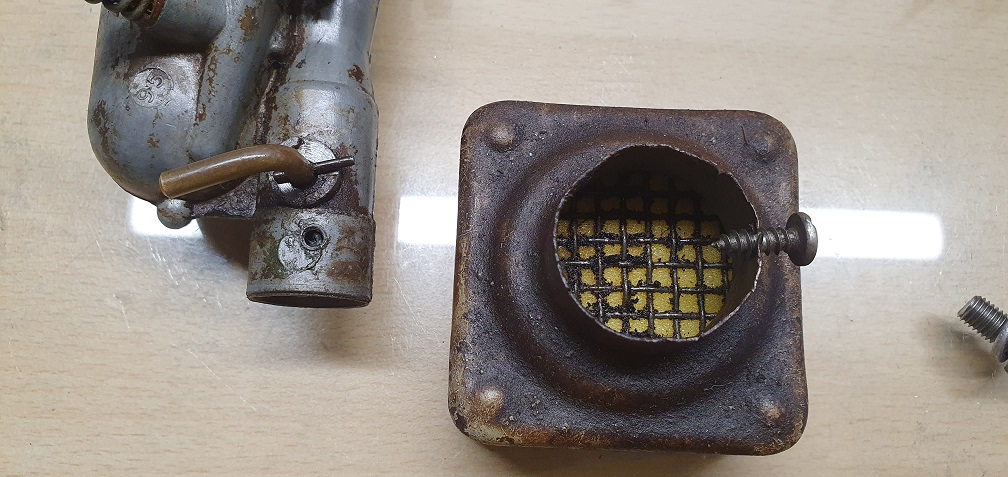
I suppose perhaps the air filter housing wasn't gripping the rubber insert properly.
Would the air filter housing have been bare metal originally as well, or were they painted the same colour as the engine?
Engine colour . The original
Engine colour . The original bushes were a rubber compound and used to soften. Replacements are “ plastic” and a good tight fit.
Thanks Angus. Engine colour
Thanks Angus. Engine colour it is. Is this the plastic version you are referring to? https://www.jungle-busters.co.uk/epages/es122164.mobile/en_GB/?ObjectPa…
There were various pattern
There were various pattern part, after market, versions of the bushes at one time, some still a soft rubber but another supplier purveyed a really hard plastic bush, very tight to fit.! There was also a plastic pattern version of the tin square filter box and then the filter type too, that you posted the link to, which was the standard Qualcast, Suffolk, Atco supplied filter for this carb type in its latter years, first made in grey plastic, then in black plastic when A98 engine came out All suffer and loosen due to fuel leakage from either float needle problems but also genuine leakage if carb tickler is used. The fine cut Punch Professional, when it had the square tin filter as on your machine, had a saucer like add on under the filter...
C.
Thank you for the information
Thank you for the information Clive, much appreciated.
I doubt there is much chance of getting hold of one of these plastic bushes to replace my rubber one, and the need for the screw. I may have to just live with it as it is.
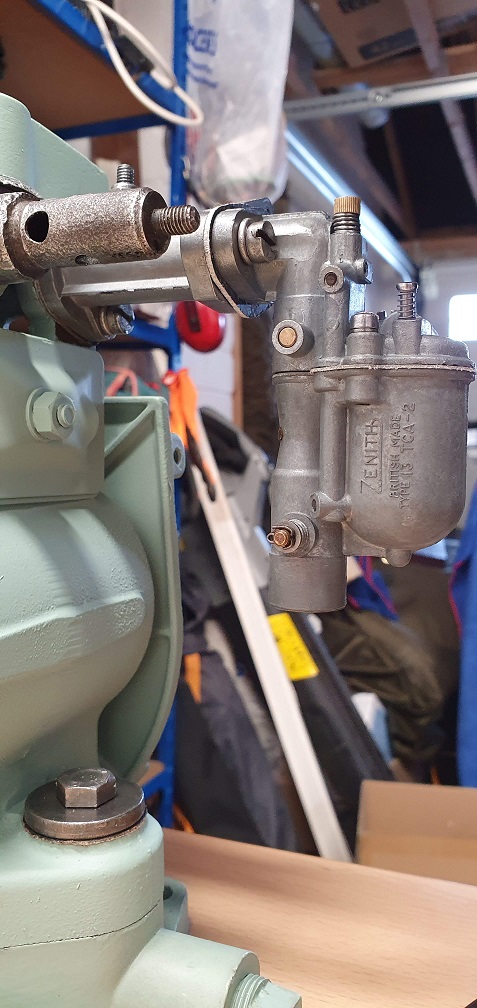
I've finally opened up the carb and thinking going to have to invest in an ultrasonic cleaner as it looks pretty grim in there. Pics to follow
Air filter. No, just the push
Air filter. No, just the push in bush in the original square filter. The L shaped assembly in your image is, I think, too modern for your machine.
The plastic bushes are readily available.
Thanks Angus.
Thanks Angus.
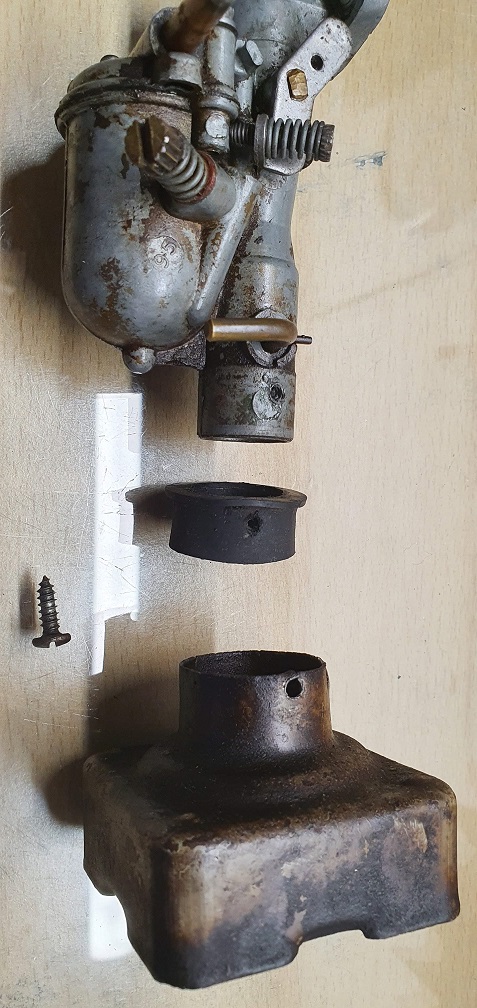
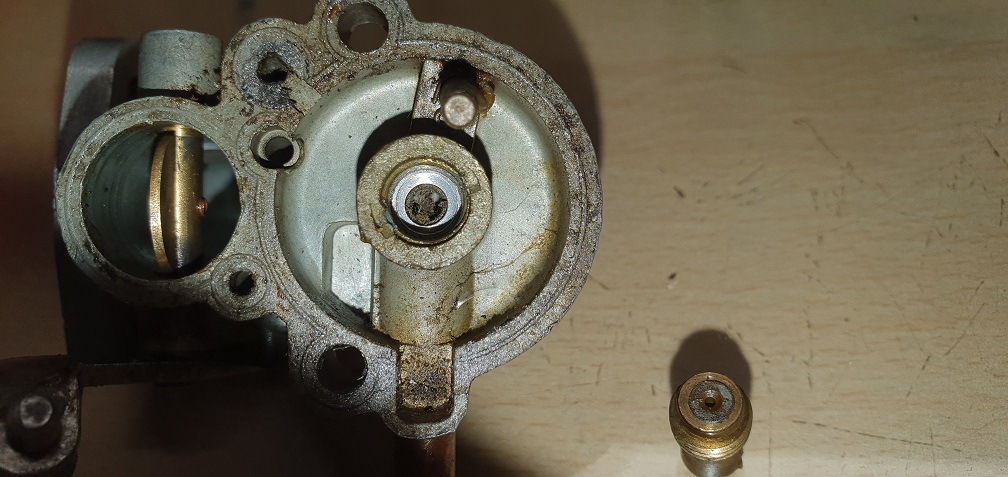
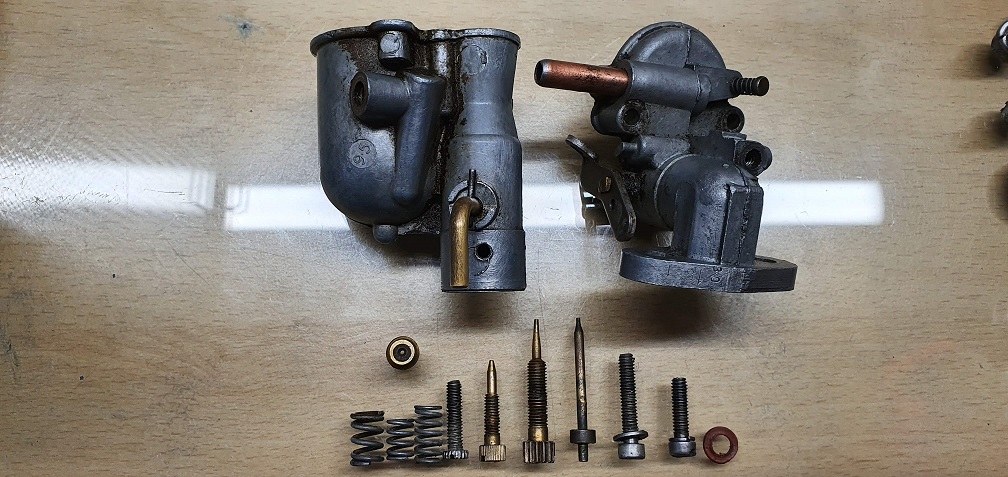
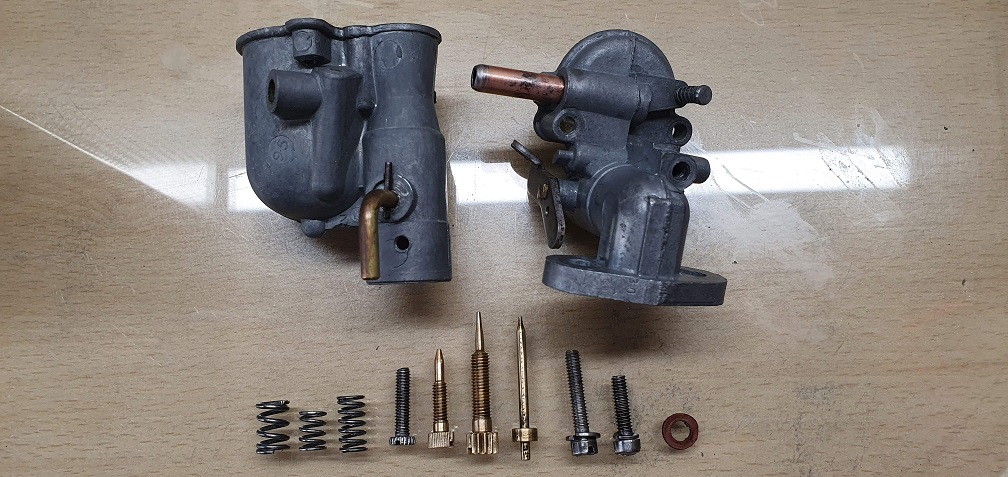
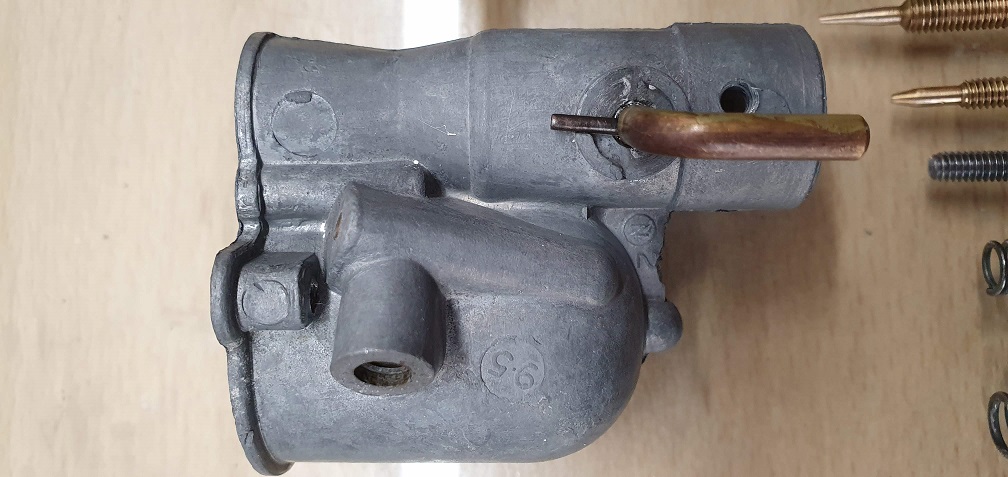
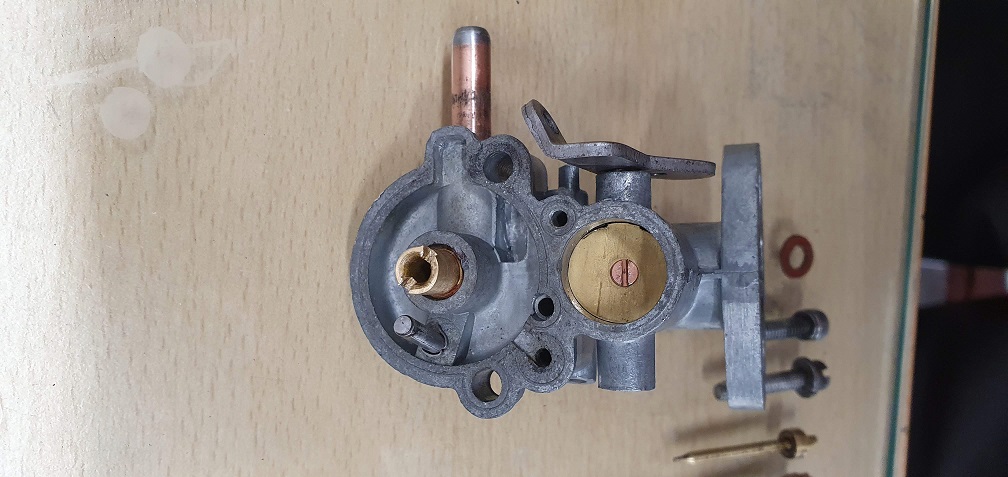
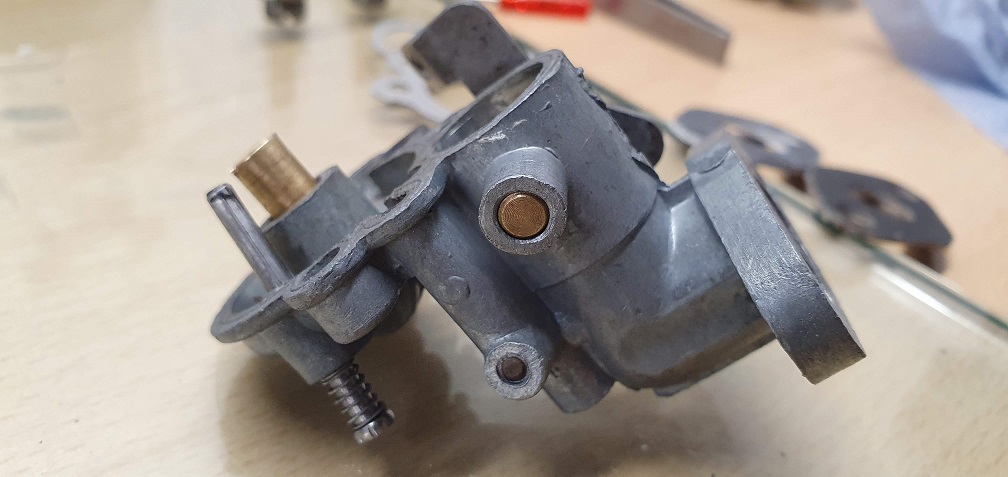
Here are some pictures of the Zenith carb opened up
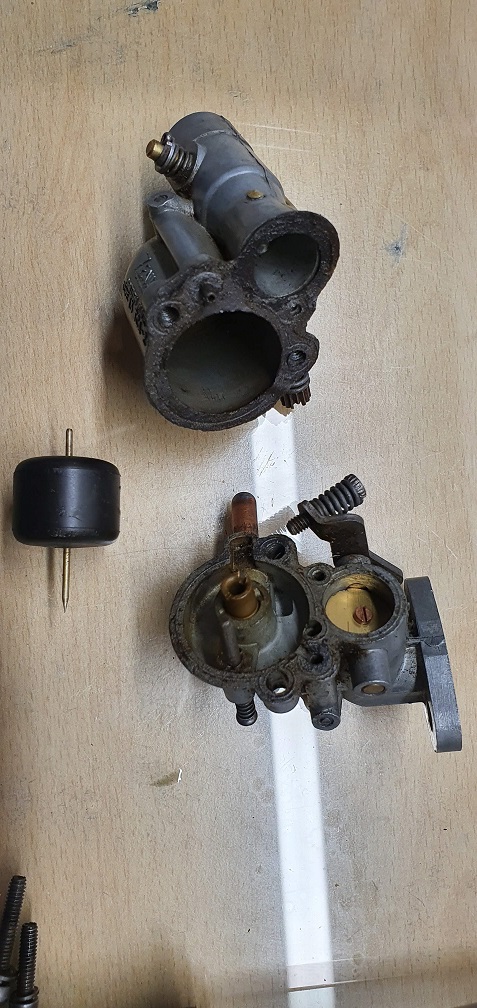
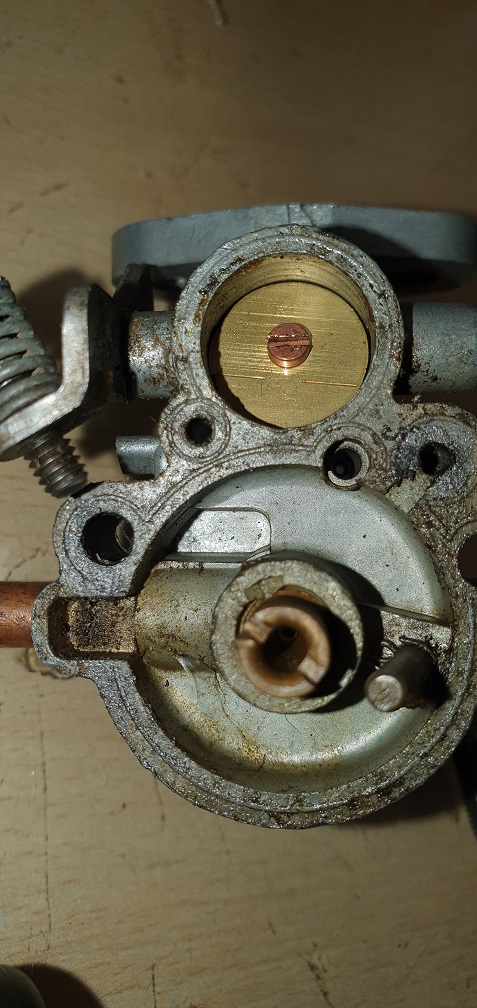
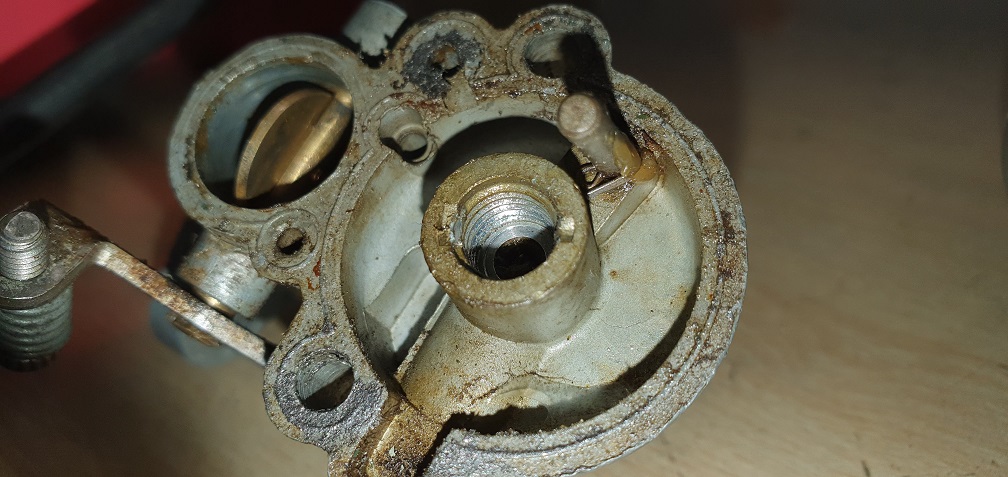
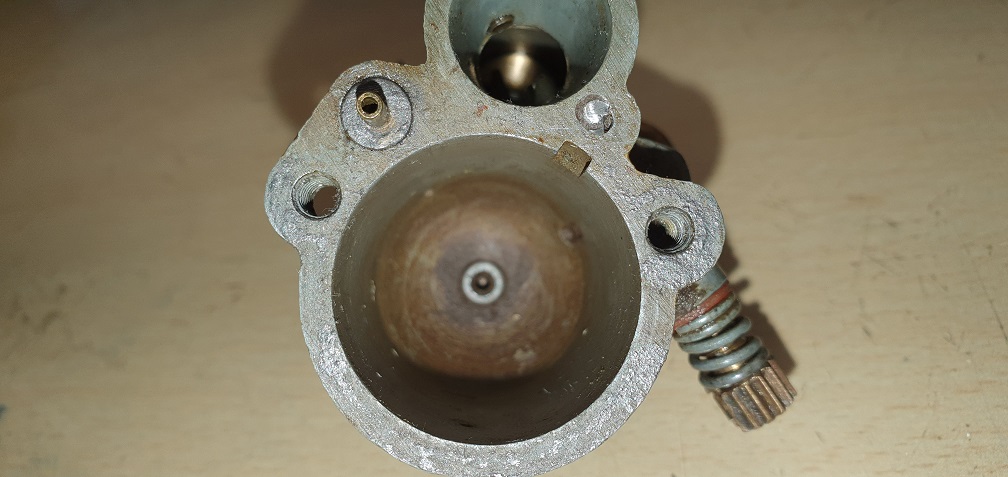
In the last picture, to me it looks as if something has sheared off - opposite the slow running tube? What is supposed to be there? Also, how do you remove the slow running tube for cleaning?
Slow running tube removal
Slow running tube removal
Warm up the carb
Find an appropriate sized twist drill with an un-chewed shank
Insert shank into slow running tube
Grip tube with side cutters (drill prevents crushing)
Place something between cutter jaws and carb to act as a fulcrum
Push down on cutter handles to draw out tube
I think that your ? sheared off item is a locating pin to aid alignment of the gasket and carb top, but I haven't got a carb handy at this time of night to check!
Useful but not vital
Thanks, as ever, Angus. That
Thanks, as ever, Angus. That done the job perfectly and I removed the slow running tube successfully. I assume it's supposed to be straight, and not banana shaped?!
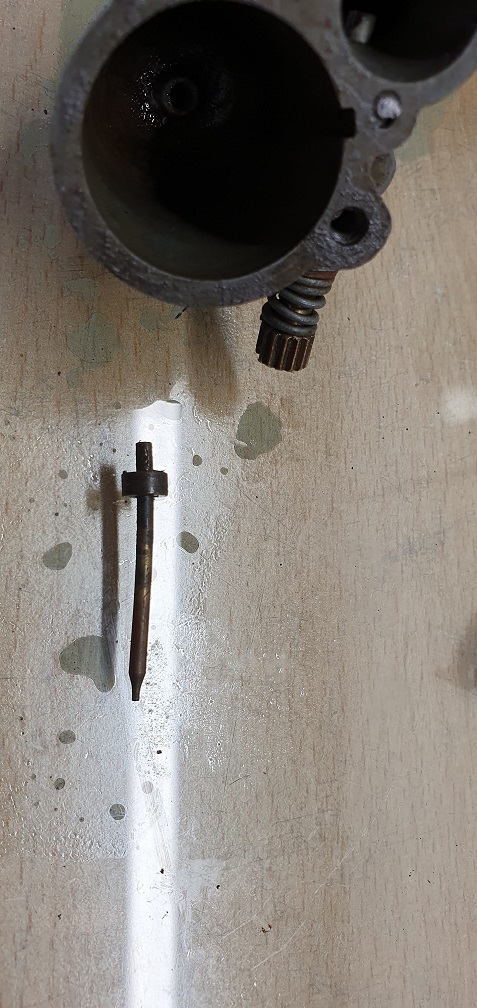
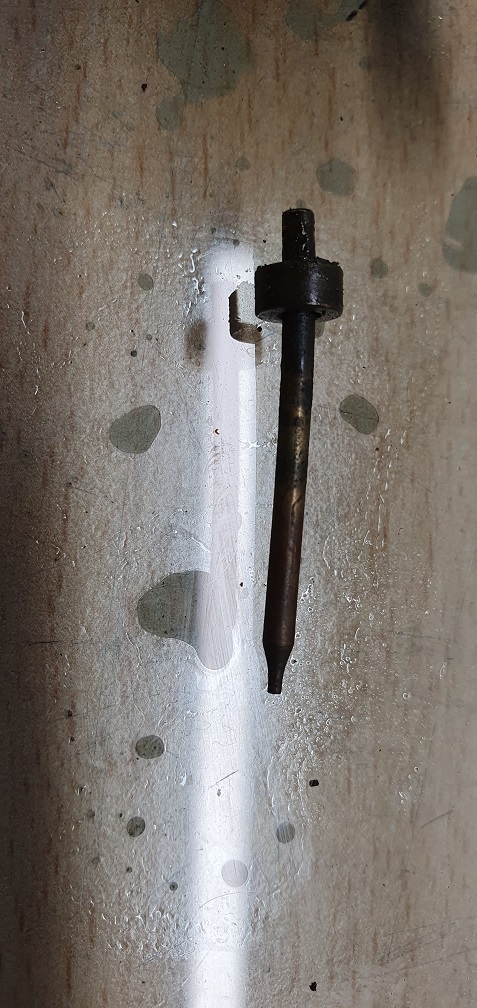
Yes, should be straight.
Yes, should be straight.
Well I'll see if it can be
Well I'll see if it can be heated and gently straightened out in that case. While I'm waiting on my Ultrasonic cleaning tank arriving, I've been getting on with Priming and painting the engine
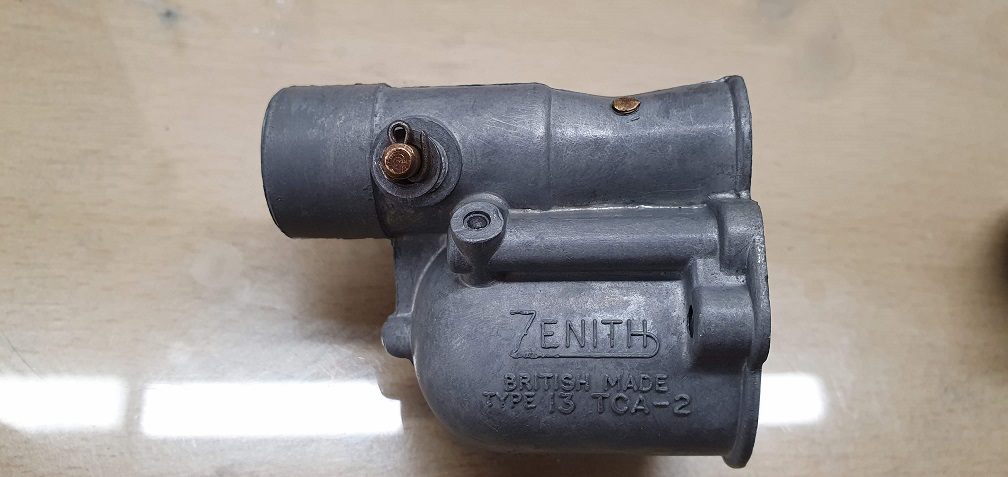
Moving on, after taking
Moving on, after taking delivery of an ultrasonic tank, the carb was next for an overhaul. The Zenith Type 13 TCA-2 was in need of a good clean, and after a few cycles of the tank with some carb cleaning solution mixed with hot water, it came up pretty good
Before -
And after -
Surgical stuff!
Surgical stuff!
Stating the obvious but the steel fastners will rust sooner or later including the head bolts especially if cleaned up with a wire wheel. Mine spotted up in less than a year so dabbed a thin Krust wipe with a rag, seems to abate and I like the dark colour. You could get them zinc plated but that's probably a step to far - or is it ![]()
Stating the obvious but the
Stating the obvious but the steel fastners will rust sooner or later including the head bolts especially if cleaned up with a wire wheel. Mine spotted up in less than a year so dabbed a thin Krust wipe with a rag, seems to abate and I like the dark colour. You could get them zinc plated but that's probably a step to far - or is it
Or a light coat of clear lacquer - not too glossy and gives a degree of protection.
Thanks Chris - but please don
Thanks Chris - but please don't go giving me ideas like that.....![]() (googles nearest plating companies)
(googles nearest plating companies)
I'll check but I'm sure I have some clear lacquer on a shelf somewhere, so I guess a small paintbrush would be best for applying to the fasteners once tightened up.
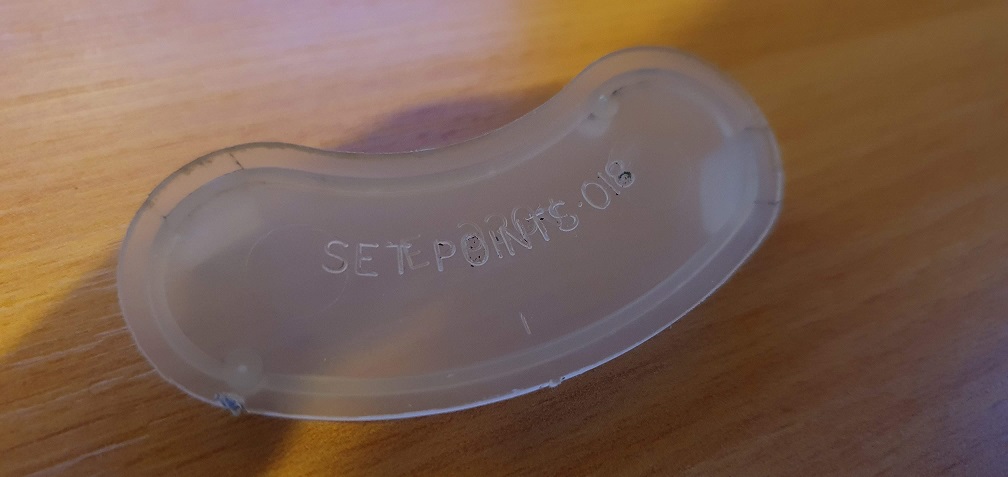
Inspecting the points, the
Inspecting the points, the surfaces are very dark, so in need of a clean up to see how much pitting there is, if any
The 2 surfaces seem to approach each other square, however as they make contact, there is very little contact area between them, as if there is a small high patch on one face. Time to gently file until they make much better square contact...
Been following your
Been following your restoration progress with interest. I am interested in buying a ultra sonic cleaner too. Which model did you buy? Thanks
"Or a light coat of clear
"Or a light coat of clear lacquer - not too glossy and gives a degree of protection. "
Yes and especially good on polished aluminium holding up oxidisation.
On zinc plating, I think you have to have a fair bit done to make it viable, a friend had a few kilos done for old motorbikes, worked out well and of course resilient to tool contact unlike lacquer.
U/S cleaners... for the money I think they are pretty invaluable for shed and for household stuff. James is supposed to be branded but tend to be quite small, sub 2L, Had a 1.5L which worked well but just too small, have a 3L now but could do with something bigger still, I would go 6L next. You see the exact same models come under a myriad of different brand names, the best approach is to check out the feedback/reviews on Amazon etc.
As for the solution.Proprietry stuff is expensive and most make up their own, mild detergent & alcohol based is best but you read a million different recipes, I know what works for me.
Examples of 2L & 6L which come under many different names for the exact same things, doubtless all manufactured in some giant factory in PRC.
https://www.amazon.co.uk/gp/product/B086CWDSLR/ref=ox_sc_act_title_1?smid=A1BXA68R006ASA&psc=1
https://www.amazon.co.uk/gp/product/B083K9PXPP/ref=ox_sc_act_title_2?smid=A32800FOXR1FCH&psc=1
Thanks Chris. I think a 6 l
Thanks Chris. I think a 6 l capacity is the way to go as it's big enough for most small engine parts. When you say you used detergents I am guessing washing up liquid? Thanks
Hi Triumph, yes, fairly
Hi Triumph, yes, fairly liquid ![]() my mix is 50% IPA 50% water and a good squidge of fiarly liquid. That makes the solution which you then dilute into water in the US tank, hard to give a ratio but I just pour into clean warm to hot water a fair amount depending on how dirty the parts are. Find the IPA which is soluble in water has the great property of evaporating the moisture when you take the part out which means it dries out with little air lining. Although US tanks have heating elements, always use warm to hot water to start, they will hold and increase temperature but the heating elements are usually quite weedy and take ages to warm cold water.
my mix is 50% IPA 50% water and a good squidge of fiarly liquid. That makes the solution which you then dilute into water in the US tank, hard to give a ratio but I just pour into clean warm to hot water a fair amount depending on how dirty the parts are. Find the IPA which is soluble in water has the great property of evaporating the moisture when you take the part out which means it dries out with little air lining. Although US tanks have heating elements, always use warm to hot water to start, they will hold and increase temperature but the heating elements are usually quite weedy and take ages to warm cold water.
Sorry RedLeader - Hijack over ![]()
That is, presumably, iso
That is, presumably, iso-propyl alcohol, & not India Pale Ale...?
I went for a 3 litre tank - a
I went for a 3 litre tank - a 6 litre would giver more flexibility but for now, 3L is perfectly adequate for these carbs and other similar sized items. There are a lot to choose from, but like Chris says, most are the same unit/components rebranded.
While I try to sort the ignition breaker points out, I decided to do a bit more painting. The exhaust muffler had a good wire brush and clean, followed by a couple of coats of VHT silver paint. I was going to go for some black BBQ high temp paint, but as I still had some silver on the shelf I figured it would look ok so used that up instead

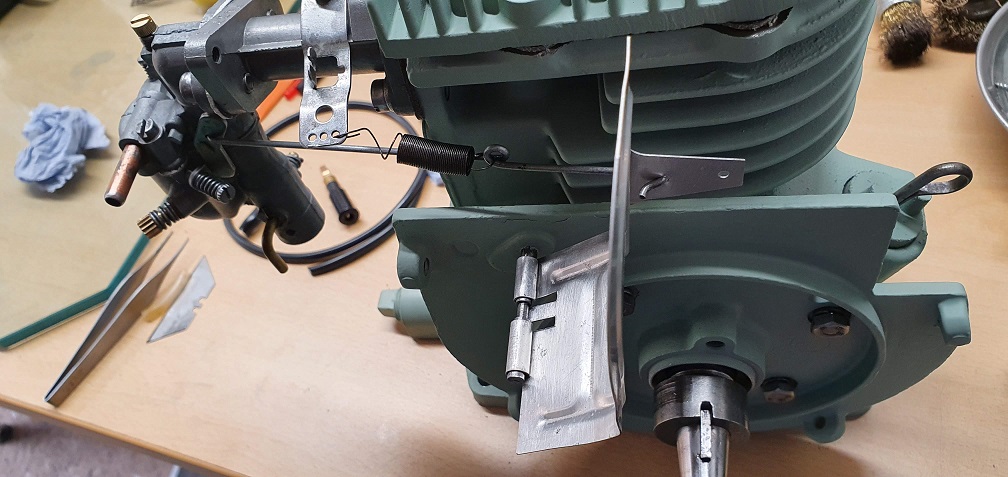
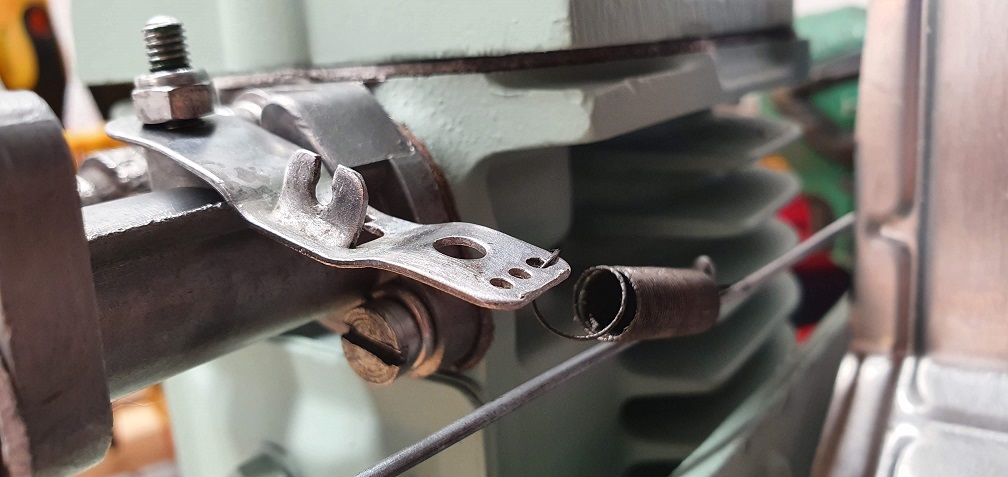
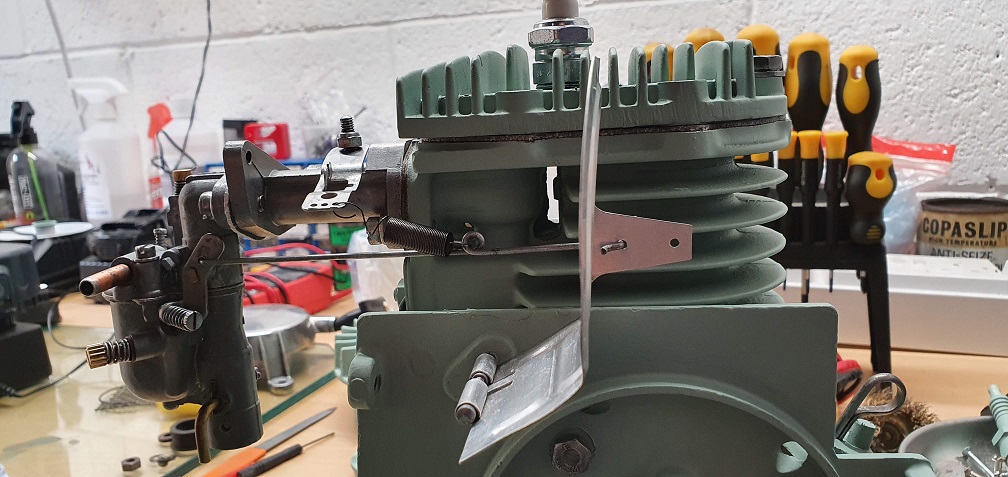
As I only have the pictures I took before stripping to refer to, and given how much of this mower was 'wrong' before I got my hands on it, can anyone help confirm if I have set up the throttle linkage correctly please? I've just set it up the same way it was but I don't know for sure if this is correct?
Hi RL, Is the motor still in
Hi RL, Is the motor still in primer?
Sorry I can't help on the carb setup, never had a vane governed job before, hope advice will be along soon, great job by the way.
Looks more or less ok to me .
Looks more or less ok to me . Perhaps the cable relay lever pivot nut could be a mite tighter. The governor spring has been stretched, possibly because the engine would not shut down to a slow enough idle to disengage the centrifugal clutch, or maybe its the wrong spring.
Hi RL, Is the motor still in
Hi RL, Is the motor still in primer?
Sorry I can't help on the carb setup, never had a vane governed job before, hope advice will be along soon, great job by the way.
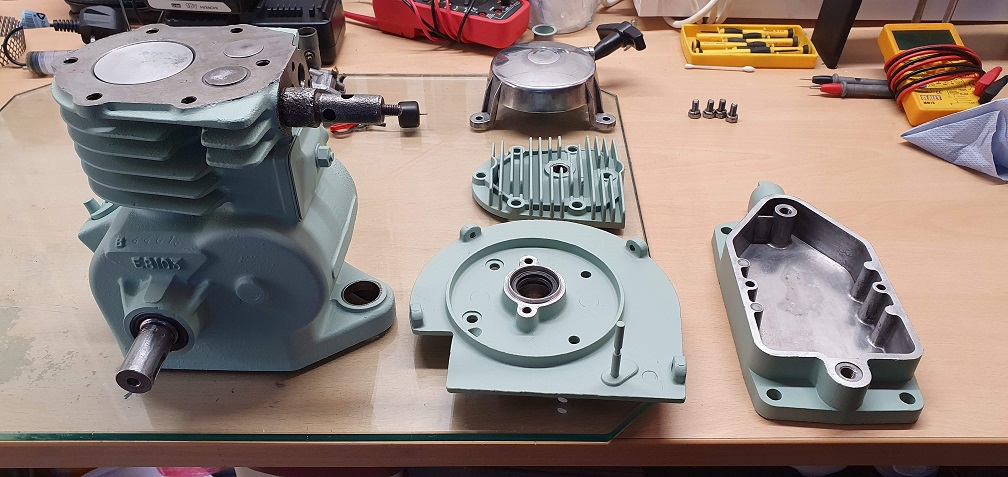
Thanks Chris. No the motor has been painted - the lighting in the garage where the pictures were taken doesn't really show the colour very well, so once I've finished assembling I will take it outside for some better pics. Not 100% content with the final colour but without being able to colour match, and having to rely on computer monitors and old pictures/ a few places on my engine which still had the original colour, it was difficult to get a good match. It's similar to the Hammerite Wild Thyme colour but a little lighter.
Looks more or less ok to me . Perhaps the cable relay lever pivot nut could be a mite tighter. The governor spring has been stretched, possibly because the engine would not shut down to a slow enough idle to disengage the centrifugal clutch, or maybe its the wrong spring.
Thanks Angus. I didn't know how slack the cable relay lever should be, so will tighten it up a bit. Hopefully the spring will be ok like it is, I'll have to see how it runs I guess.
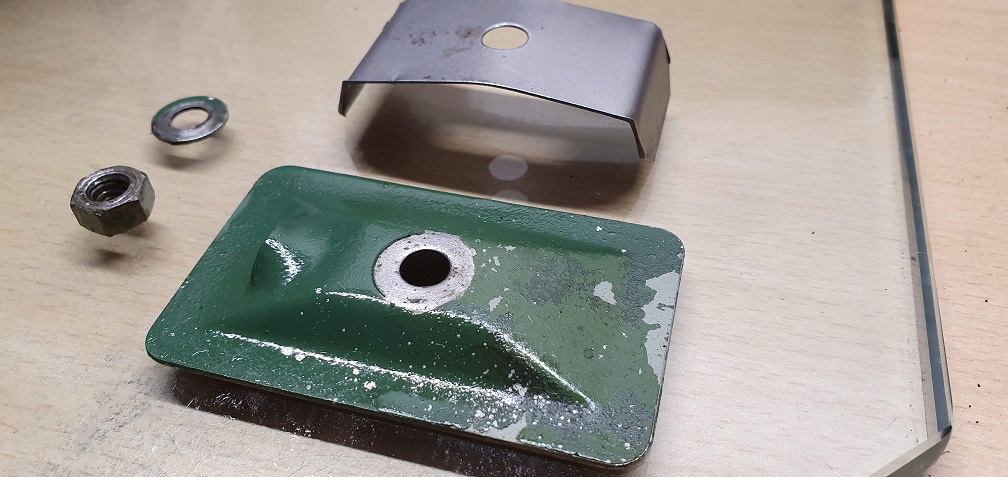
I sanded the base lightly
I sanded the base lightly just to see a bit clearer what was going on,
Definitely some sort of blistering reaction. With some of the blisters like bubbles that you can press down, I didn't want these to potentially break and flake off into the oil in future, so I thought it safest to just sand the surface down to get rid of the blisters