A brace of Ransomes Marquis - Restoration
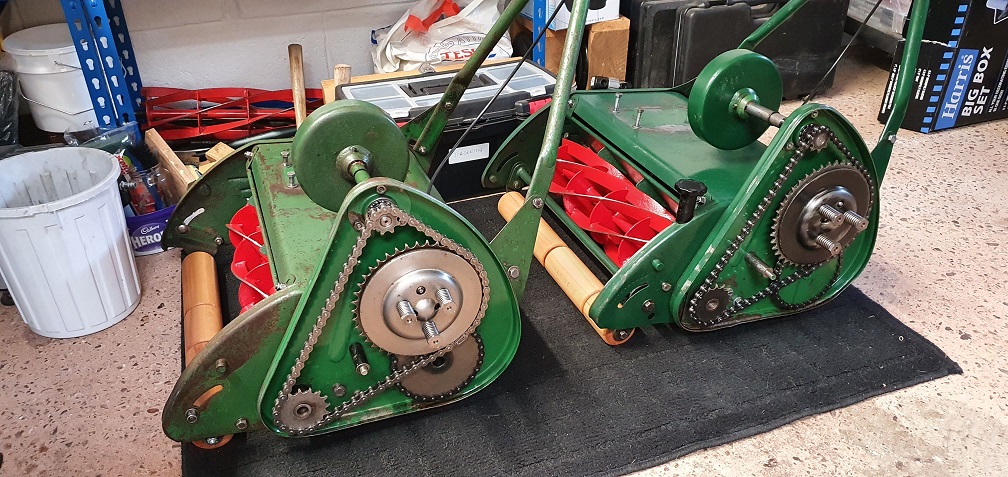
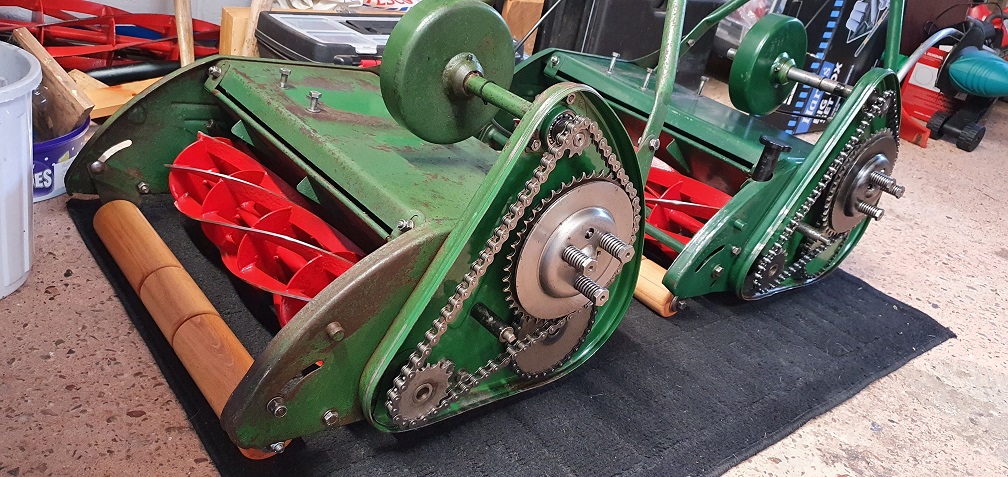
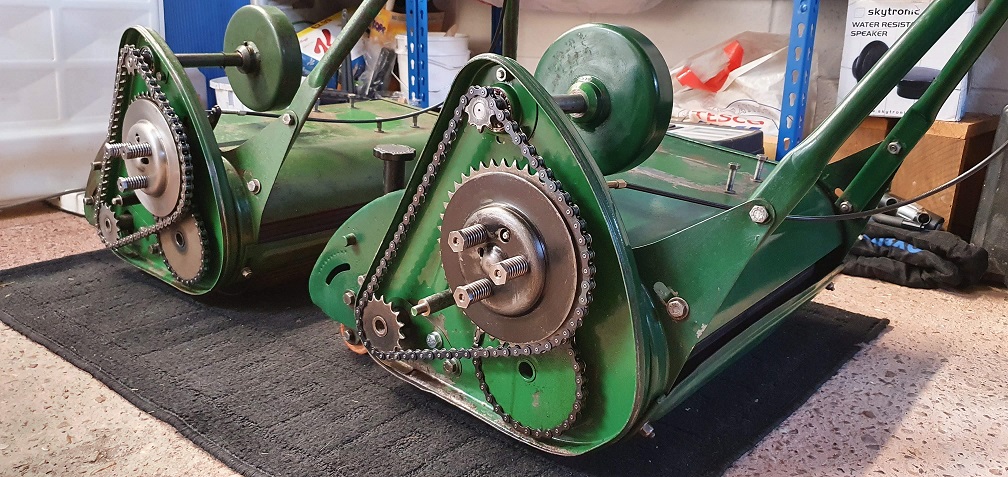
The finish line was in sight for my Atco / Suffolk Super Colt and I wanted to get something lined up for my next project. I spotted a Ransomes Marquis 18" non runner due to no spark (here we go again!), and when I went to look at it, the chap also had a running Marquis which was a slightly newer model, but had a fuel leak at the carb. Needless to say I ended up getting them both in the back of the car, with assistance!, and brought them home.
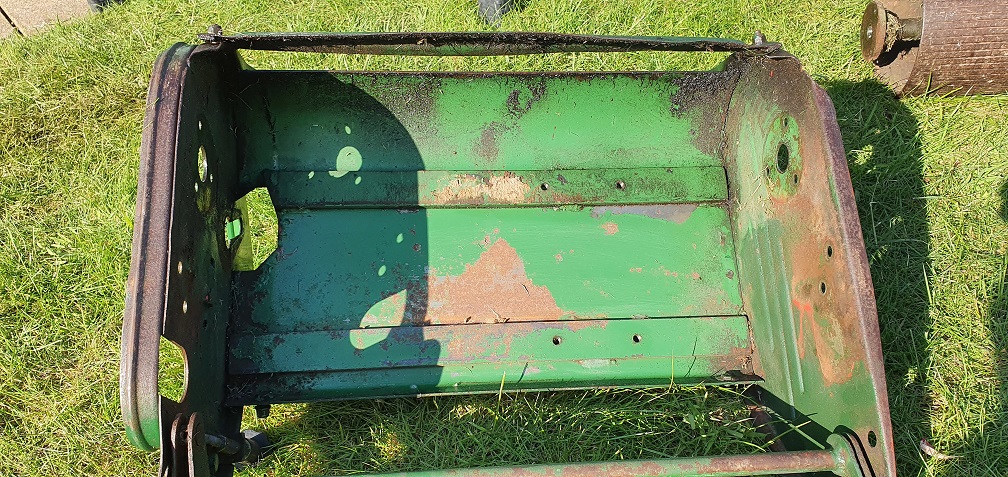
I'm not going to go to the lengths I went to with the Atco - as good a learning experience as that was, I now want to keep the mowers cosmetically as they are, bar a couple of little touch ups here and there, but overhaul them mechanically to get them both running well. Hopefully I can use one of them as my regular mower as the 18" cut will hopefully make things easier around the garden, and I do like the look of these mowers.
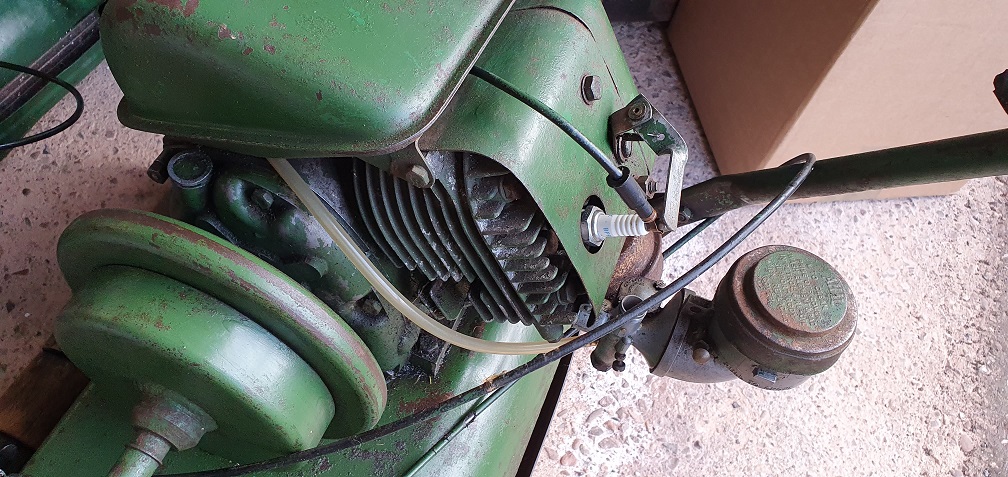
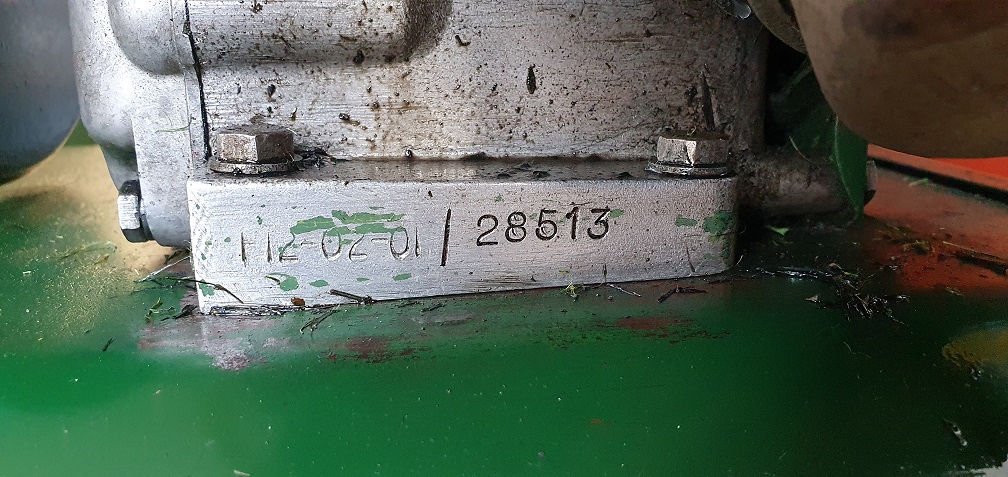
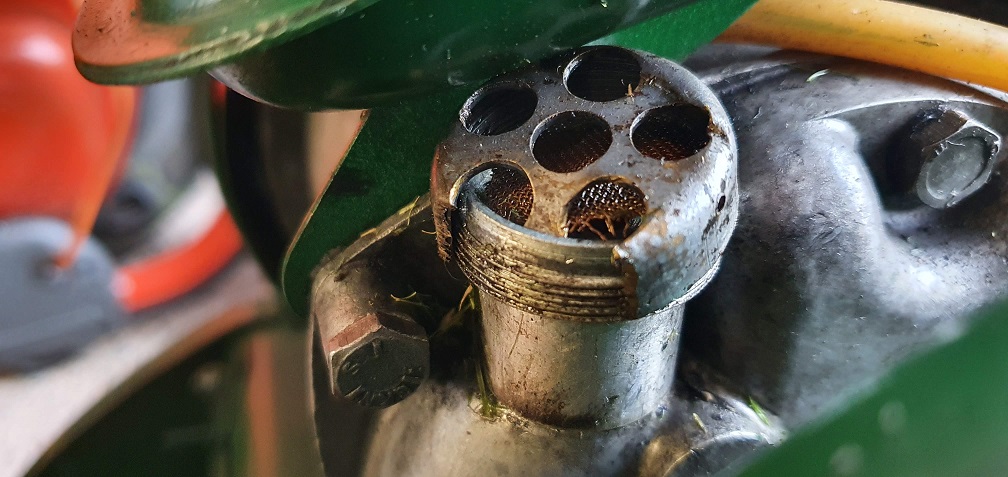
I would like to get an idea of manufacture date for both, and one should be easier as it has the plate on the side which says Mk4, but they both have the same BSA marked F12 Sloper engine
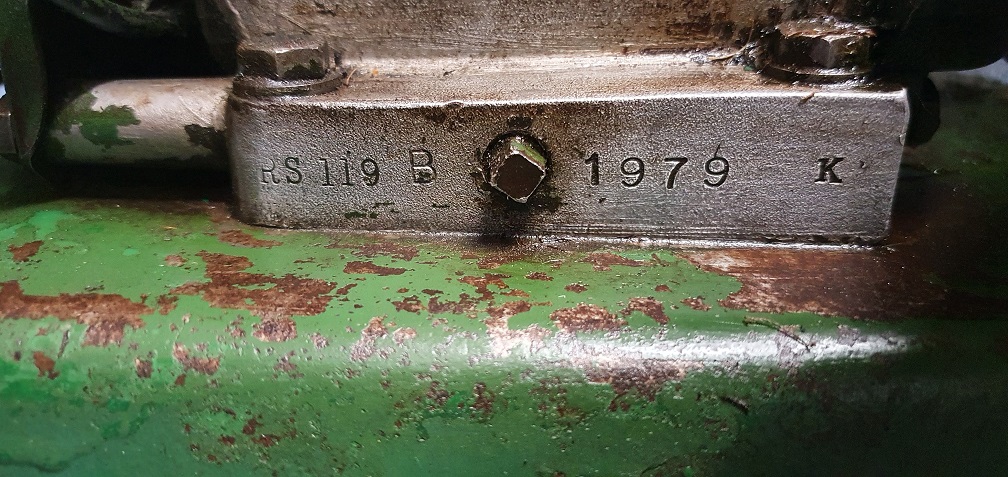
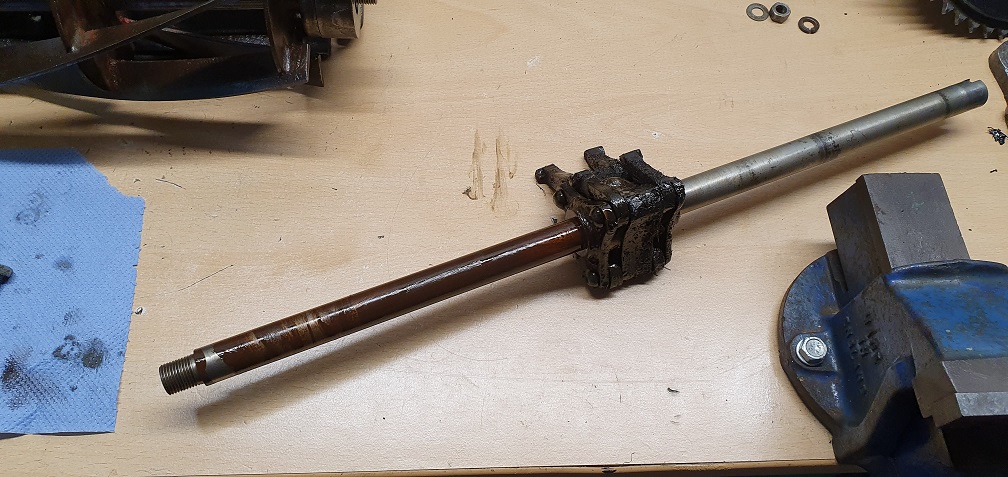
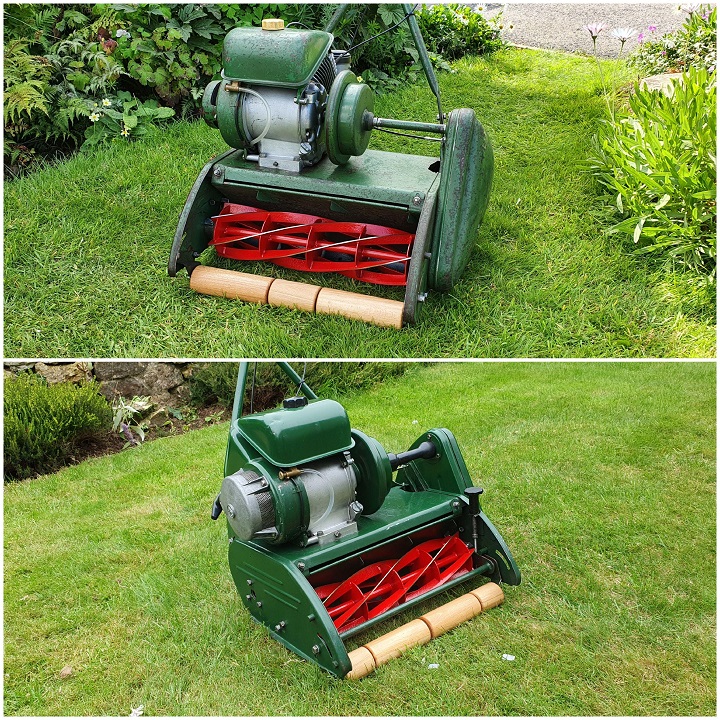
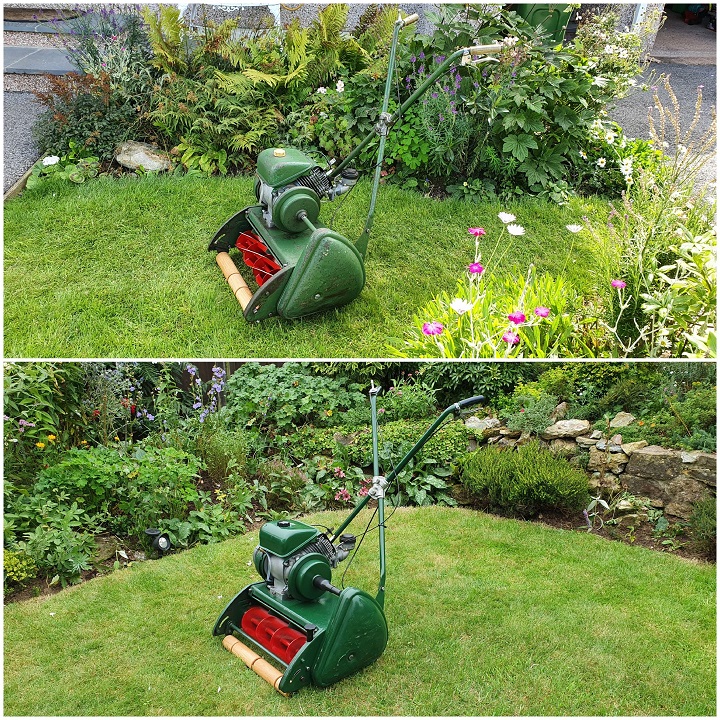
Mower 1 - Ransomes Marquis 18" Mk4 - Reg No. DC 398
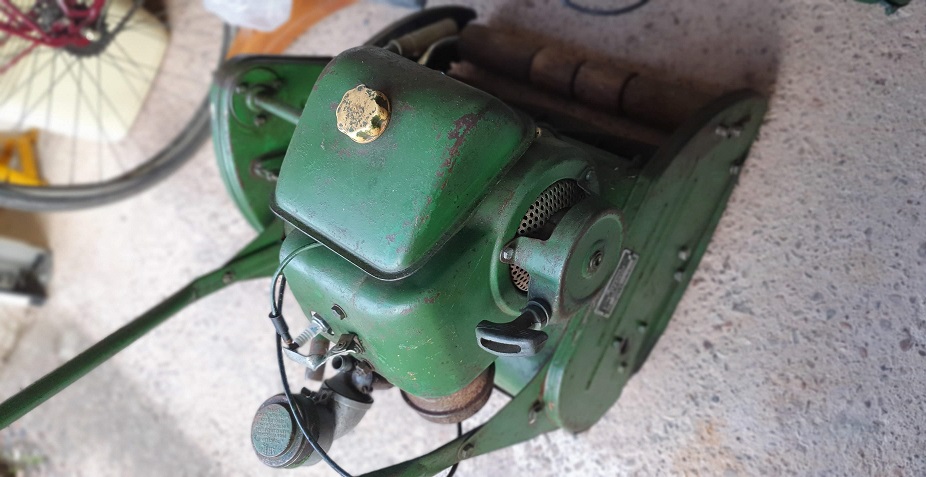
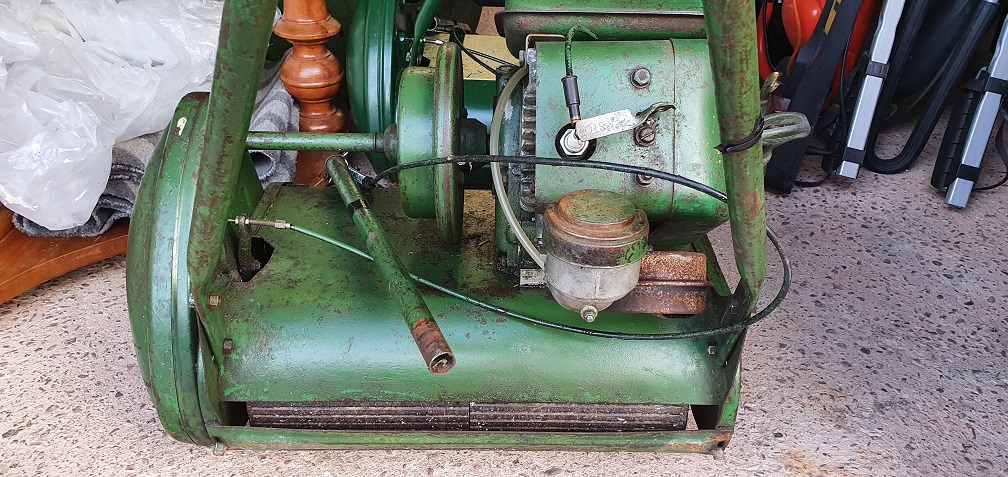

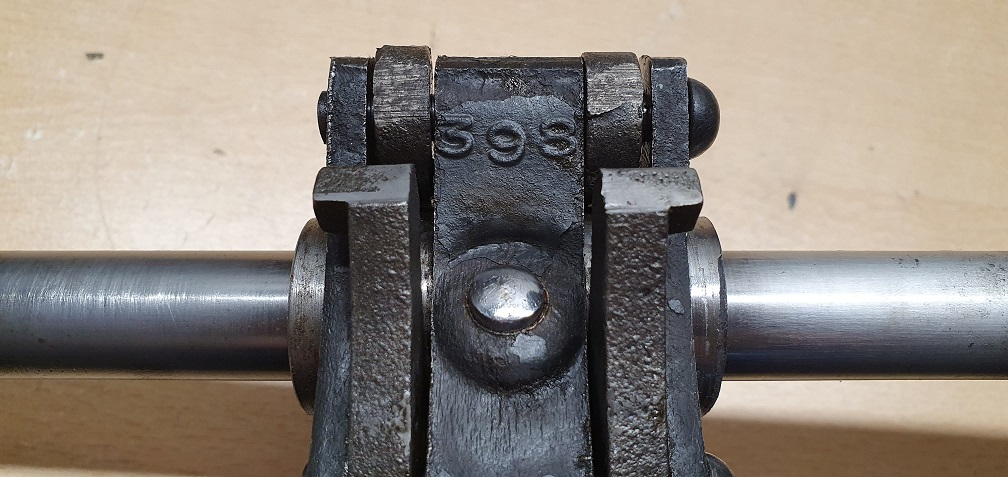
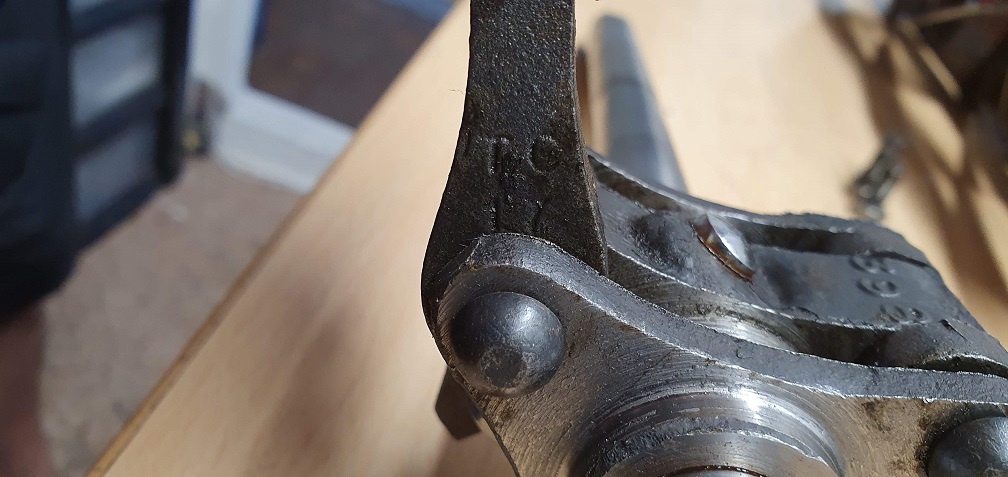
No numbers on the exhaust side of the block like the other mower, however the sump drain plug side has the following - RS 119 B 1979 K
Mower 2 - Ransomes Marquis 18" Mk??- No ID Plate

Forums

Good point about appearances
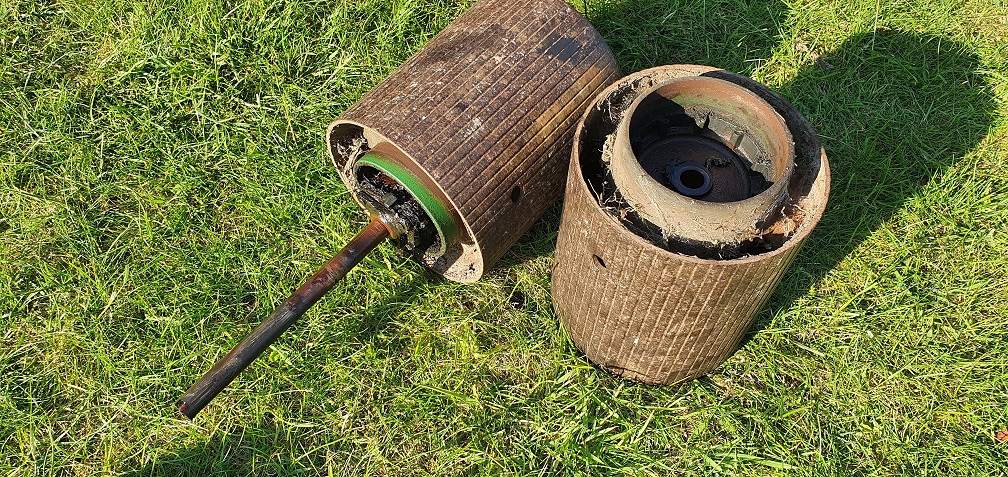
Good point about appearances - perhaps given the amount of slop in the central holes of the wooden pieces combined with the taper, maybe renewing them is the way forward. I wasn't thinking about the even height of cut and stability obtained from a new set of rollers, but mechanically they are probably lacking a bit in their current state, in comparison to the rest of the mower.
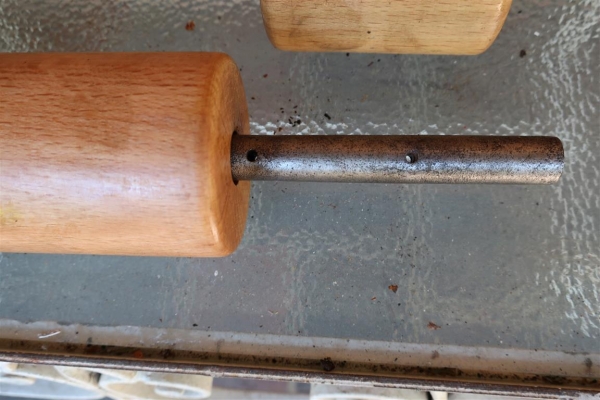
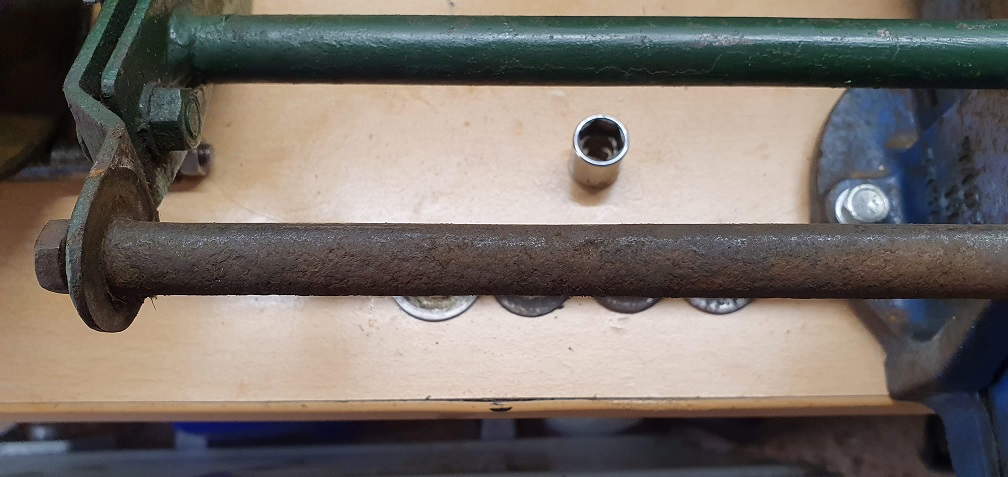
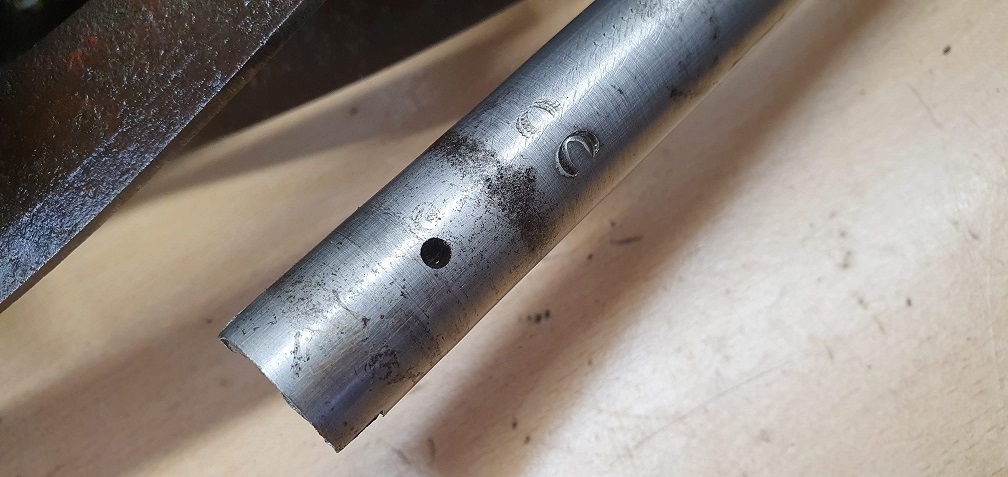
In terms of the holes in the spindle for the R clips, the correct small rollers must only be what, 1" wide? My current small rollers are much wider than the space between the spindle hole and the end of the spindle

So would the correct roller setup be a set of 2 x 1" width and 2 x 8" to match the 18" cylinder? Or would they be a little smaller to allow for spacing?
Interesting about the
Interesting about the positioning of the hole in the shaft. A week ago I would have been able to post a pic of a shaft from an 18” machine with two holes at each end , one to take the small roller that you have and one closer to the end as per your shaft. No chance of a pic now as the machine has gone to a new owner . I have seen a image of a Marquis fitted with a very narrow roller, more like a wheel but never seen one in the metal - or should that be wood ? Silly question; is it possible that your shaft has the second holes but they are so full of muck that they are not immediately visible - doesn’t look like it in your image but....... The the holes in the shaft of the machine that I’ve just sold were so solid with compacted dirt that I had to drill them out. In the meanwhile I’ll try to remember what I was looking at showing the narrow rollers / wheels.
Not a silly question at all -
Not a silly question at all - I had to go and tripple check that I hadn't missed any additional holes - but none to be found. The two holes that I do have were also packed solid and had to be drilled out. Perhaps an early spindle with only the outer holes for the narrower version of the smaller rollers at the ends.....
I will compare with the spindle on my MK4A later and see what holes are present on that one, although that has a different combination of sizes still - 2 large and one small
I had to have a shift round
I had to have a shift round in the shed to access another machine so I pulled out anothe ready for sale 18" Marquis and guess what I found?
So there are two holes, one of which enables the use of the standard short roller that is common to the 18 & 20" Marquises and also to the Twenty Four. The other is, presumably, for the very short rollers, yet to be identified.
Thank you Angus, that's a big
Thank you Angus, that's a big help and much appreciated. Your 18" mower which that roller setup belongs to must be a MK4A or newer then, is that correct? Going on the female threaded ends of the spindle, which belong to the microset height adjusting mechanism. If so, perhaps the MK4 only came with one hole in the spindle at each end, for the yet to be discovered - smallest outer roller.
I've taken apart the rollers on my MK4A and right enough there are 2, very well hidden, holes at either end
so out with the drill again to clear the holes
My MK4 spindle with the single hole at either end has a male thread at either end which the locking nut tightens up on, once the roller height has been manually set

Upon inspection of my MK4A rollers, the small middle one is actually just a chopped down longer roller, with an uneven cut on one side!
My short rollers on the MK4 are of the correct length it seems, as they fit inside the second hole on the MK4A spindle. Perhaps the MK4 spindle only ever came with the one hole at each end, and the original small rollers at the ends were very small, about an inch long, in order to use the single hole and an R clip. 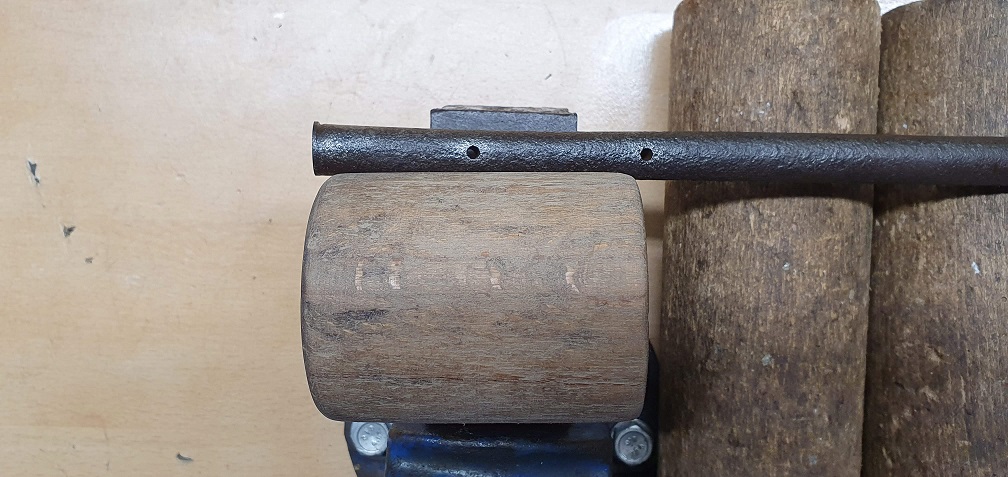
What outer diameter is the correct spec for these rollers when new? I'll look into getting a couple of sets made up the same, based on my slightly worn spindle diameters.
I hope you don't mind me
I hope you don't mind me pointing out that there is a technical term for the shaft with the four holes in it. The terminology starts with a 'kn' and ends with 'ackered' ;)
The genuine article, Three
 The genuine article, Three inches by two and a quarter. I actually make mine with a slightly larger diameter so as not to waste too much of the standard sized spindle blanks from the local turning wood suppliers. I did find a firm that would supply smaller cross section blanks but their carriage charges negated any saving.
The MK4A spindle I have with
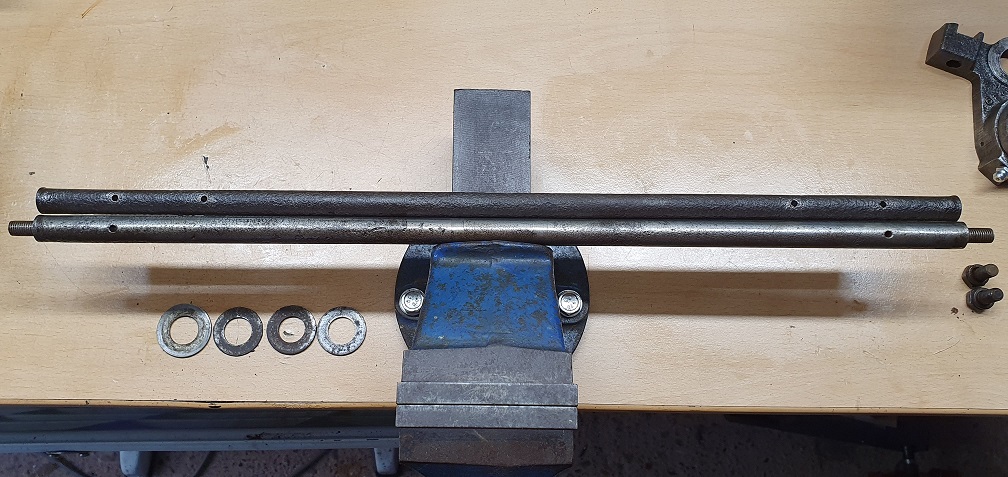
The MK4A spindle I have with the 4 holes has certainly seen better days that's for sure - there's a definite flat 'side' to the spindle where it has worn, and it's no longer round! The MK4 spindle with the 2 holes is also resembles a banana, therefore it looks like I'm going to replace both of them, otherwise the new rollers will be wasted on them.
Thanks for the picture and sizes Angus. Looking at the parts list, there are some 'side wheels' listed. Were these offered to enable the Marquis to deal with long grass, in the same way as running with just the smaller of the 2 front rollers? Or were they for a different purpose? Parts 17,18 here:
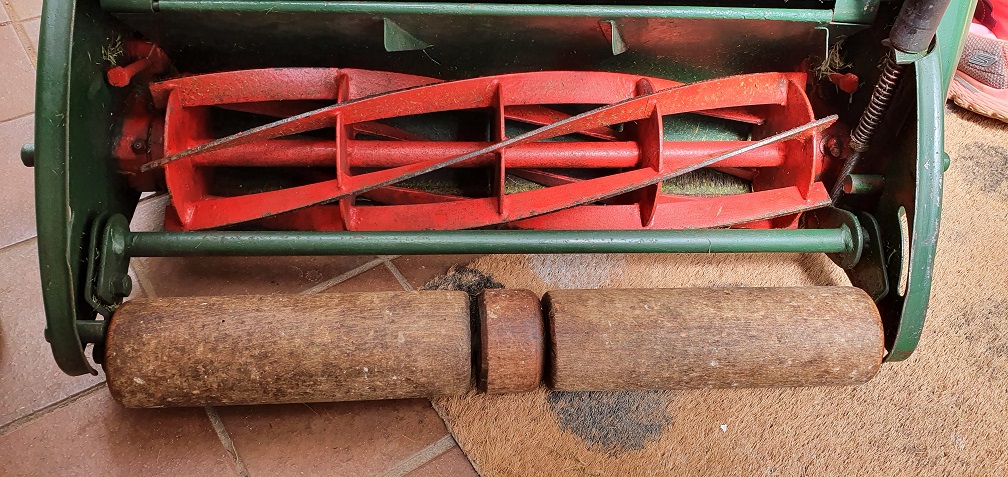
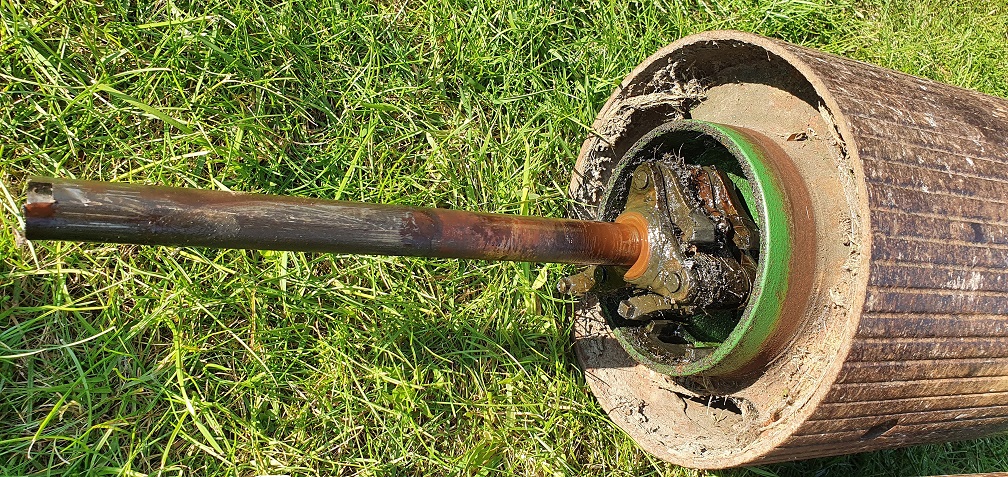
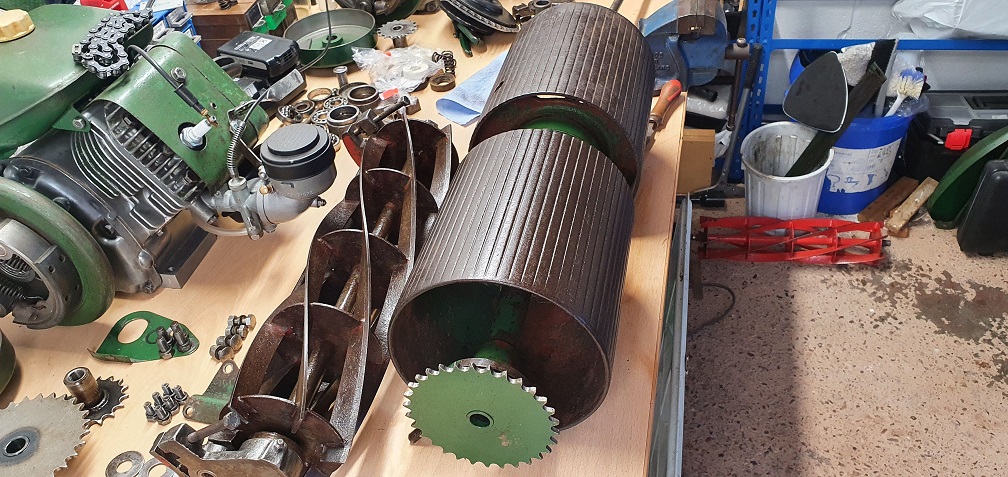
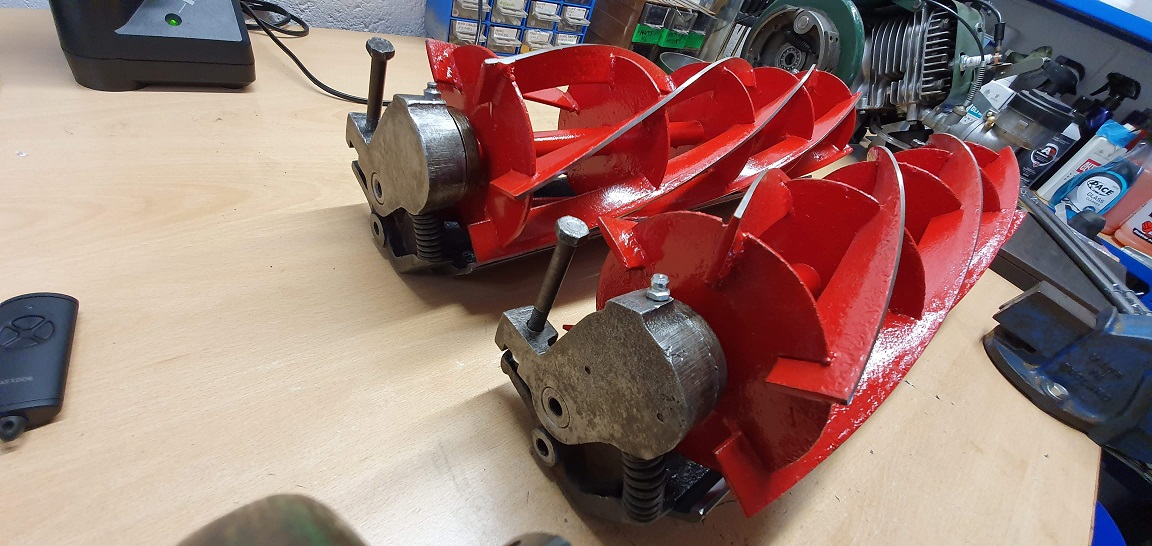
More good news - one of the blade ends on one of the cutting cylinders has a crack in it
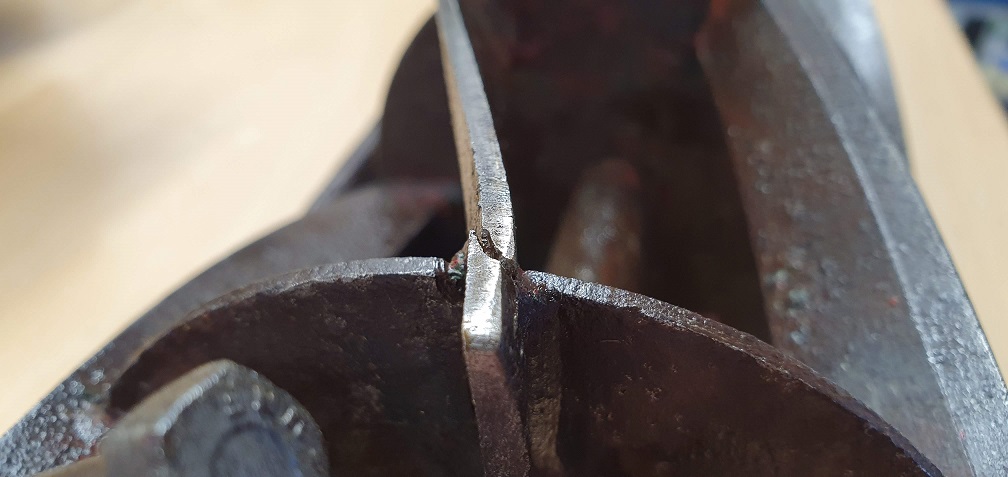
As the cylinder is getting down a bit in terms of diameter, it may not be worth getting this one repaired and sharpened.
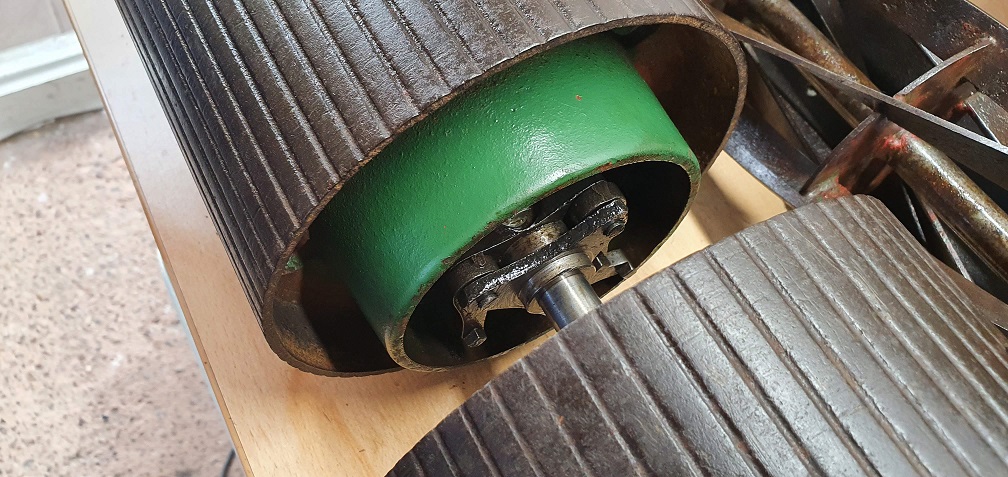
In more positive news I have been able to remove the rear roller from the MK4A with the same process and tools as I used on the MK4, and no cracks in sight on either of these 2 roller halves thankfully!
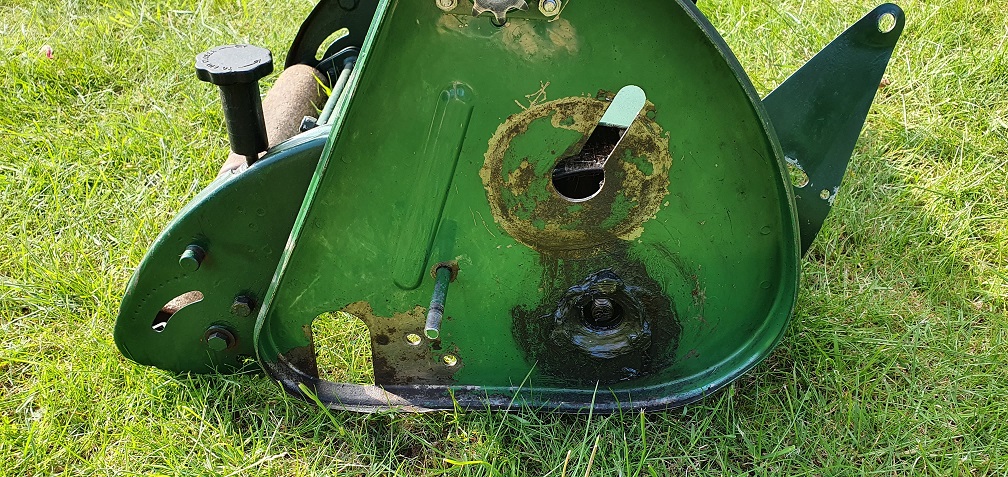
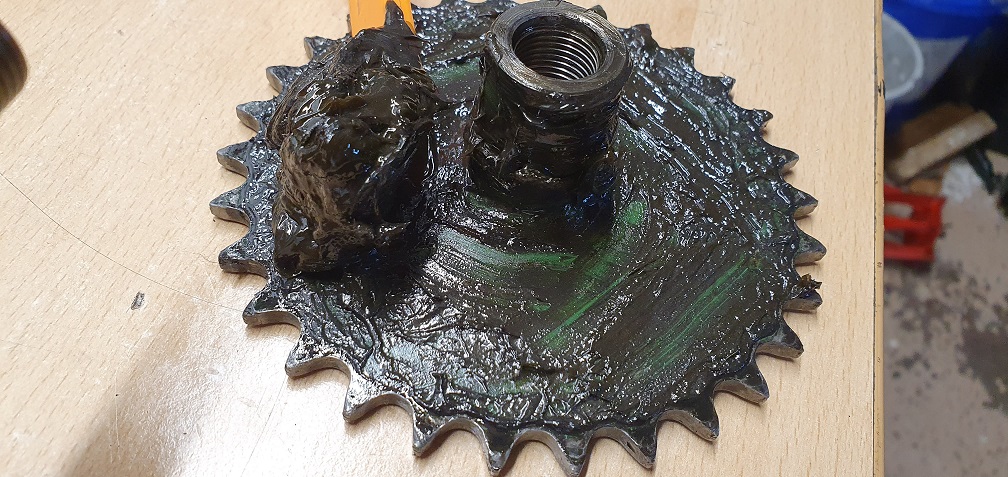
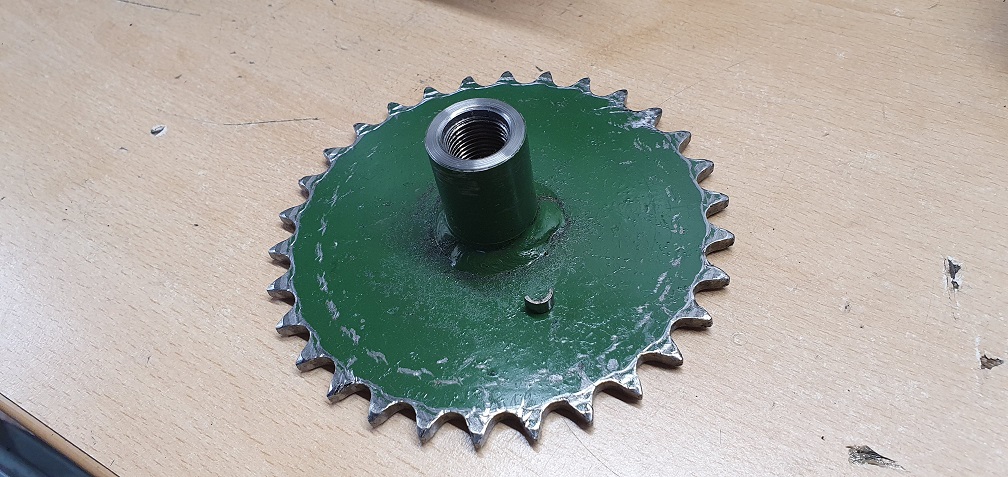
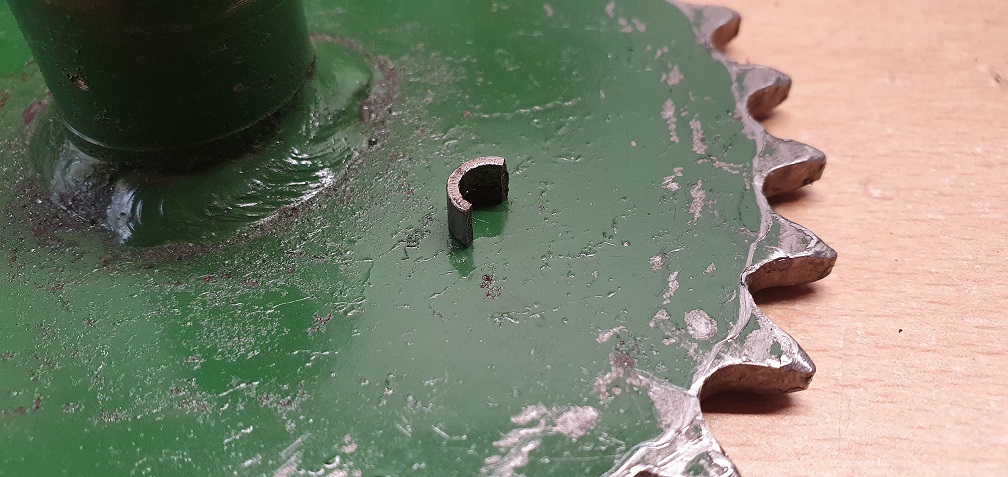
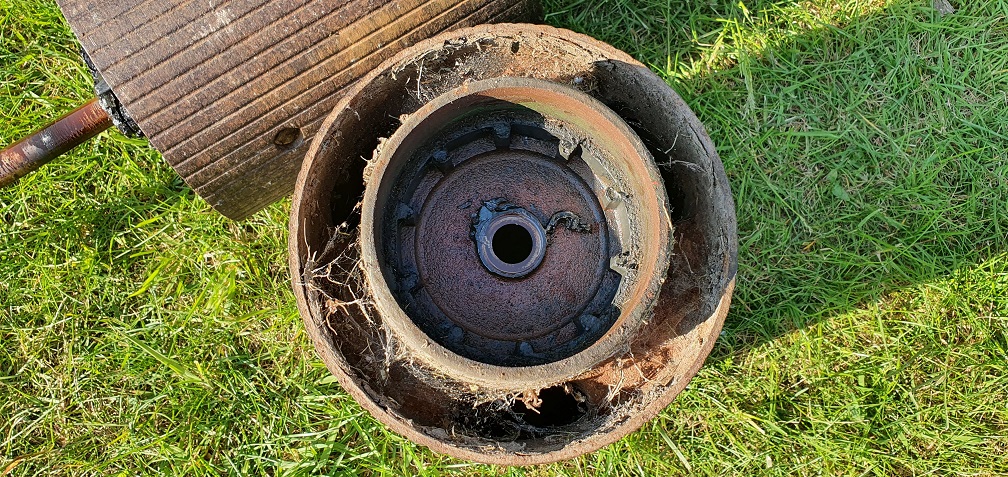
Quite a collection of grease behind the rear roller drive sprocket
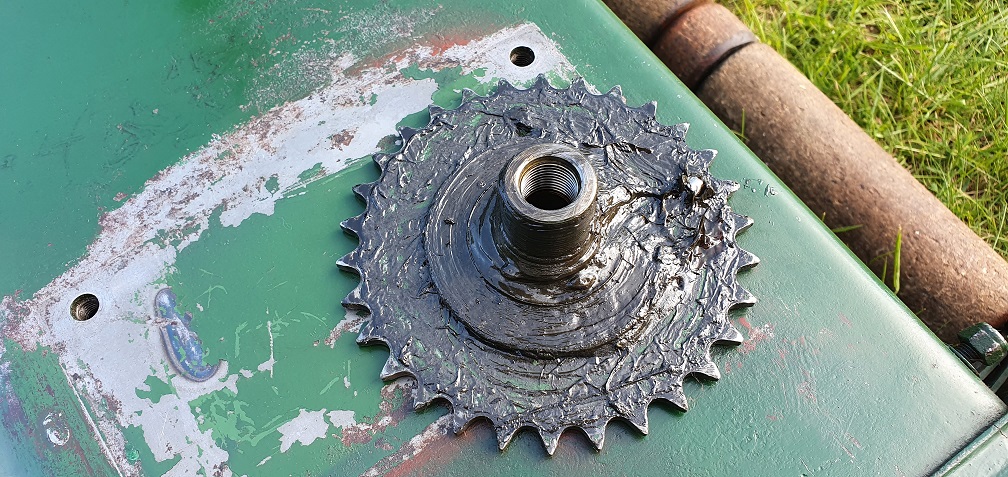
Oddly, the grease was harbouring a foreign object, which, after a clean up, turned out to be half a chain roller!! Some sort of chain breakage incident in the past....
More arachnid evicting...
The pawls were coating in thick treacle/tar like crud and dirt and were very sluggish to move
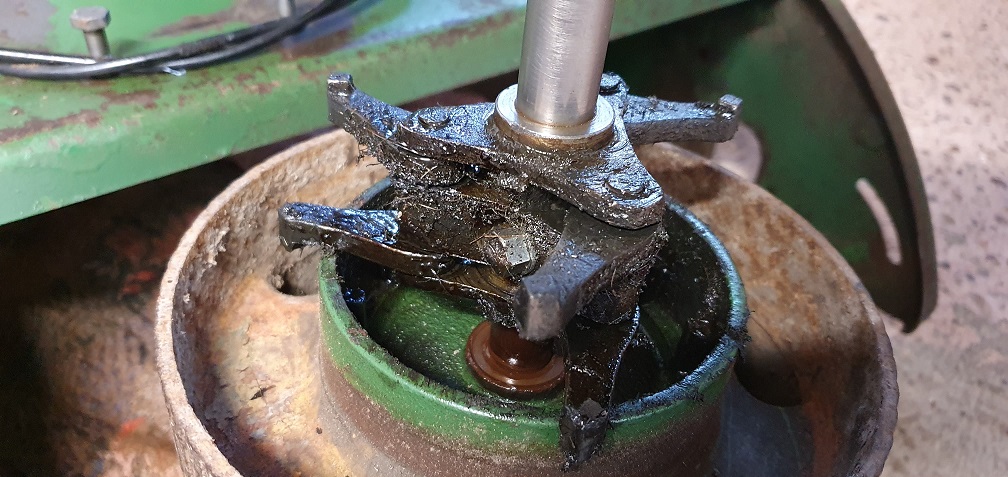
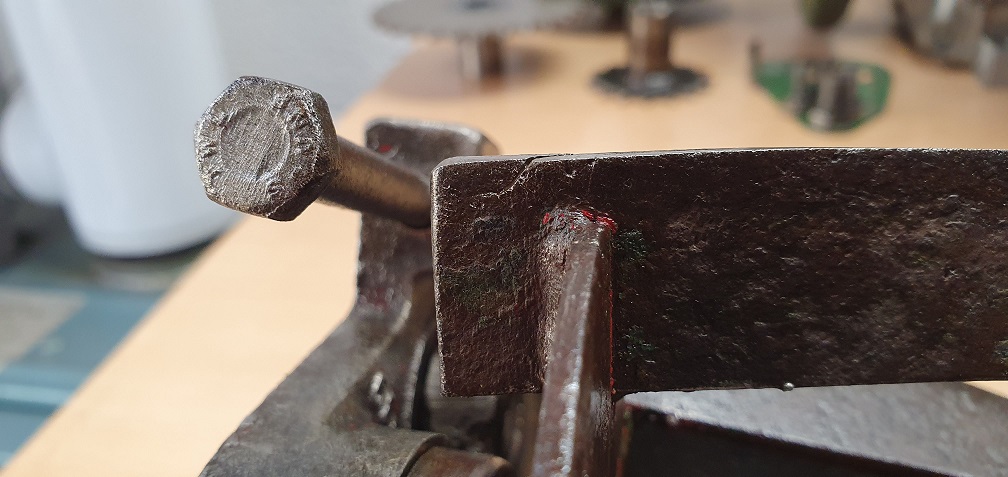
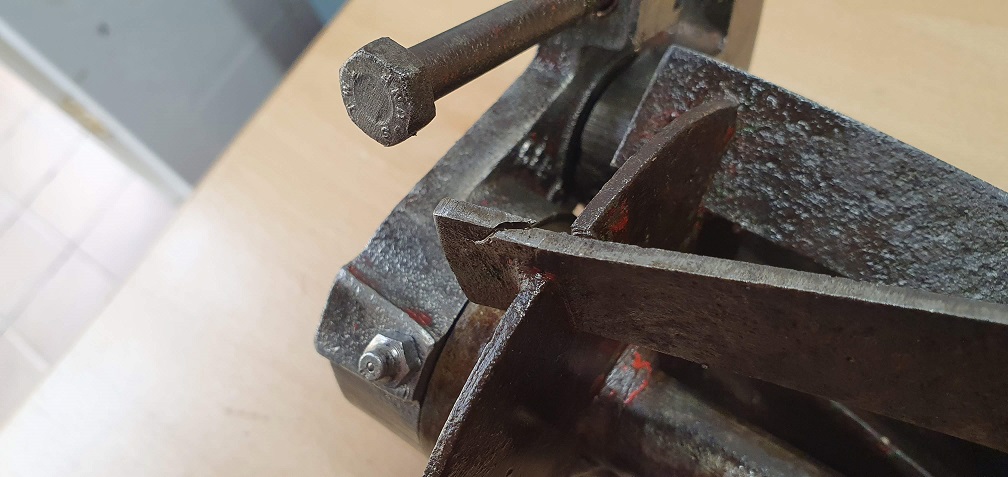
Again on this mower the drive side plain bearing was quite tight to remove from the shaft, so I put my shaft locking tool to use as a sort of 'puller' and eased the bearing from the shaft
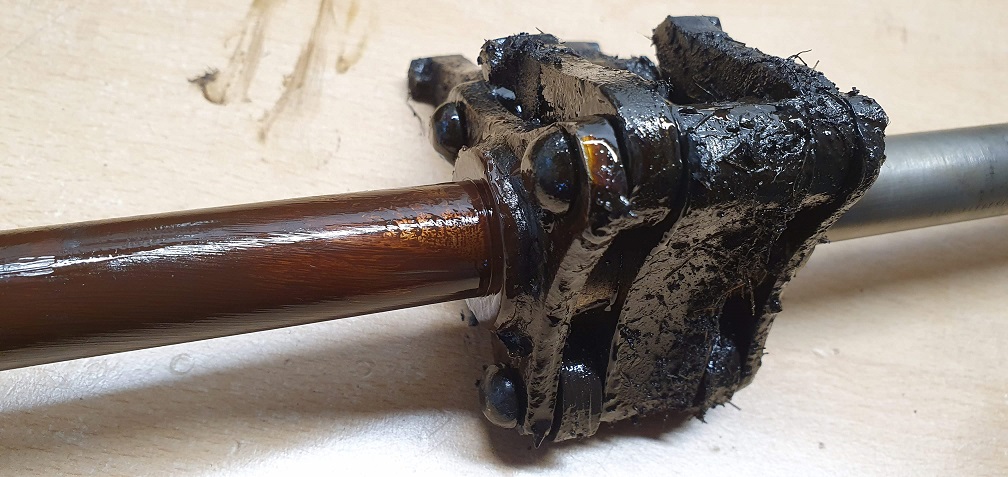
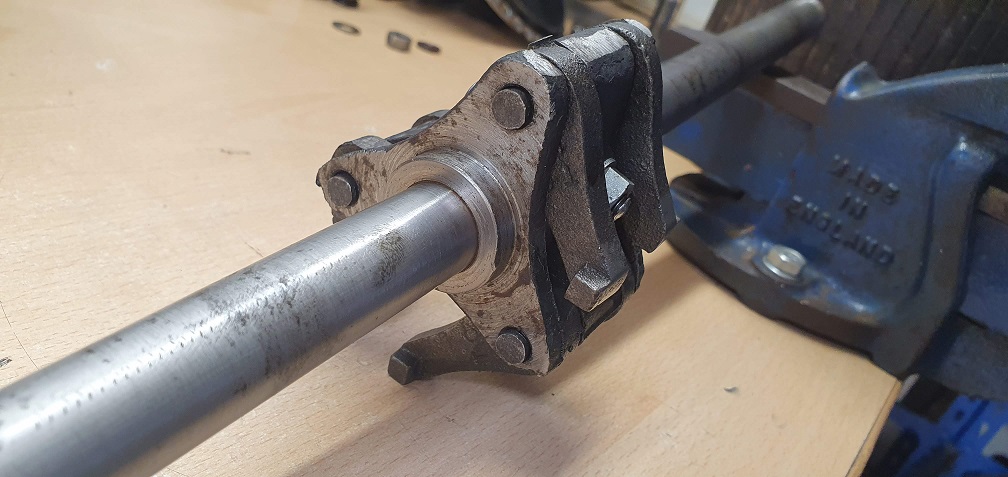
This roller has been apart for either repair or servicing at some point in the past, evident from the vice bite marks on the spindle and second set of grub screw witness marks
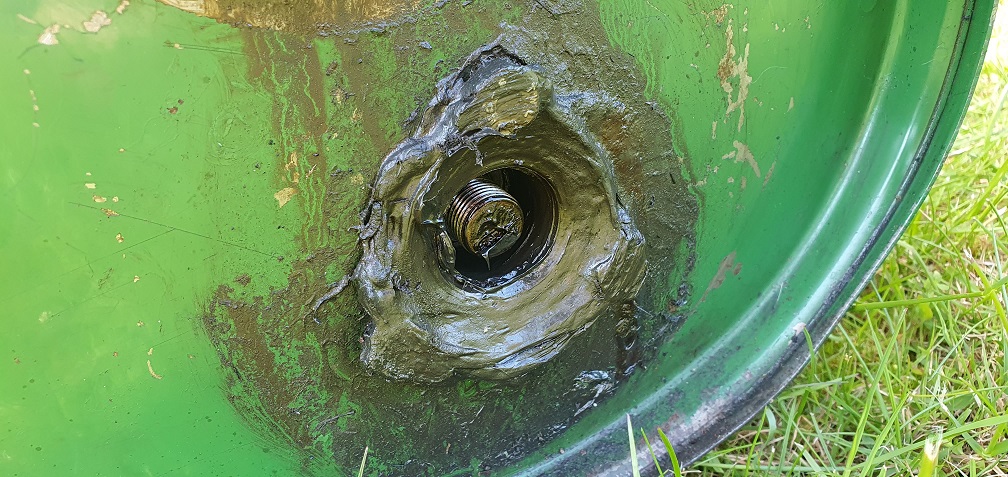
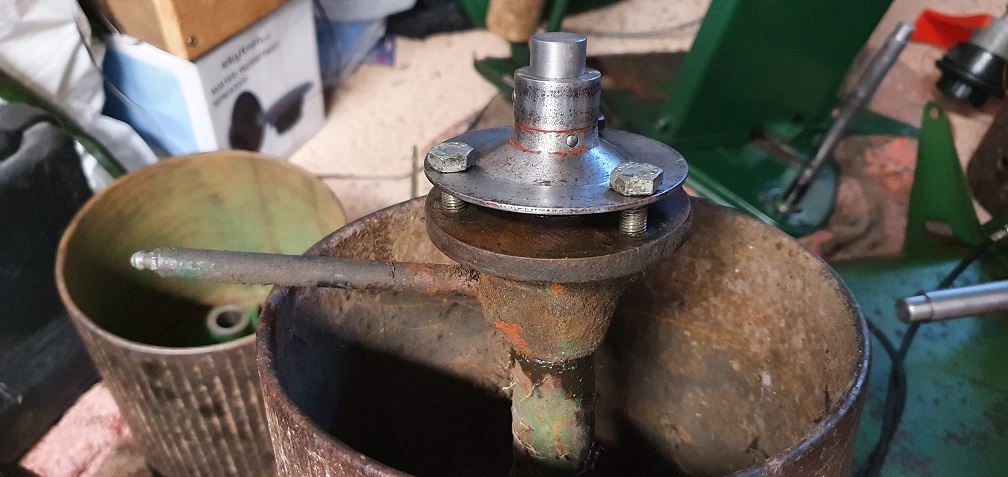
Oil hole blocked with old grease - par for the course
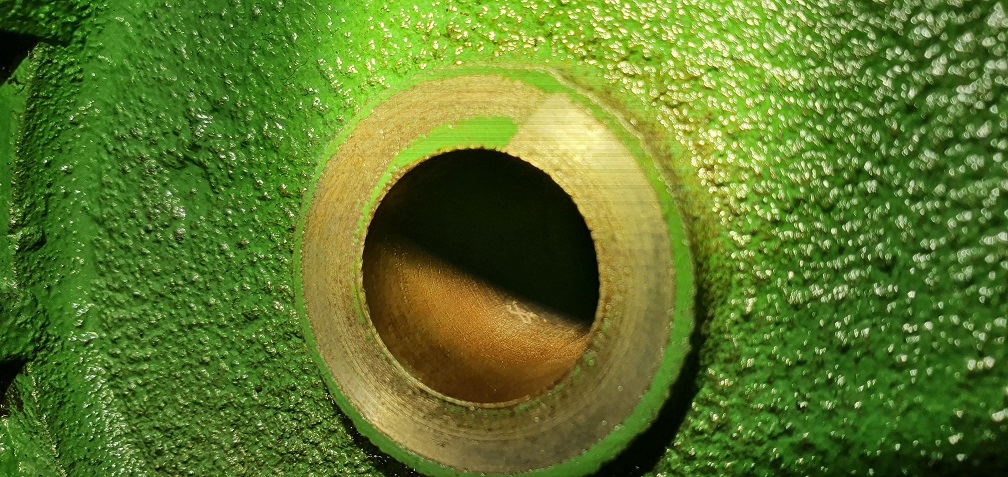
Camouflage paintwork on one of the plain bearings - either that or some red oxide primer showing through from a previous paint job!
Lubricator tube full of grease. Good intentions of 'lubrication' from previous owners at least
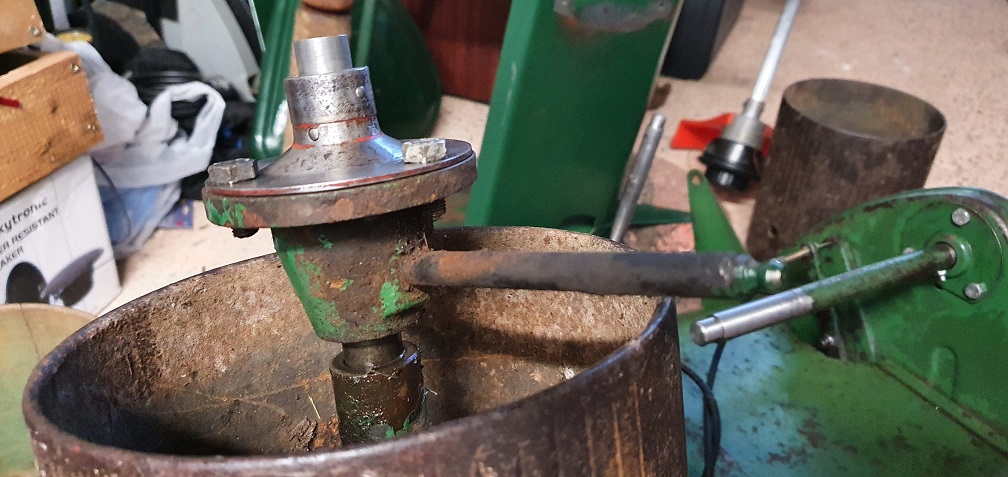
Both roller lubricators were also blocked like the other mower, but one of these 2 was so badly blocked with old grease it took a good 2 hours of fettling to clear it - X marks the spot or the compacted dry grease and crud
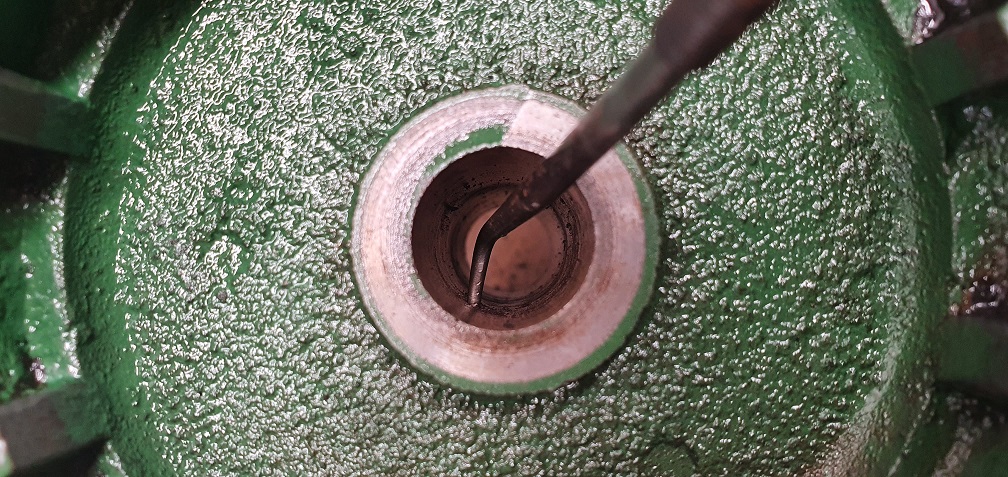
Had to just chip away at it and find a suitable straight length of wire that wouldn't deform that I could try to drill down through the lubricator with to clear it. Got there in the end
Everything could then be fully cleaned up, lubed and reassembled
Sprocket fitted just to hold the bearing in place until it's ready to go back into the chassis
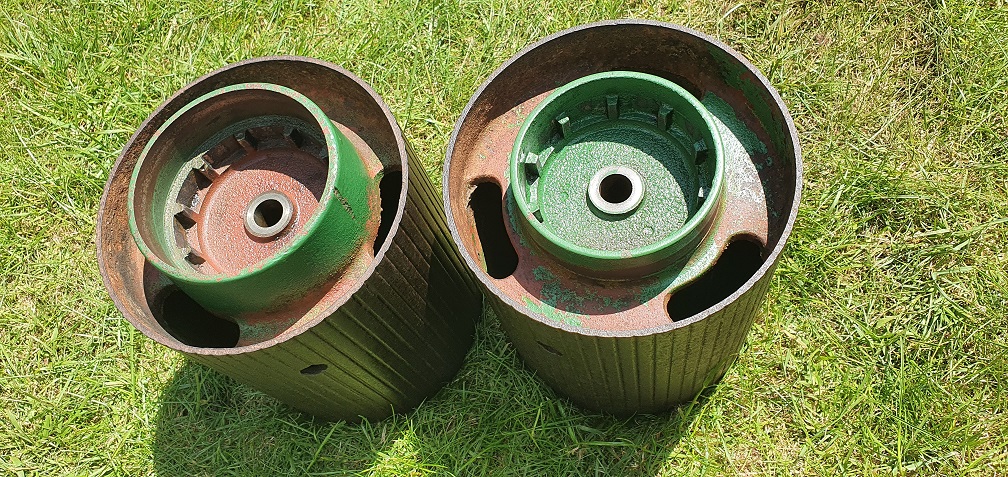
Those 'outrigger' rollers
Those 'outrigger' rollers were only used on the MK4 and earlier Marquis's which had three wooden rollers, the centre one differed in size between the 18" & 20". Later Marquis's used four wooden rollers, the two outer ones were the same size on the 18" & 20", the inner rollers differed in size.
Those outrigger wheels
Those outrigger wheels/rollers look like a different way of doing the same high cut job but I’ve never seen them in the metal. I’ve seen front roller spindles that were worn oval . The wooden rollers pick up grit and dust on their internal bores and it’s that abrasive material that acts like a rotary file on the thrust / weight carrying side of the spindle.
Red oxide paint. I’ve quite often seen it under the green on Ransomes castings. I wonder whether they cast or bought in castings for stock and the red oxide was to preserve them until such time as they were needed for production. The insides of Ransomes rear rollers are often red oxide coated, presumably no incentive to waste green paint.
Your struggles to clear the compacted dried ot grease from the various oil ways more than justifies Ransomes mantra of oil only , no grease.
Thank you both for the
Thank you both for the information! So to maintain original form, my 18" MK4 needs a set of 3 rollers, all 6 inches long? The 20" versions would have used the configuration of 6" 8" 6" - is that correct? The MK4 spindle only having the two holes in it so close to the ends, must have had some optional different rollers available to use which must only have been an inch long in order to fit between the end fo the spindle and the R clip going through that hole. Unless it used the same wheels as the outrigger 'side rolls' mentioned? They look to be about that size in the parts diagram at least, although I'm aware it's not to scale!
For my 18" MK4A, that would need 4 rollers, setup as 3" 6" 6" 3" - would that be correct? All rollers 2.25" diameter with a centre bore to match whatever size the new spindles are (inc clearance)
Those 'outrigger' rollers
Those 'outrigger' rollers were only used on the MK4 and earlier Marquis's which had three wooden rollers, the centre one differed in size between the 18" & 20". Later Marquis's used four wooden rollers, the two outer ones were the same size on the 18" & 20", the inner rollers differed in size.
I agree with that and have found a very early parts list that just refers to 18 & 20" Marquises with no Mk numbers. Part numbers but no dimensions. Three rollers in both cases.
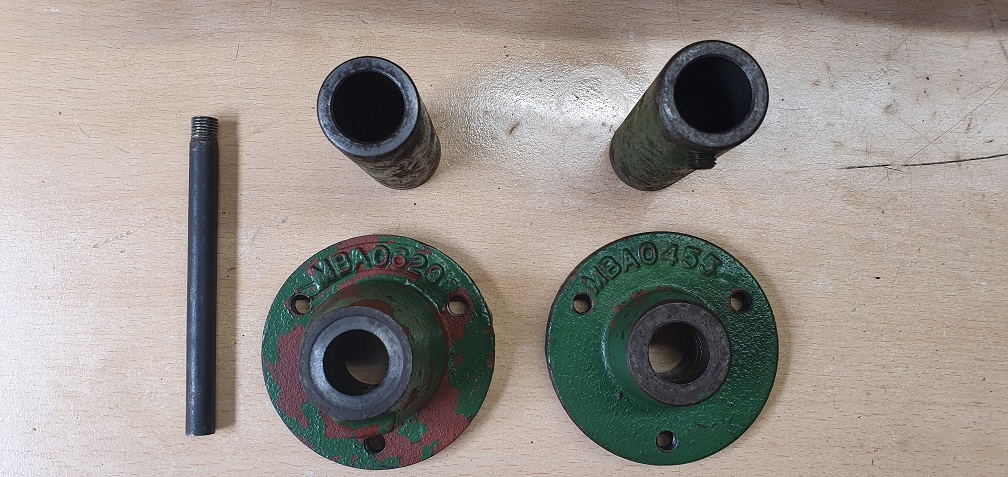
18"
Front roll outer x 2 SD5988
Front roll inner x 1 LCC21
20"
Front roll outer x 2 SD5988
Front roll inner x 1 MBA1607
Side (outrigger)rolls for both
Roll NA42C
Roll complete (with bracket) LAS202D
Thanks Angus, so the original
Thanks Angus, so the original setup wouldn't have been 3 x 6" rollers on the 18" due to the different part numbers. I wonder if the original setup was | 5" | 8" | 5" | perhaps, but then the original single spindle holes at the ends would still have been redundant unless there were optional 1" rollers available with R clips. Who knows - I doubt I would get the dimensions from a Ransomes dealer, even if they could find the original rollers by these part numbers. I wonder if anyone on here has done a full restoration of a MK4 or earlier Marquis with rollers to spec - I'll have another search....
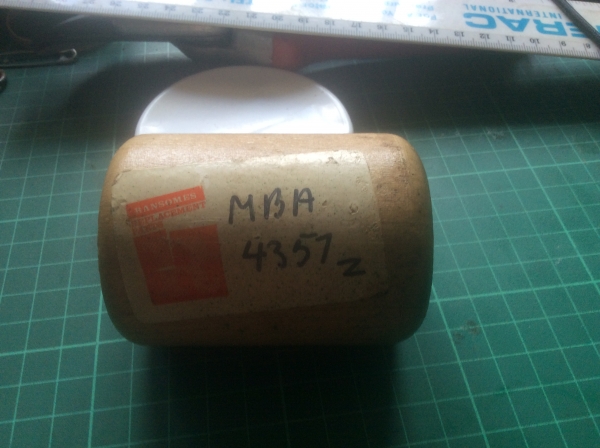
I've asked the Ipswich Transport Museum if they would be able to supply the Illustrated parts list for the MK4A and the MK5 and 5M Marquis as they would be useful to have available on this forum, and the MK4A list would probably show the revised spindle with the 4 holes in, and I suspect, as per Angus's picture further up, the smaller of the 4 rollers with the MBA4357 part number. At least by knowing that roller is 3" long, the 2 longer inner ones must be 6" each. That list will also give me the part number for the revised spindle with 4 holes so I can check availability. The 18" spindle for the MK4 with just the 2 holes is part number MBA0873, so again I'll check availability.
OK so after further research
OK so after further research in addition to the information Angus posted, I have found the following regarding the front roller setup for the 18" Marquis.
MK4 - Front roller spindle - 9/16" diameter, 18" long, 5/16" UNF male threaded ends which are 9/16" long. Part number MBA0873. There are 2 spindle holes for R Clips to retain 2 optional smaller (approx 1") rollers for long grass cutting. There are 3 regular wooden rollers. The 2 outer rollers are part number SD5988 and the middle roller on the 18" version is part number LCC21. Lengths of all rollers still unknown.
MK4A - Front roller spindle - 9/16" diameter, 18" long, 5/16" UNF internal female threaded ends which are 3/4" deep. Part number MBA0873B. There are 4 spindle holes for R clips. The outer 2 holes are for retaining some optional smaller rollers (approx 1") for long grass cutting. The inner 2 holes are for retaining the standard outer 2 wooden rollers for long grass cutting. There are 4 regular wooden rollers. The 2 outer rollers are part number MBA4357 and are 3" long. The 2 inner rollers are part number MBA4356 on the 18" version and are 6" long.
The picture further up that Angus posted showing an outer roller with part number MBA4357Z actually belongs to a Marquis MK5 or MK5M according to the additional parts lists that I now have. I'm not sure if or how this Z version is different from the MBA4357 item on the MK4, but perhaps something changed.
Regarding the small optional rollers that I can't yet find a reference to, I did discover a previous thread on here where an owner has posted a picture which, I believe, shows these elusive 1" or so long rollers - post #7 here:
https://www.oldlawnmowerclub.co.uk/forum/history-and-technical/technica…
While I sort out wooden
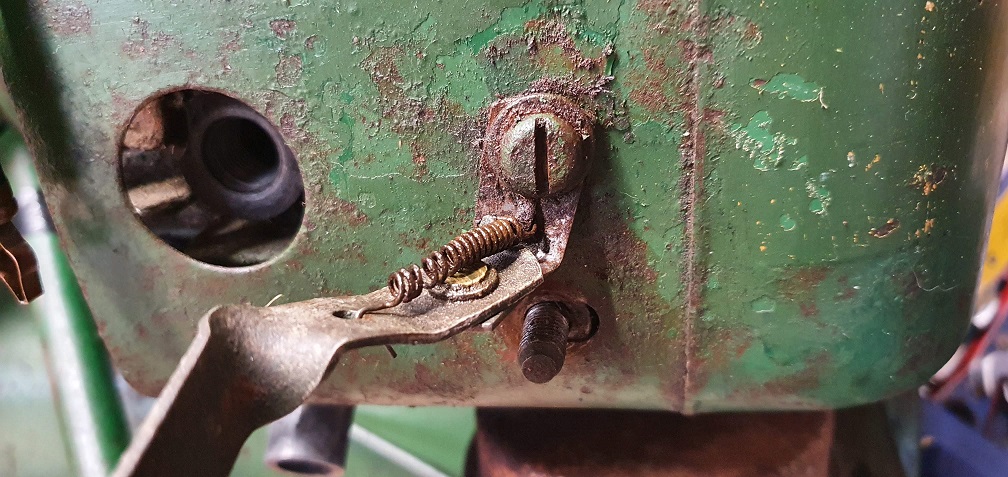
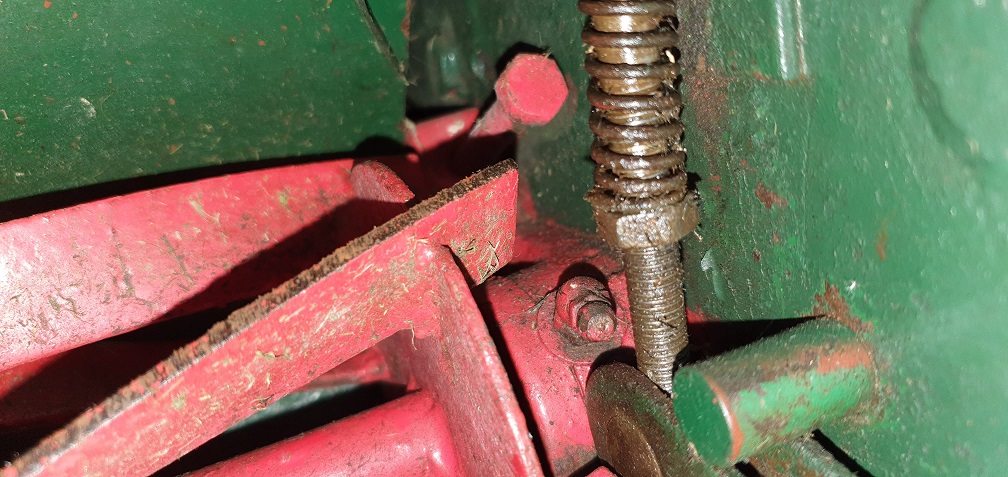
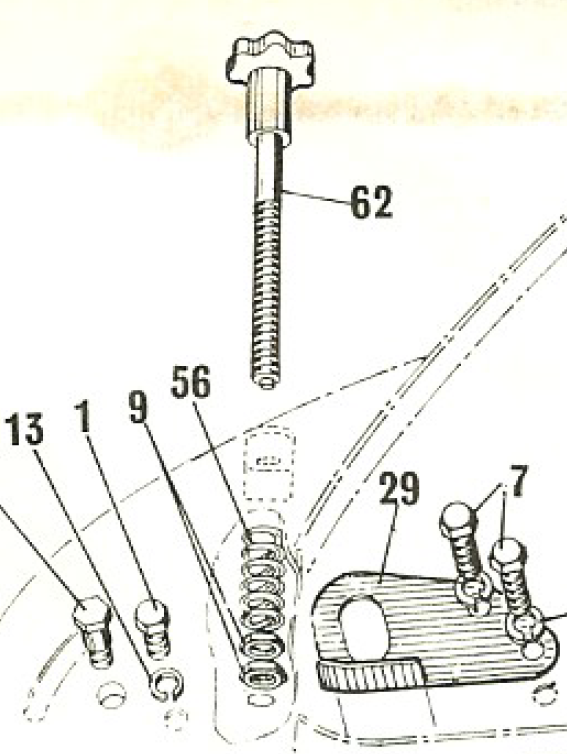
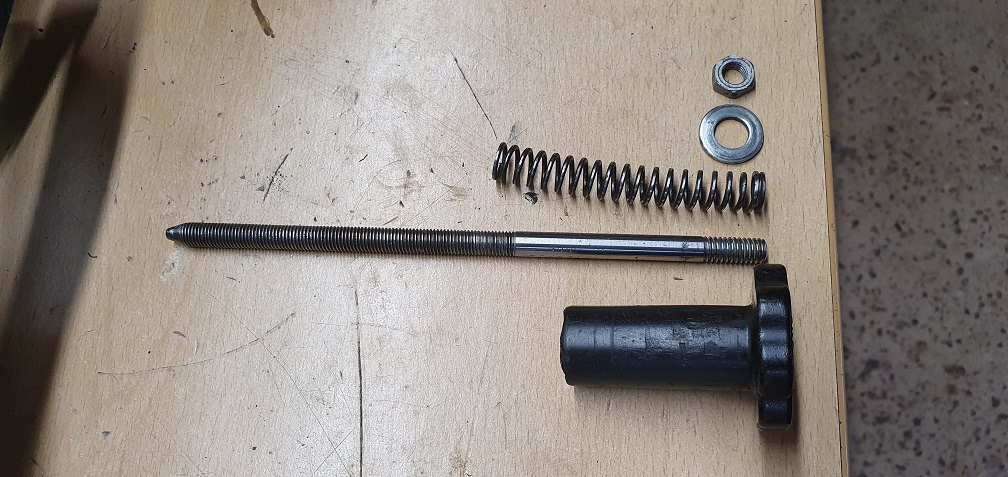
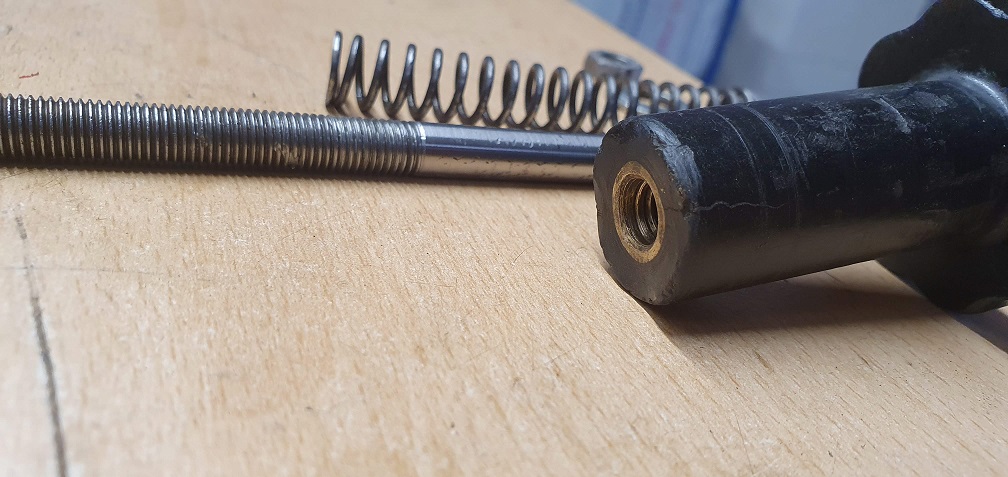
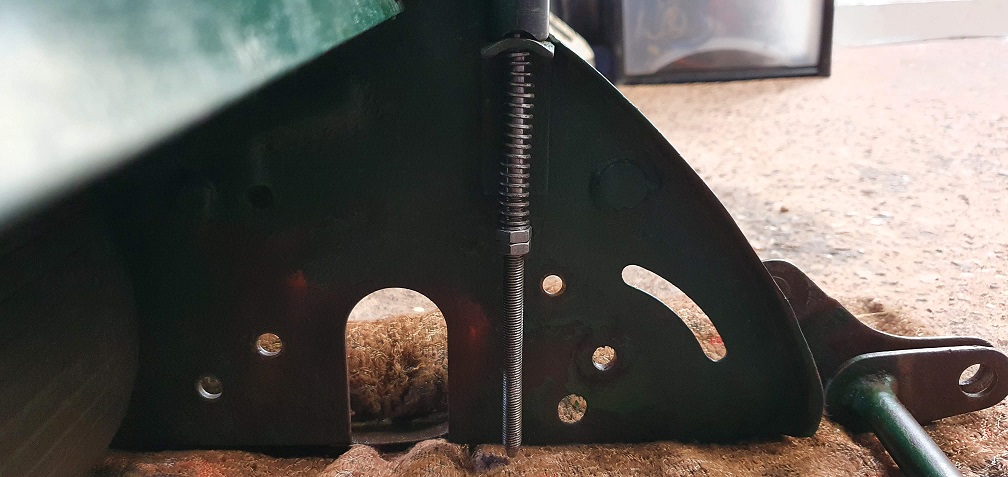
While I sort out wooden rollers and spindles for both machines, I wonder if anyone can answer a question regarding the micro set cutting height adjustment on the MK4A please? The spring is held captive by a locking nut about half way down the thread. The position of this locking nut - is it simply to keep the spring under a slight amount of compression in order to maintain the height setting on the thread? I was going to remove the locknut and spring to give them a clean up but wasn't sure if I need to mark the nut position before removal, or if it isn't particularly important, providing the spring is under compression when the nut is screwed back on?
The spring only has to exert
The spring only has to exert enough pressure between the “ ramps” on the underside of the handwheel boss and the raised ones on top of the chassis side rail to maintain the desired height of cut. I would do it up until making the adjustment becomes difficult and the back it off a turn or two.
Thanks Angus. The parts
Thanks Angus. The parts diagram seems to show 2 nuts under the spring, presumably to lock against each other - the nut is referred to as a 'locknut' - part number 9
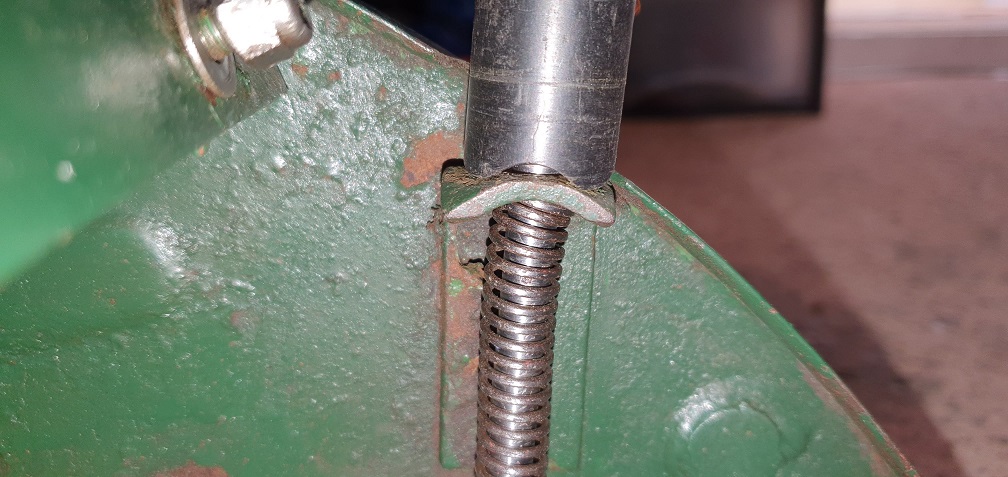
although rust seemed to have locked my single nut in position just fine... I'll have a look and see if I have any 5/16" UNF spare nuts to keep it original. There was a washer fitted under the plastic adjusting boss, which looks like it doesn't need to be there

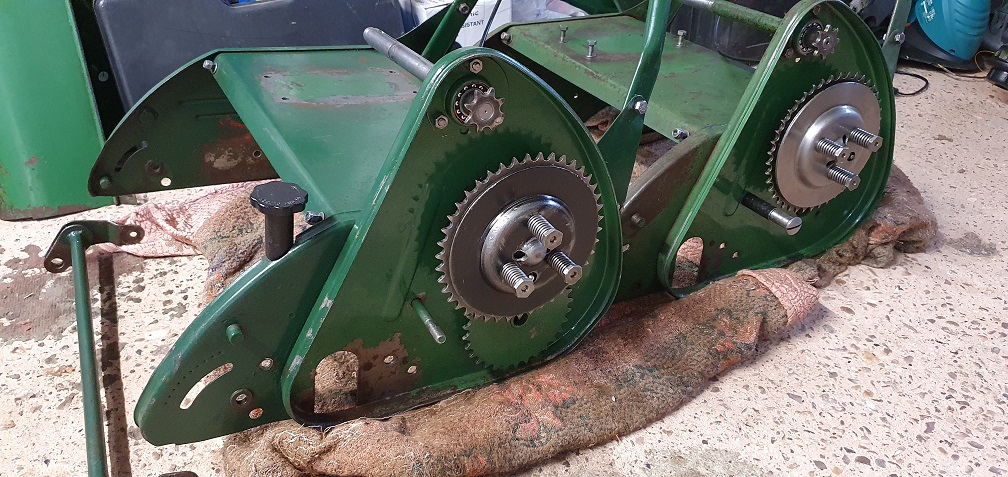
Both clutches back together
Remaining things to sort -
- Sort cutting cylinder, bottom blade and sole plate for both mowers
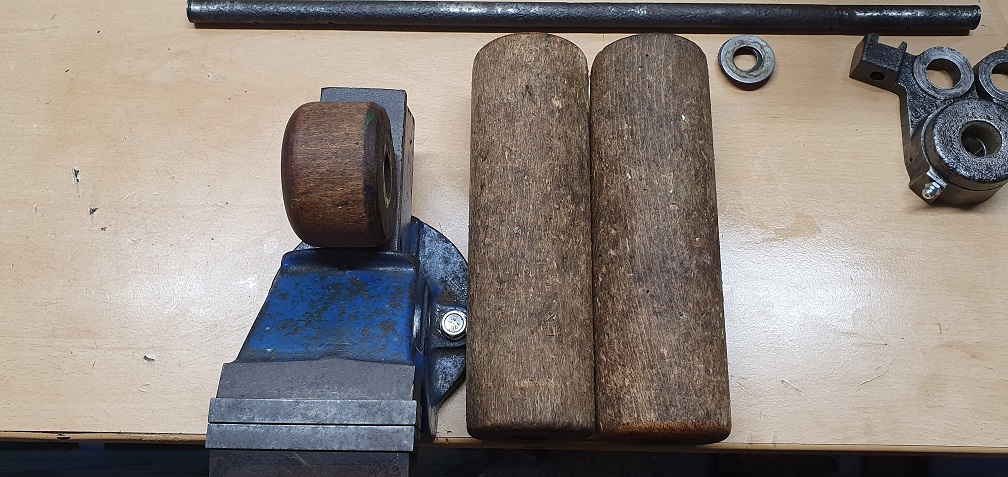
- New spindle and set of wooden rollers for each mower
- Get cracks welded in rear roller half for MK4
Other than fitting the rear roller drive chain on the MK4A, that's about as far as I can go for the moment. It's going to be a bit of a waiting game while the remaining things get sorted. I won't fit the engines back on just yet, to allow the chassis to be moved around easier while fitting the new wooden rollers, cutting cylinder and concave etc.
I’d noticed the single nut
I’d noticed the single nut but as you had described it as a locknut I assumed that someone had used self locking aero or binx nut. You are correct in saying that there are usually just two plain half nuts.
Definitely no plain washer under the hand wheel . Your hand-wheel seems to be worn fairly flat and won’t be doing much engaging with the lumps on the chassis side rail. I’ve never been aware of the adjuster trying to undo itself in work but if it’s a problem, I suppose one could always file a hollow into the underside to engage with the side rail or even use a toothed washer.
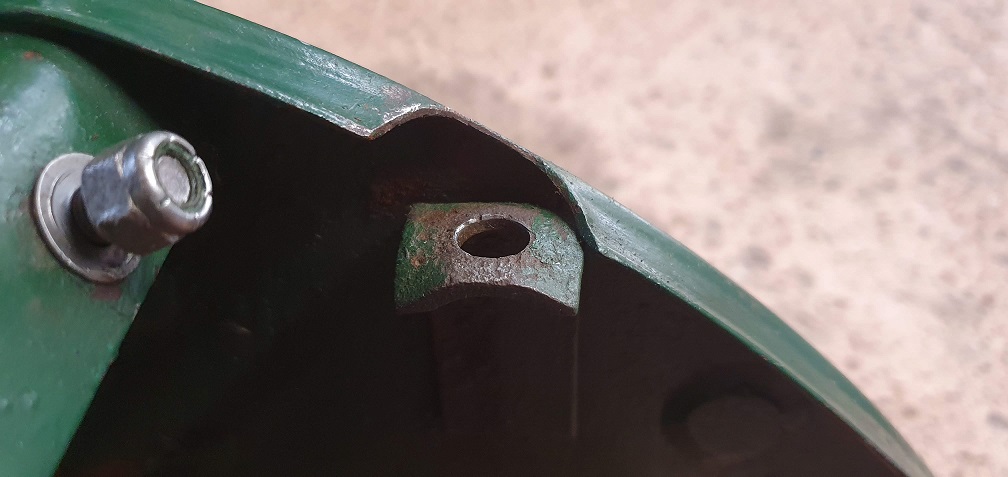
Something that is worth checking is the condition of the threads in the trunnion that the adjuster shaft screws into at the roller end. Being a softer material than the shaft they do wear. Sometimes not apparent with the machine on the bench but when on the ground with the weight of the grass box on the front roller the trunnion just slides on the shaft.
Now there's a man who knows
Now there's a man who knows his trunnions....... ....... I'll get my coat.
Thanks for the info. I'll refit 2 new plain half nuts in that case as this one is slightly rounded. I can see the ramps that you mention on the underside of the handwheel. They do resemble a wave washer and are still present, although undoubtedly worn do a degree - I could file the low points a little to make them slightly more concave, but I think they are already level with the brass threaded insert in the handwheel boss
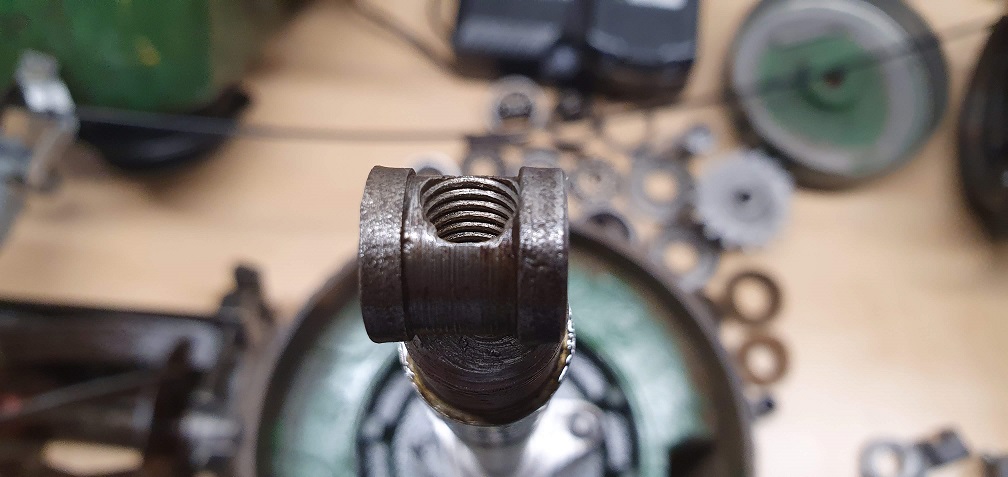
Thanks for the pointer on the trunnion, all threads present and correct and a good secure hold on the adjuster shaft
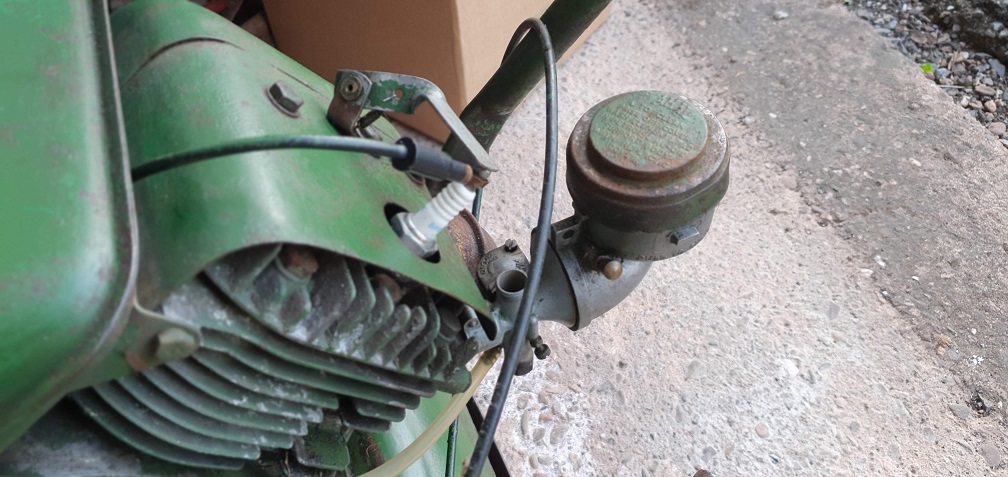
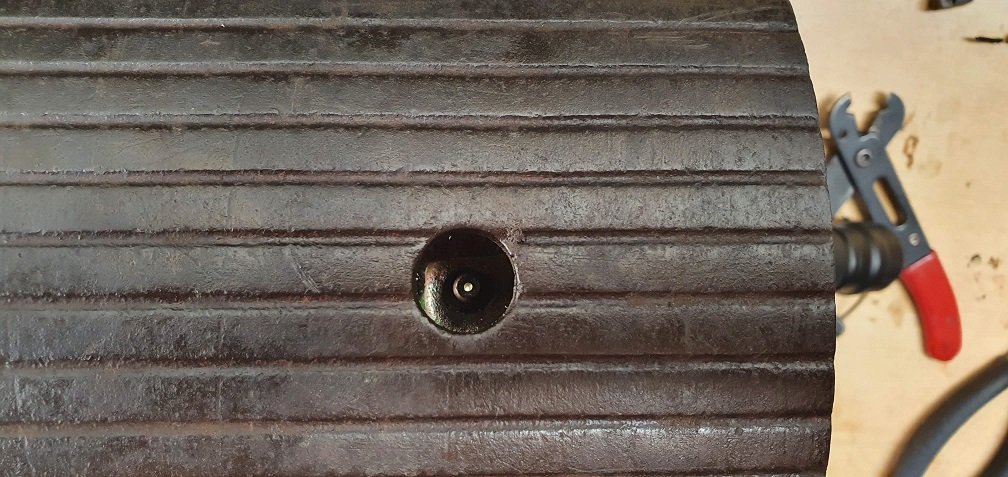
In lieu of a proper oil gun that covers both older and newer style of lubricators, I've used a slightly different approach...
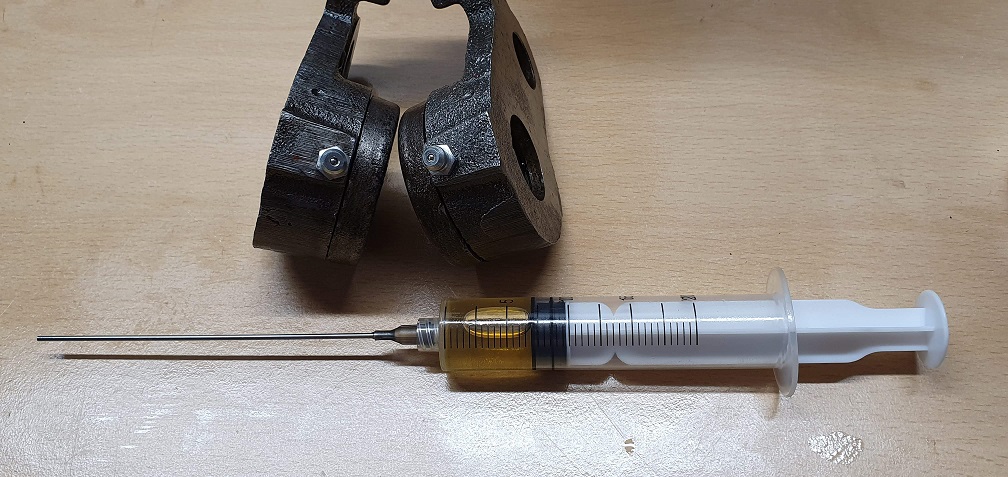
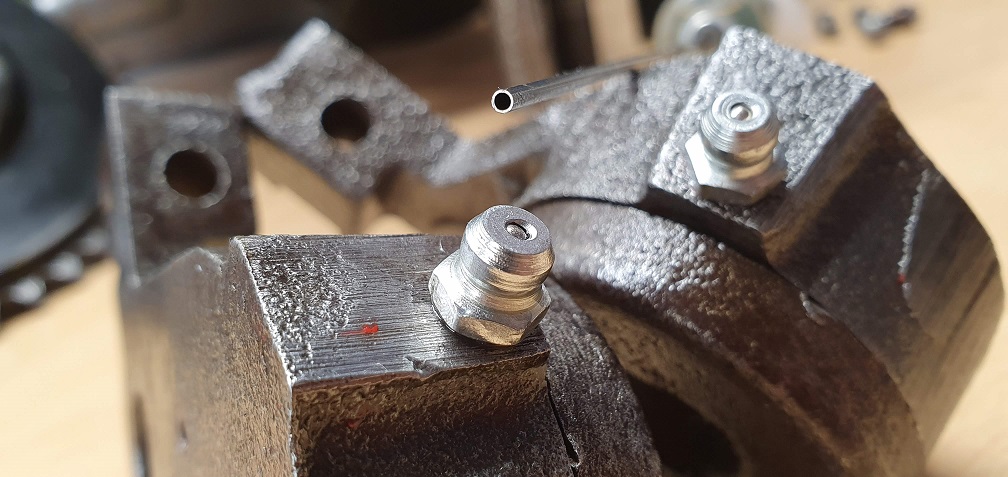
The blunt needle is just the right diameter to depress the ball and spring and a good enough fit in the hole to not allow too much oil to escape when it's injected in. The newer style lubricators work well with a 16 gauge needle and the older style ones need a slightly smaller 18 gauge needle. With the needles being 4" in length they easily reach through to the rear roller lubricators also
Shooting up with oil
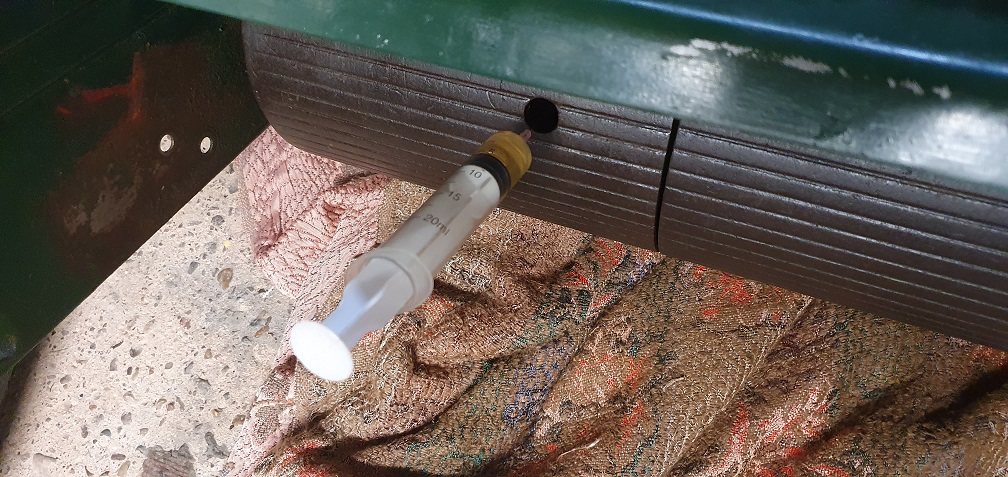
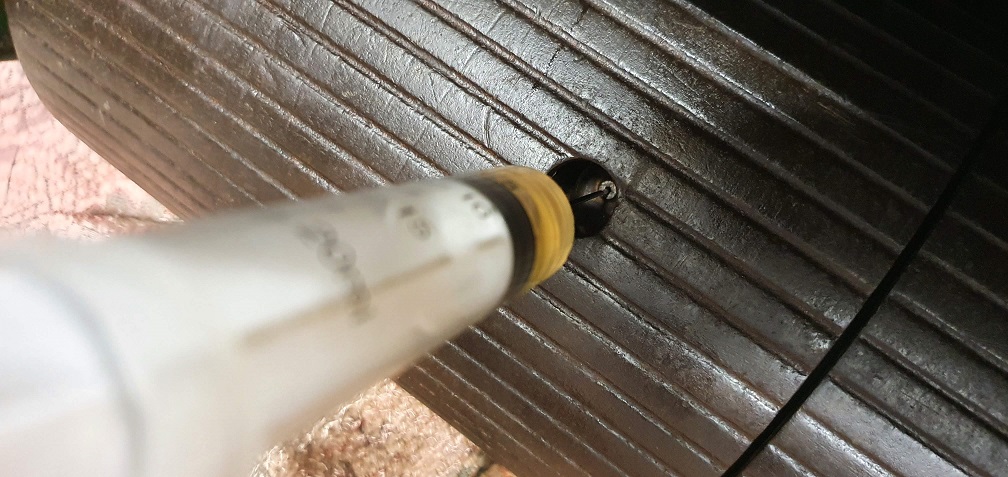
Plus you can see exactly how much oil has gone in, and it really doesn't take much to get enough in for lubrication.
Your 'waves' are totally worn
Your 'waves' are totally worn out, on a Marquis it is the 'waves' that hold the height of cut in place. The Auto-Certes uses a similar system, except that the adjuster knob is made from brass and there are two clamp bolts at either side of the roller (they go in the curved slots either side of the chassis). It is unlikely that the height of cut on your machines will stay in place during use.
Thanks for the explanation.
Thanks for the explanation. If I understand the setup correctly, when adjusting the cutting height, the locknuts should be released enough to reduce the spring compression, which allows the 'waves' in the hand wheel boss to pass up over the chassis mount ramps. Therefore the wear to the plastic hand wheel 'waves' has probably come about from owners who did not unscrew the locknuts first before turning the handwheel, and so the plastic waves have been forced over the steel chassis mounting point over and over when adjusting the height of cut.
Searching for the plastic handwheel, it looks like it only comes as a full assembly with the threaded rod, part number MBA4912, which looks to have been superceeded by MBA4912A. There's a picture of the new part here:
https://parts.pols.nl/en/product/MBA4912A/handwheel
however it's still not particularly clear the exact pattern of the 'waves' on the underside. If I can get the original pattern back on my handwheel by removing some of the plastic in the low points, even if it means taking away a little of the brass centre insert, there is still plenty of thread on that insert, and I doubt I would have to remove a huge amount. It looks like the peaks are around 1/4" above the lowest points. If anyone reading has a picture of the underside of a good or new handwheel and can post it up, that would be helpful! After some very tentative Dremel work, following the existing pattern, I have made the 'waves' a little more pronounced, but don't want to go any further until I know I am on the right track:
No, the locknuts are for
No, the locknuts are for setting the tension on the spring, once set, leave them alone. You just turn the knob to set the height of cut, the 'waves' are supposed to be deep enough to work similar to a ratchet and hold the knob (and hence the HOC) in place. I hope you understand this, but if not, please ask and I will try to explain further.
The compression of the spring
The compression of the spring is an initial setting. As I said in my post it should allow the hand wheel to ride over the ramps without undue force and without further fiddling with compression. I’d leave the Dremel in its case and use a large diameter round file ( 1/2” diameter min) straight across the face of the hand wheel and insert. That will give a natural wave which only needs to be a couple of mm deep. No file? Wrap a bit of 80 grit abrasive around a bit of dowel or even the shank of a 1/2” twist drill.
As Hortimech says, the Auto Certes has additional clamping bolts, one in each roller quadrant which must be released when making height adjustments . These are not normally fitted to a Marquis.
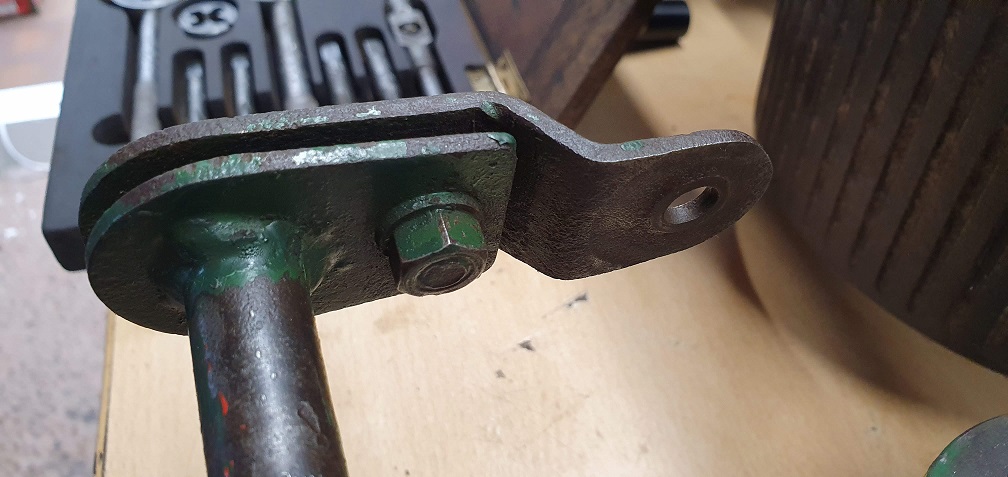
While working on the front roller assembly, it’s worth spending time in ensuring that the left to right levelling adjustment for the roller shaft is free and easily moved - a lot easier to do it now than have to fight it when the machine is reassembled and one is levelling the front roller to the rear roller and bottom blade - another good reason for having good parallel rollers that are a fairly snug fit on a cylindrical roller shaft.
Thank you both for the
Thank you both for the explanation, crystal clear. I have a 1/2" file and possibly a larger one so will have a rummage. The radius of the chassis side plate ramps seems quite large compared with the waves on the hand wheel, so perhaps a slightly larger file would suit better. I'll see what I can achieve and test it out with some compression on the spring and see if it is likely to hold ok.
I believe I've achieved the
I believe I've achieved the desired result
New lock washers
The spring compression still allows the hand wheel to be turned with slight effort, but pulls the handwheel down onto the ramps enough so that the waves can't ride up over the ramps of their own free will. I'll re-check the spring tension is adequate once the new rollers and spindle are fitted and the rod is screwed back into the trunnion.
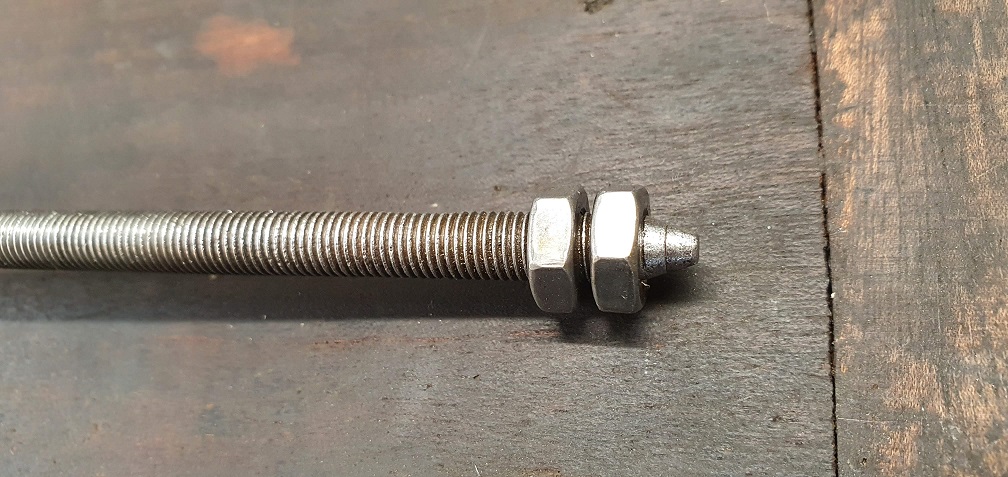
In terms of setting the front roller left to right height, is this achieved by slackening this nut here and pivoting the rail?
Well overdue for am update
Well overdue for am update here - due to various health issues I've had to take things easy for a while, but finally I've been able to get these 2 mowers put back together. I'll post a few pictures of the final stages of the parts going together
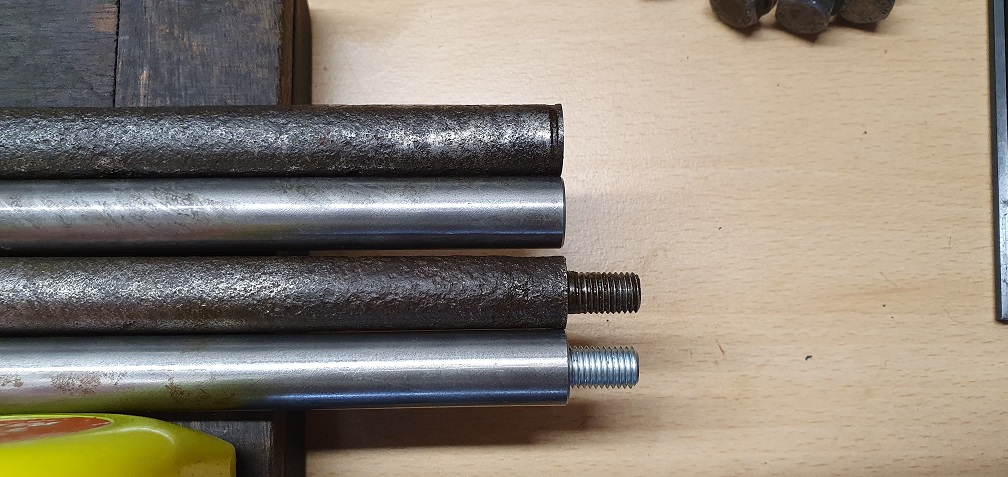
New front roller metal spindles to replace the badly worn originals
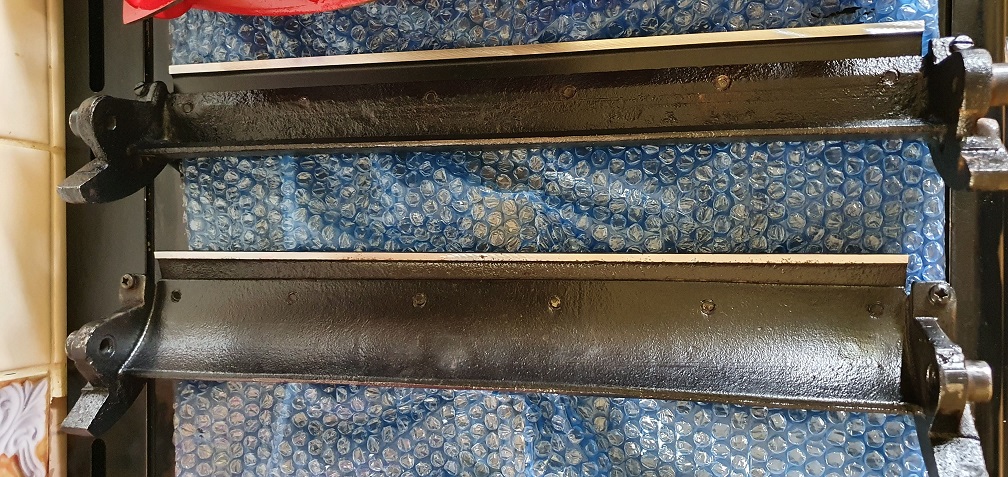
 New bottom blade for one of the mowers, which I fitted to the sole plate and sent off along with the other good condition used bottom blade and both cutting cylinders to get ground and painted

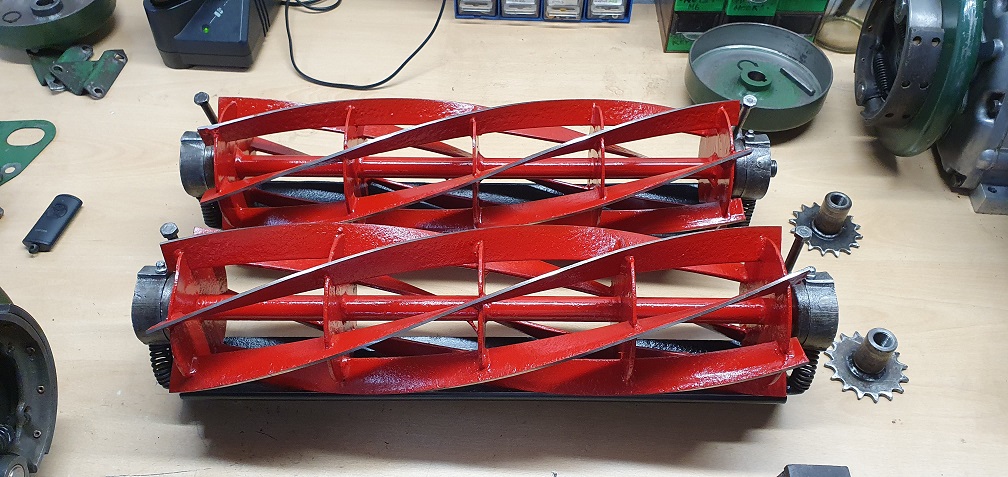
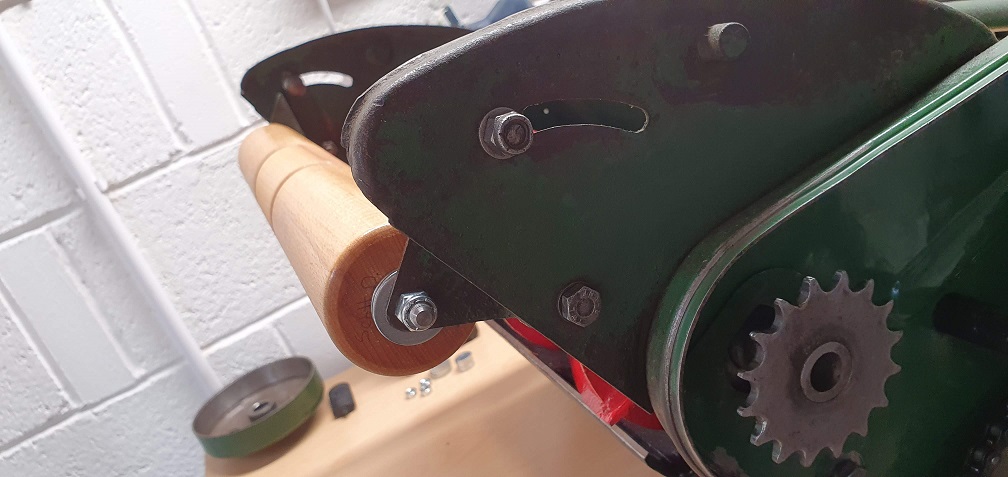
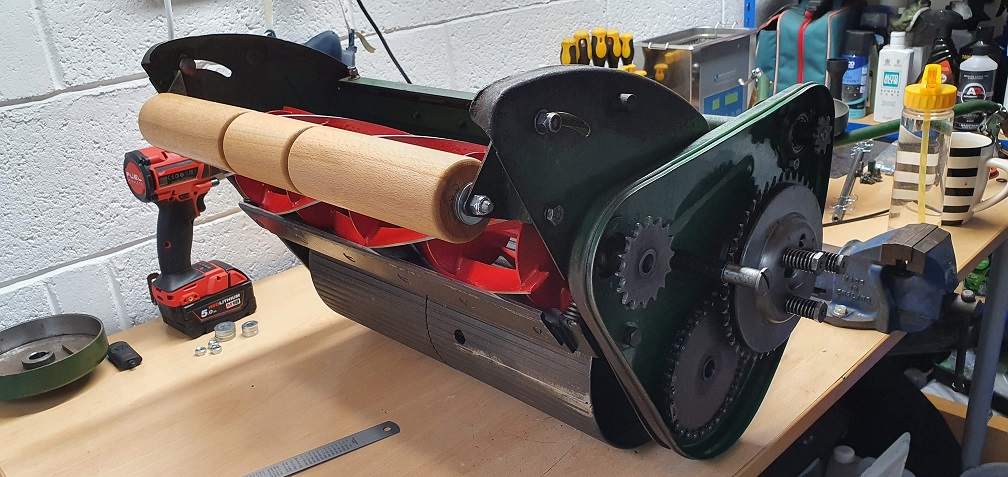
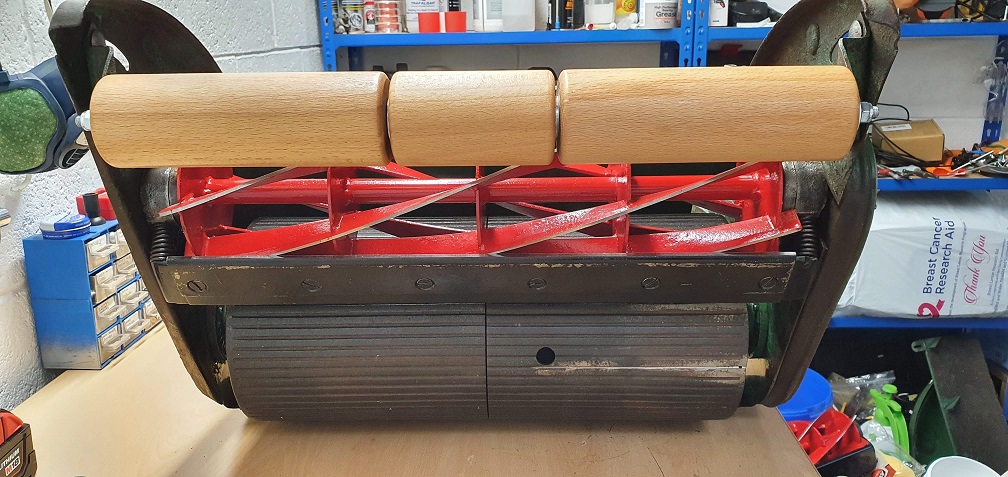
New wooden rollers and spindle fitted to the MK4
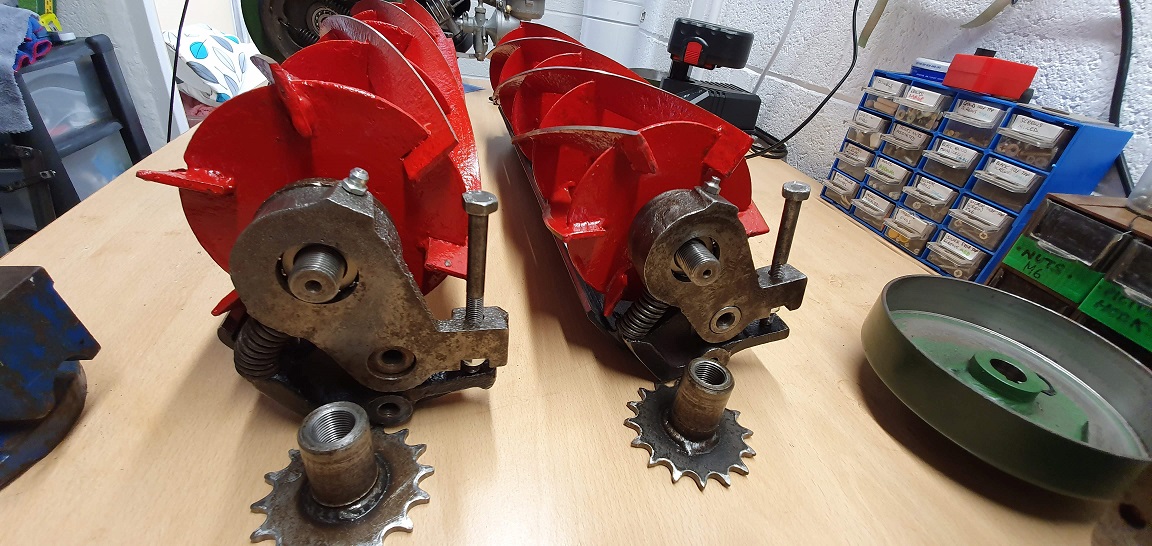
The hairline cracks in the rear landroll were welded as well
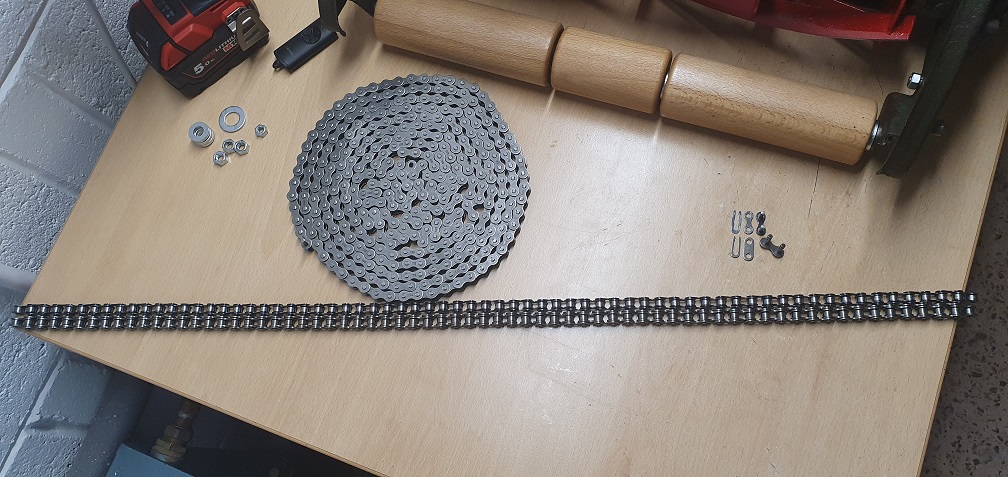
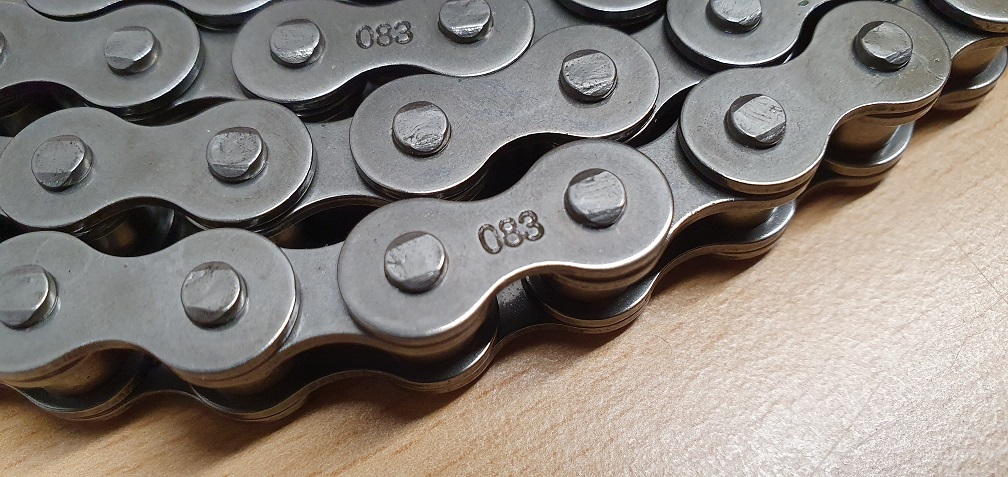
New cutting cylinder drive chain made up using 083 chain
and for the MK4A new wooden rollers and spindle fitted back on with the micro set adjuster
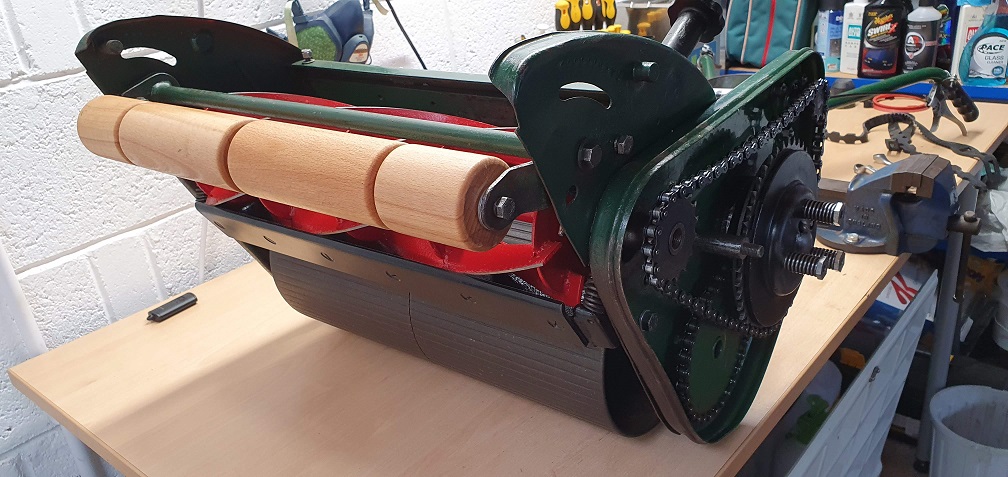
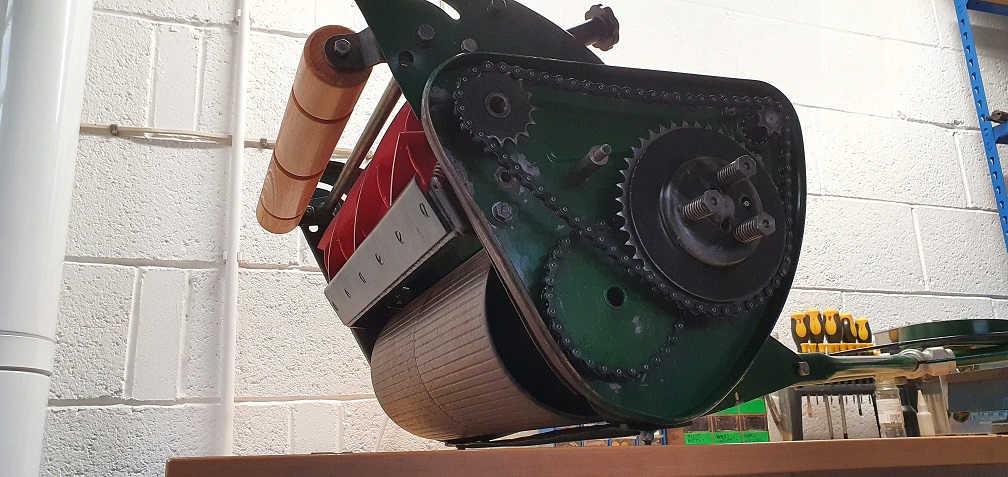
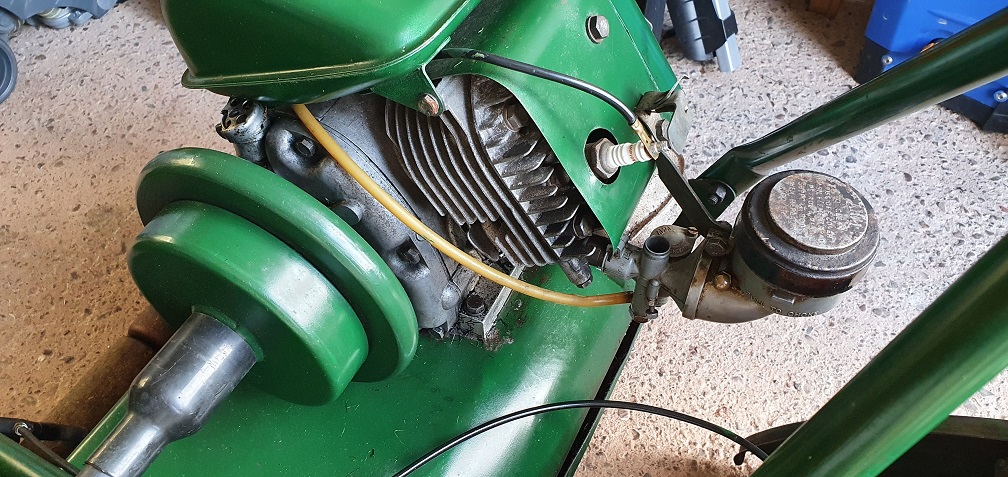
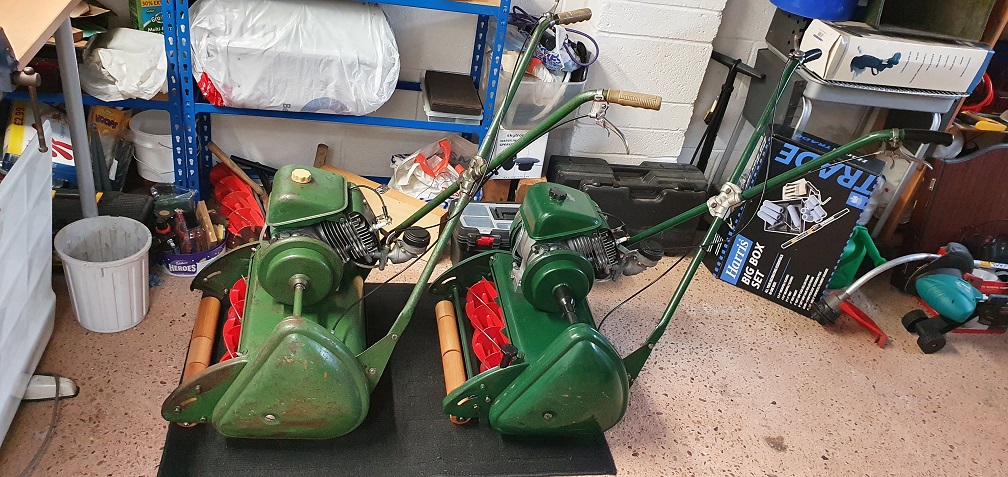
A replacement chain case spacer/distance piece was sourced to replace the missing one which caused the paint scrapes on the chain cover of one of the mowers, and then the engines could be fitted at last!
Sliding the clutch drum and circlip back to expose as much of the clutch drive shaft as possible really helps with alignment of the engine and central bearing

Don't forget to put the plastic telescopic guard back on first though....
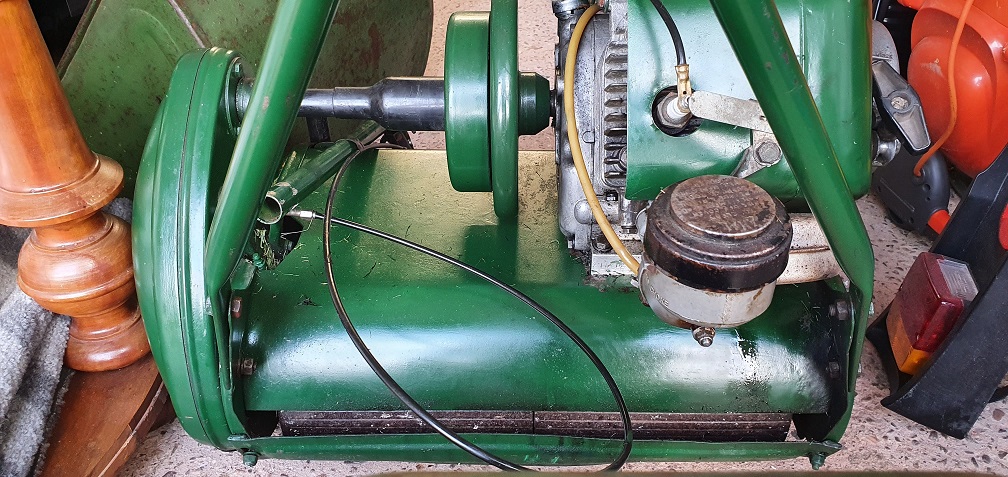
And there we have it, both mowers finally back together after well over a year!!

Almost too good to use; a
Almost too good to use; a credit to you.
a new set of rollers would
A bit more that that maybe. The taper plus "slop" on the spindle will detract from the stability of the machine and the quality of the finished cut. The two short rollers belong at each end and the holes in the shaft are for R Clips to retain them there when running without the centre ones in a high cut situation. Also, if its your eventual intention to sell the machine the tapered rollers are immediately there for a potential buyer to see despite all your detailed work that is out of sight. Appearances do matter.